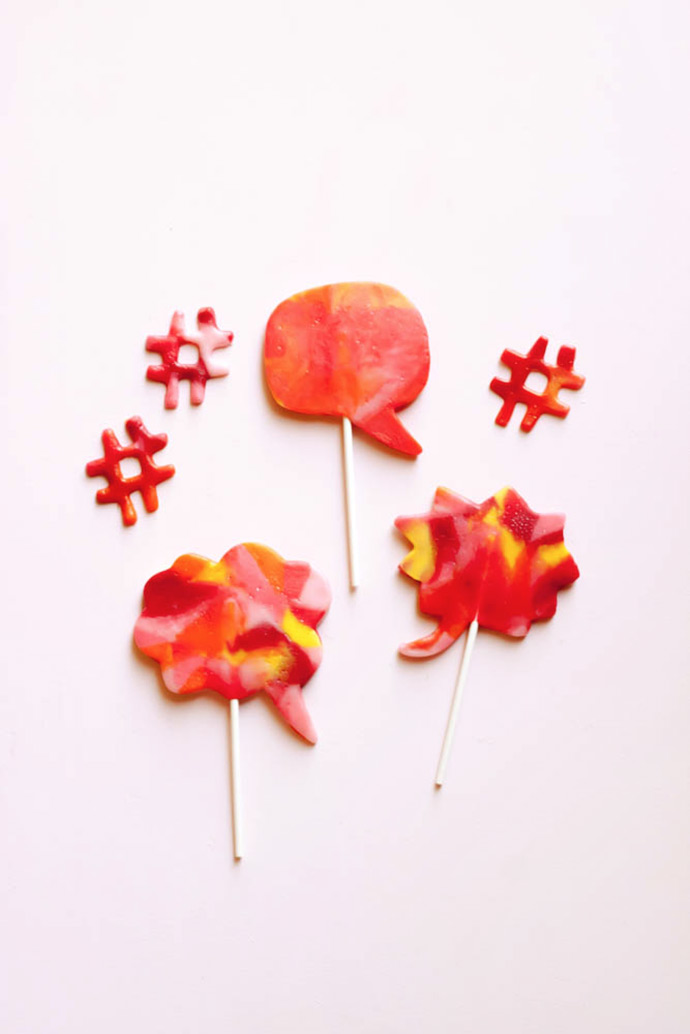
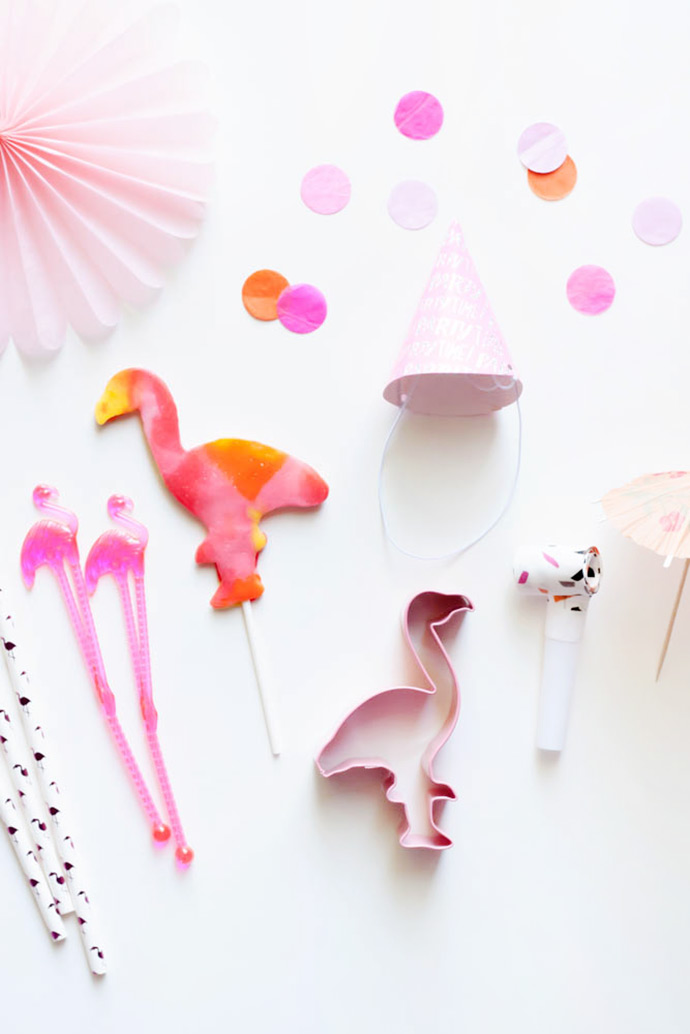
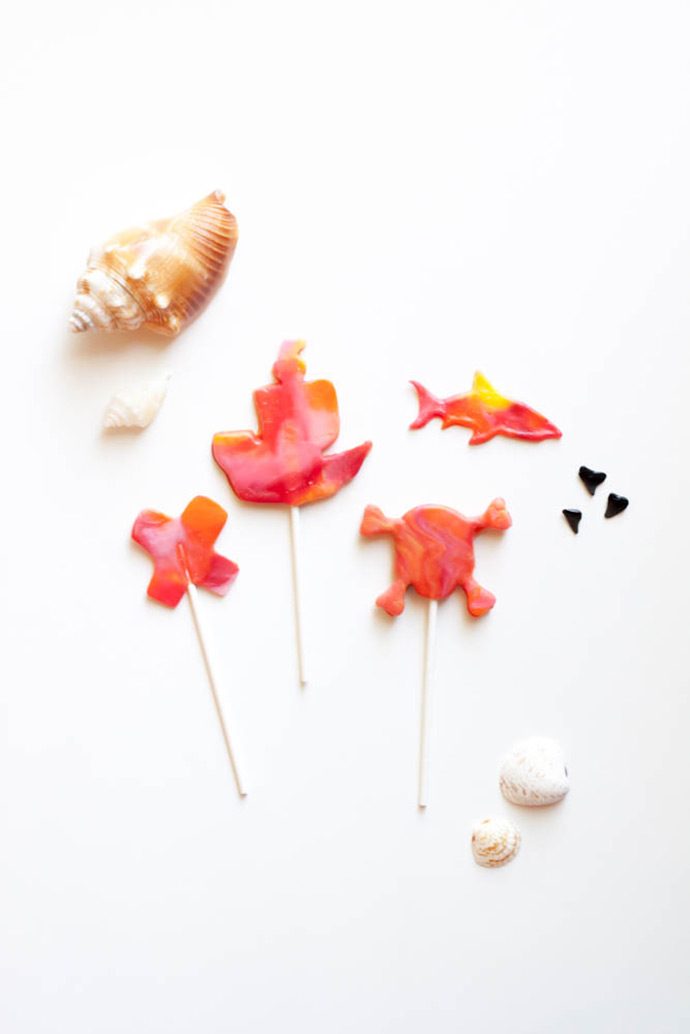
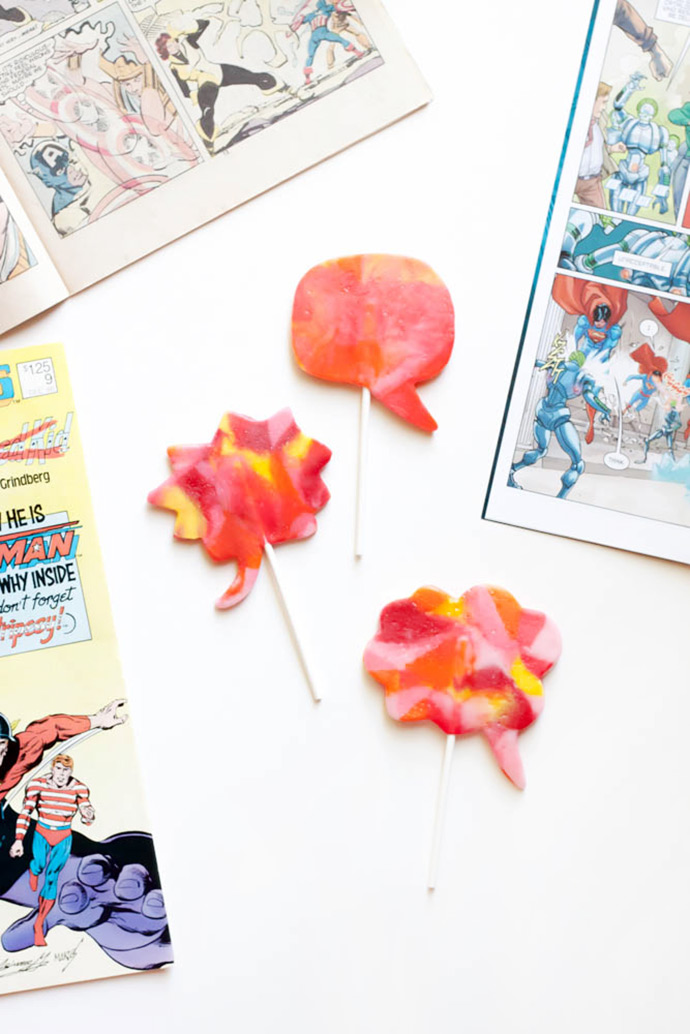
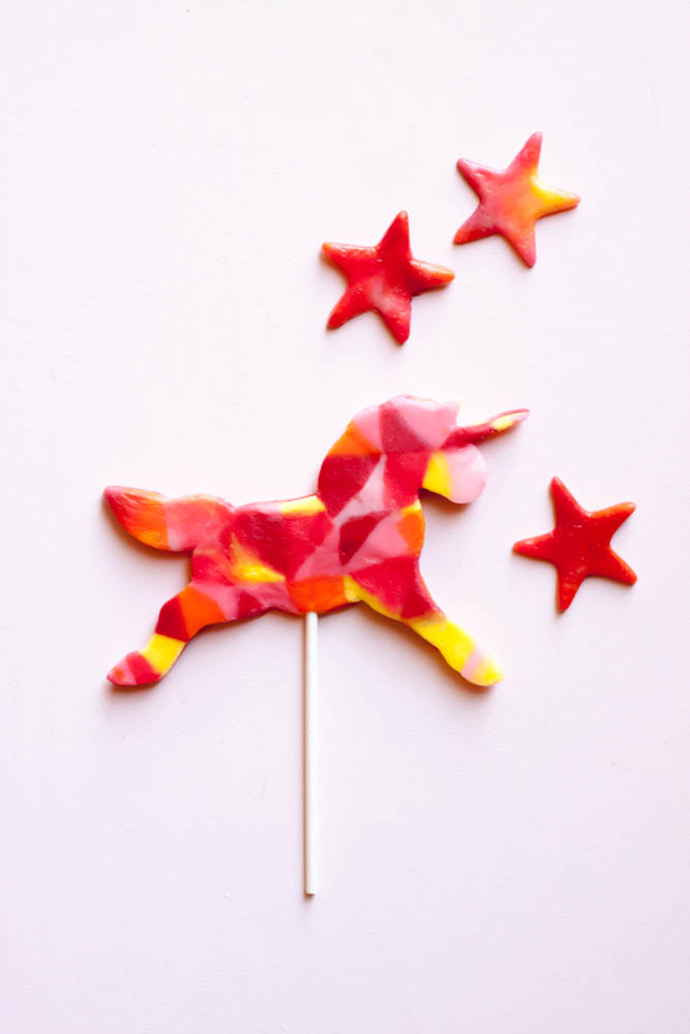
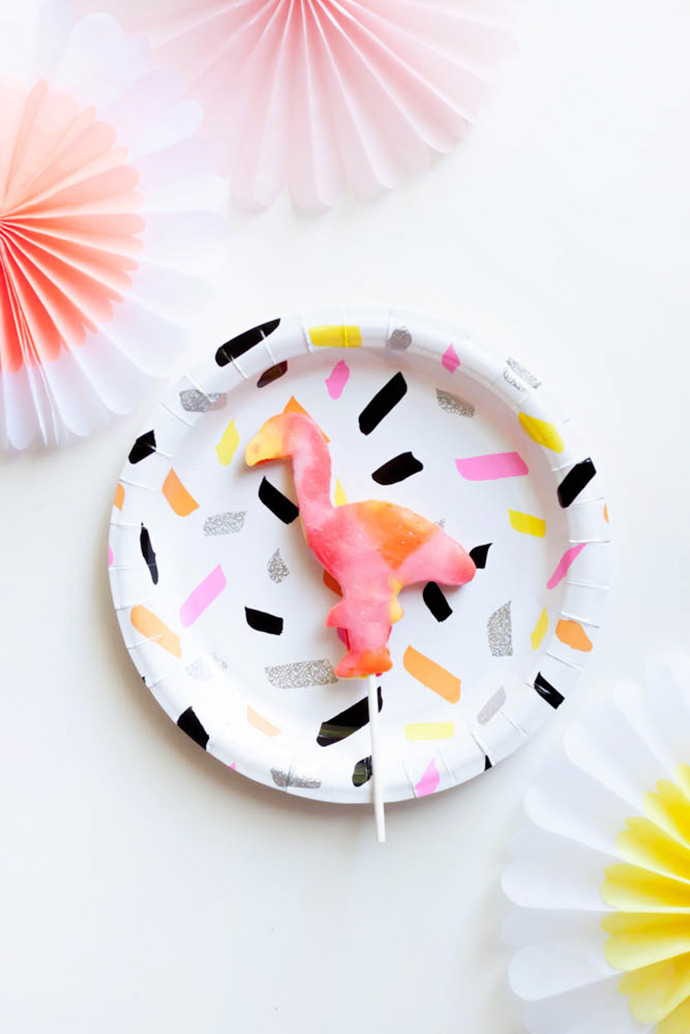
Isn’t it a bummer when you have a fabulous idea the night before your party, but it’s just too late to track down the custom supplies you would need to make it a reality? I love when a party has a fantastic theme that is carried out in all the details, right down to the lollipops … and that’s what I love about this project! You don’t have to have a mermaid or pirate candy mold to make some cute suckers. You can most likely come up with something to go with your theme, straight from your very own cookie cutter stash!
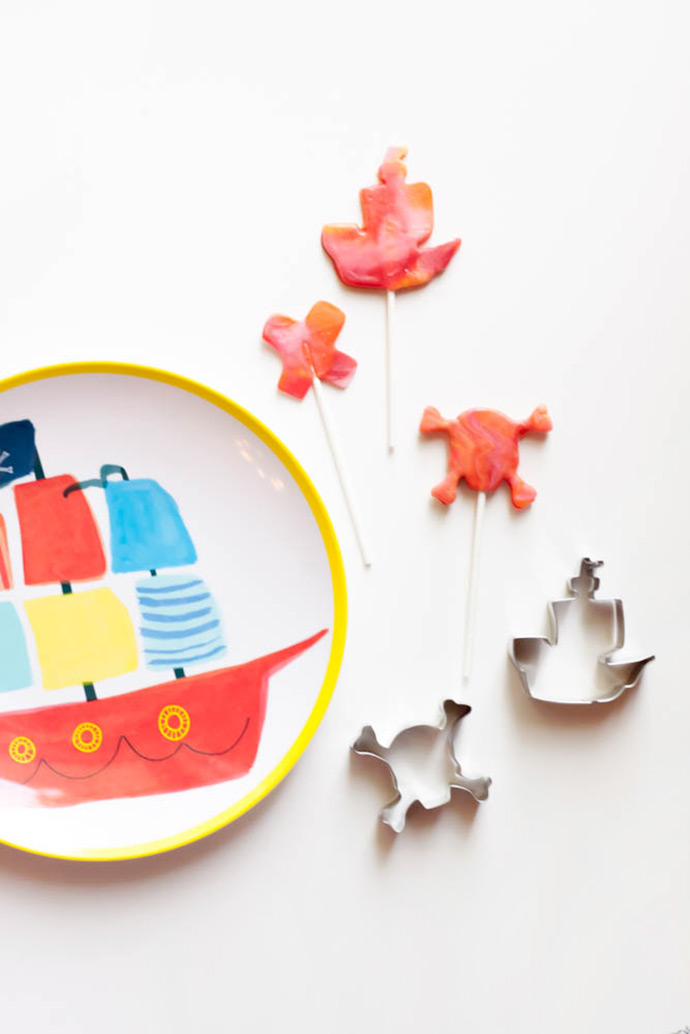
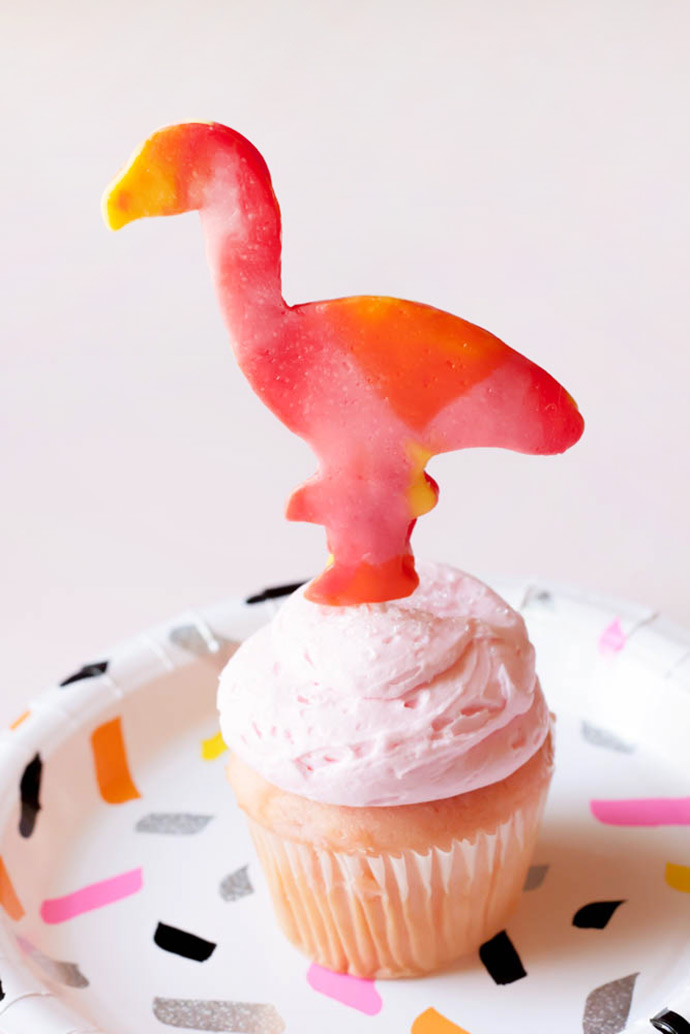
And guess what! These candy pops can serve as cupcake toppers, favors, party treats, or you could make one as a gift topper for the birthday kid! This would even be a fun craft to whip up on a rainy day. Kids will love having an excuse to play with their food! Just make sure that a responsible adult is there to work the iron. This edible craft is very similar to working with fuse beads. In fact, that’s what inspired the project!
what you need:
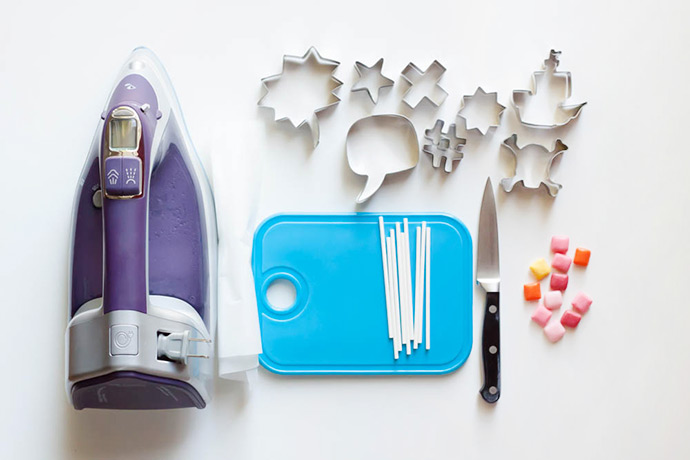
• Cutting board
• Sharp knife
• Starburst Minis
• Parchment paper (oven safe and non-stick)
• Iron & ironing board (board not pictured)
• Cookie sheet (not pictured)
• Cake pop sticks
• Cookie cutters
how-to:
Step 1
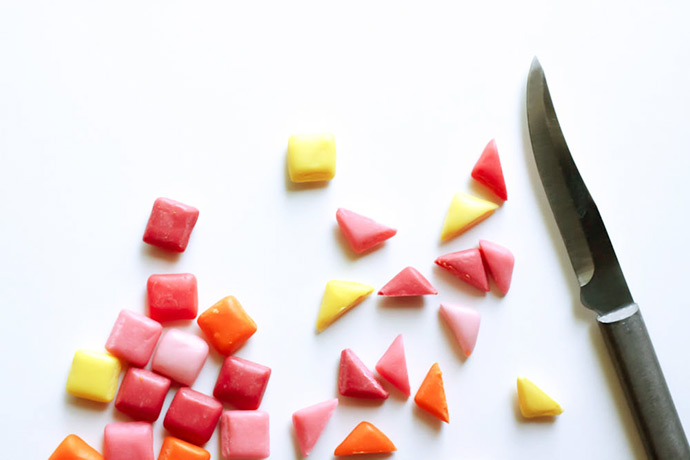
Using a sharp knife and a cutting board, cut your Starburst Minis in half to create triangles.
Step 2
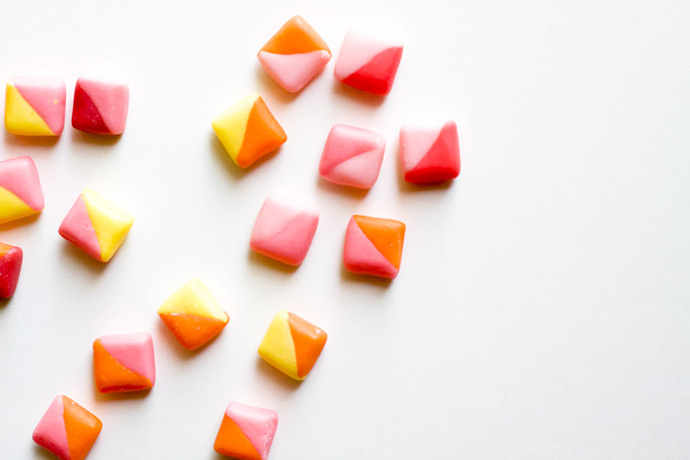
Using two different Starburst colors, squeeze two triangles together with the cut edges facing each other. You will have to mold them with your fingers a bit, and as they warm up from your hands, they become easier to shape. You should now have a two-toned square. Repeat this step with all different color combinations, until you have enough squares to create a grid that is larger than your cookie cutter.
Step 3
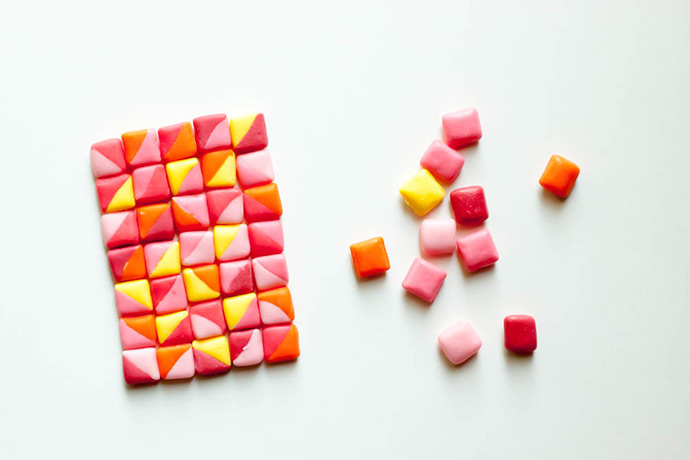
Place a sheet of parchment paper on a flat cookie sheet, and arrange the two-toned Starburst squares in a grid. Basically, you will place your squares in columns and rows, and make sure the pieces are touching. Remember to make it large enough to fit your cookie cutter.

Step 4
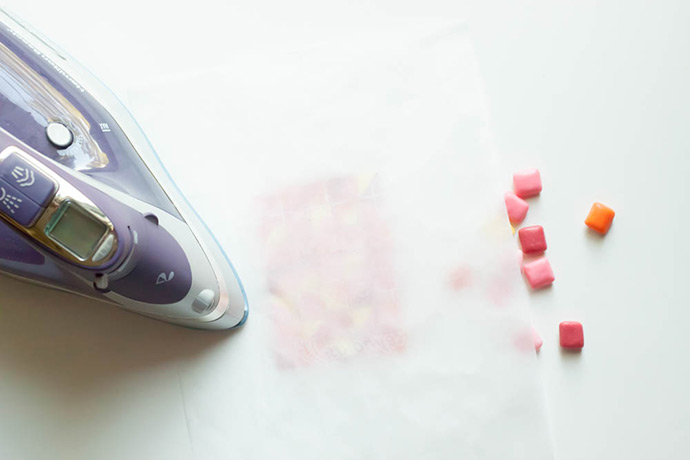
Preheat your iron on a low setting. I set mine to “silk”. Place the cookie sheet on the ironing board, and carefully cover your grid arrangement with a second sheet of parchment paper. Keeping the parchment paper between the iron and the candy, carefully iron over your grid arrangement. Do it as evenly as possible, keeping the iron pretty level and parallel to the cookie sheet. Once the squares appear to be fairly melted together, and the candy is the same thickness throughout, flip the candy grid over to the other side. It should still be sandwiched between two pieces of parchment paper, and should remain on the cookie sheet. Iron the second side of your candy grid until all the pieces are sufficiently melted together.
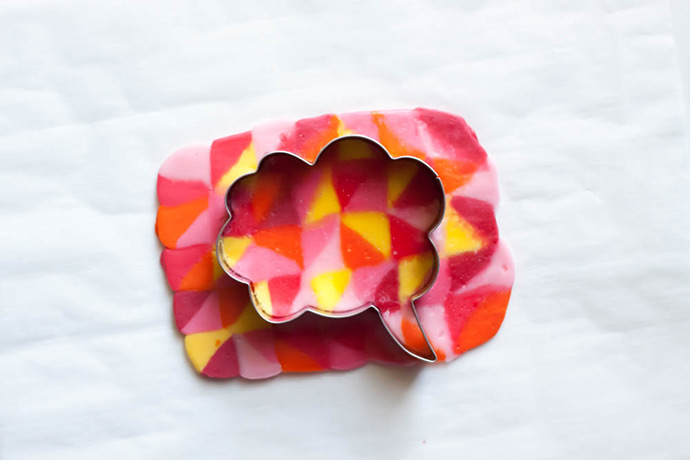
Step 5
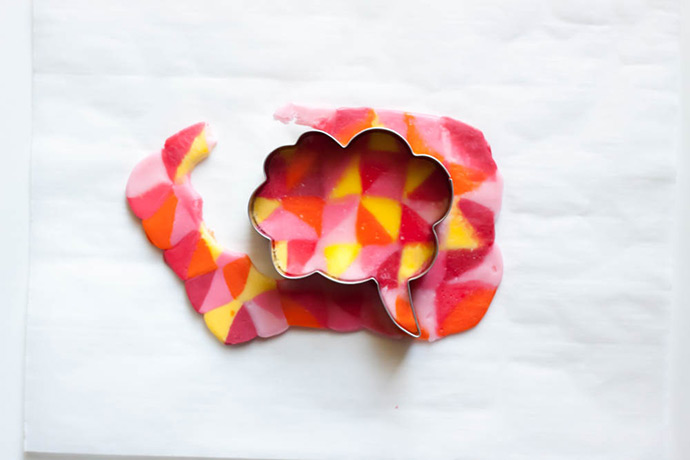
Set your iron aside and let the grid cool a bit before peeling the top sheet of parchment paper off the candy. If it peels the candy up at all, wait a few more seconds before trying again. Now, place your cookie cutter on the melted candy, and press down until it goes all the way through. Carefully peel the candy up around the sides of the cookie cutter, and once the cutter is free, use your fingers to pop out your candy shape.
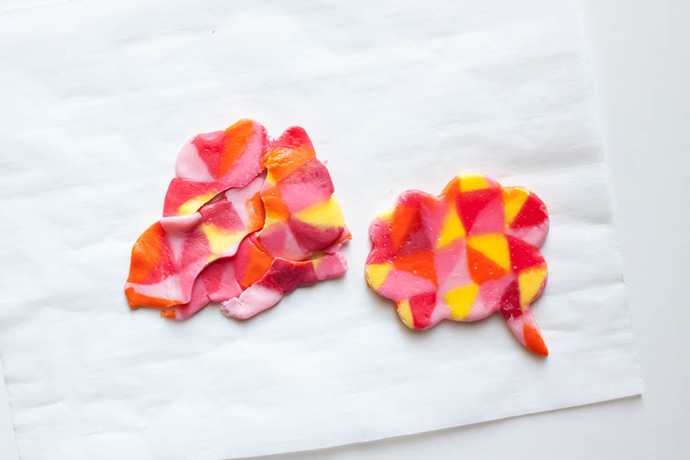
Step 6
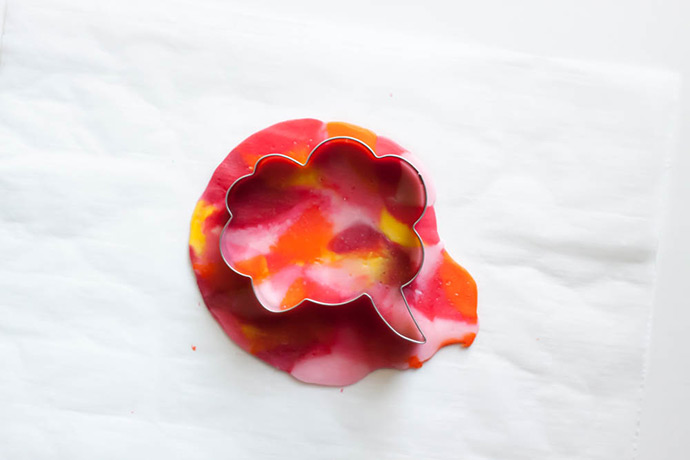
Take the remaining candy that was peeled from the edges of the cutter, and either ball it up, or carefully piece it back together, and repeat steps four and five with the “leftovers”. If you have enough room, you will want to use the same cookie cutter in order to make your candy pop. If not, just use some smaller cookie cutters to use up the candy, and create another grid to make your second piece using the same cookie cutter.
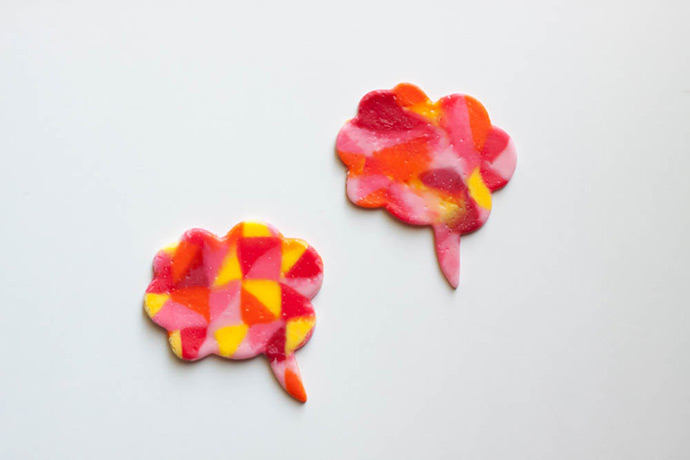
Step 7
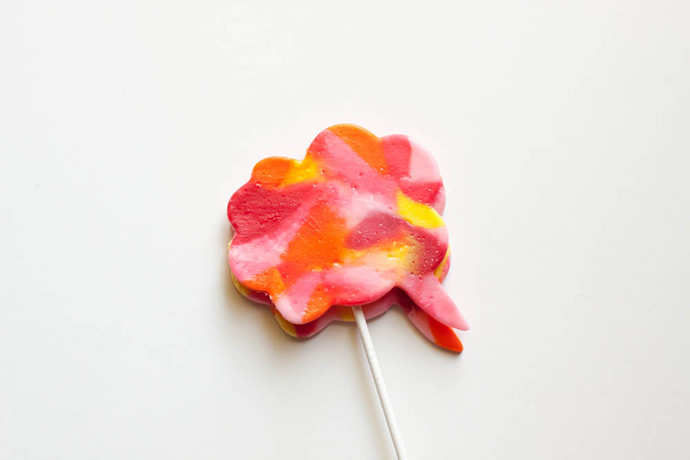
Once you have two identical shapes, sandwich a cake pop stick between the two, and line the shapes up so that they mirror each other perfectly. Place them between the two pieces of parchment paper on the cookie sheet, and carefully iron over both sides of the shape. Once it cools enough to peel off the parchment paper, use your fingers to press the pieces together while they are still warm. You may have to repeat this step one more time to seal the pieces together around the cake pop stick. Lay your candy pop on a flat surface to cool.
Enjoy!