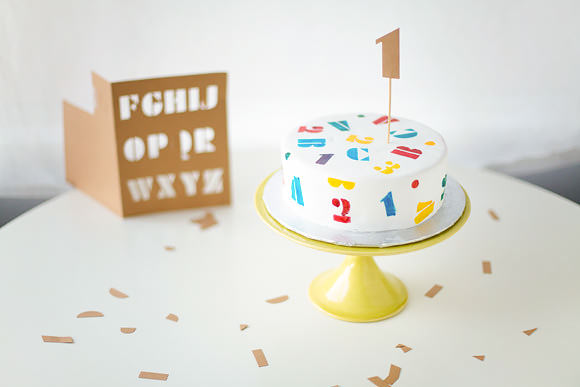
This brightly colored, cute-as-can-be ABC Stencil Cake would be a sweet surprise for your little one’s next alphabet–themed birthday party. You will need a white fondant–covered cake, some new paintbrushes, gel food coloring, and your favorite Handmade Charlotte stencils!

Never worked with fondant before? Not to worry. This video from Martha Stewart will show you everything you need to know! Fondant is a sugar dough that can be rolled out thinly and applied as a smooth covering over a frosted cake. It’s a lot of fun to work with and opens up another world of cake design applications—including stenciling! It’s available in baking-supply or craft superstores, or you can make your own marshmallow fondant. Make this ABC cake for a birthday party or even a back-to-school cake. I’ve had the Jackson Five’s song ABC stuck in my head for days now!
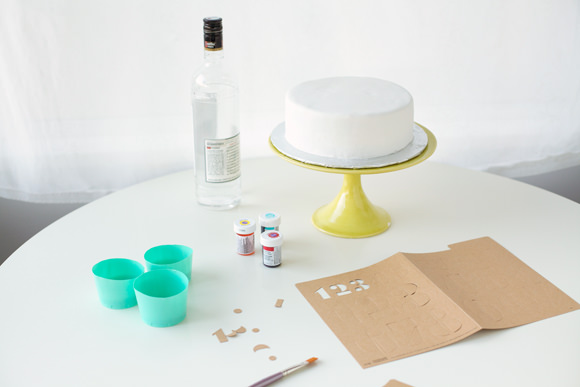
What You Need
- One fondant covered cake
- Gel food coloring in red, blue, and yellow
- A paint palette or cups for mixing paint
- Optional: A teensy bit of vodka
- Clean, small craft paintbrushes
- Cotton swabs and a small bowl of water
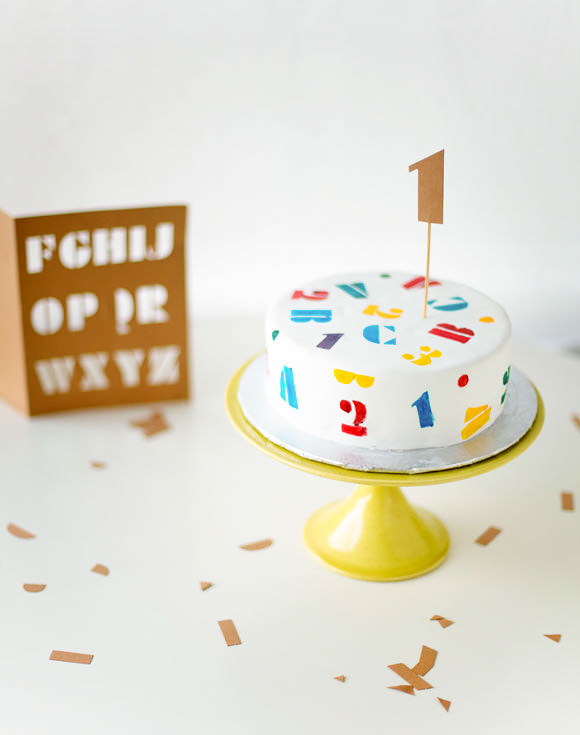
- Handmade Charlotte stencils—I used the Party set!
Step 1
Bake your cake. Cool cake completely. Frost your cake, then cover with fondant.

Step 2
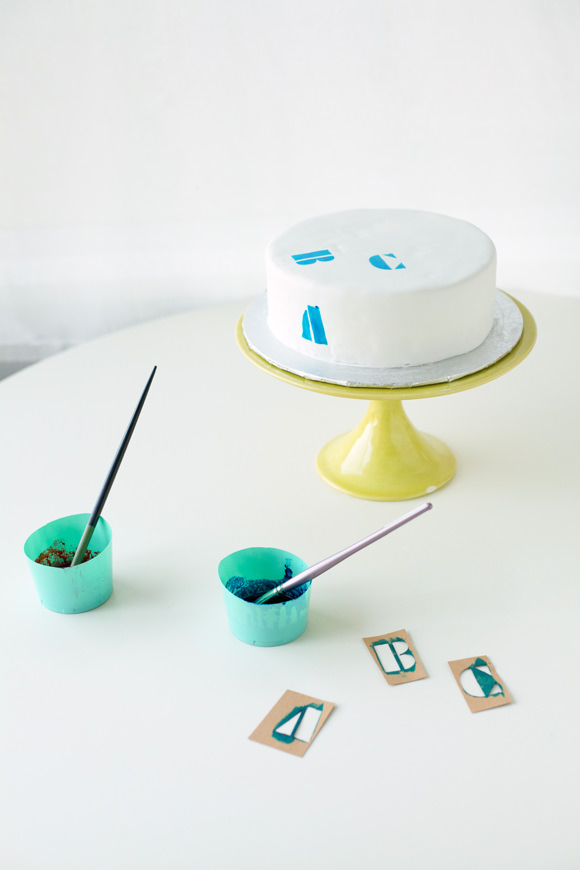
Add a half teaspoon of each gel coloring into their own cups. Add a ¼ cap of vodka (you have some lying around, right?) to each cup and mix it with a paintbrush, creating a more paint-like fluid. Don’t make it too runny, however! This is optional—you can use the gel colour straight but it’s a little jelly-like, hence the vodka. Why vodka? Vodka evaporates, leaving all the brightness of the gel color behind.
Step 3
Carefully cut out the letters you want to use for your cake. Punch out the letter’s interior paper to yield the stencil. Now, it’s practice time—roll out a piece of spare fondant thinly and do some practice stenciling! Dip your paintbrush into the gel coloring, pulling the brush along the edge of the bowl to minimize dripping. You want a fairly dry brush with not too much gel on it. Holding the stencil lightly but firmly against the fondant, brush on top of the stencil in a back and forth motion, ensuring proper coverage, then gingerly pull the stencil away.
Step 4
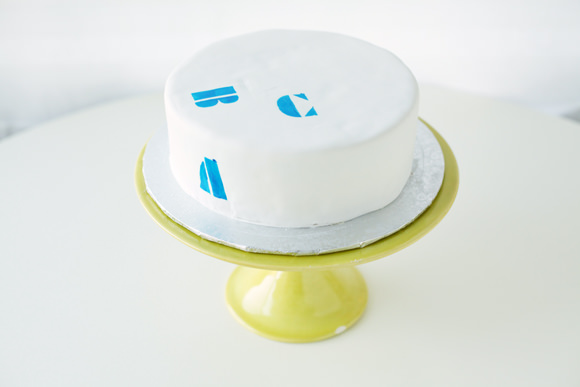
Time to stencil your cake! I was sweating during the first few letters, but it was turning out so cute I felt more and more confident. Place a stencil where you want a letter or number to be, press down lightly so you don’t indent the fondant, and go for it! Bonus: If you muck up, simply wet a Q-Tip (just a little—so it’s practically dry) and go in and touch up your stenciling.
Step 5
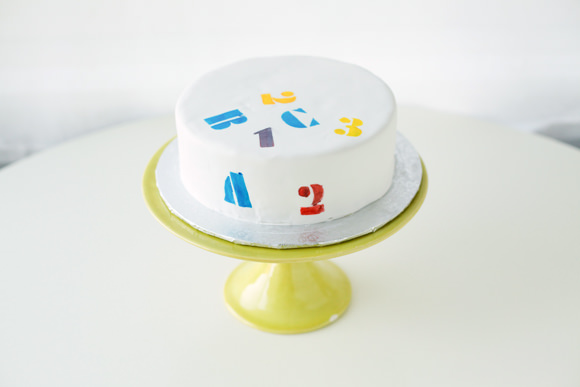
Alternate the gel colors for the numbers and letters. I wanted a fun vintage classroom look to my cake so I used primary colors, but feel free to use any gel colors you wish.
Step 6
Keep on stenciling until your cake is covered to your liking! Don’t worry if your spacing looks weird at first. I filled in any gaps and white spaces with dots or parts of letters and numbers—for instance, the polka dots are part of the number “2” and the yellow scallop is part of the letter “B.”
Step 7
For some extra styling fun, I used one of the punched out numbers to create a simple matching cake topper! I love the look of the brown craft paper against the education-friendly cake. Simply adhere the punched out number onto a wooden BBQ stick with tape for instant cuteness.
Hope you enjoyed this DIY ABC Stencil Cake. See you again soon with another cute cake-themed tutorial!