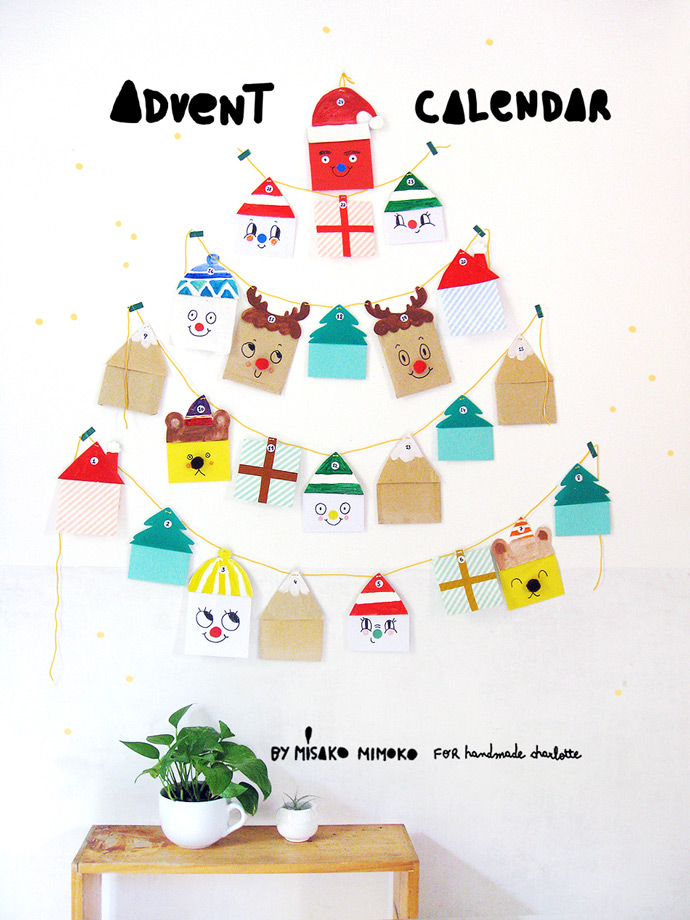
Make this holiday season even more joyful with a handmade Advent garland! All you need is some cord, paper bags, envelopes, the free printable templates, and a little imagination. This easy-to-make project is perfect to enjoy with the kids and guaranteed to put them in the holiday spirit.
The mini pouches are just big enough to hold a small gift or a sweet message. Later, you can use them as super fun Christmas tree ornaments. Let’s get started!
What You Need

- Printable Advent Garland templates (download here)
- 24 small gifts or messages on paper
- Small paper bags, envelopes, lunch bags (or any large pieces of paper)
- Empty cereal boxes
- Colored paper
- Pom-poms
- Stamps or pen
- Round stickers
- Cord
- Paint
- Tape
- Scissors
How-To
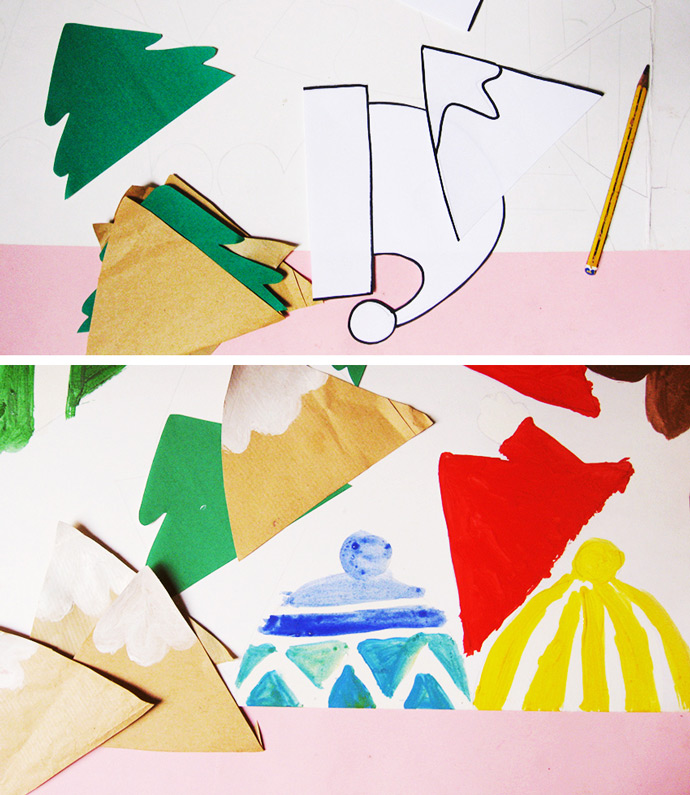
Step 1
Download, print and cut out the printable templates. These will be used to make the paper bag toppers. There are multiple designs that you can repeat for each day of the Advent calendar.
Draw and paint shapes onto the cardboard from the cereal box. Alternatively, you can use colored paper to make them (as I did on the tree or the gift) or reuse craft paper and paint (like the mountain design pictured).
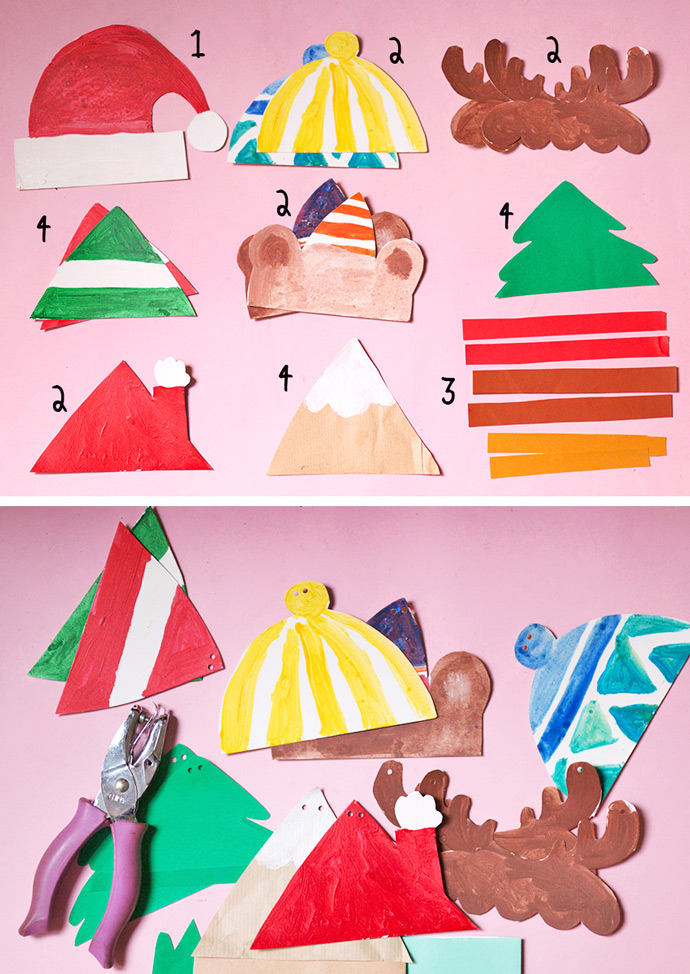
Step 2
Cut out colored paper, paint recycled cardboard or reuse large pieces of paper until you have a total of 24 toppers. Punch two small holes centered on the top of each shape.
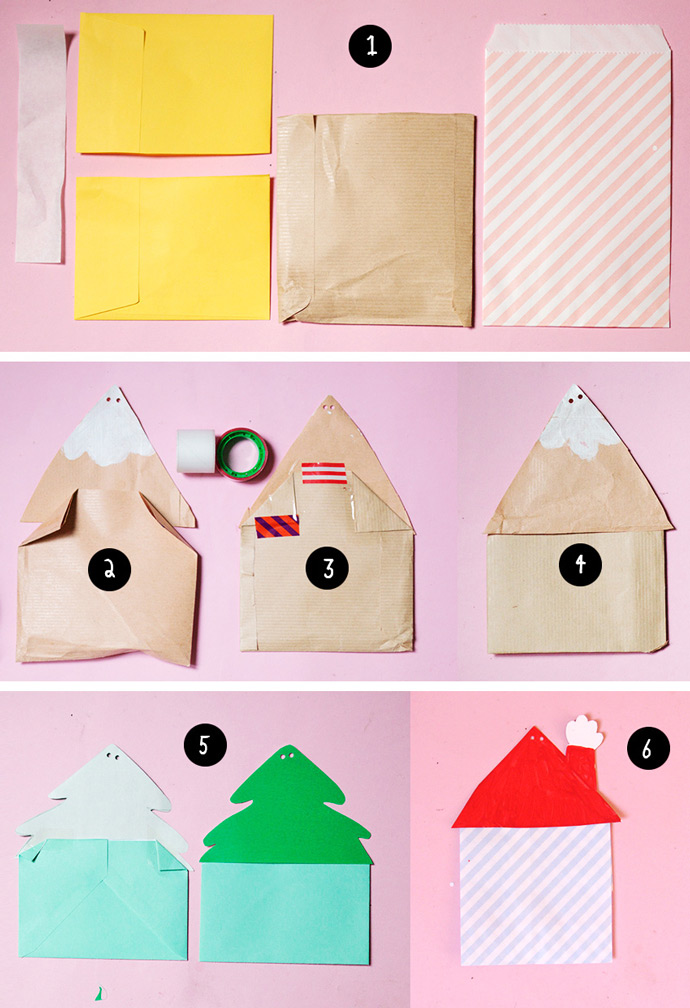
Step 3
Time to make the pouches!
- Use small paper bags to make 24 paper pouches, each roughly 4″ by 5″. Recycled envelopes or large pieces of paper will work as well.
- Fill the pouches with your favorite goodies and gifts. If the paper bag is too big for the topper, fold top corners at the back to make it smaller. Take the top of each paper bag and tape it to the topper, backs together. Now your little bag mountain is ready to go!
- Repeat for the tree bag.
- Use decorated bags or paint any pattern to get a cute and colorful advent calendar (as I did for the house).
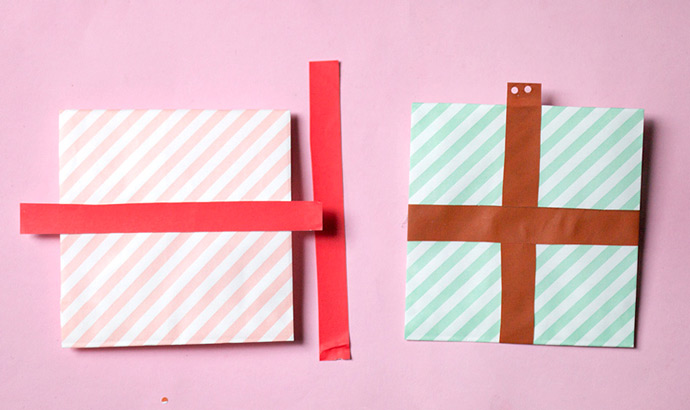
Step 4
Time to make the gift bag
~! Use patterned bags or paint plain bags with stripes or dots. Cut out two pieces of colored paper 5.5″ long by 0.7″ wide. Glue them, crossed together and centered, onto the paper bag. Make a tag by folding the top of the colored paper and punch two small holes. Fold and glue the excess colored paper on the back.
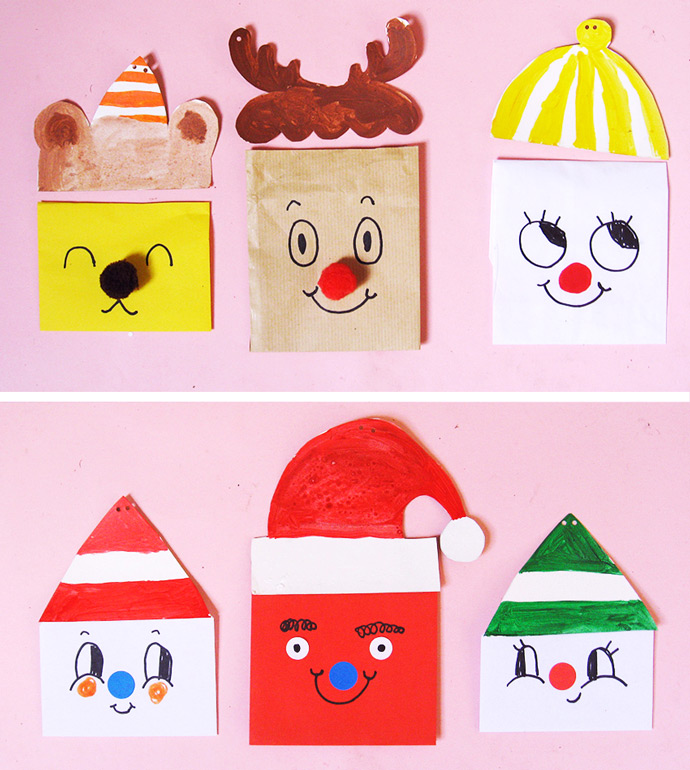
Step 5
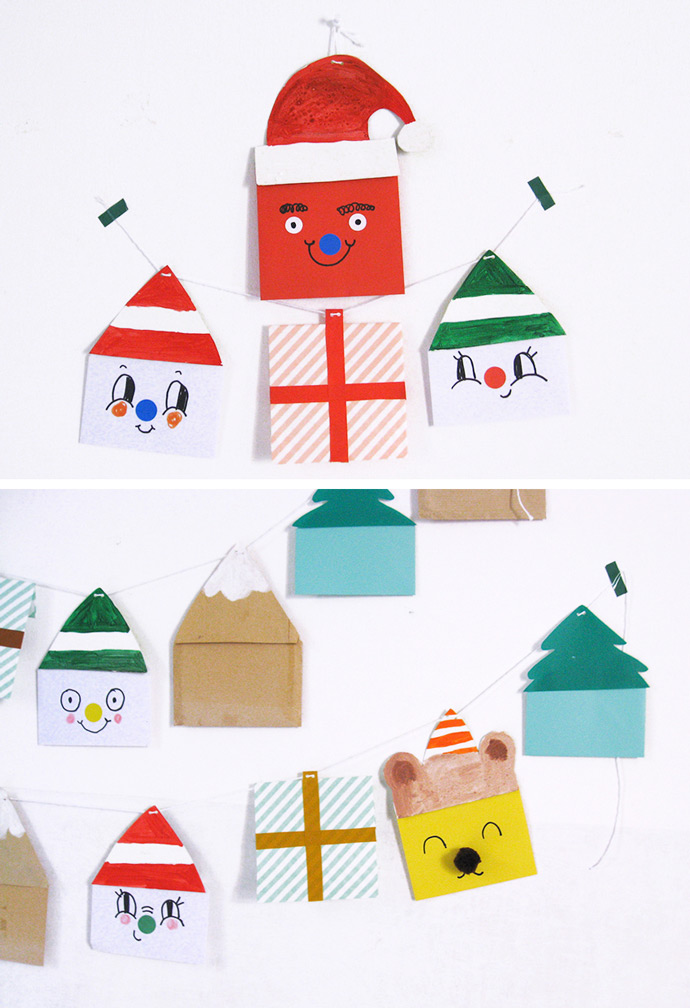
Draw funny faces for the advent calendar characters. Add pom-poms or stickers to use as eyes, noses, etc.
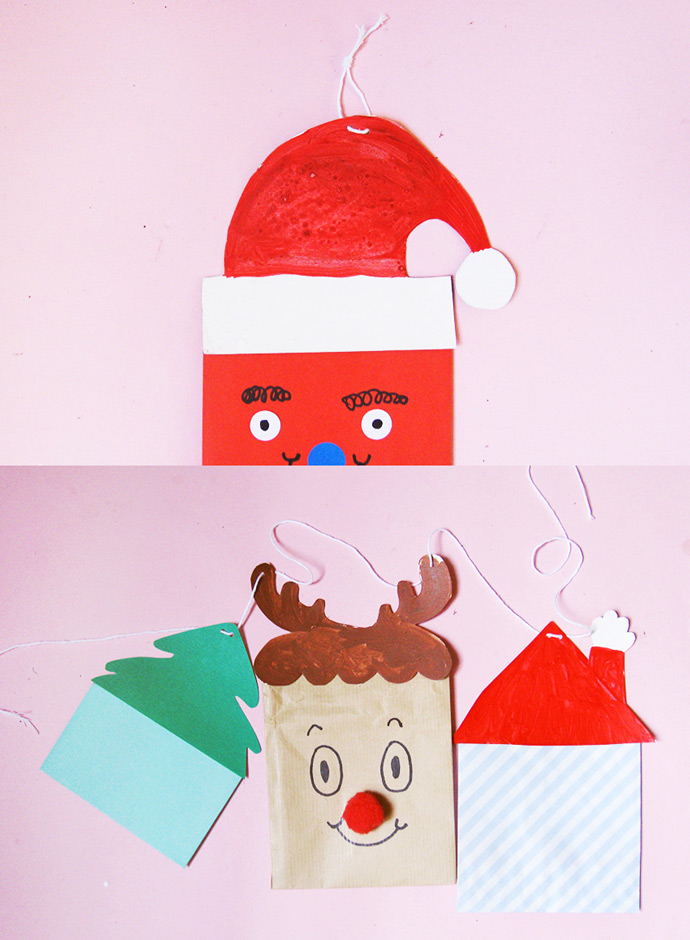
Step 6
Thread Santa with a small piece of cord and tie it to hang on top of the advent calendar. Use a long piece of cord to thread top bags into different strands of garland.
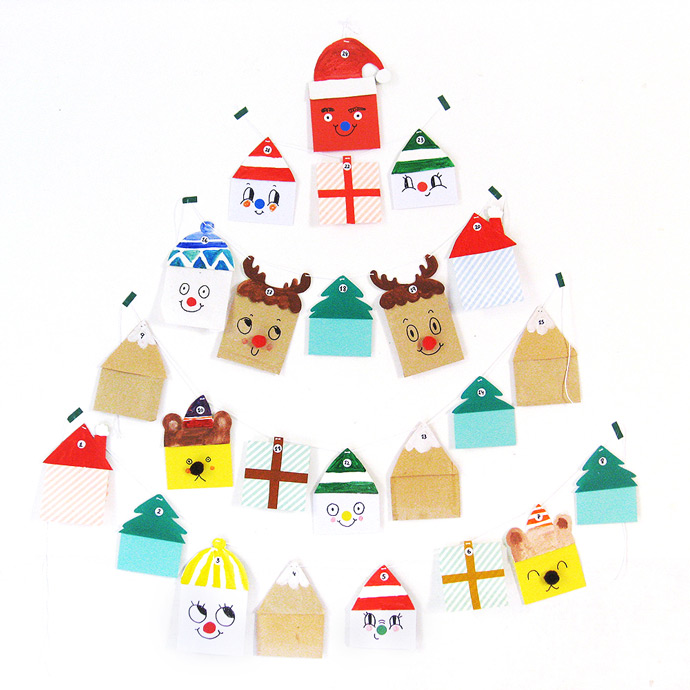
Step 7
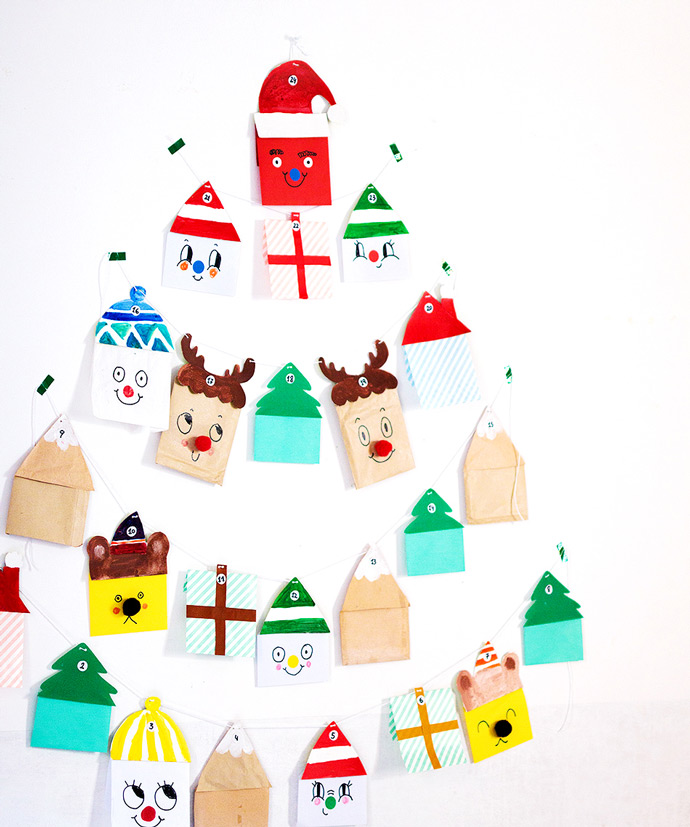
Tape and arrange garlands in a pyramid shape on the wall. Hang Santa on top and then make the first chain, threading three bags for the first chain, five bags for the second, seven bags for the third, and five for the bottom chain.
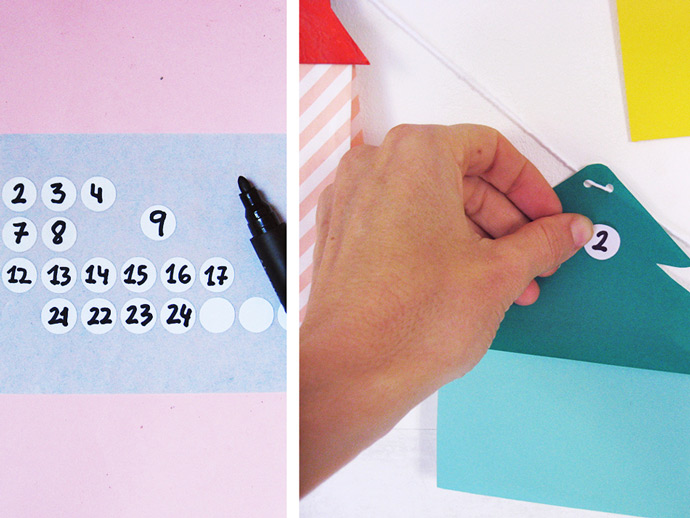
Step 8
For the numbers, I used black round stickers with written numbers. You can use stamps or other decorative elements to add numbers to the pouches.
That’s it! Now you and the kids can start the exciting countdown and make the holiday season even merrier. Happy crafting!!