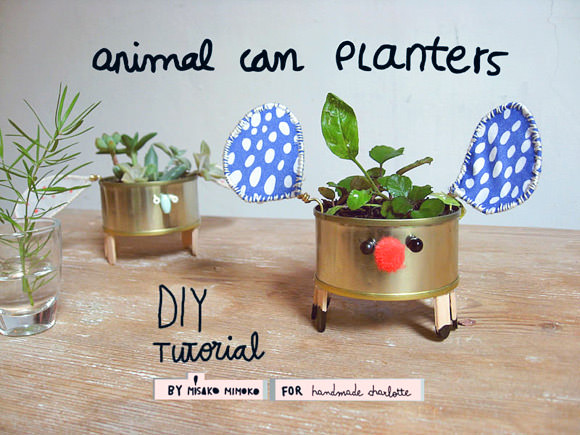
Teach your kids how to grow and care for their own plants with these super fun recycled tuna can planters! They’ll have a blast creating the crazy animals and bugs, complete with legs, wings, and ears.
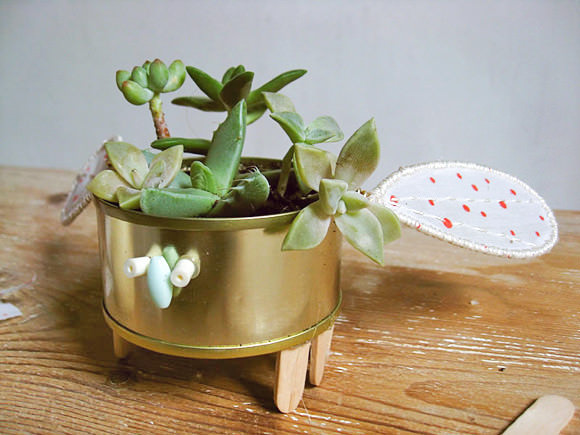
I always use mini planters to propagate some of my favorite plants. This activity can turn into a lovely way to decorate your home—stem cuttings can look really cool while rooting.
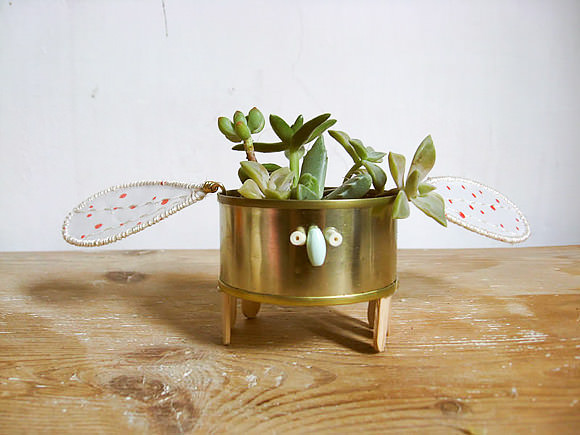
These cute mini planters are also perfect for succulents!
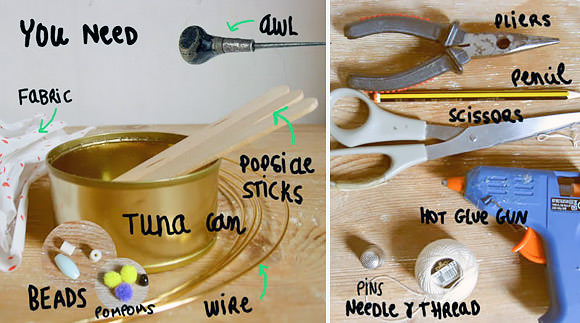
What You Need
- Tuna can
- Fabric
- Malleable wire
- Pliers
- Awl
- Scissors
- Pencil
- Hot glue gun
- Pins
- Needle & thread
- Beads, pom-poms, etc.
- Paint
Prepping The Can
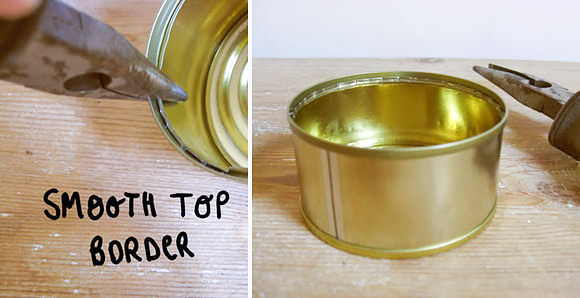
Step 1
Smooth the cut edge of the tuna can using pliers.
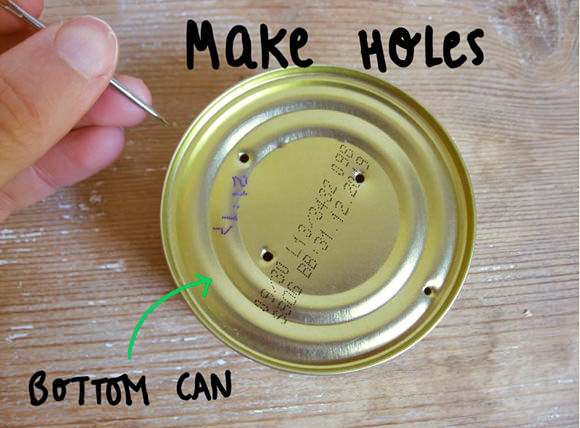
Step 2
Make several holes in the bottom of the tuna can with an awl.
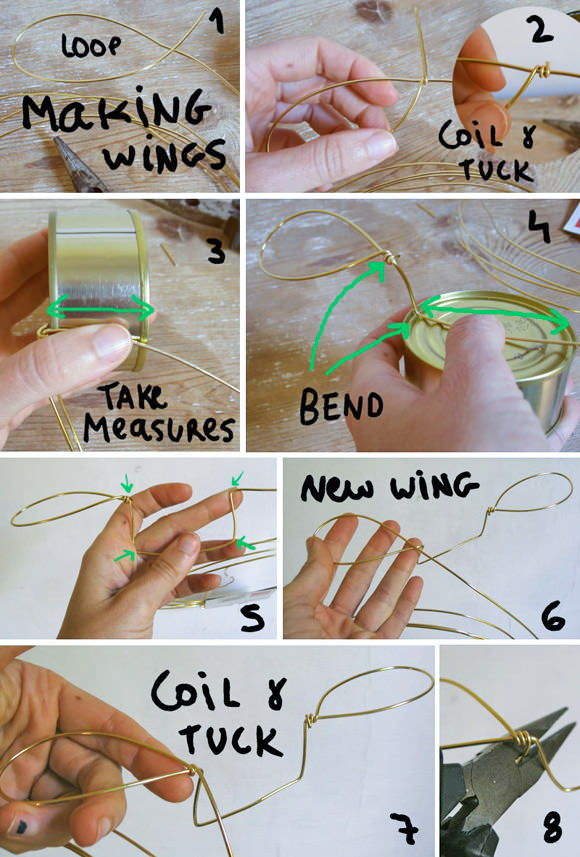
How To Make The Wings Part 1
Note that I didn’t cut any piece of wire; I just used the whole piece and cut the wire when the wings were finished.
Step 1
Gently fold the wire, creating a loop at one end.
Step 2
Coil and tuck the excess wire.
Step 3
Use the tuna can to get the measurements for where to bend the part of the wire that sits in the can.
Step 4 & 5
Bend the wire at the end of the wing to make sharp angles as shown in the photos above.
Step 6-8
Once you have the wire bent on the four angles, create a new loop for the other wing. Coil and tuck the wire.
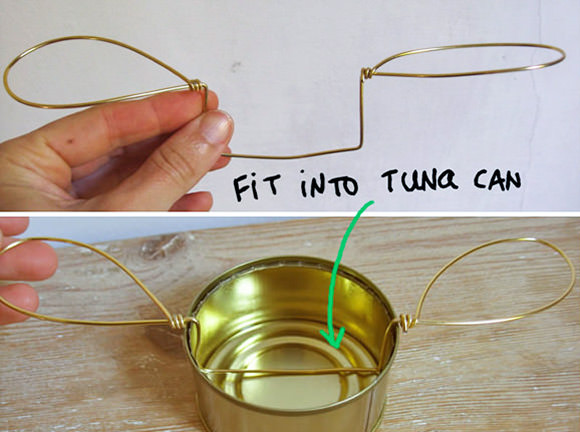
The wing structure has to fit inside of your tuna can.
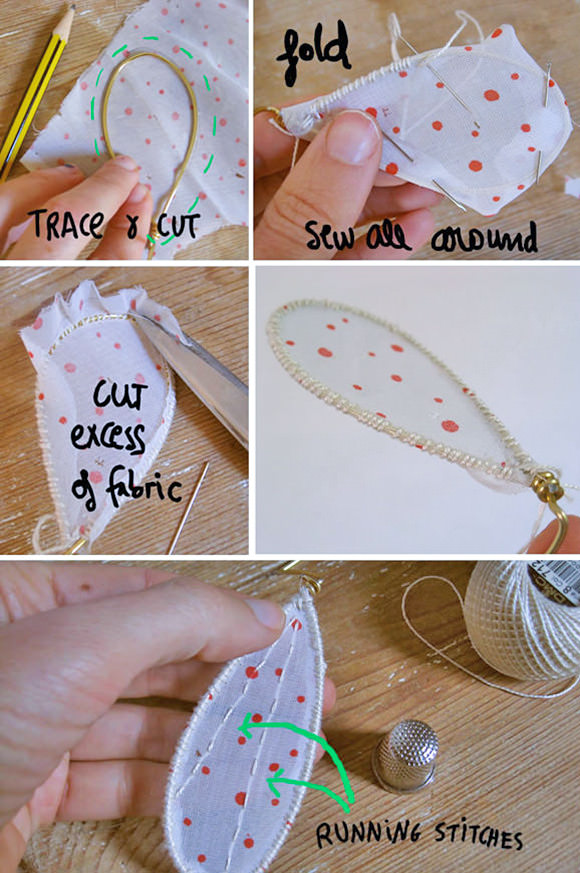
How To Make The Wings Part 2
Step 1
Place one of the wings onto the wrong side of the fabric and trace the shape. Cut the shape out, leaving a seam allowance.
Step 2
Take the piece of fabric and wrap it around the loop wire; pin the folded edges. Then stitch all around the loop wire. Cut the excess edges.
Step 3
Repeat the process to make the other wing. You can decorate your wings by stitching some lines using running stitches.
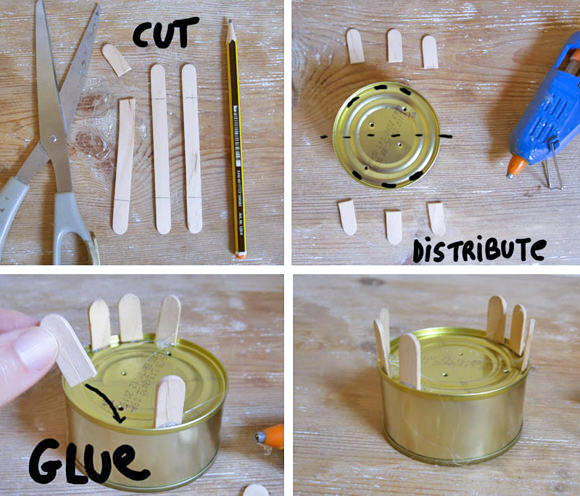
How To Make The Legs
Make legs from Popsicle sticks ends. Cut 6 pieces of 0.8 inch ( 2.3 cm) length. Distribute 3 of them on one side of the bottom of the tuna can and glue. Repeat with the other 3 pieces on the opposite side.
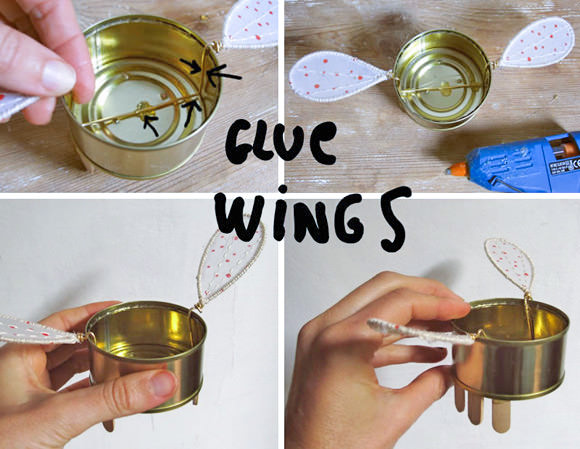
The Finishing Touches
Now place the wings structure into the tuna can, center, and glue to fix it in place.
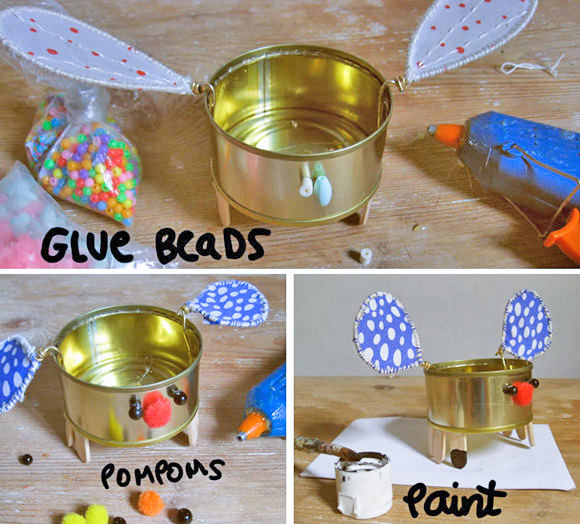
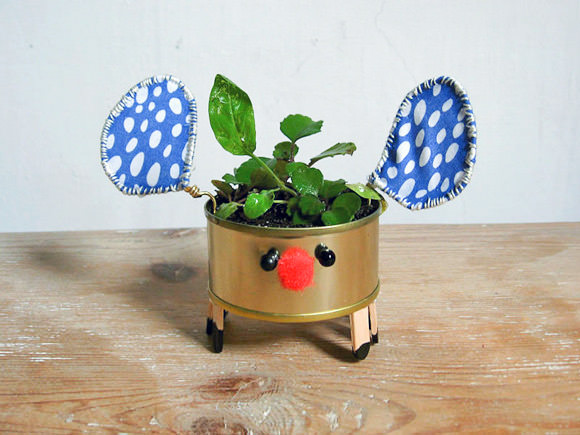
Decorate your little animal or bug using beads and pom-poms for the face and paint the feet.
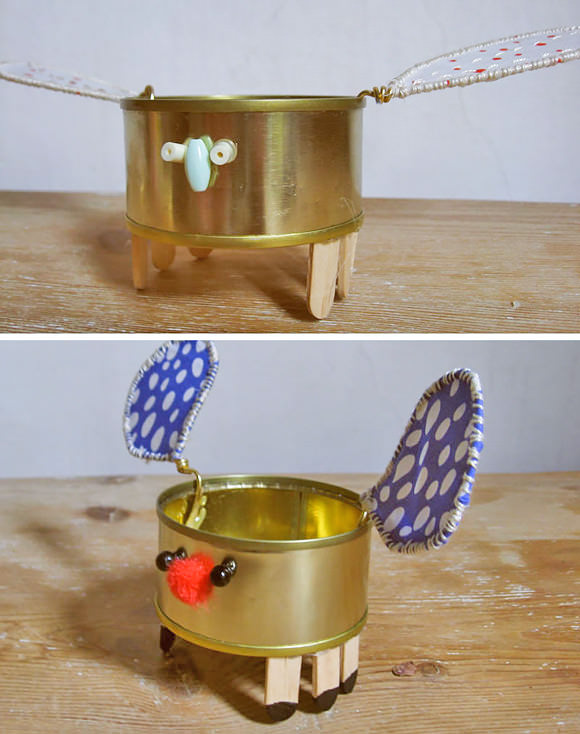
I love the golden brass of the tuna can combined with wood, so I left it visible. But you could paint the tuna can or wrap it using cute paper or fabric … or glue pom-poms all over the body to make some crazy fellows! Just have fun decorating it.
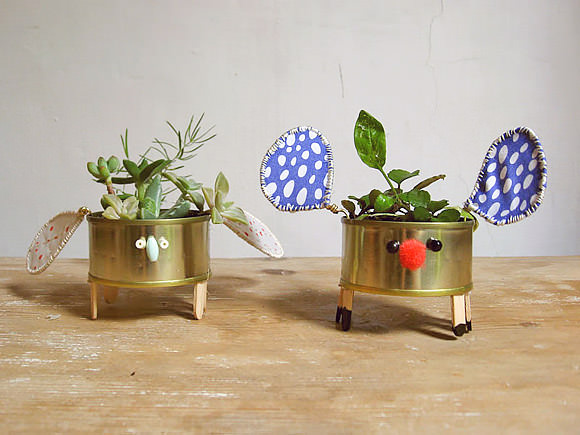
Fill with soil and plant some seeds to introduce your kids to gardening, or just plant tiny succulents to instantly add some green to your place.
Enjoy!