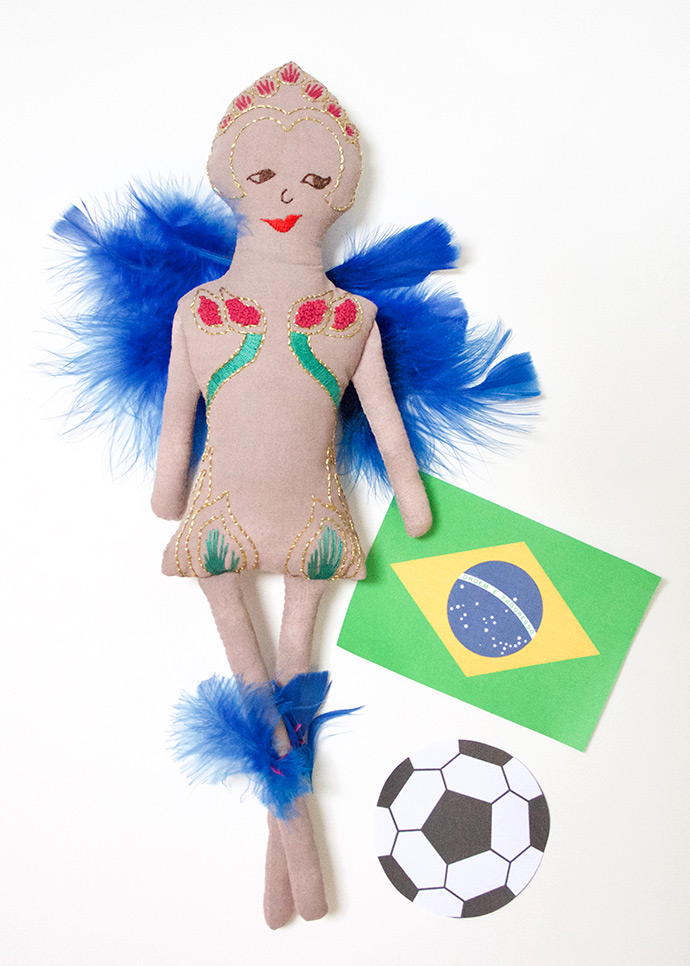
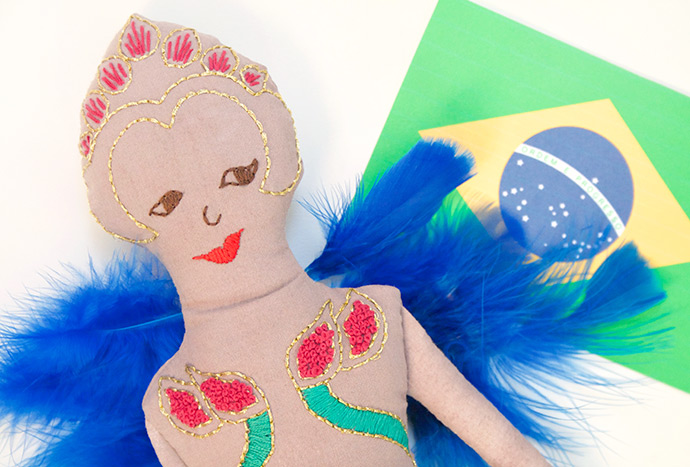
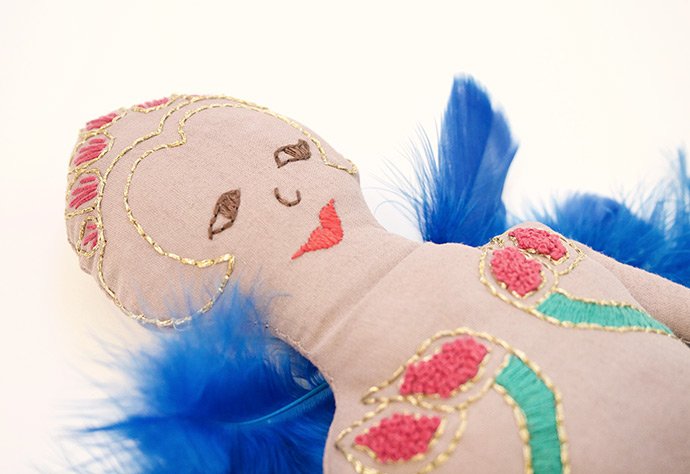
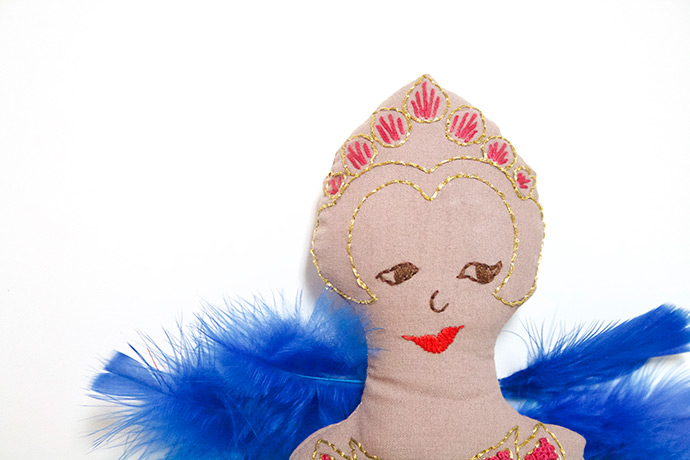
Famous for soccer, fun, and incredible fiestas, in this month’s Dolls Around the World post we’ll be making a handmade doll inspired by colourful Brazil. Use craft feathers and bold embroidery threads in pink, green, and gold to create the next lady in our handmade doll series. This gal is ready for some serious showing off!
what you need:
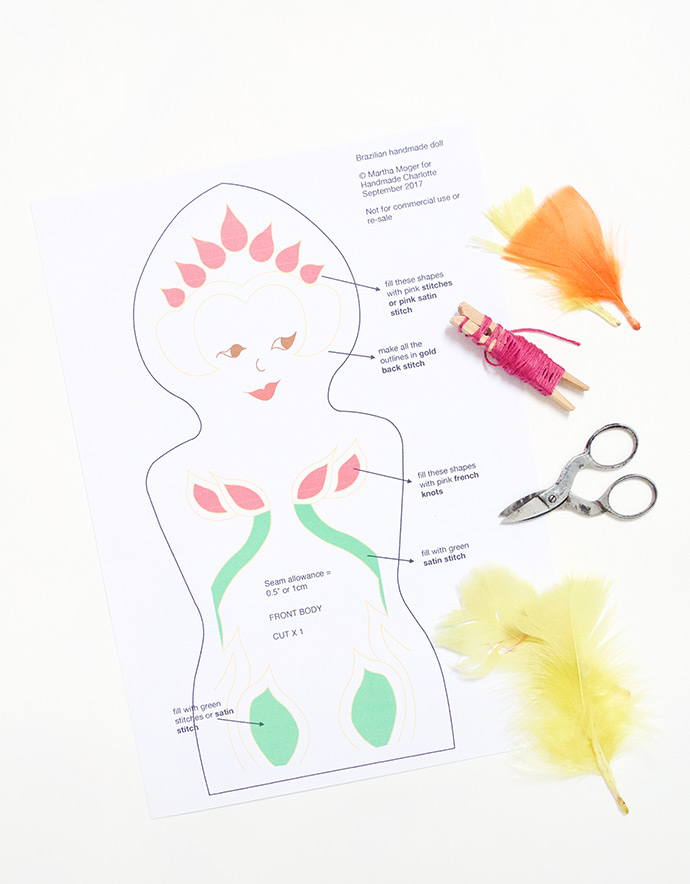
- Paper pattern download and stitch guide
- Light pencil and air erasable fabric pen
- Piece of base cotton, approx. 22” x 22” (This can be any colour, depending on what skin tone you would like your doll to have)
- Embroidery hoop, any size
- Embroidery thread in bright green, gold and fuchsia pink
- Embroidery needle
- Large and small scissors
- Sewing machine with white cotton thread
- Polyester stuffing
- Dressmaking pins
- 6-8 colourful feathers
- Approx. 3” of cotton tape or ribbon
how-to:
Step 1
First, iron your base fabric and make sure you don’t have any creases in it. Then, download the paper pattern and trace the body, arm and leg pieces onto it – don’t cut them out yet though! Also trace on the face and body embroidery pattern. The easiest way to do this is to tape your pattern to a window and tape your fabric on the top. The light will shine through the back of the pattern and fabric and make it easy for you to transfer.
Step 2
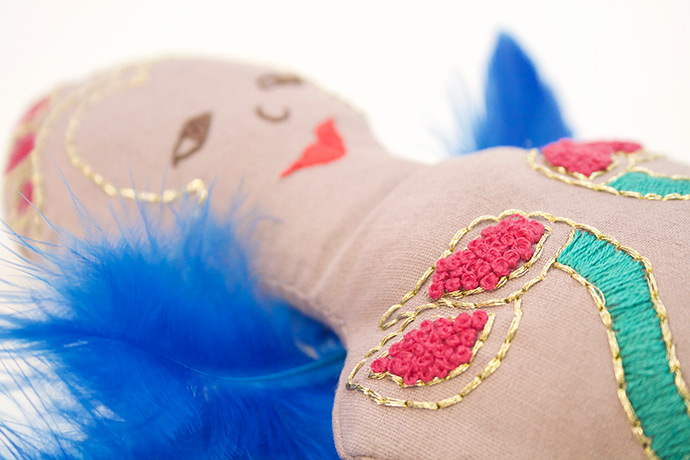
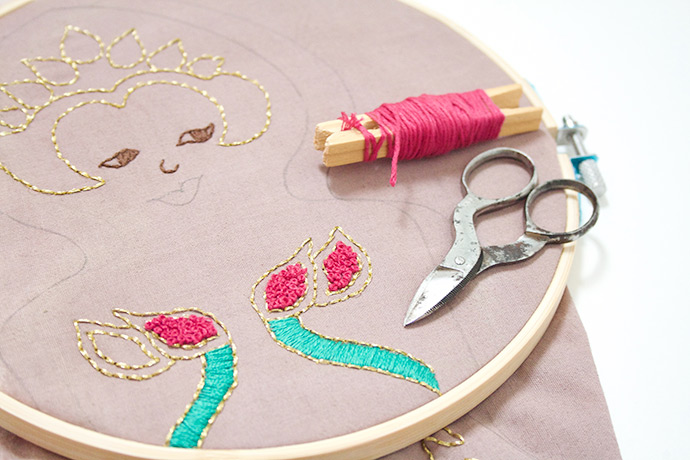
Now it’s time for the embroidery. Put your fabric into the frame with as much of the body piece as possible pulled taut and showing in the hoop. Follow the stitch and colour guide download to do your embroidery, making sure you split your embroidery threads down to three strands each so that they go further and produce finer work.
i) To do back stitch
Use backstitch for the outlines of the shapes as the guide. Push the needle up through your fabric and then back down just to the left of where you started. Now go back up through the fabric again, but this time to the right of that first stitch. Then, go back down through the exact spot of the first stitch and keep going on in this way, going back on yourself.
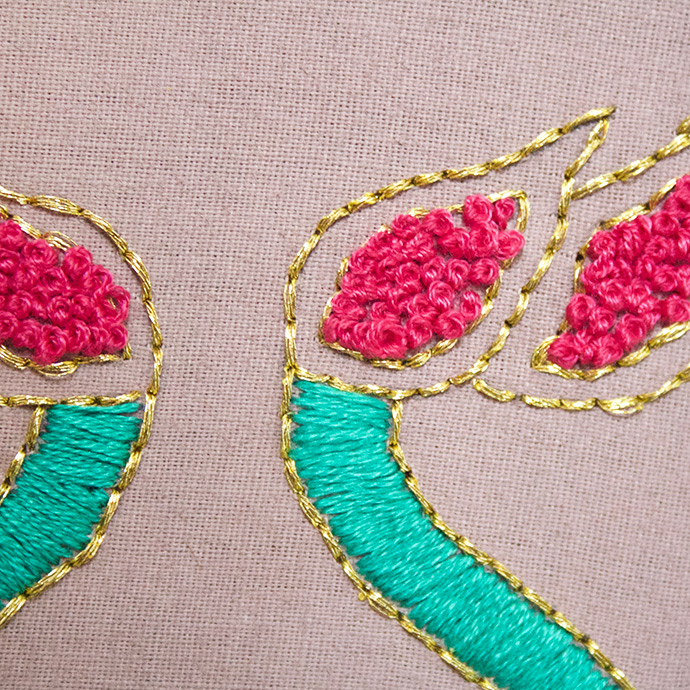
ii) To do french knots
French knots make up the bright pink petals across the doll’s chest. Pass the needle up through your fabric, wrap your thread around twice before passing needle back through and pulling tight to make a smart, cute little knot.
iii) To do satin stitch
A lovely stitch for filling in shapes with a gorgeous sheen of thread. To start, push the needle up at shape’s edge. Then do the first stitch by pushing the needle back down, and come up next to where you first started. Repeat!

Step 4
The next thing to do is attach the feathers. Take 6 feathers and lay them onto a short piece of cotton tape or ribbon approx. 3” in length. With the tips of the feathers on the tape, sew them carefully down by sewing machine.
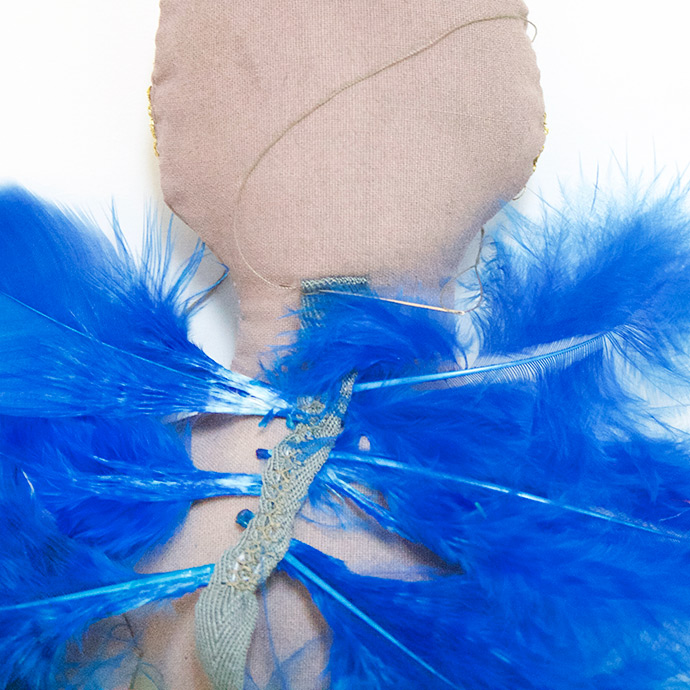
Step 5
Now take the cotton tape and place onto the back of the doll at her neck. Hand sew the tape carefully down her back in a vertical line with a small running stitch.
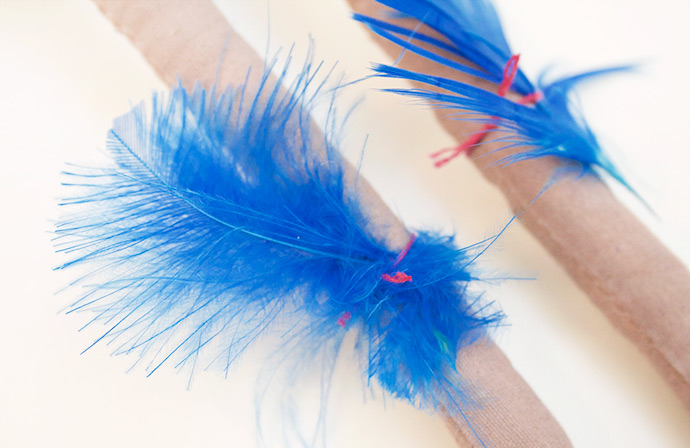
Step 6
Finally, take two more feathers and using a short length of the pink embroidery thread, tie one feather around each leg.
Happy crafting!