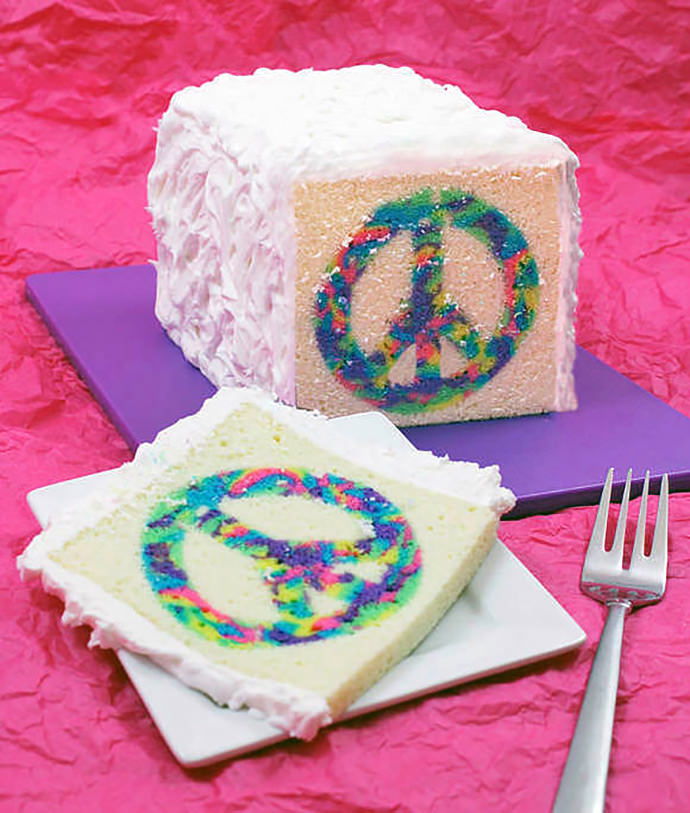
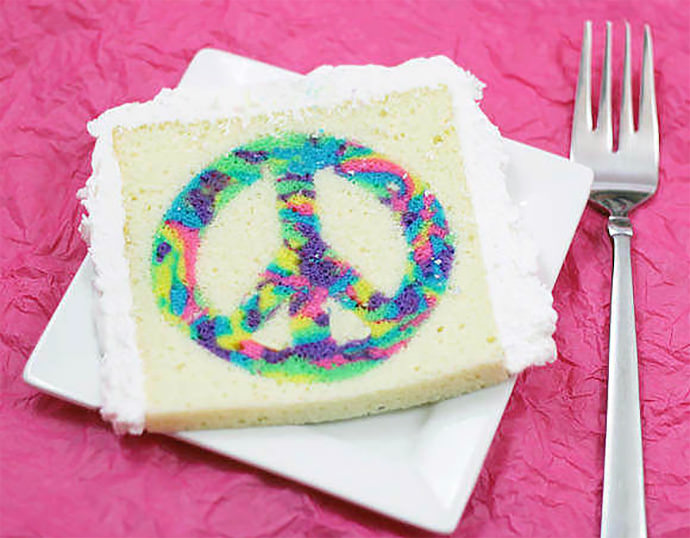
What’s better than a slice of cake? A slice of cake with a surprise baked inside! This tie dye cake dessert recipe is a cinch to make and can be customized with any shape.
For the past couple of years, I’ve been experimenting with desserts that have hidden surprises. I’ve tried a number of different ways to bake shapes inside of cakes, and this one has delivered the best results by far. (Fortunately, my family enjoys eating all of my failed attempts.)
At first glance, this Peace Cake might not seem like a “piece of cake” to create. But I’ve simplified the process so that you can achieve sweet success in your own kitchen. By the way, I used a peace sign in this tutorial, but you can do this with any shape. It’s really fun with alphabet letters, numbers, holiday shapes, etc. You’ll just want to make sure you have the right-sized pans to fit the sizes and shapes of your cookie cutters.
What You Need
Makes a 6-inch by 8-inch cake- 4 boxes Betty Crocker Pound Cake Mix (has fewer air bubbles than regular cake)
- 2 2/3 cups milk (use 2/3 cup per box)
- 1 cup softened butter (use 1/4 cup per box)
- 8 eggs (use 2 eggs per box)
- Food coloring: blue, purple, pink, green, and yellow
- Disposable pastry bags or Ziploc bags
- Frosting
- Peace sign cookie cutter (I found mine at cheapcookiecutters.com)
- Two 6-inch x 6-inch x 2-inch baking pans
- Non-stick cooking spray and flour (for dusting the pans)
How-To
Step 1
Spray pans with nonstick baking spray and dust with flour. Preheat oven to 350 degrees.
Step 2
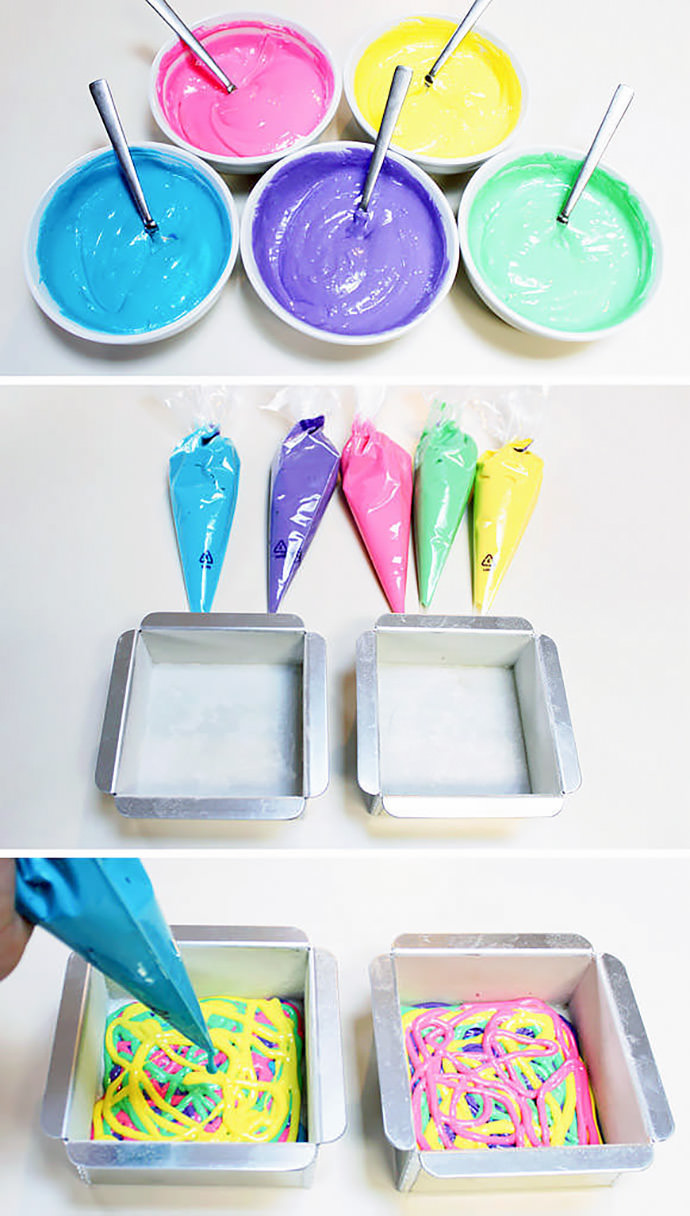
Mix one box of pound cake mix with 2/3 cup milk, 1/4 cup butter, and 2 eggs. Split into 5 equal portions and add food coloring to each, making blue, purple, pink, green, and yellow. Pour colored batter into separate, sealed disposable pastry bags or Ziploc bags.
Step 3
Cut off the bottom tips and begin swirling the batter into the pans, alternating colors often. Tap and lightly drop the pans on the counter to help eliminate air bubbles.
Step 4
Bake 35 to 40 minutes. Slightly under baking them is OK since you’ll bake them again later. Allow the cakes to cool, then remove them from the pans and set aside. Repeat previous steps to make two more swirl-colored cakes. When all four cakes are baked and cool, wrap them in plastic wrap and freeze for 4 hours or overnight. (Freezing the cakes makes them easier to slice and cut. It also helps prevent them from overcooking the second time they are baked.)
Step 5
Spray pans with nonstick baking spray and dust with flour. Preheat oven to 350 degrees.
Step 6
Mix one box of pound cake mix with 2/3 cup milk, 1/4 cup butter, and 2 eggs. Pour batter into a sealed plastic pastry bag. Set aside.
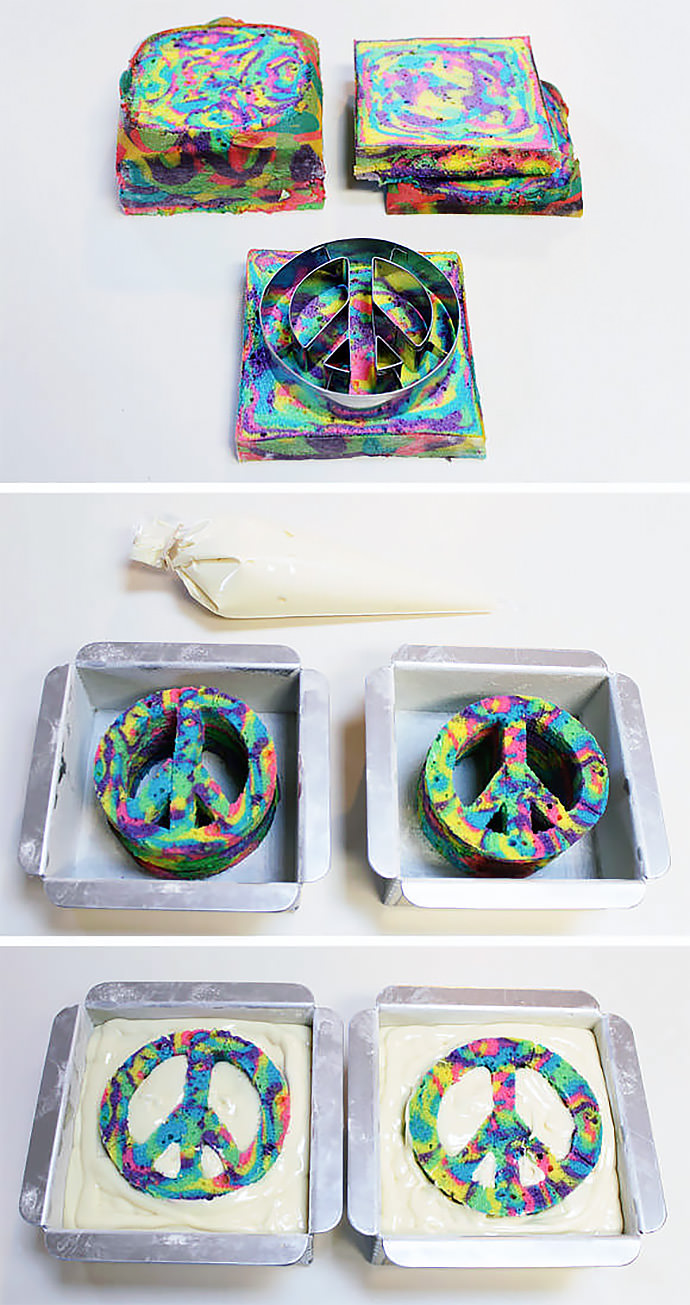
Step 7
Remove two, swirl-colored cakes from the freezer and slice them to the thickness of your cookie cutter. Cut shapes from each slice, and stack them in the center of your baking pans.
(HELPFUL HINT: After you have stacked your cut shapes, insert a few long toothpicks or wooden skewers into the stacks. This will prevent them from moving or shifting when you pour the pound cake batter around them. It will also keep them from bubbling up and shifting out of place while baking. Just remember to take the toothpicks out after they’re done baking.)
Step 8
Cut off the bottom tip of the pastry bag filled with pound cake batter and begin squeezing batter into the inner shapes of the peace sign. Once those are filled, pour batter all around the outside.
Step 9
Bake for 40 to 45 minutes, or until a toothpick inserted comes out clean.
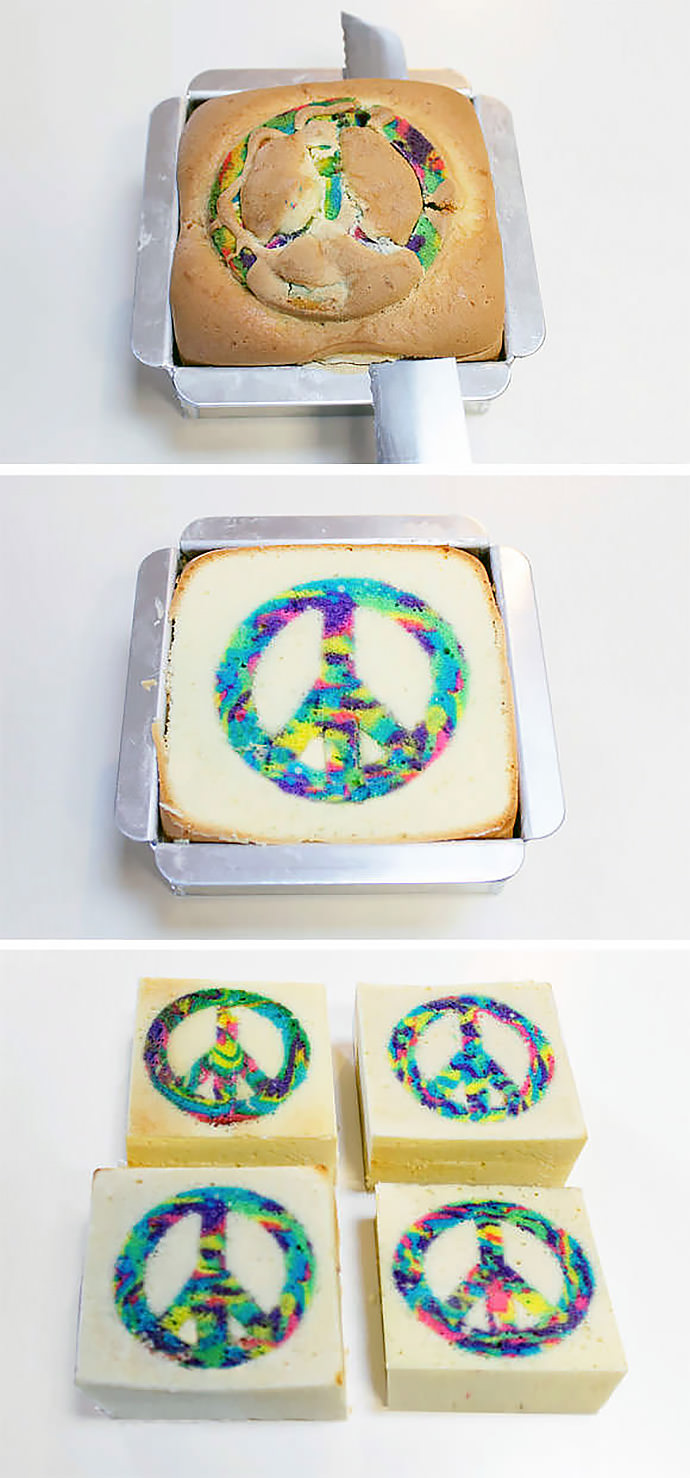
Step 10
Allow the cakes to cool. While still in the pans, cut off the top bubbly portion of the cakes, flush with the pan. Remove the cakes and trim all four sides neatly. Repeat the previous steps to make two more cakes with peace signs inside.
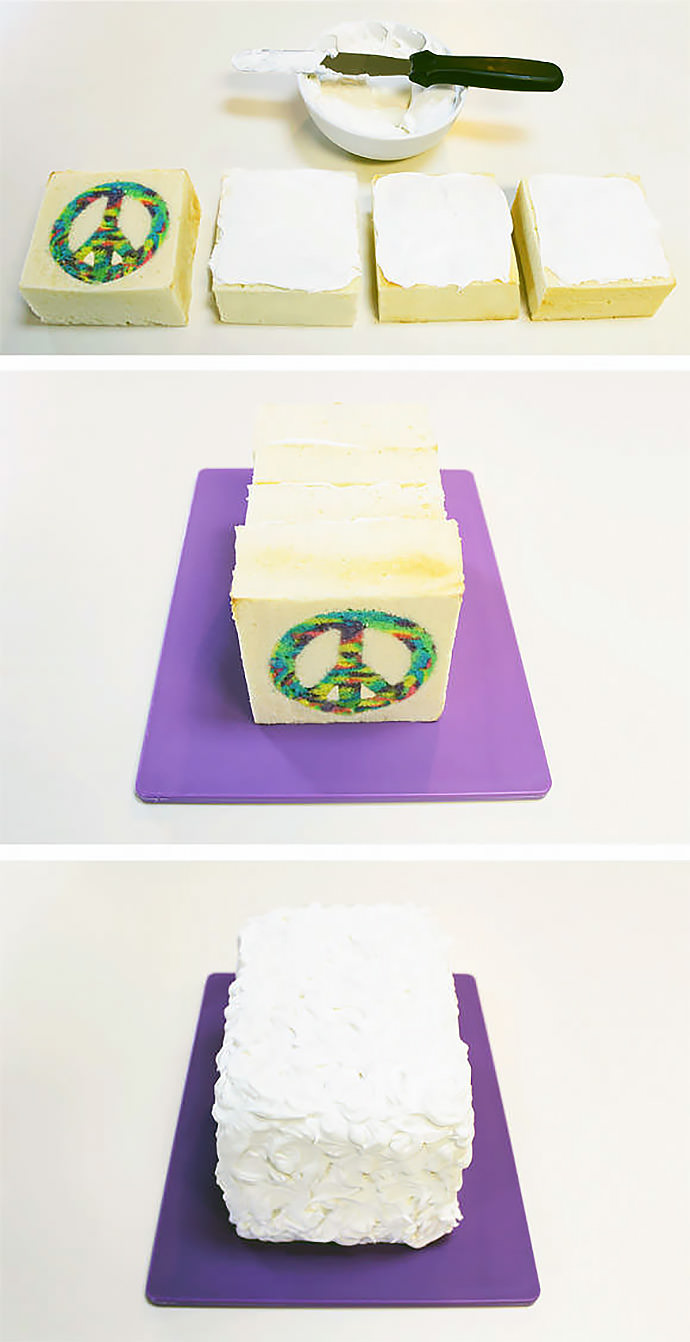
Step 11
After all four cakes are trimmed to the same size, put a thin layer of frosting on the tops of three of them. Stand them upright and stick them together on your cake plate. Frost the entire cake with a thin, crumb coat of frosting. Refrigerate for an hour, then frost the entire cake with a thicker, more decorative layer of frosting. (REMEMBER: mark which side of your cake plate is the front, so that you know where to cut from later.)

That’s it! Slice and surprise your guests with a cake that’s so much more than it appears!
Happy baking ;-)