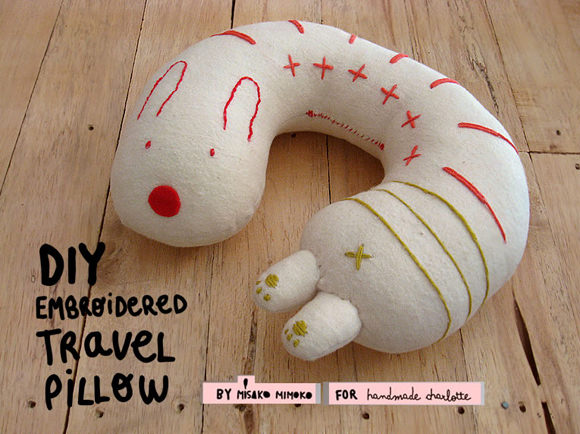
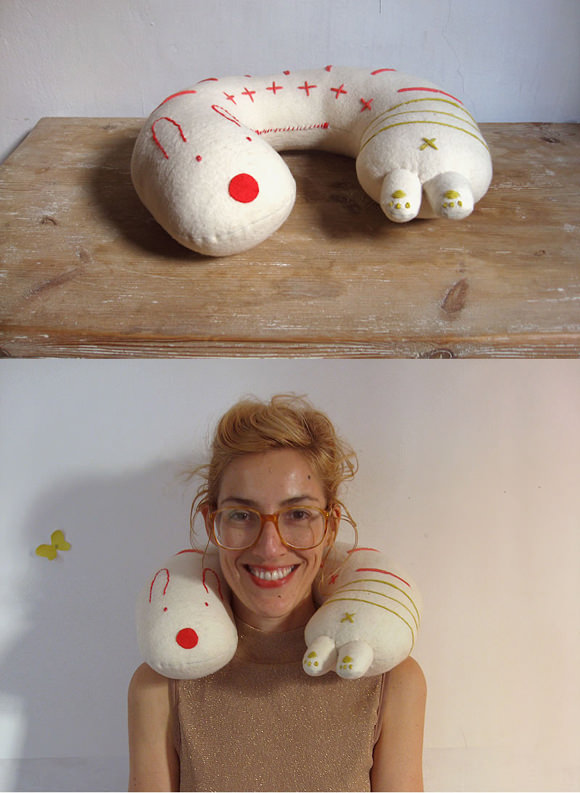
Relax or travel in comfort with this super cute neck pillow! You can make it in any size using any fabric, perfectly fitted to everybody—kids or grown-ups—by simply adjusting the template.
You can also turn it into a scented neck pillow by filling it with rice and adding some herbs or spices. Scented or not, it can be a lovely gift!
A quick word of warning: this bunny causes extreme comfort and lulls to sleep!
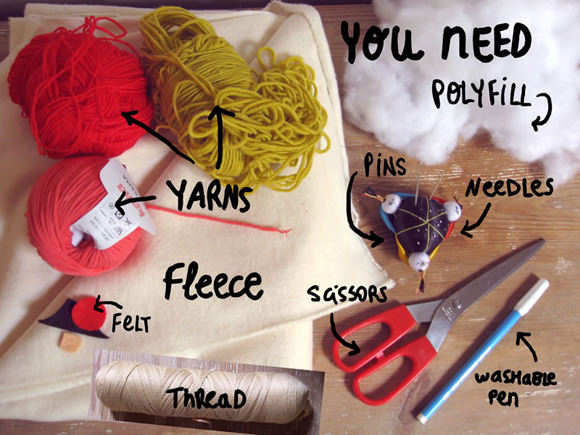
What You Need
- Printable template (download here)
- Soft fabric (fleece, flannel or soft knit)
- Wool and a large-eyed needle
- Polyfill or batting
- Red felt
- Pins
- Thread and sewing needle
- Scissors
- Washable pen
- Sewing machine
Step 1
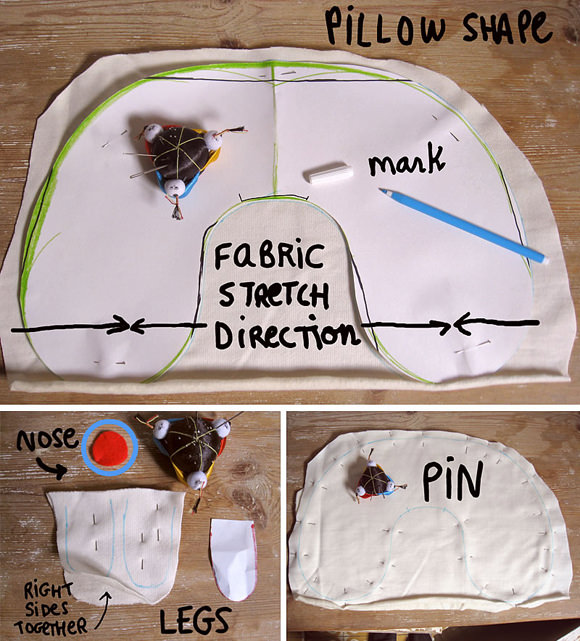
Download, print, and cut out the template. Fit the pillow template around your neck to test the fit, then make adjustments to the size or shape if necessary.
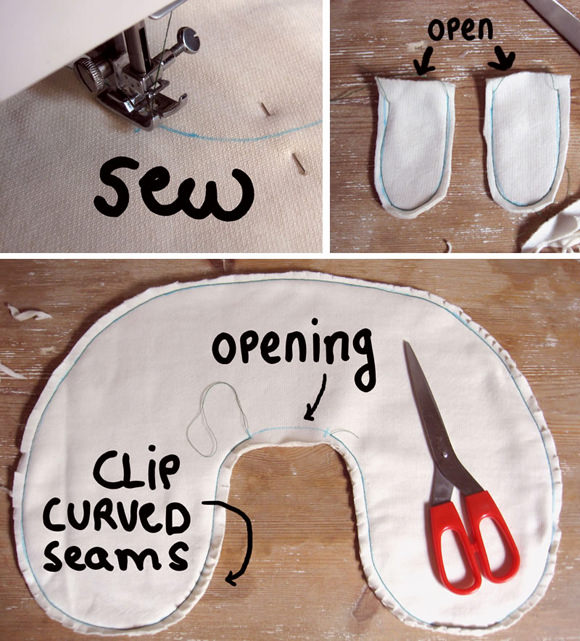
Fold your fabric in half with the right sides together. Lay the template on the fabric and mark the pillow and legs shapes. Pin the pieces together. Cut out a 1-inch from the red felt and reserve it for later.
Note: I started embroidering once I had the pillow sewn, but you can transfer the design and start embroidering on the fabric first, and then sew the embroidered pieces together. Just choose the way you feel more comfortable!
Step 2
Stitch around the pillow with a 1/2 inch seam. Leave a three-inch opening at the inside-middle. Sew the two legs. Trim all the seams to 1/4 inch and clip all curves. Turn the pillow and legs right side out.

Step 3
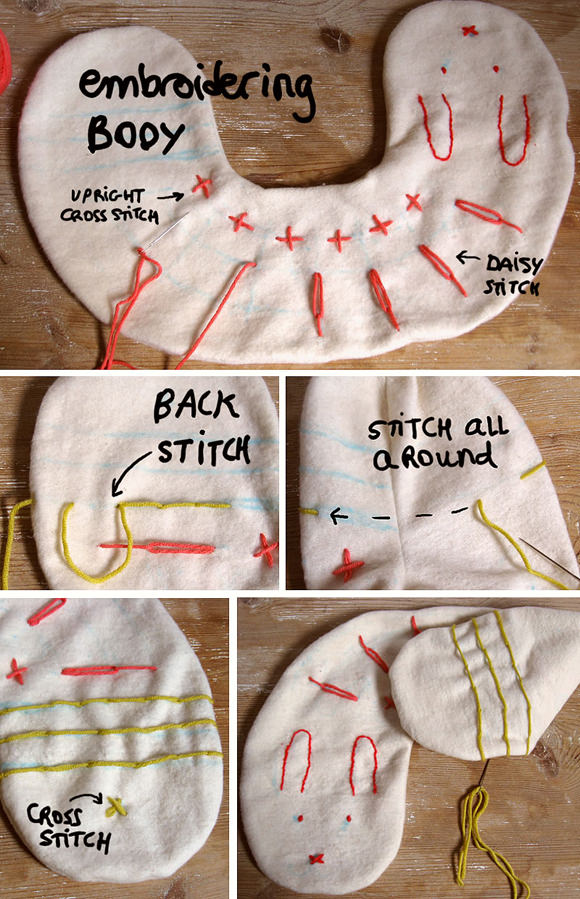
Mark the horizontal center of the pillow to distribute all the stitches or transfer the embroidery design.
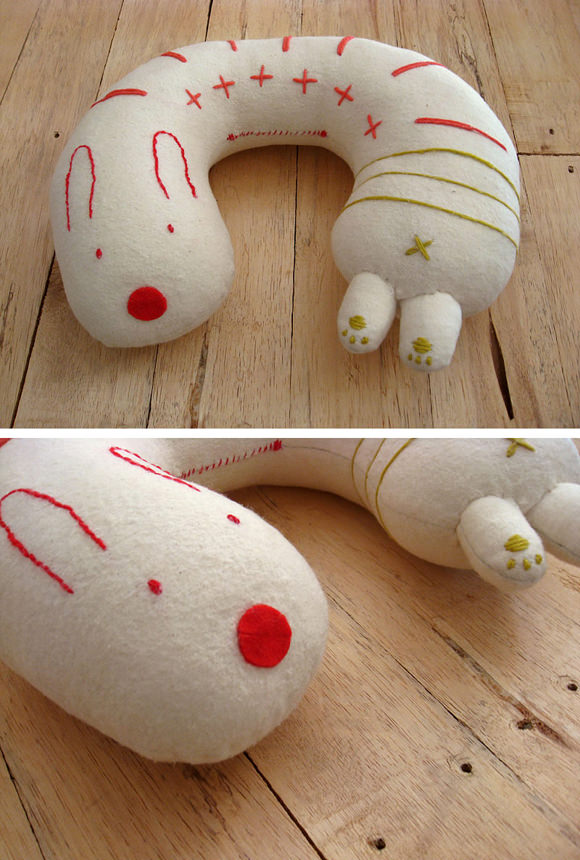
After drawing the bunny face, tie a knot at the end of the red yarn and pass the threaded needle through the opening of the pillow. Back stitch the ears, add few straight stitches for the eyes, and mark its nose with a cross-stitch. Tie a knot on the inside of the pillow as you finish each part of the embroidery.
Note: If you feel lost, take a look at this simple guide to embroidery!
Step 4
Sew pink upright cross-stitches following the shape of the curve. Don’t pull the stitches too tight; let them be fluffy.
Add detached chain stitches, or straight stitches if you prefer, following the pillow curve. I switched to a mustard-colored yarn to back stitch the last three lines near the pillows end and stitched them all the way around.
Cross stitch the bunny tail.
Step 5
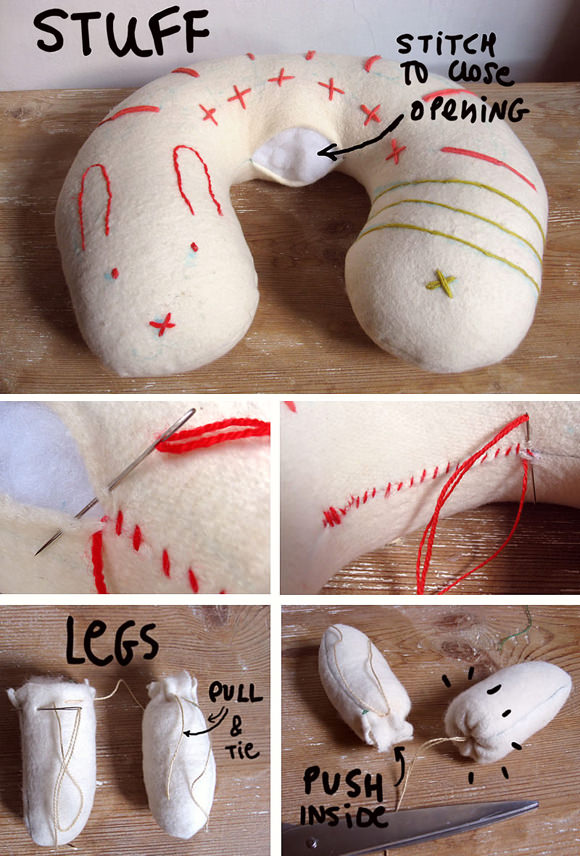
Stuff the pillow with as much batting as you can, filling from both ends. Then stitch to close up the opening. (I used the red yarn.)
Stuff the legs and close with a running stitch all around the opening, pulling and tying the ends of the thread.
Push the excess fabric inside using scissors.
Step 6
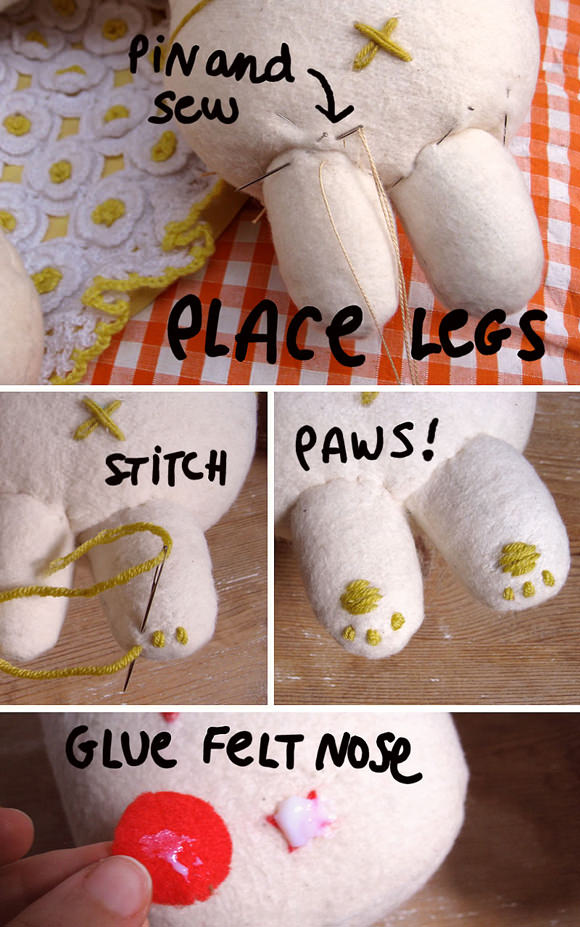
Pin the two legs in place. Sew them to the pillow with invisible stitches. Now embroider the yellow paws adding a few straight stitches at the bottom of each leg. Glue the red felt nose to finish the bunny face.
Fit it to the neck and relax! Happy crafting!