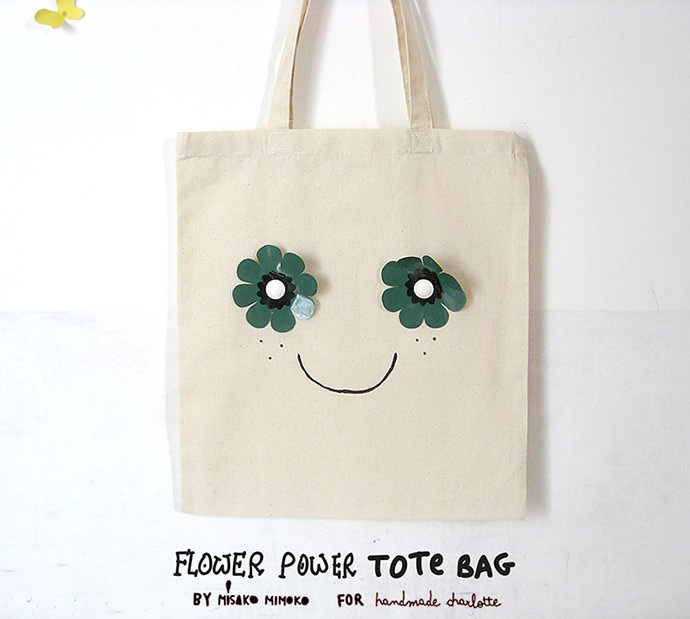
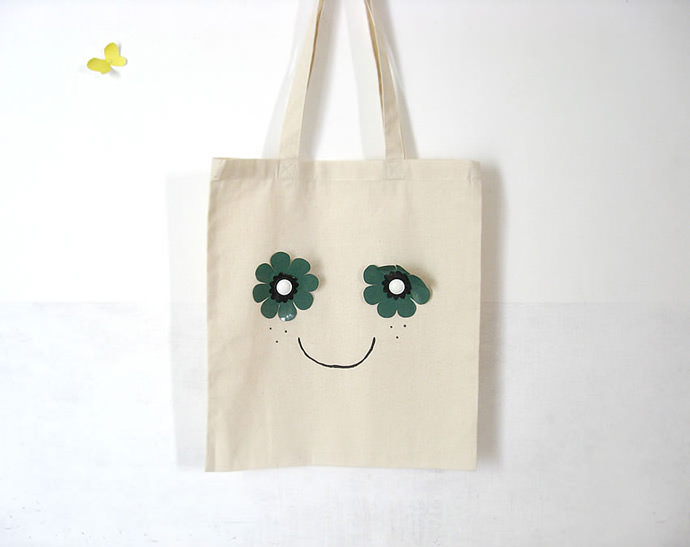
Feel the power of flowers with this cool and simple retro design. You’ll have fun cutting, stitching, and tracing with this project! Recycle any old plastic-lined tablecloth you have at home (only some scraps of soft plastic are needed).
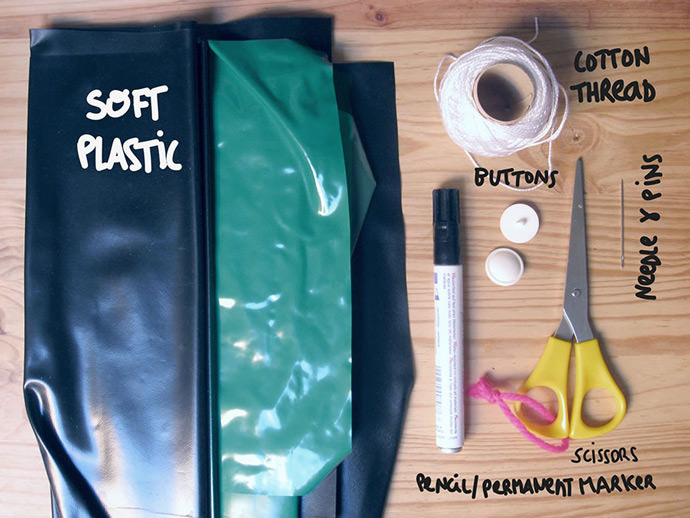
What You Need
- Printable pattern (download here)
- Tote Bag
- PVC or any plastic tablecloth
- 2 Buttons
- Cotton thread
- Needle
- Pins
- Scissors
- Pencil or permanent marker
- Black fabric paint or marker
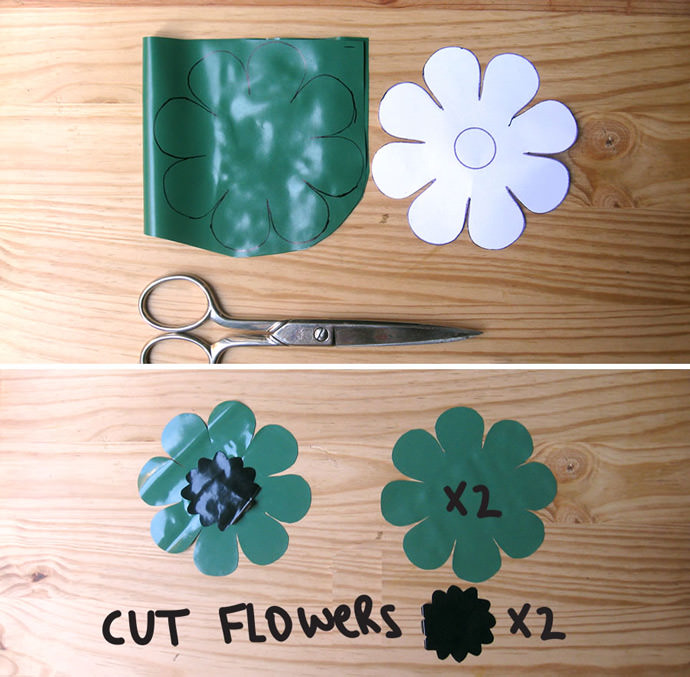
Step 1
Download, print, and cut out flower templates. Trace the two shapes of each design onto plastic using a pencil or marker, and cut out.
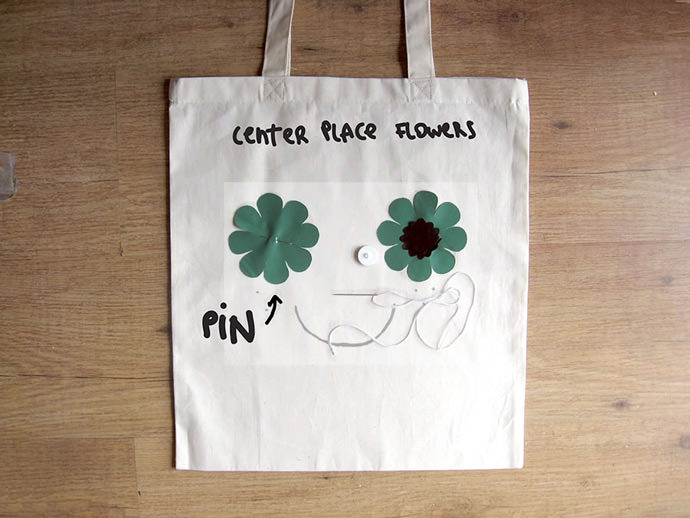
Step 2
Take the printed face template and slide it inside the bag so it shows through. Place big flowers onto the bag following the template. Pin them to the bag and then slide the printed template out of the bag.
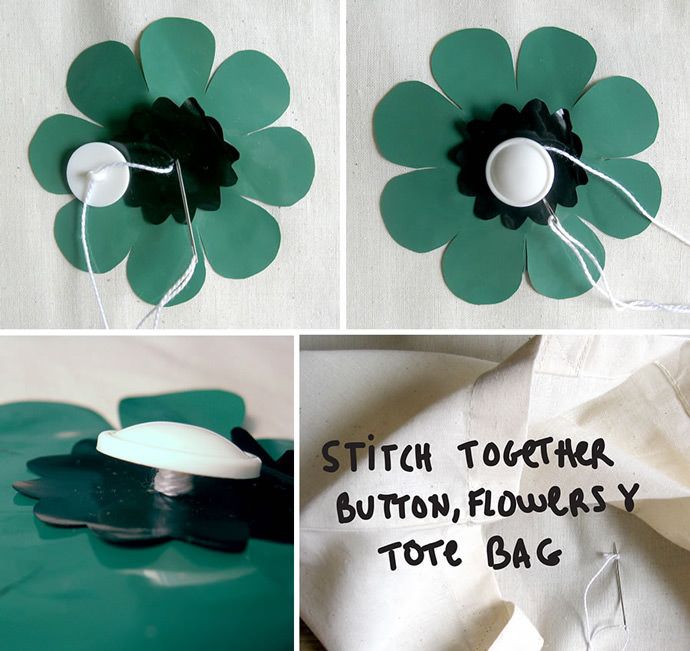
Step 3
Place small flowers onto each big flower and align centers. Thread a needle, knot the end of the thread, and stitch a button in the middle of each layer of flowers, making sure to pierce through the bag too.
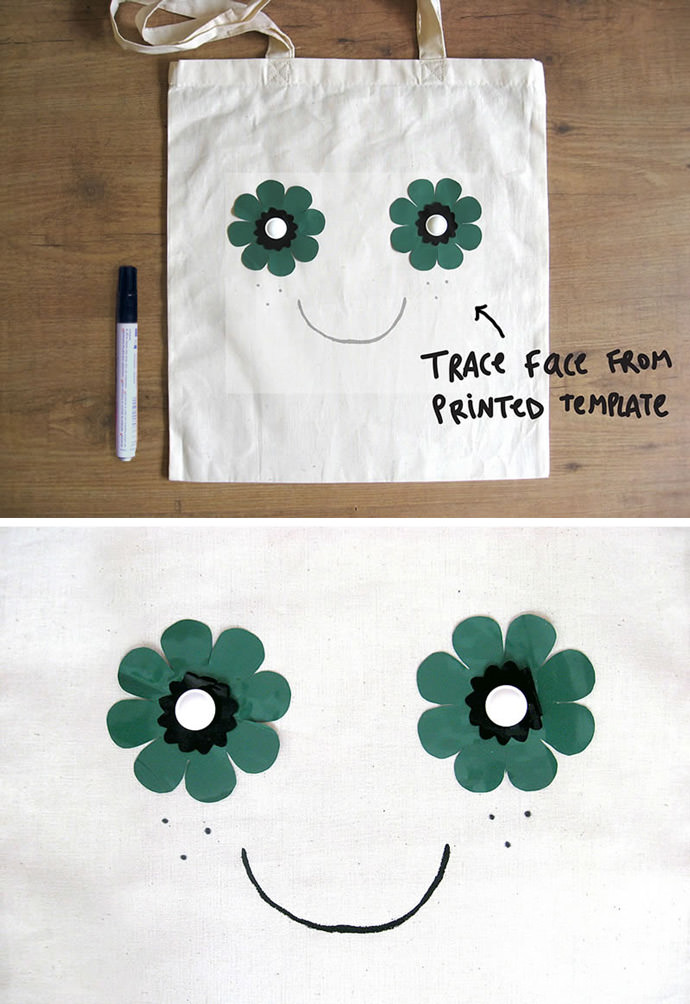
Step 4
Using fabric paint or a marker, follow the printed template and trace the smiling mouth and freckles. Let it dry… and enjoy your new retro bag!
Oh! Remember to be careful when ironing the bag. Clean it with cold water to keep your plastic flowers safe and sound : )