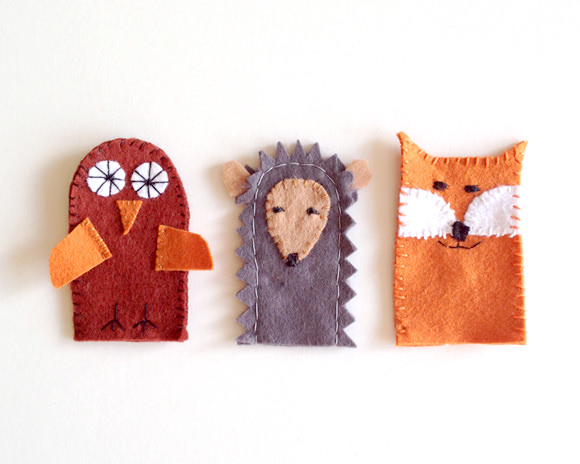
Here’s an easy craft for beginner sewers—even kids can make these easy felt finger puppets!
Choose the felt, cut the shapes, thread your needle, and start sewing! Afterward kids can make up their own woodland-inspired play—where do they sleep? Under a cozy leaf!
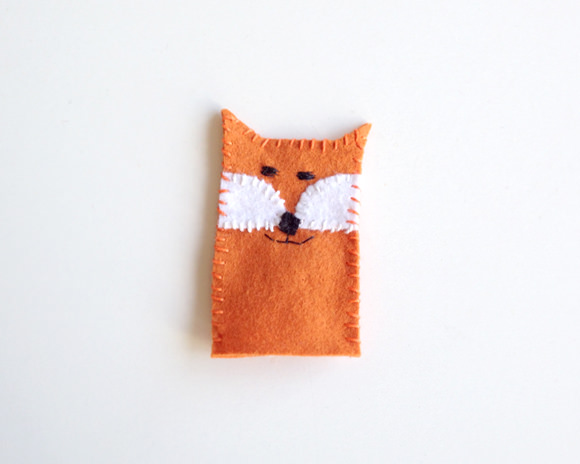
How To Make The Fox
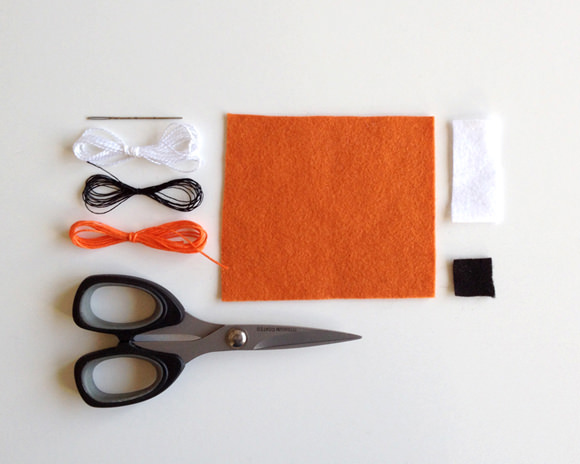
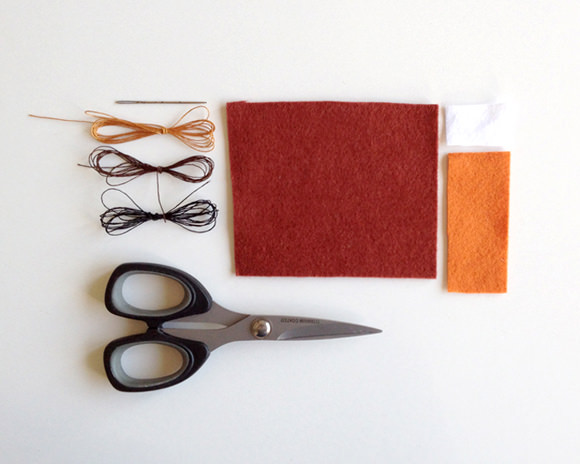
What You Need
- Printable Forest Friends template (download here)
- Felt, red brown 3 1/2 x 4 inches (9 x 10 cm)
- Felt, white 1 x 2 inches (2 x 5 cm)
- Felt, black 1 x 1 inches (2 x 2 cm)
- Embroidery needle
- Embroidery floss: red brown, white, and black
- Scissors
Step 1
Cut out the felt shapes.
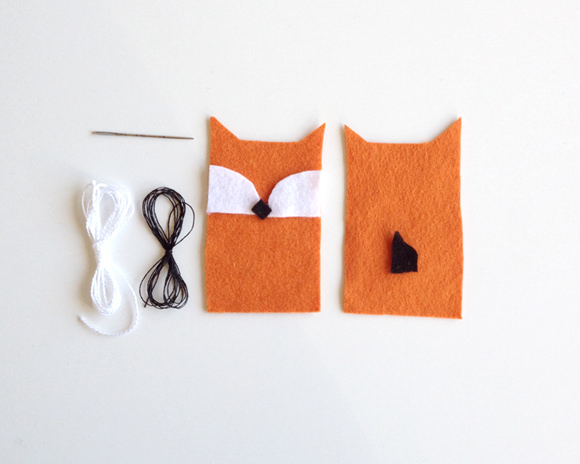
Step 2
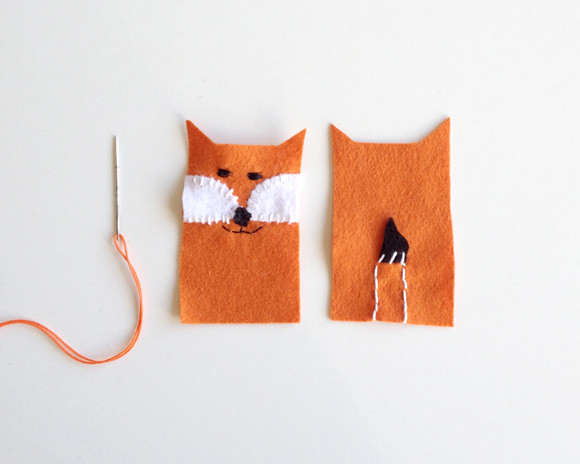
Thread your needle and start embroidering the face: Stitch on the white felt fur, black nose, mouth, and eyes. On the second piece of orange felt sew on the tail.
Step 3
Sew together the front and back pieces. Your fox finger puppet is ready for play!
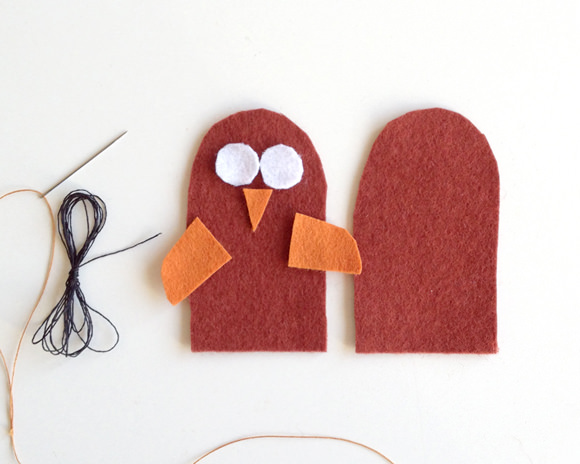
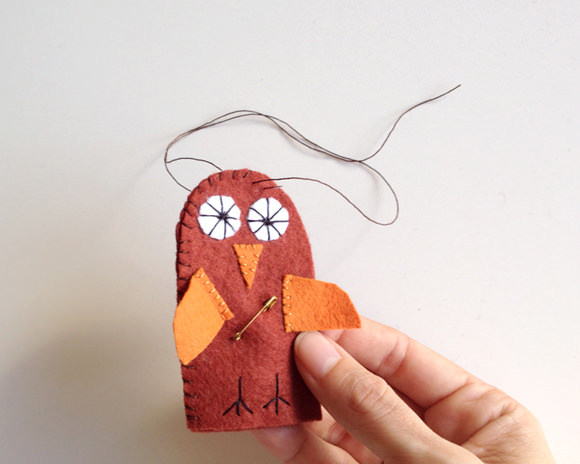
How To Make The Owl
What You Need
- Printable Forest Friends template (download here)
- Felt, brown 3 1/2 x 4 inches (9 x 10 cm)
- Felt, white 1 x 1 1/2 inches (2 x 4 cm)
- Felt, orange 1 x 3 inches (3 x 7 cm)
- Embroidery needle
- Embroidery floss: black, brown, orange
- Scissors
Step 1
Cut out the felt shapes.
Step 2
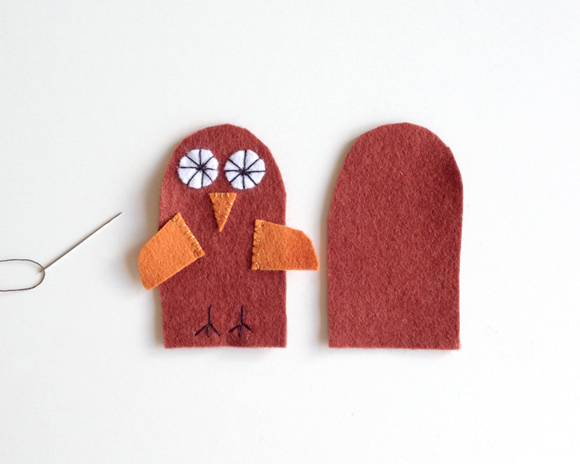
Embroider the face with the white eyes and orange beak, then add the wings and claws.
Step 3
Sew together the front and back. Your owl finger puppet is ready for play!
How To Make The Hedgehog
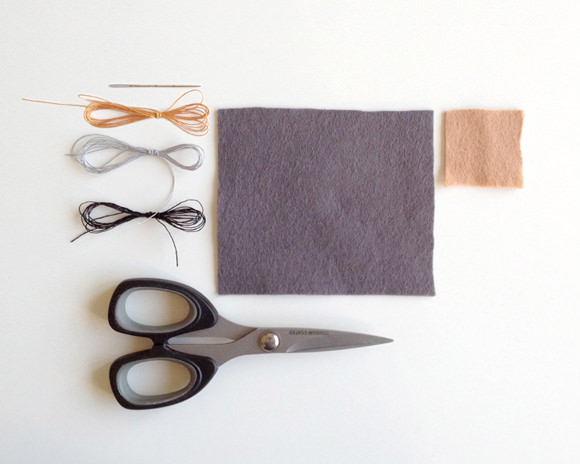
What You Need
- Printable Forest Friends template (download here)
- Felt, gray 3 1/2 x 4 inches (9 x 10cm)
- Felt, light brown 1 1/2 x 1 1/2 inches (4 x 4cm)
- Embroidery needle
- Embroidery floss: gray, black, light brown
- Scissors
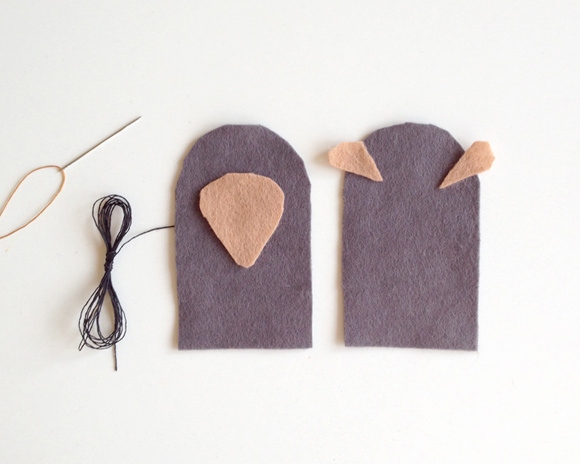
Step 1
Cut out the felt shapes.
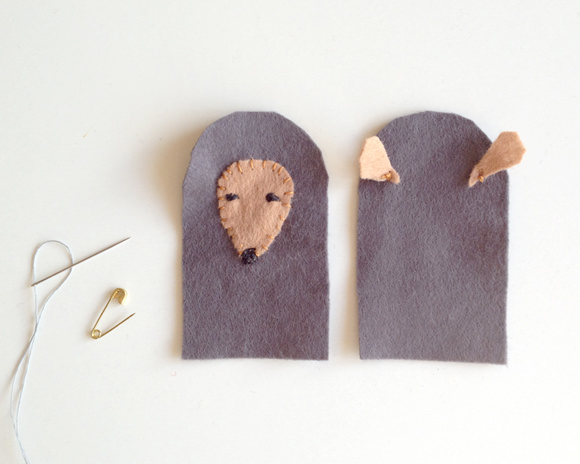
Step 2
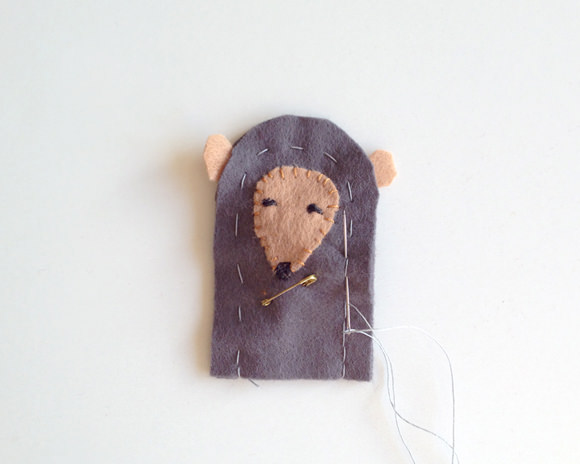
Thread your needle and sew the face, then embroider the eyes and nose. Sew the ears onto the inside of the second piece as shown above.
Step 3
Sew the front and back pieces together 1/5 inch from the border.
Step 4
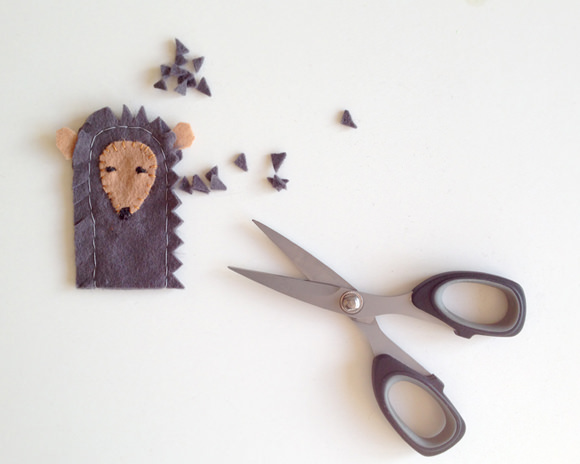
Cut some “spikes” around the edges.
Now all 3 of your finger puppets are ready for play!
How To Make The Leaf Envelope
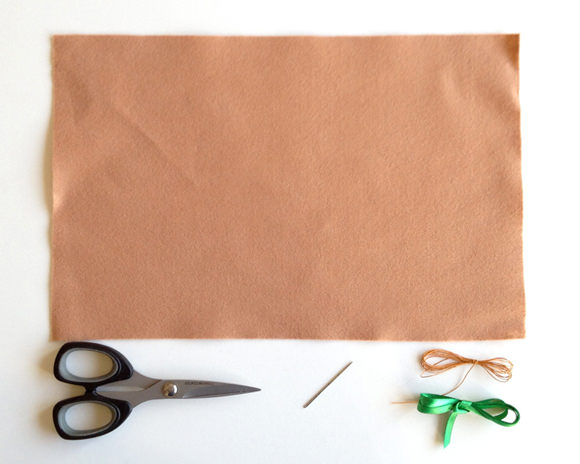
What You Need
- Printable Envelope template (download here)
- Felt, light brown A4: 8 1/5 x 12 inches (21 x 30cm)
- Ribbon, green 23 inches (60 cm)
- Embroidery needle
- Embroidery floss: light brown
- Scissors
Step 1
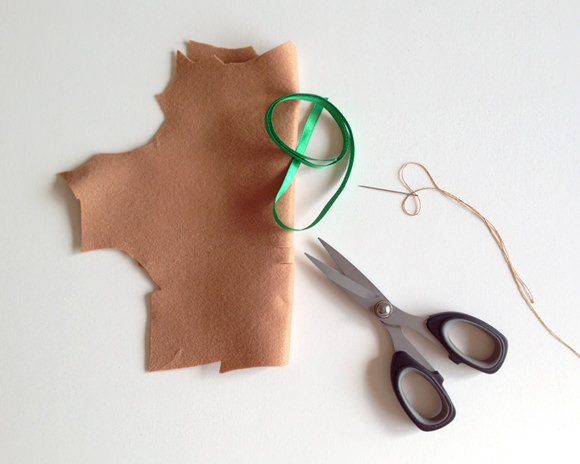
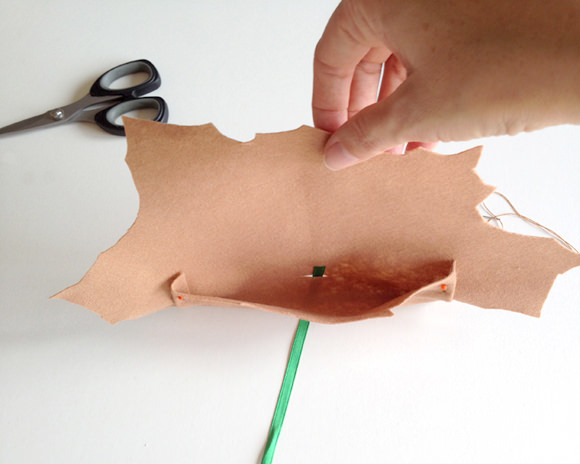
Cut out the felt shape. Cut two slits for the ribbon as shown above.
Step 2
Thread your needle and sew the pocket as shown above.
Step 3
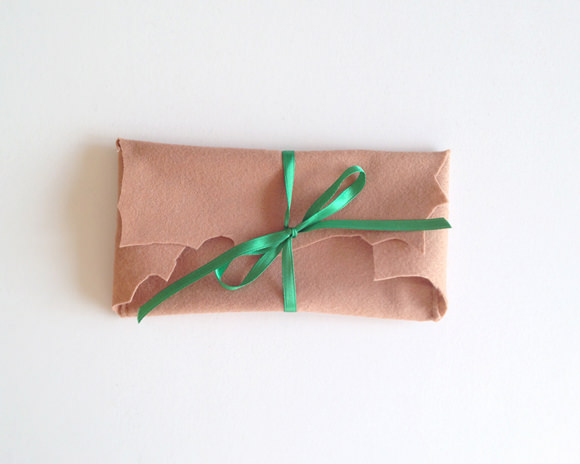
Tie the envelope shut with the ribbon, then fix the ribbon with an easy stitch to the felt.
The leaf is now ready to hold your finger puppets.
Note: You can also make the leaf envelope from a brown paper bag.
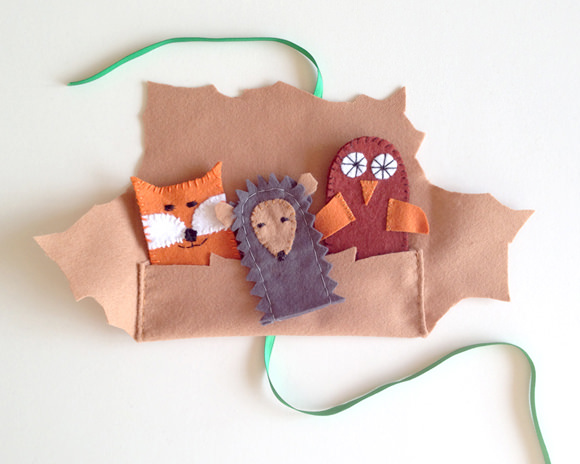
Have fun playing with your forest friends!