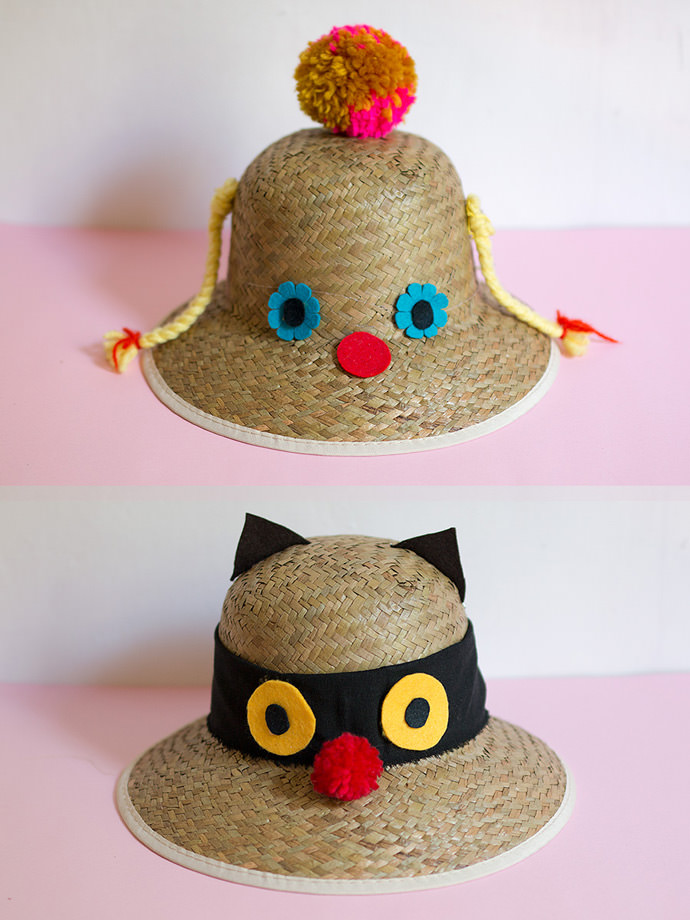
Let’s make some happy straw sun hats to avoid those intense summer rays. Kids will enjoy both making and wearing these funny faced accessories! This is a super easy, simple and fun summer activity to keep children busy and help them avoid sun damage. Grab a plain straw hat, some felt, fabric and yarn and follow the steps to decorate. You can make a cute dog, a bandit cat or a blond braided girl! You can also let children create their own different characters and have fun!!
Make different designs for family and friends! They’ll be an original and cute summer gift.
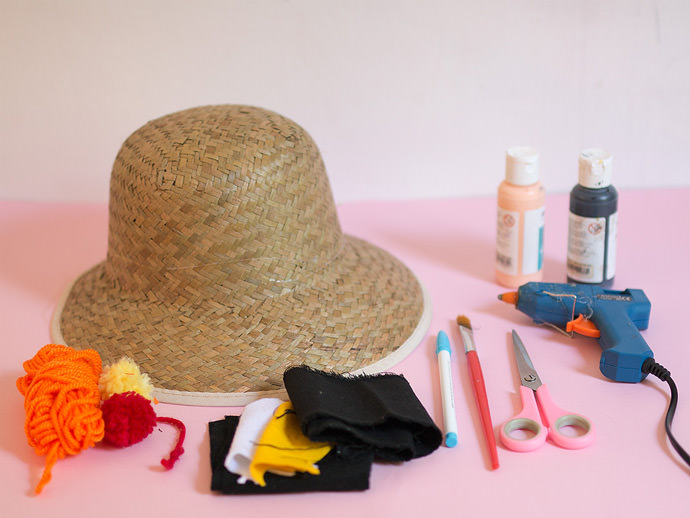
What You Need
- Printed templates (download here)
- Straw sun hat
- Felt
- Fabric scraps
- Yarn
- Hot glue gun
- Scissors
- Soluble marker
How To
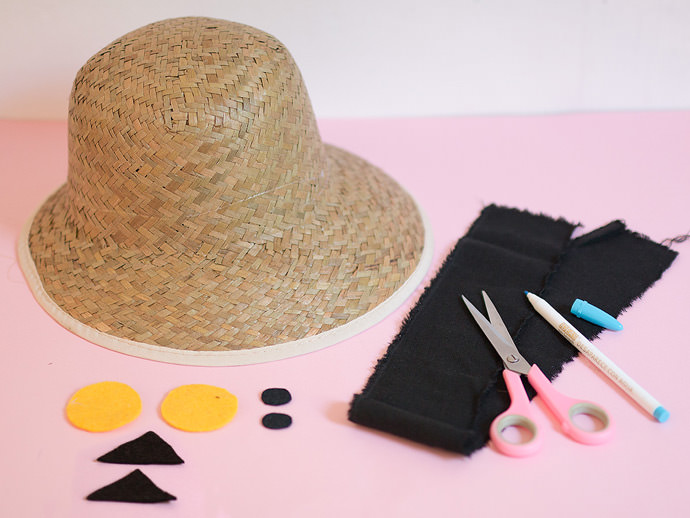
Step 1
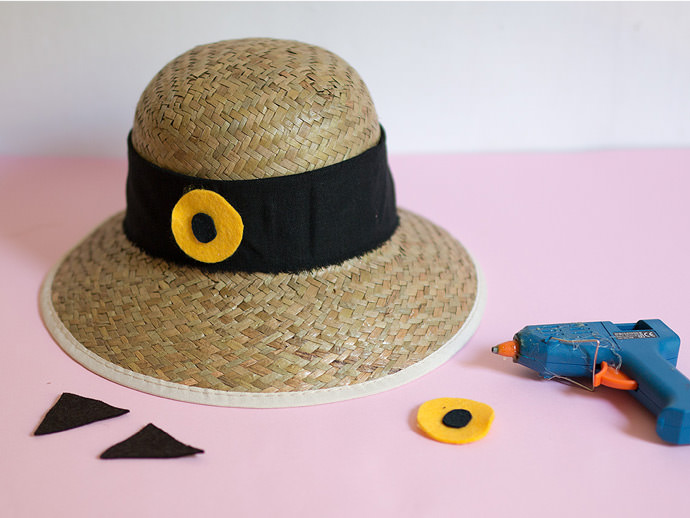
Download, print and cut out shapes from the template. Gather some felt, transfer and cut out two big circles for eyes, pupils and ears. Use a long piece of fabric (or a ribbon) for a hatband. Cut to fit your hat size.
Step 2
Glue the fabric or ribbon for the hatband around the hat. Leave fringed borders for a casual look or fold border inside for binding. Then glue each pupil centered onto the big eyes felt, and then glue eyes to the hatband.
Step 3
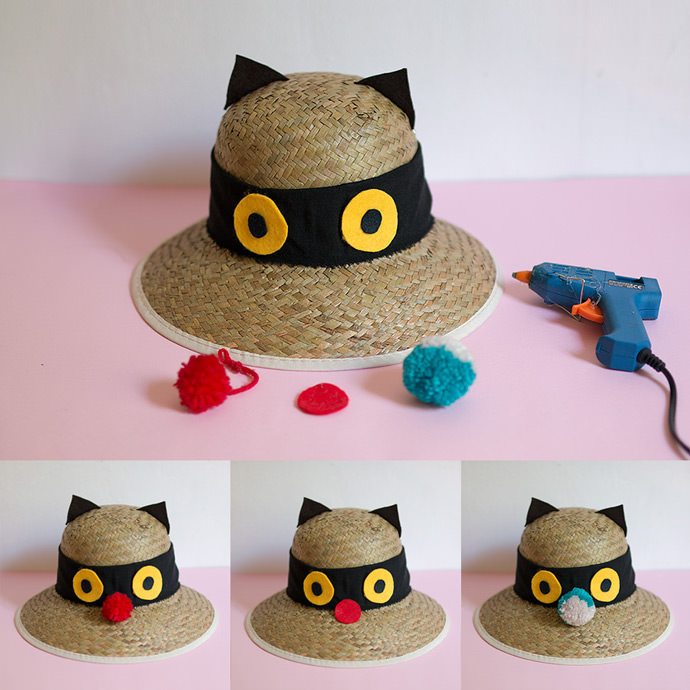
Glue felt ears on top of the hat. You can make different noses for your funny hat. Pick some yarn and make small pompoms for the nose, or cut template nose shape out from felt, choose the one you prefer!
Step 4
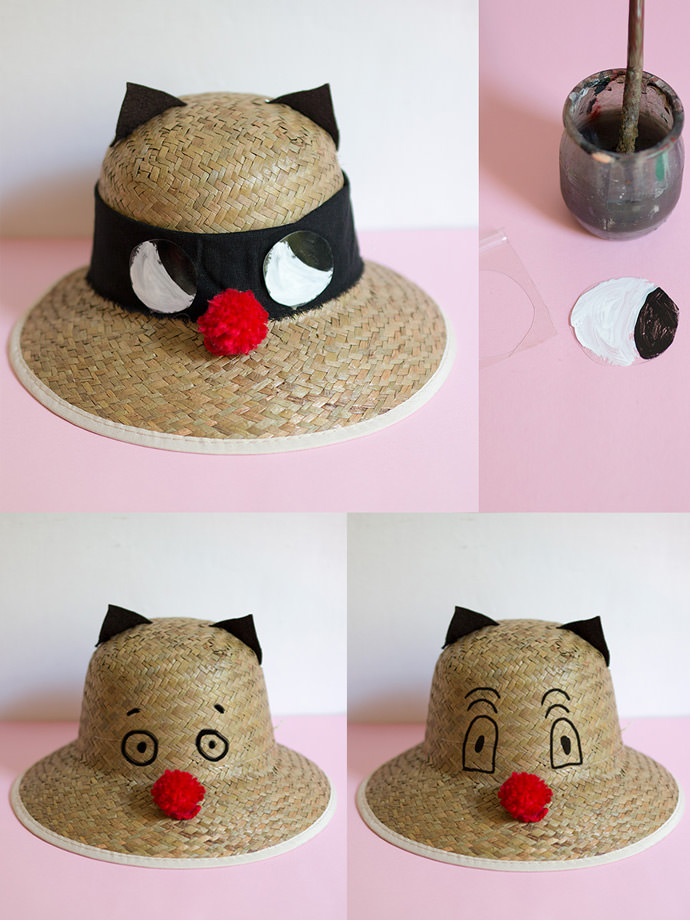
You can make different eyes using some painted plastic scraps. I made mine from fruit plastic boxes. I drew and cut out two circles, painted pupils and white-eyes. Then I put a dab of glue on the painted side and attached to the hatband. The simplest option: Paint two big eyes to the hat! :)
Step 5 – The Doggy Hat
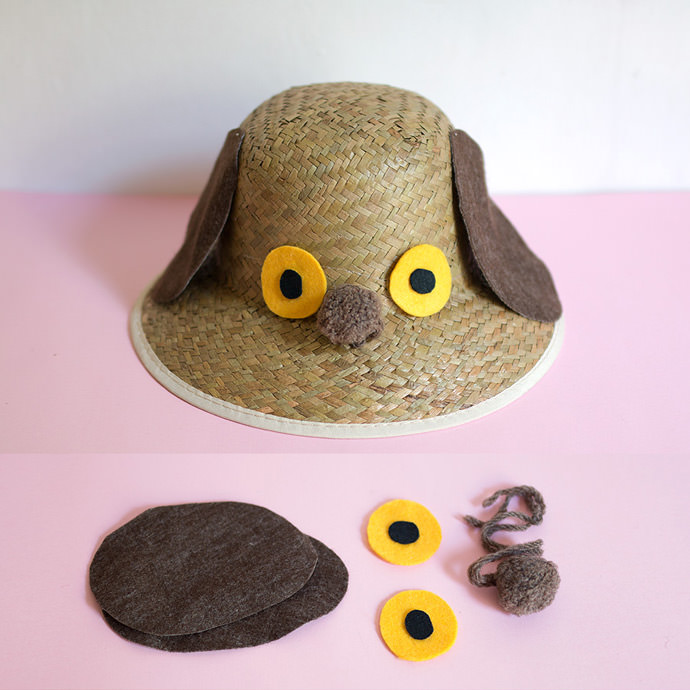
Create your dog face using the same felt eyes from bandit cat hat, cut out two big ears from felt and a pompom for the nose. Glue them to make your doggy cute face!

Step 6 – The Braids
And now… A cute hat design for a pretty girl! Cut out two big flower templates, pupils and one nose from felt. To make the braids, cut out some yarn, tie it with a ribbon or leftover yarn, then divide the yarn in three and make a braid. Tie with a ribbon. Repeat for the other braid. Make a big pompom and glue it to the top of the hat. Place and glue pupils, flowered eyes, and nose to the hat. and each braid to one side of the hat
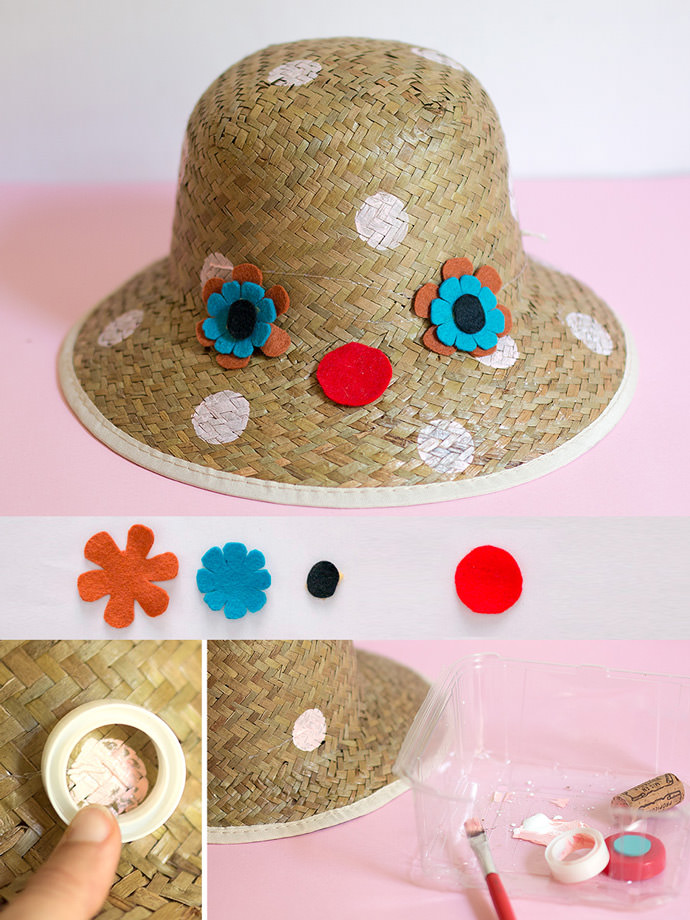
Step 7 – The Dotted Flowered Face
To make the dots, decorate with paint! I chose some pink paint and painted dots all over the hat. I used an adhesive tape bobbin as a stencil and moved it all around the hat while painting inside of the bobbin. You could also stamp dots using either actual stamps or corks. For the face I cut two felted flowers and pupils, glued together for each eye and a red felt nose. I placed and glued them to the hat after the paint was dry.
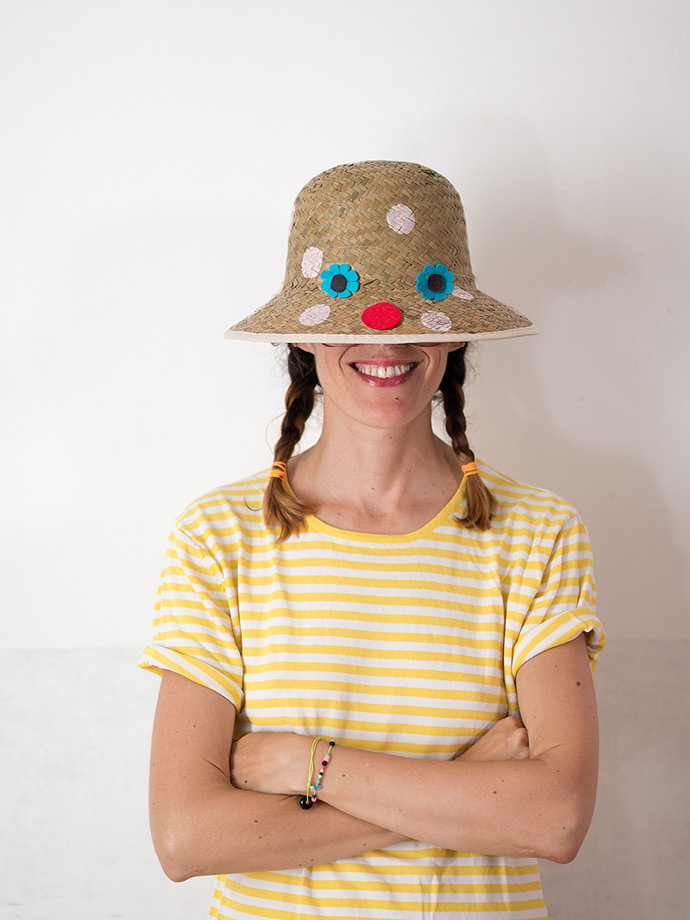
Tada! Fast, easy and cute! And so addictive… Now, I feel that I should have bought more hats! :)
Happy crafting!