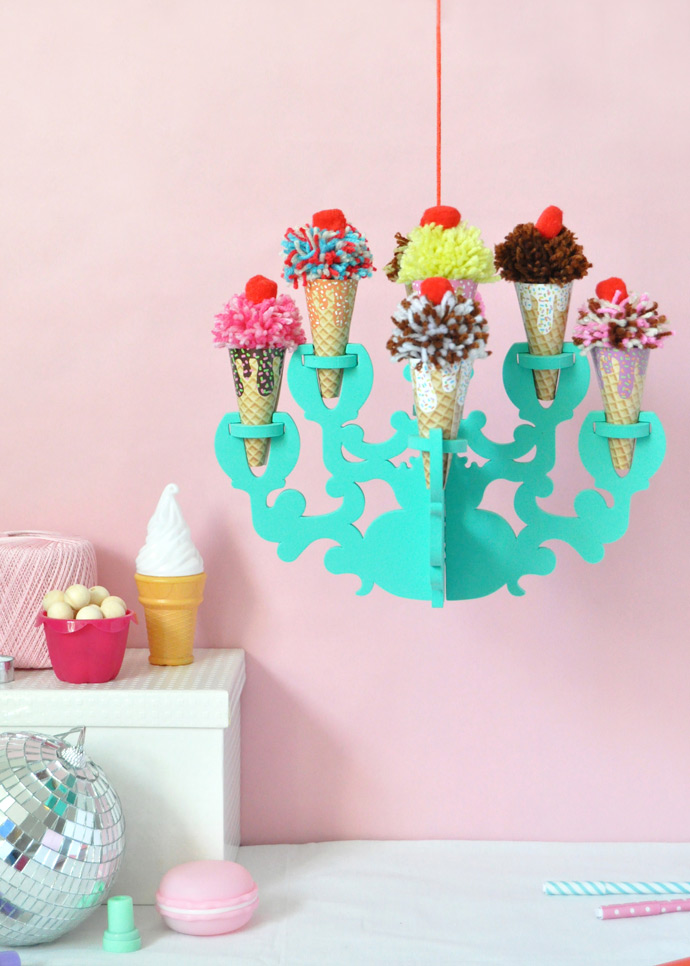
I scream, you scream, we all scream for ice cream! Even though the weather is getting cooler everyday and peak ice cream season is mostly behind us, we love ice cream so much that we made it into a fun DIY chandelier as part of our new line of Handmade Charlotte Kids craft kits and supplies available exclusively at Michaels! The kit includes everything you need to make your very own ice cream chandelier to party every day! This is great news for all the ice cream lovers out there. :)
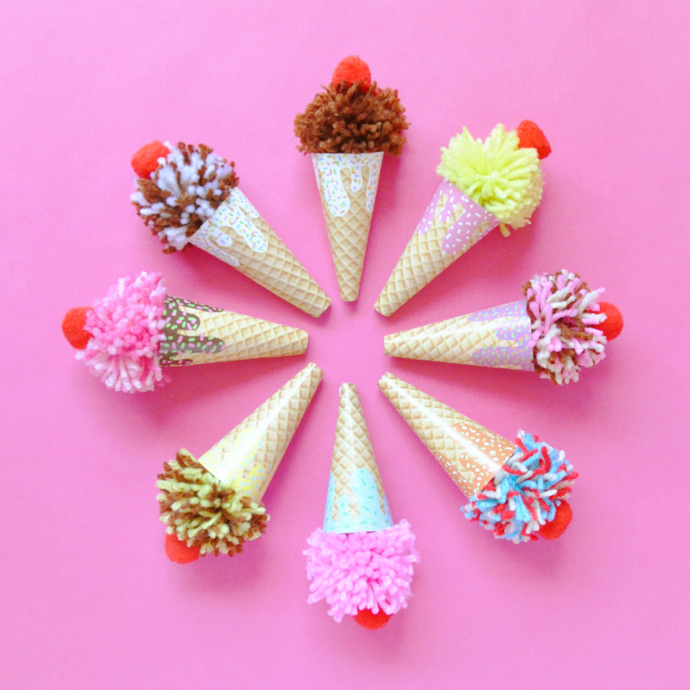
Each kit comes with eight skeins of colored yarn so that you can turn the pom poms into your all your favorite ice cream flavors: mint chocolate chip, strawberry swirl, cookies and cream … need we go on? A super fun way to decorate kids’ rooms, we think the ice cream chandelier goes perfectly with disco balls and bright rainbow colors. Keep reading for a closer look at how to craft your own chandelier – everything is included in the kit available online and in Michaels stores nationwide. Let’s get crafting!

Contents
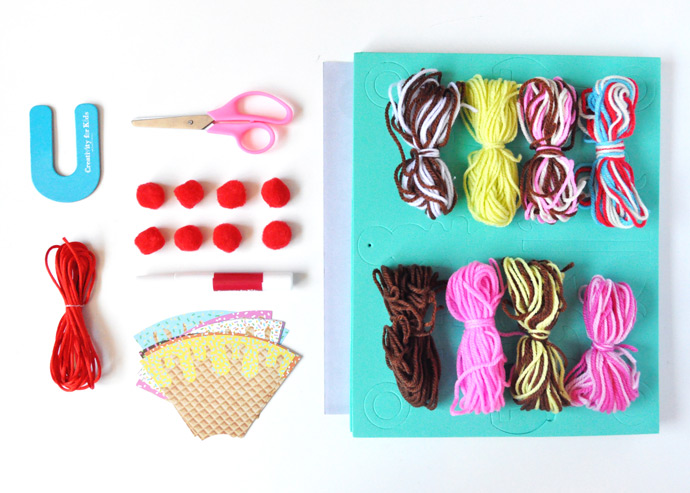
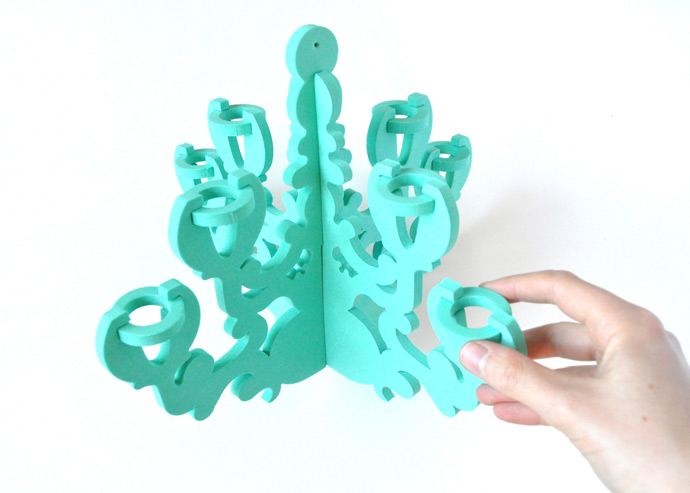
- Foam chandelier
- Pompom maker
- Yarn
- 8 red pom poms
- Paper cones
- Satin cord and hanging hook
- Scissors
- Glue
- Adhesive strips
- Instructions
How-To
Step 1
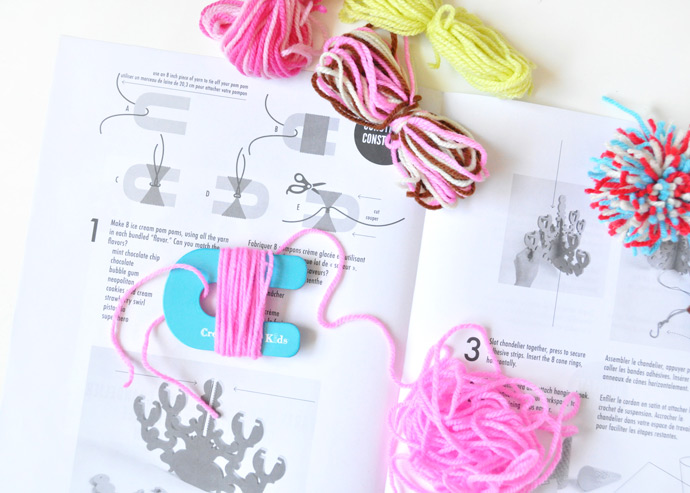
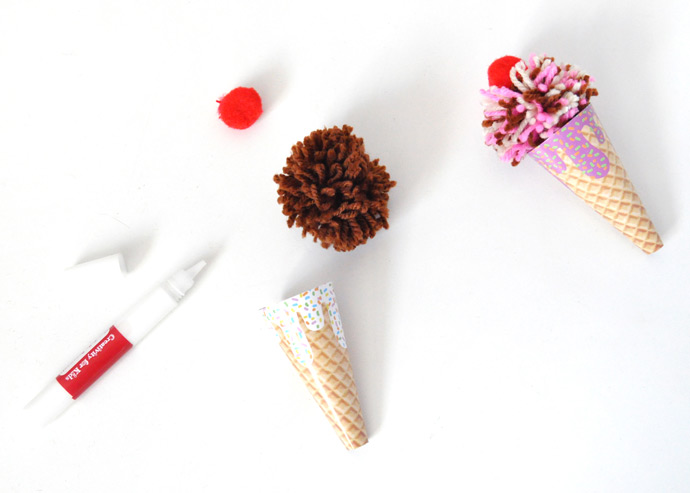
The first step is to make your eight ice cream pompoms! Wrap yarn around the U-shaped pompom maker, leaving an 8” strip to the side for tying. Once you wrap all the yarn around the pompom maker, tie around the middle and use scissors to cut the yarn loops, forming a pom pom! Repeat with all colors of yarn, and trim to make the pompoms neat and round.
Step 2
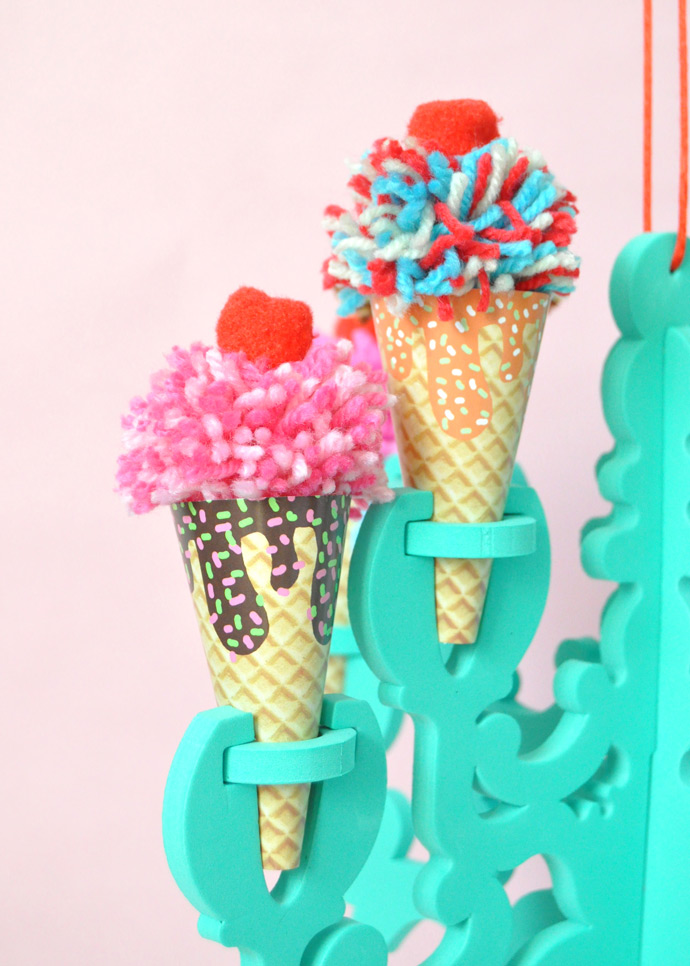
Pop the foam chandelier out of the frame, including any negative space pieces, and the eight circles. As the instruction booklet shows, apply adhesive strips to the slots of the chandelier and then slide together, pressing to adhere. Place each circle into the holders as shown.
Step 3
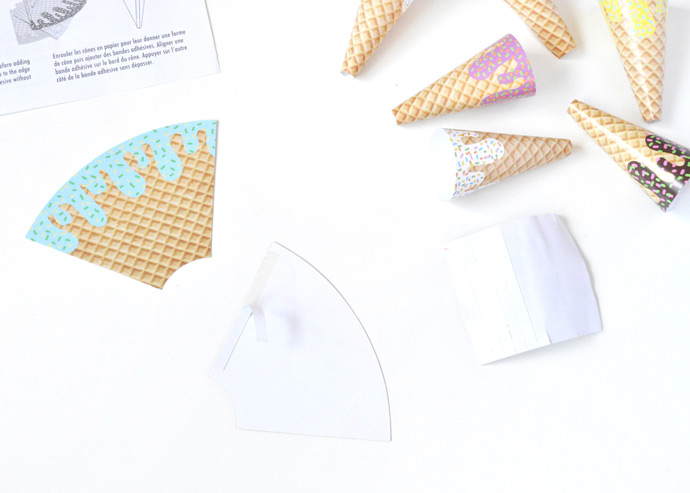
Apply an adhesive strip to an edge on the plain side of each paper ice cream cone. Roll into a cone, and press along the adhesive to secure. Repeat for all the paper cones.
Step 4
Glue each big pompom into a cone, and then glue a mini red cherry pompom on top of each. Let dry, and then place each ice cream cone into a circle holder on the chandelier. Thread the red satin cord through the center loop of the chandelier, and attach the red hook to hang.
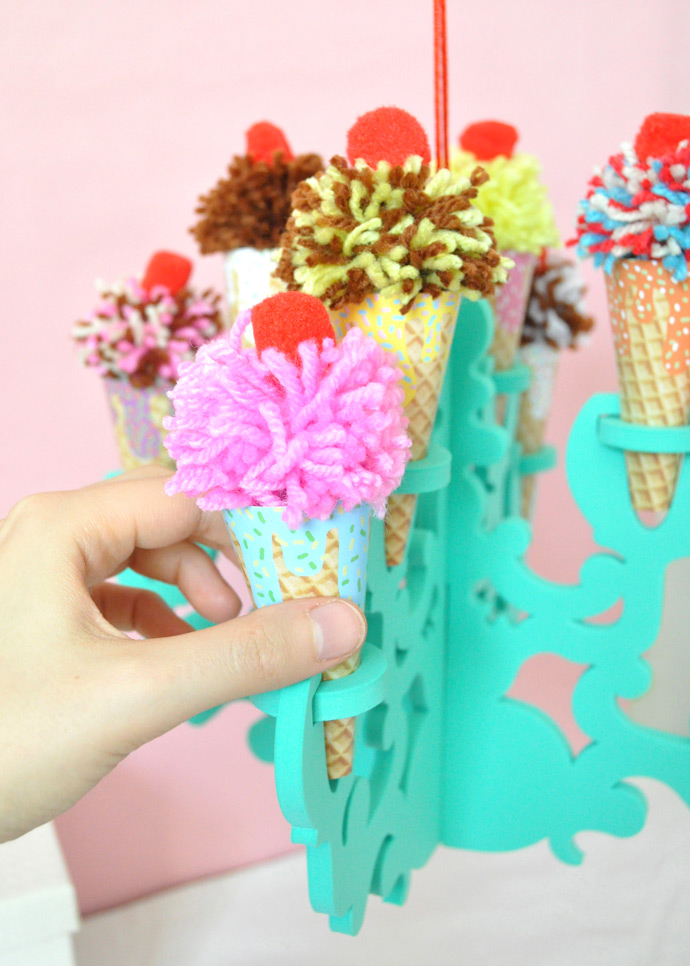

Pick up your own Party Everyday Ice Cream Chandelier kit here. Happy crafting!