
Let’s create a cute, decorative doorstop following this super easy craft tutorial! I always use doorstops in the spring and summer to keep air flowing through the house. Without them, my doors slam shut whenever there’s a gust of wind.
This smiling rock is the coziest solution I’ve found for adding some fun and a touch of organic design to my home. He’ll be happy to help you hold your door open, or, if he’s placed behind the door, keep it from slamming into the wall.
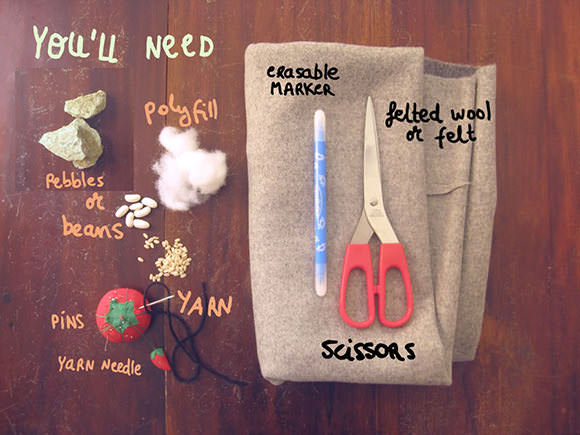
Materials
- Printable template (download here)
- Felted wool (or just felt)
- Yarn needle
- Yarn
- Scissors
- Tailor’s chalk or erasable marker pen
- Pins
- Sewing machine
- Polyfill combined with pebbles, beans, rice, lentils, or other heavy fill material.
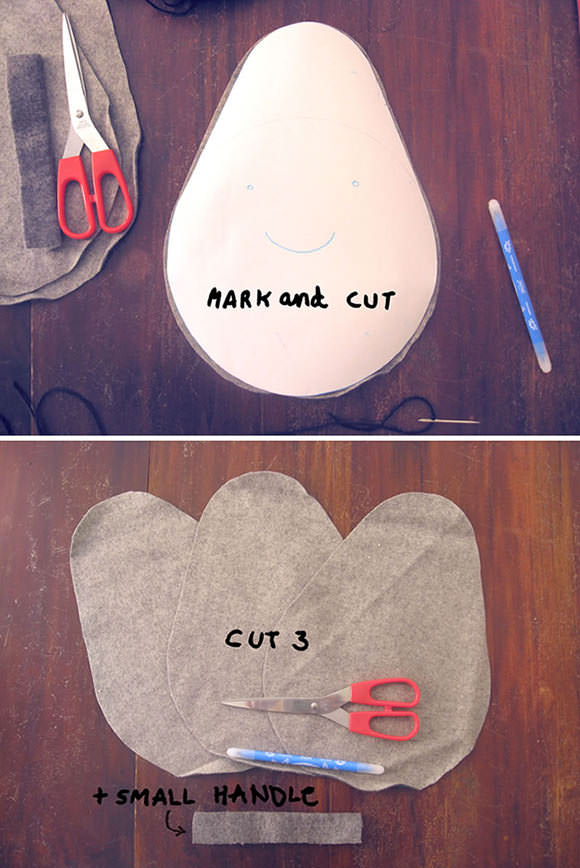
Step 1
Print the template. From the felt, cut 3 pieces (9.5 x 13 inches) of the rock template shape and one piece of the handle shape ( 3.3 x 7.8 inches).
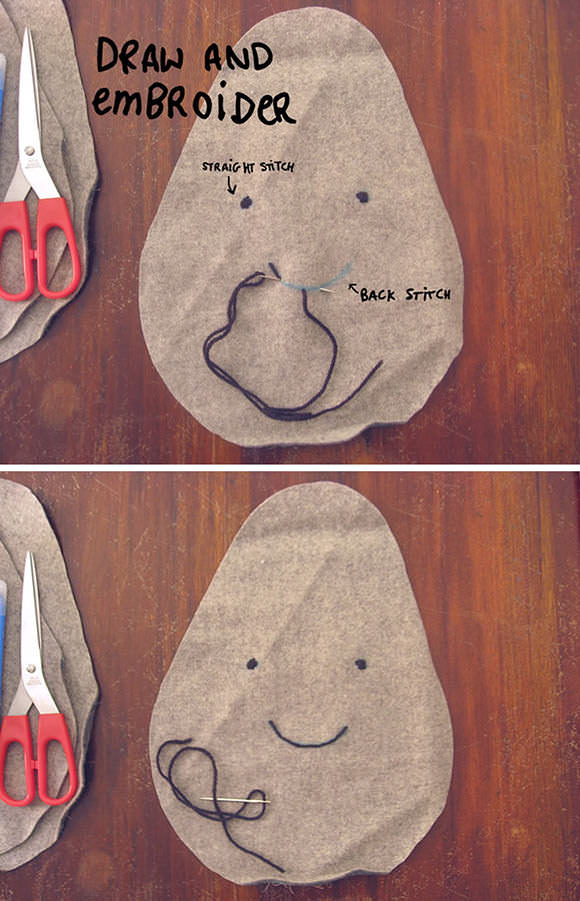
Step 2
On one rock-shaped piece of felt, draw eyes and a mouth on the right side of the fabric using an erasable marker. Embroider over the drawn design with yarn, using straight stitches for the eyes and backstitches for the mouth.
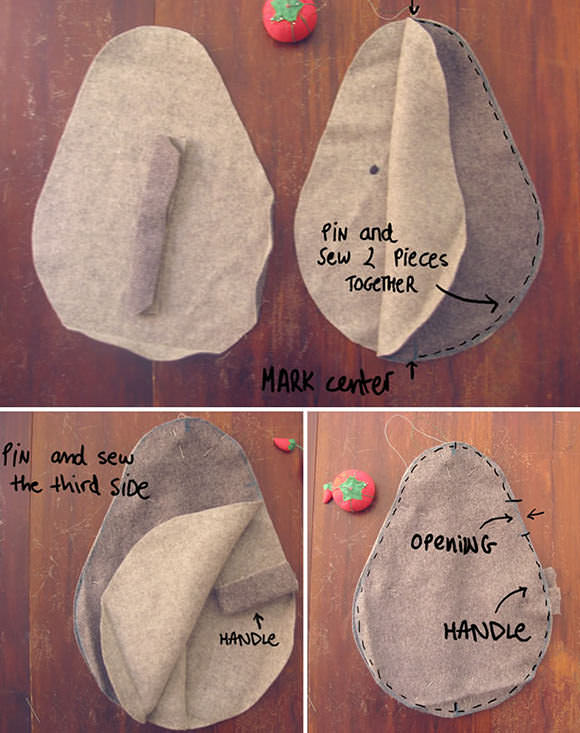
Step 3
Let’s get sewing!
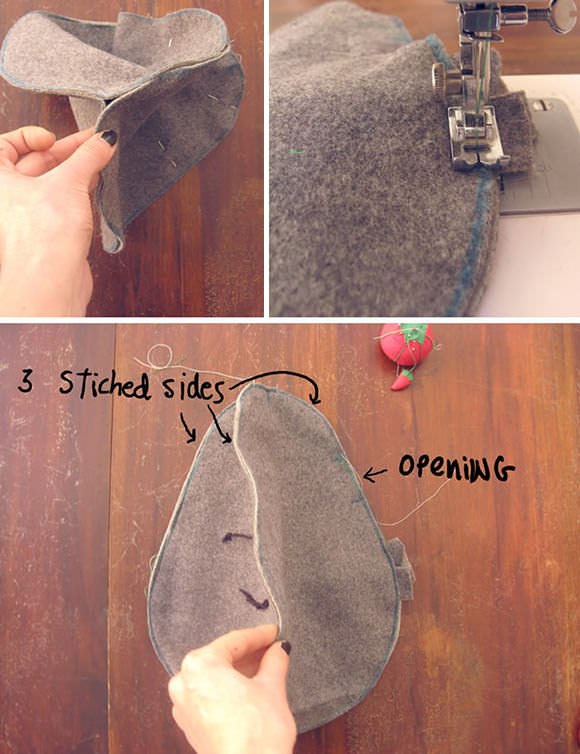
Mark the center of the pieces. Take the embroidered piece and a second rock-shaped piece of felt, and place them right sides together. Stitch the two pieces together down one side, from the center of one end to the center of the other end..
Next, place the third piece in place, right side down, and pin it to the unstitched side of the embroidered piece. Stitch together.
Fold the handle piece over itself lengthwise, then fold it in half the short way to make a loop. Place the loop under the third piece as shown, making sure it will be at the back seam of the rock. Pin and stitch the final seam to create a 3-piece shape, leaving a 3 inch opening near the center of the seam.
Step 4
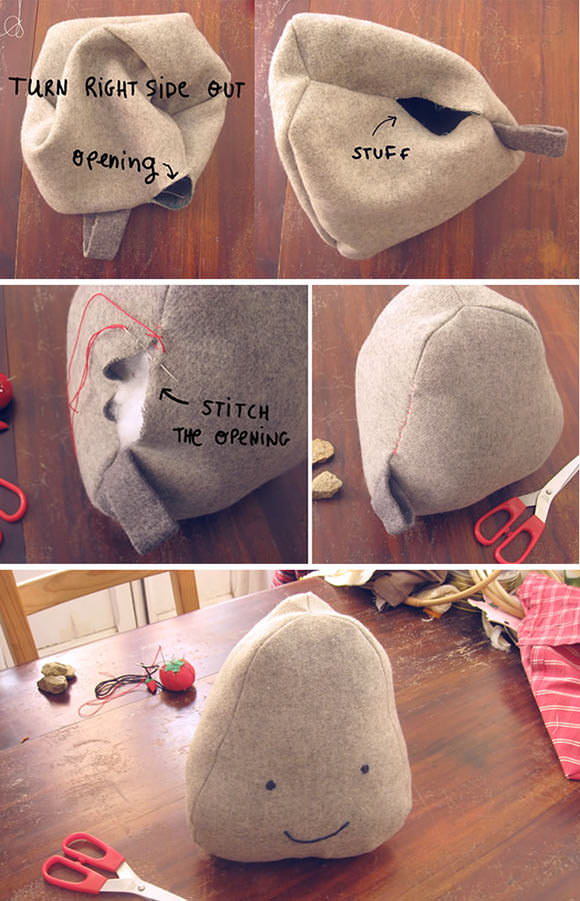
Turn your rock right side out through the opening. Fill with pebbles (or any other weighted filler) until it becomes heavy enough (don’t fill it all the way!), then stuff the remaining space with polyfill.
Carefully stitch the opening closed.
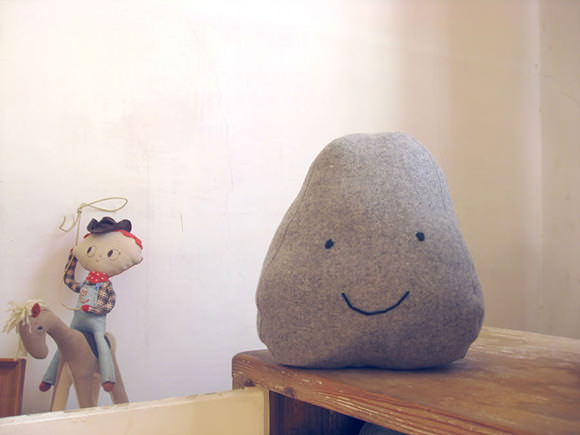
Voila! You’ve finished your decorative doorstop. This happy rock is ready to hold your favorite door in place.
Happy crafting!