
When I saw these marbled playing cards at Ikea, I stopped dead in my tracks! At $2 a deck, the question wasn’t if I would buy them but how many I would buy. I was talked down to two, and was instantly brainstorming ways to craft with them.
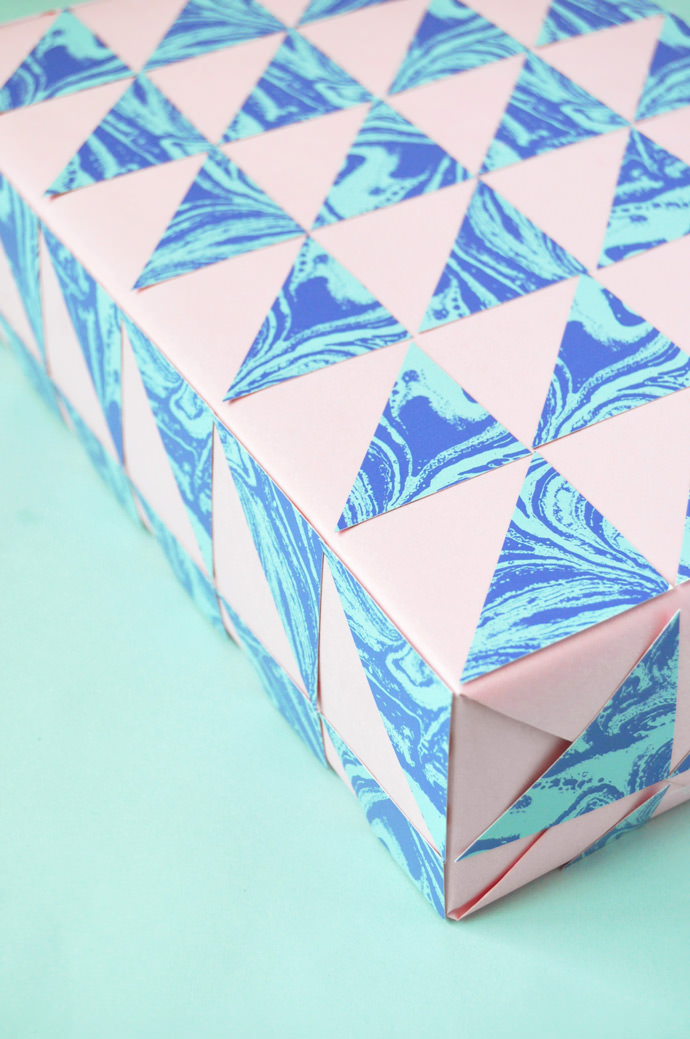
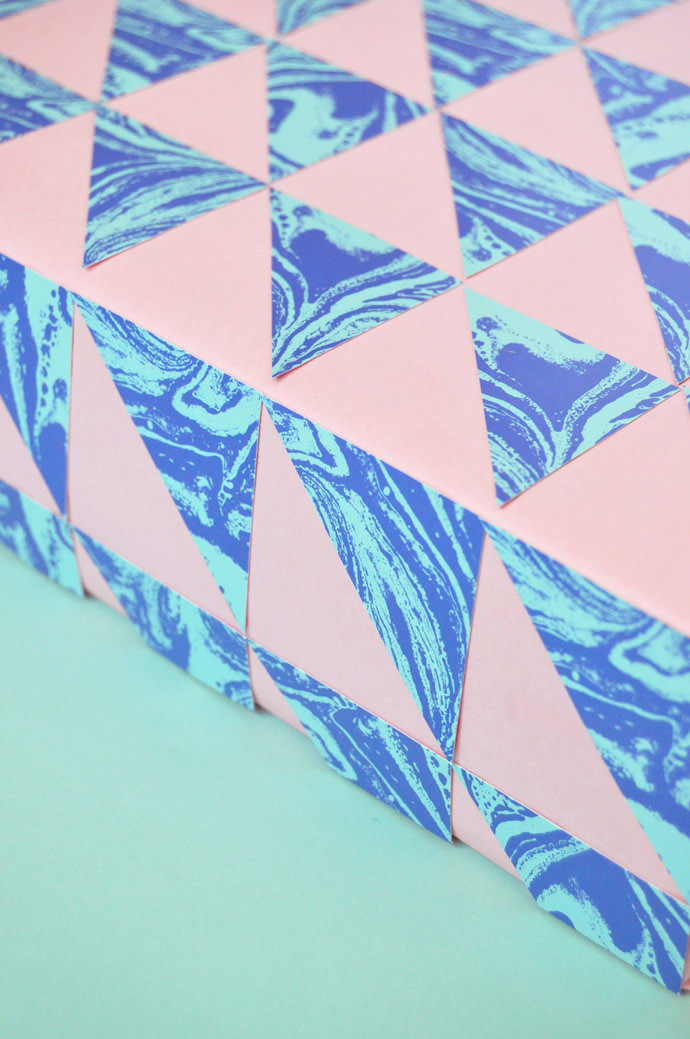
For today’s DIY gift wrap project, I used less than one deck and cut them into triangles to form this geometric-marbled pattern. Pretty fun, right? You could easily swap in any paper instead of the cards, or even try another shape for a different geometric look.
What You Need
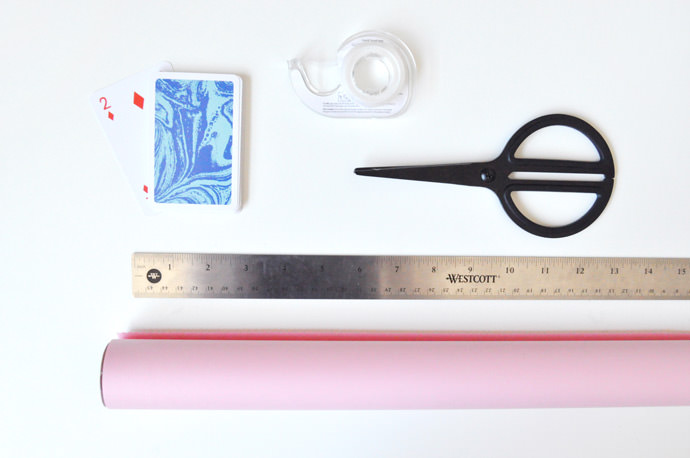
- Pink wrapping paper
- Scissors
- Tape (regular and double-sided)
- Ruler
- Playing cards (these are from Ikea) or patterned paper
How-To
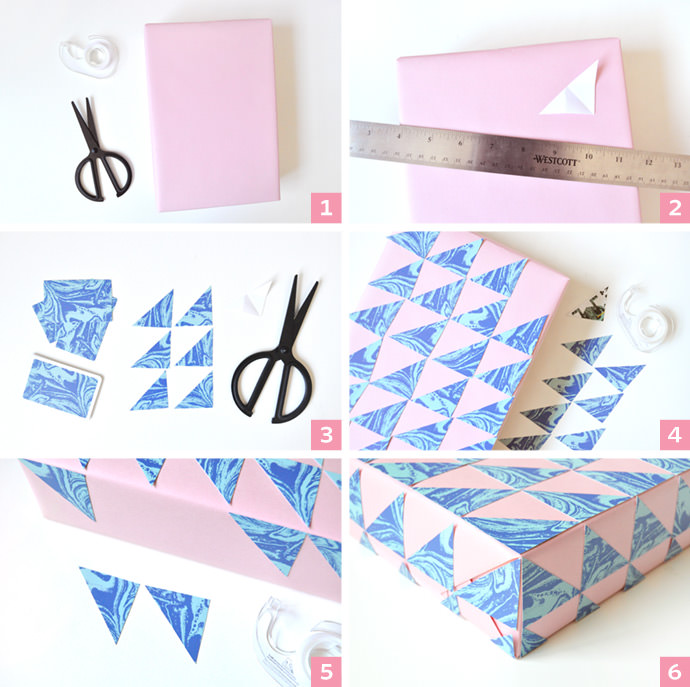
- Wrap your gift using pink gift wrap.
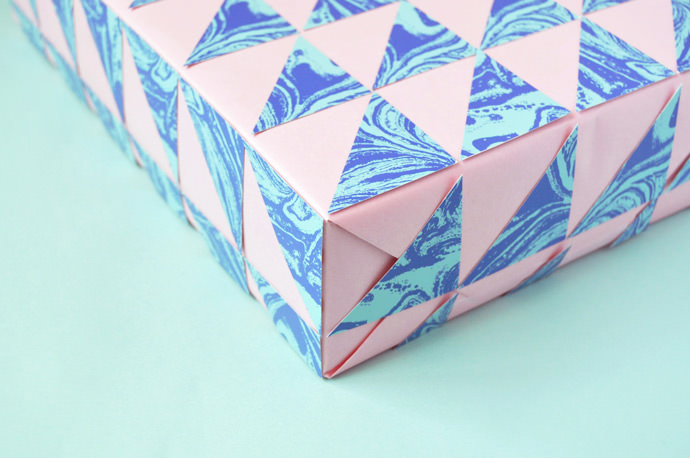
- On scrap paper, make a right-angle triangle template that fits as equally as possible onto your gift both horizontally and vertically. Depending on the dimensions of your gift, you should be able to get a triangle that is perfect (yay!), or almost perfect (squeeze/space it out a little and it won’t be noticeable). If really you can’t get a triangle that works, no worries: the top pattern will just have to be trimmed along the edge (or wrapped around to the sides) to fit. (For example: my box was 7 ½” wide by 10 ¾” long so my triangle template was about 1 7/8” by 1 7/8” by 2 5/8”)
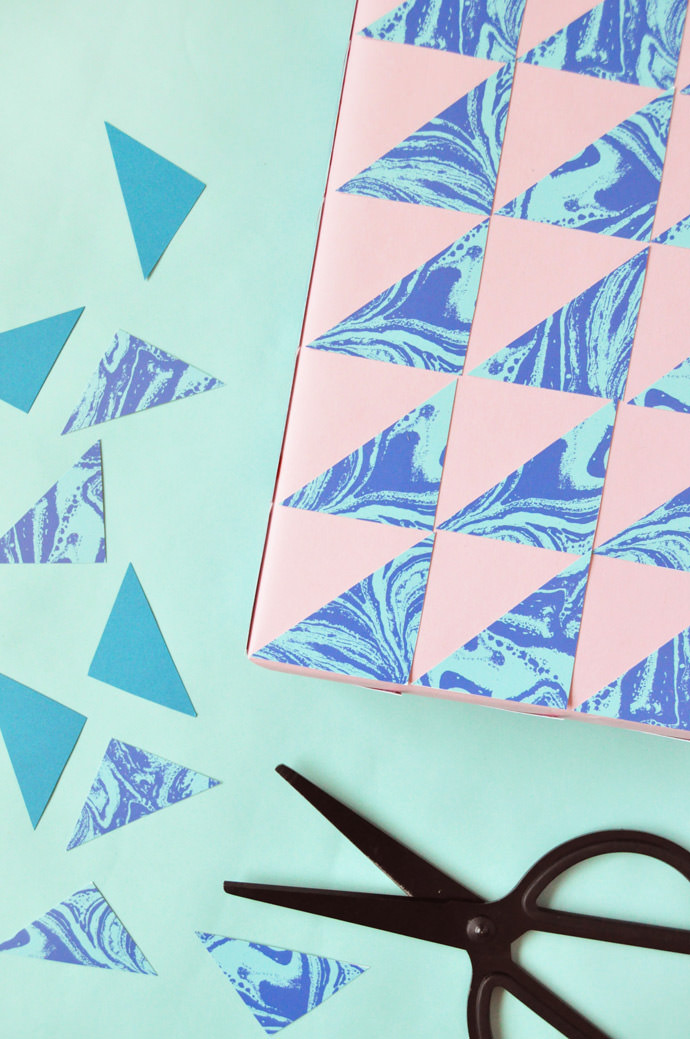
- Use the template to cut triangles out of the marbled playing cards/paper.
- Lay the triangles out on the top of the gift and use double-stick tape to adhere.
- Do the same for the sides and bottom of the gift.
- It’s okay if the triangles don’t fit the gift perfectly! For the sides shown, I had to trim the triangles a bit along the bottom edges.
Happy crafting!