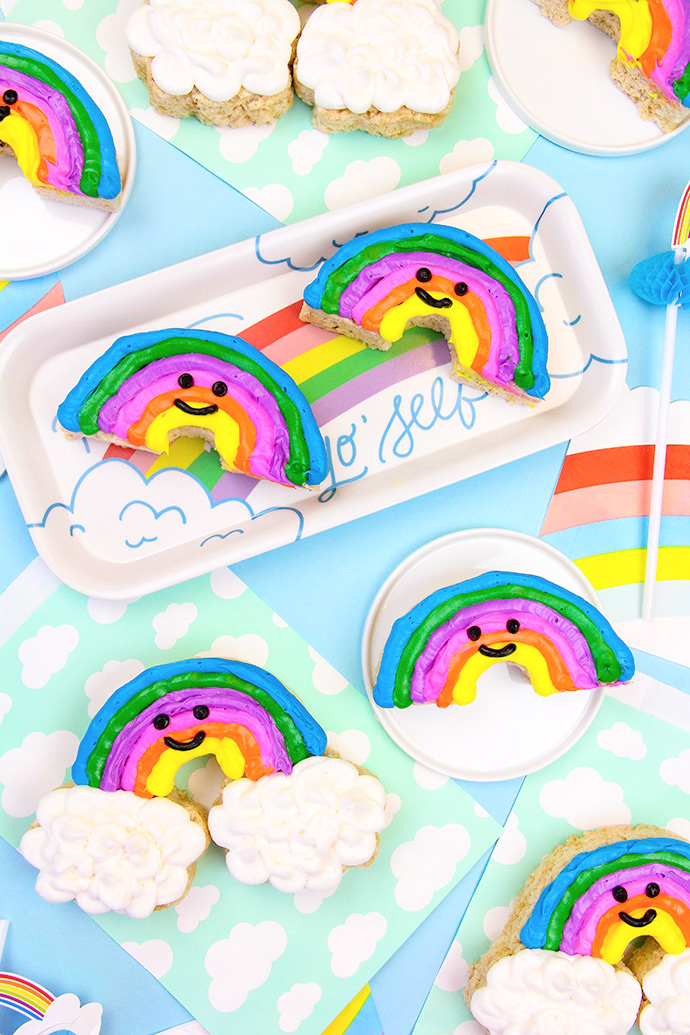
With summer in full effect, there’s nothing better than enjoying some time in the sunshine with your family and friends. But wait: don’t forget to bring along some fun summer-themed treats!! I don’t know about you, but I love rainbows. They’re great any time of year of course, but even better in the summertime!
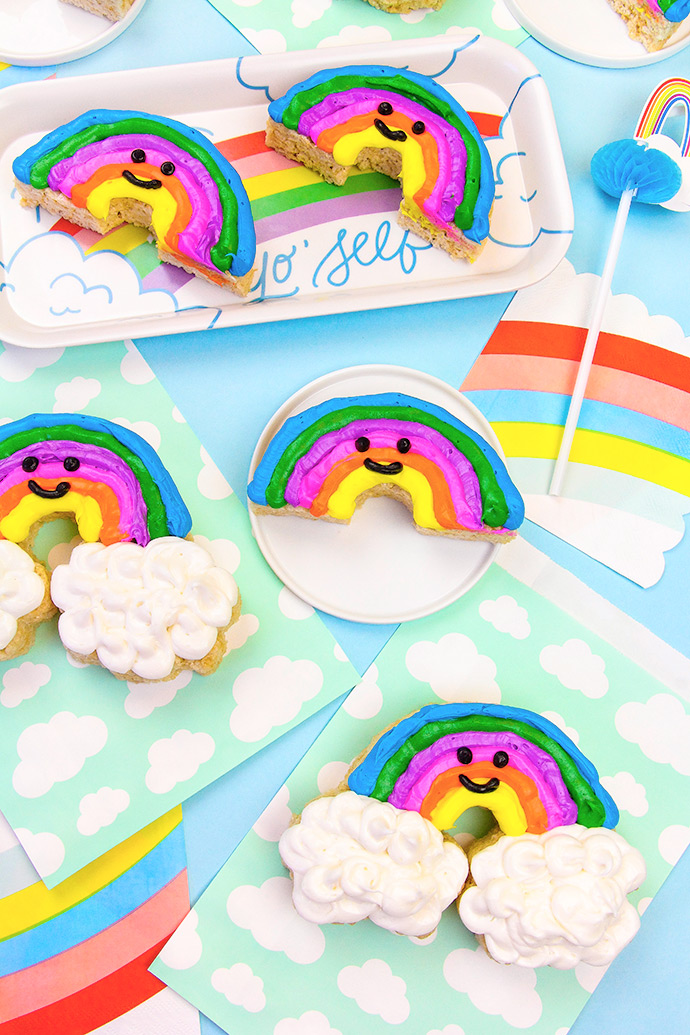
If you love rainbows as much as we do, try your hand at these DIY rainbow Rice Krispie treats! They’re so easy to make and the whole family will love how cute and colorful they are. Their little smiling faces make them almost too cute to eat! Keep reading to see the full instructions below! Yum yum!
what you need:
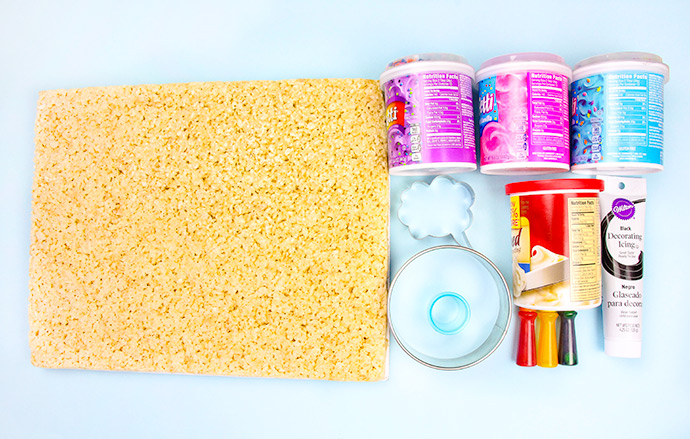
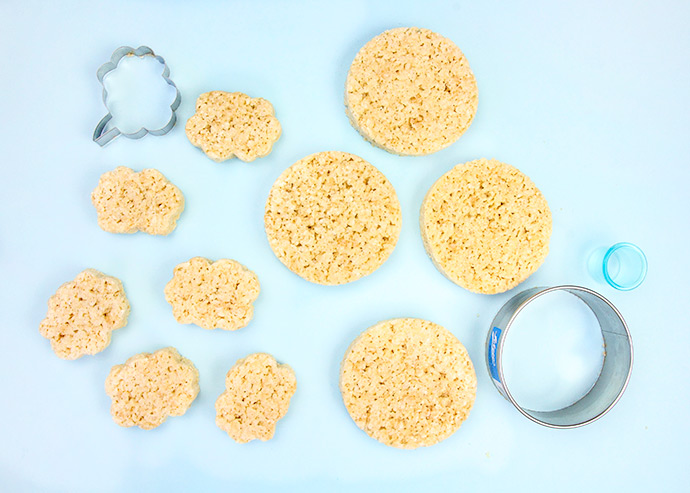
- Flat sheet of Rice Krispie treats (make one yourself or buy premade)
- 1 pink, 1 purple, 1 blue, and 2 white fluffy frostings
- Black decorator icing
- Red, yellow, and green food coloring
- Cloud (or thought bubble) shaped cookie cutter
- 4″ round cookie cutter
- 1″ round cookie cutter
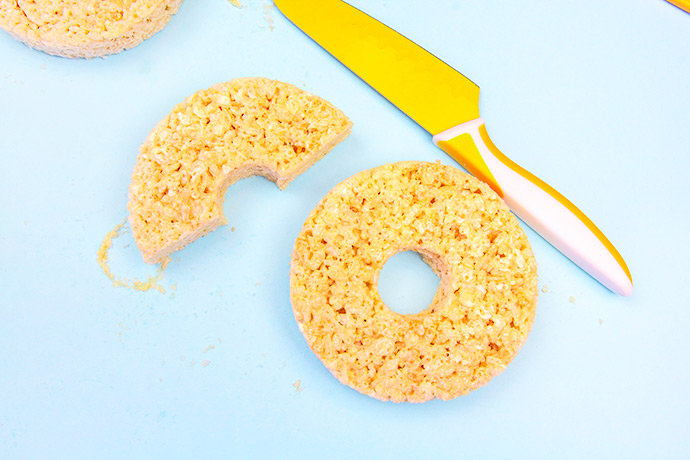
- Knife
- Piping bags and tip
how-to:
Step 1
Cut some circles out of your Rice Krispie sheet using your 4″ cookie cutter. You’ll also need to cut out some cloud shapes too. If you’re using a thought bubble cookie cutter (like I did), you’ll want to cut off the triangular bottom piece, so that it looks like a cloud.
Step 2
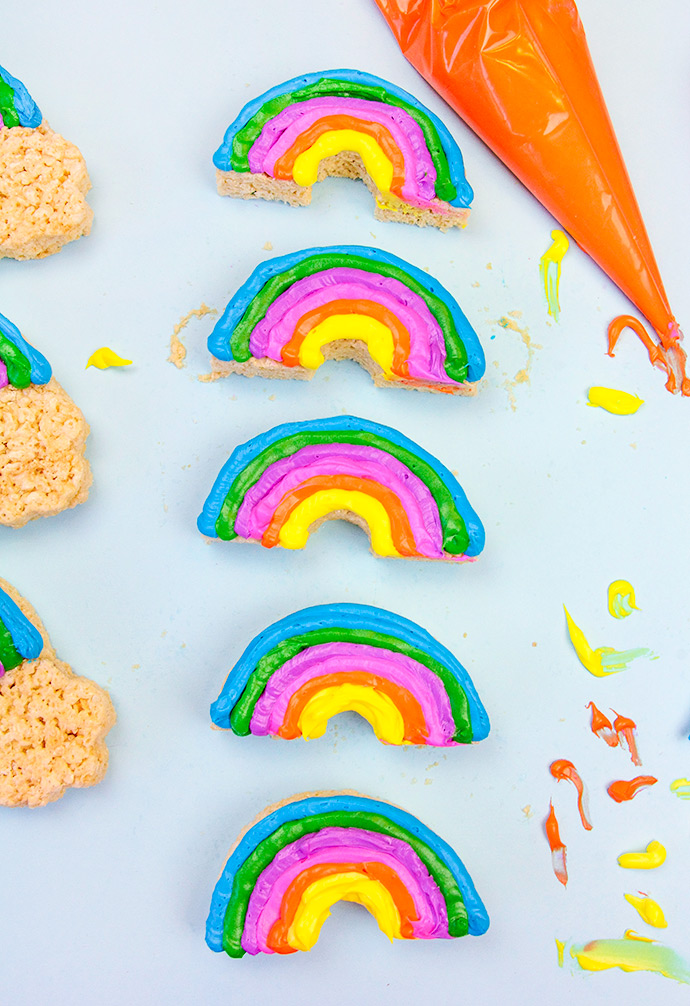
Use your 1″ cookie cutter to cut out a hole out of the center of the 4″ Rice Krispie circles – this will create a donut-like shape. Then, take your knife and cut the donuts in half. This will create the rainbow shapes!

Step 3
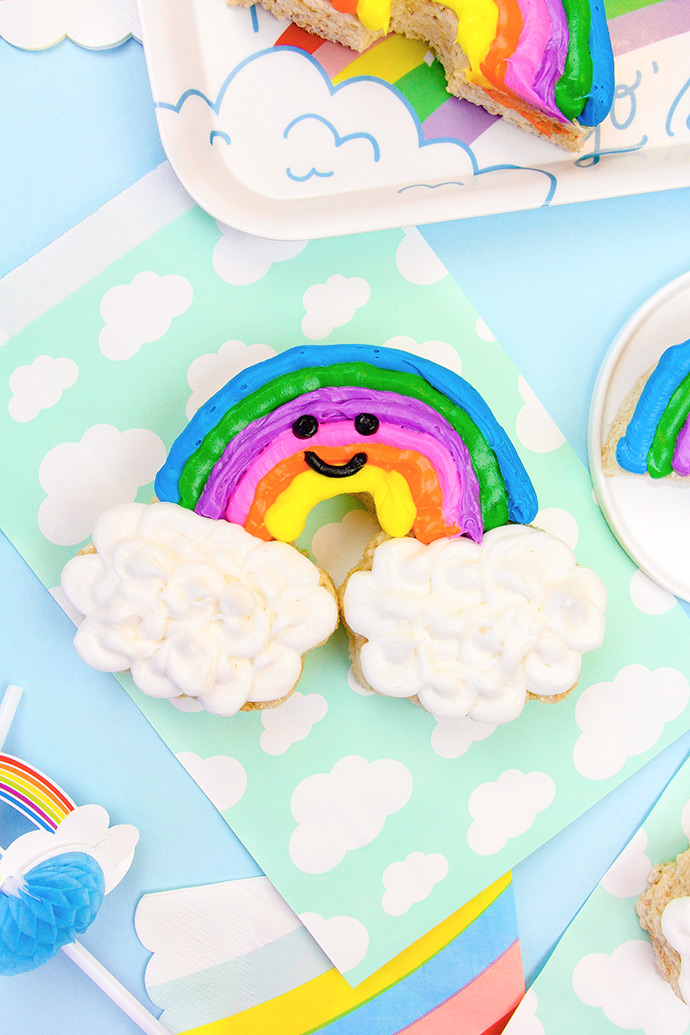
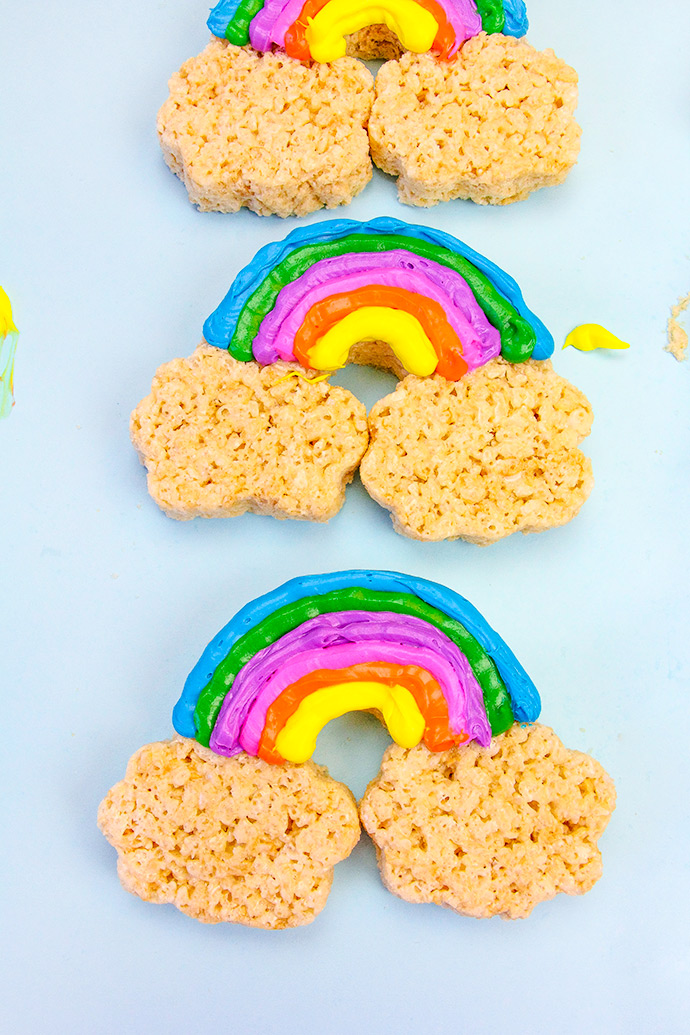
Take your cloud or thought bubble cookie cutter and cut out the cloud shape from each edge of your rainbow arch. This will allow you to fit your rainbow and clouds perfectly together.
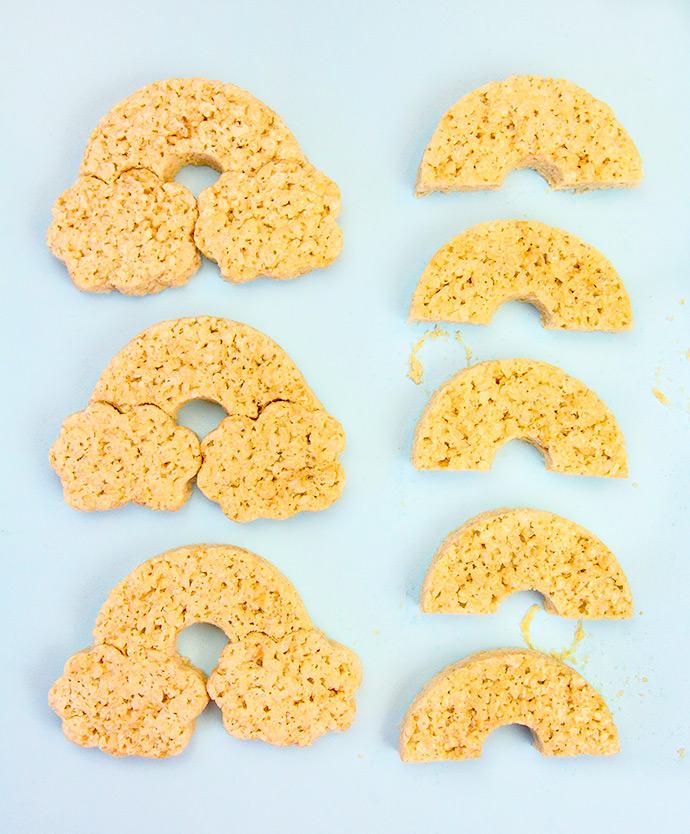
Step 4
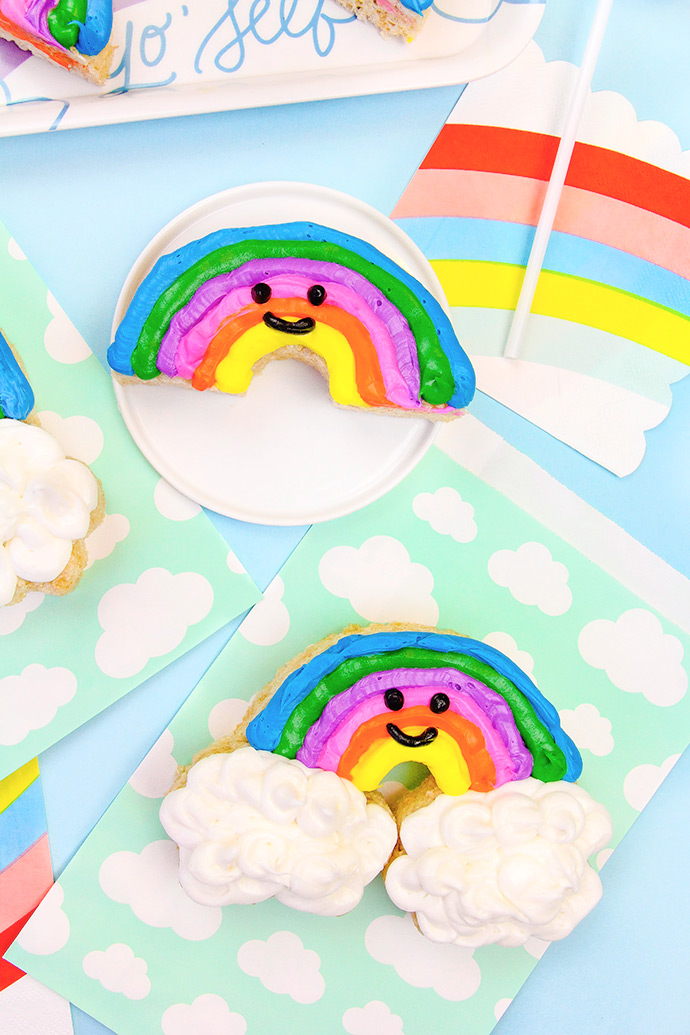
Join your rainbow and cloud shaped Rice Krispies together. You can make these with or without clouds. One sheet of Rice Krispies will make 3 rainbows with clouds or 5 without clouds.
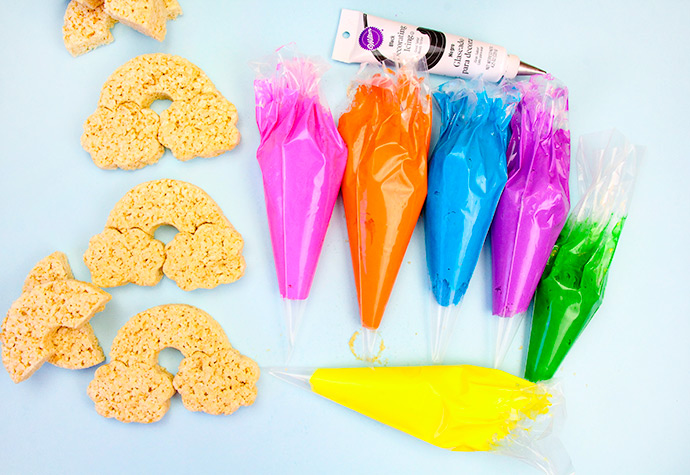
Step 5
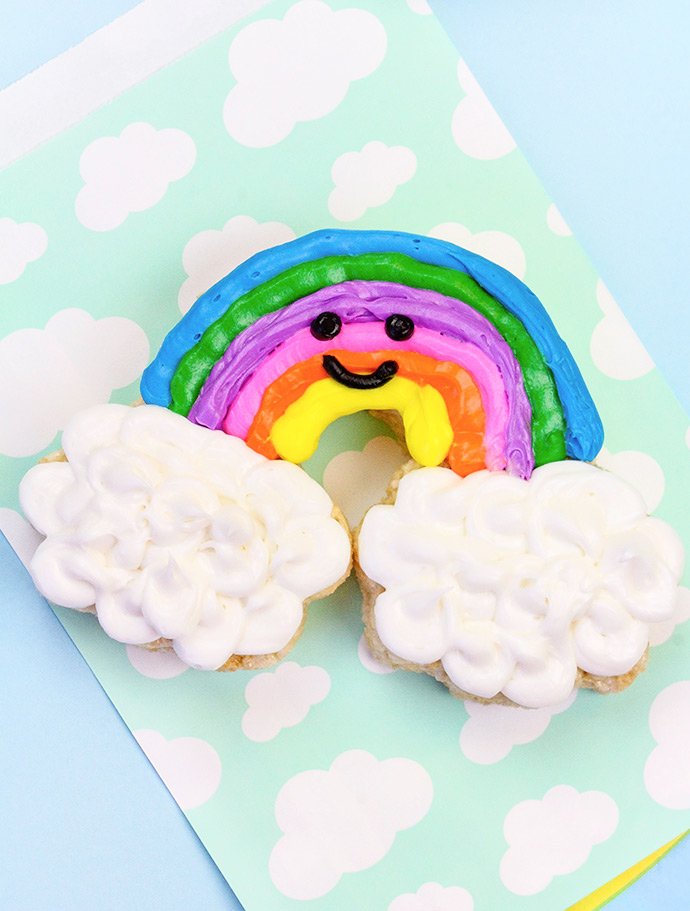
Divide your fluffy white frosting into 3 bowls and mix in the orange, green and yellow food coloring. Place one color into each bowl. Leave some of the fluffy white frosting as-is for your clouds. Then place each frosting color (including the white) into piping bags.
Step 6
Pipe on your rainbow onto your rice kripies using your frosting and piping bags.
Step 7
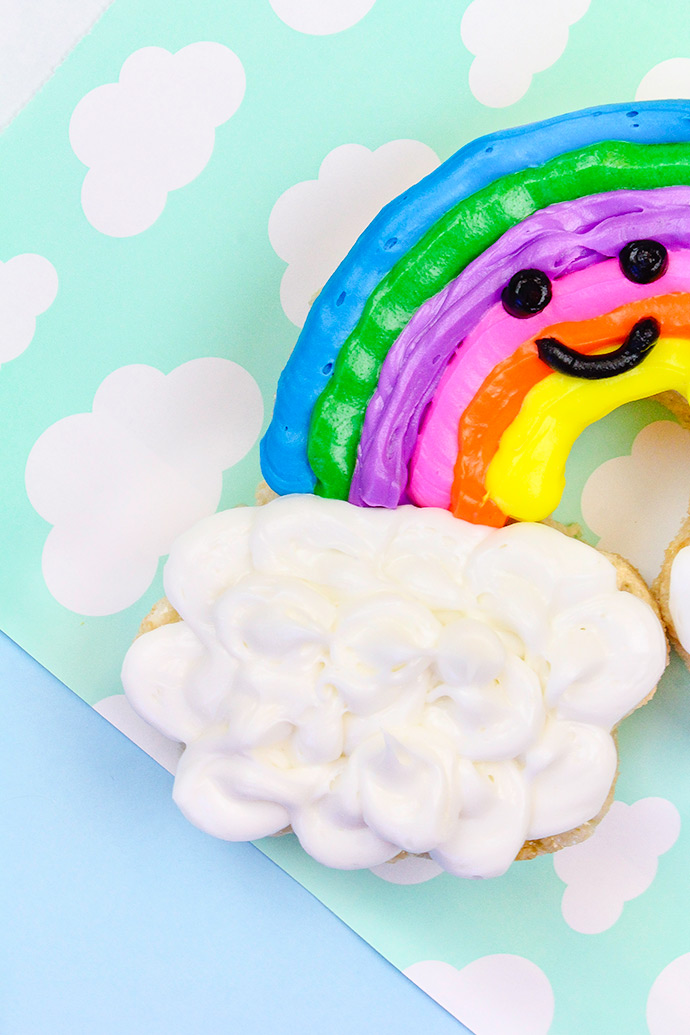
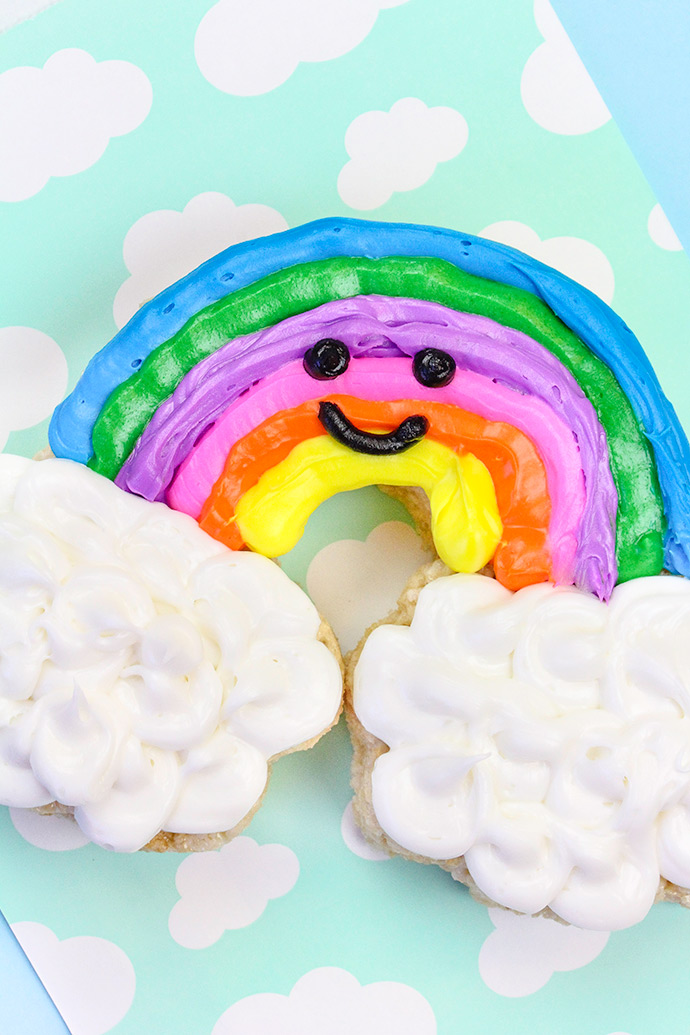
Pipe on the clouds with your white frosting. Make a round motion with your piping bag as you go around the cloud shaped rice krispies. This will make it look more cloud like.
Step 8
After you’ve piped on all your rainbows and clouds, pipe on the happy faces with your black icing.
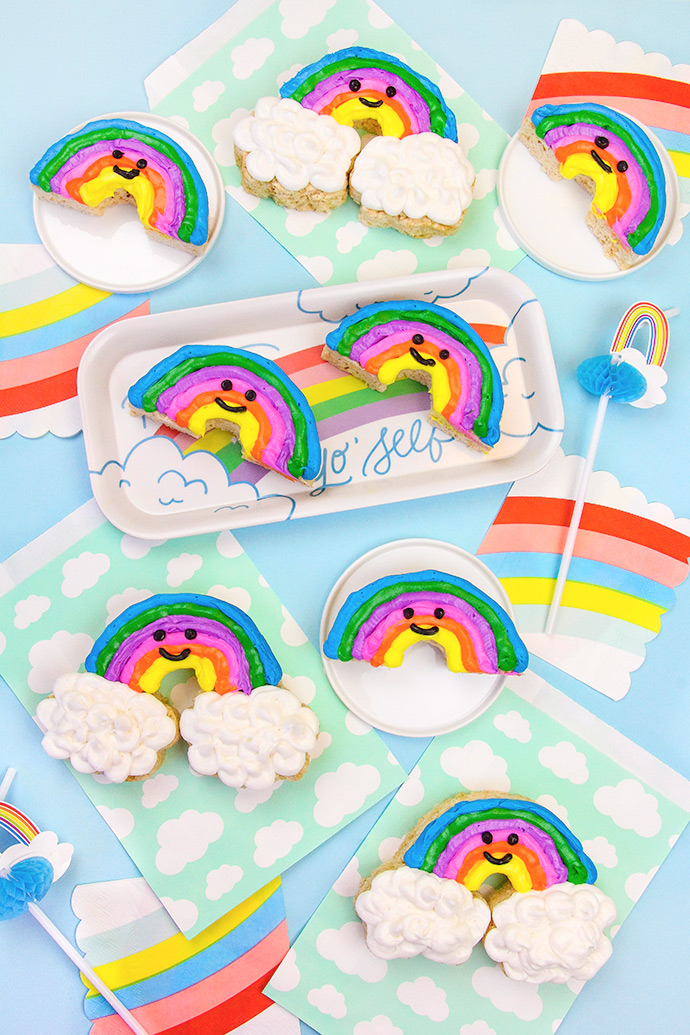
You can let the frosting and icing harden up and put them in a little cloud treat bag to take them with you on your summer adventures.
Have a rainbow-filled summer!
These sweet little rainbows come from guest contributor Vanessa Diaz. Vanessa founded Brite and Bubbly, her creative lifestyle brand and online blogazine, in 2009 as a place to share her creativity, inspiration, and family life experiences. Check out her blog for even more DIY projects, recipes, party planning tips, entertainment news, and all the brite and bubbly moments from everyday life!