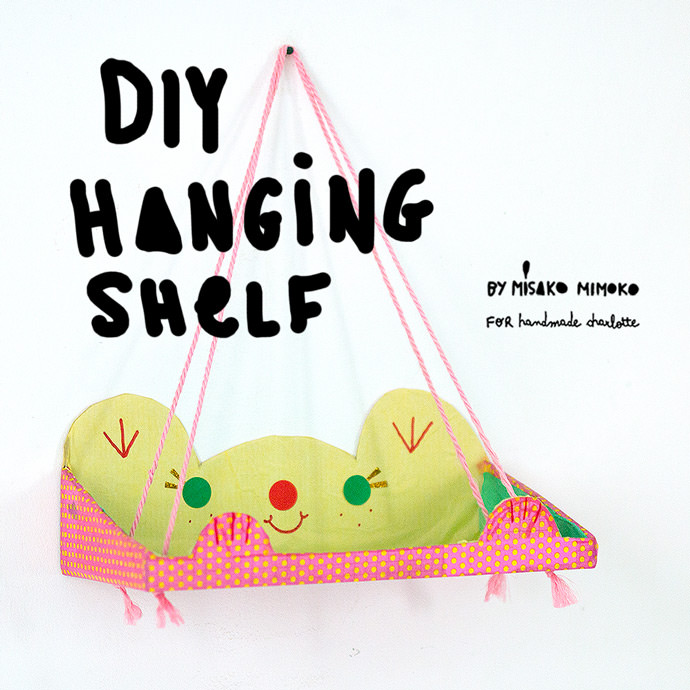
Recycle a shoebox into a super cute hanging shelf for your tiny toys, books, and craft supplies! This is an easy craft project loaded with fun to enjoy with your kids.
I always need extra space too keep all my tools, yarns or deco tapes handy and organized This is a great solution that will add some fun to a space on a budget.
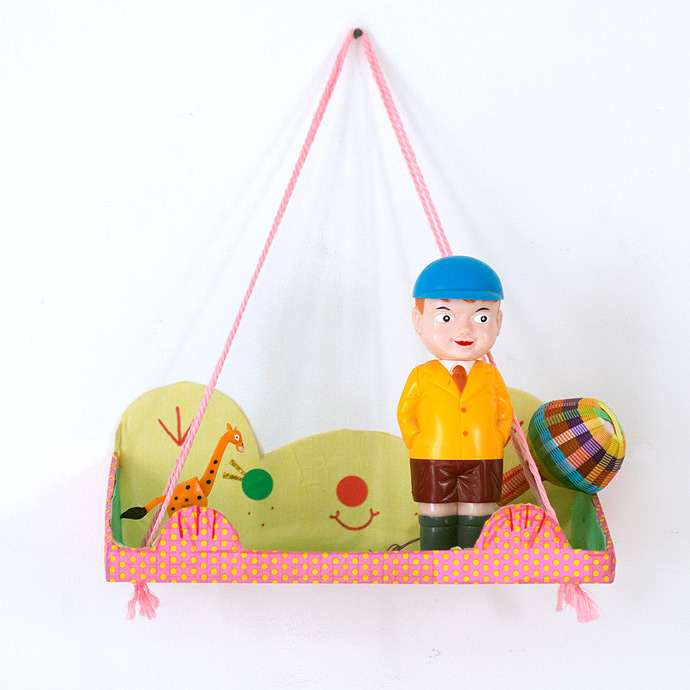
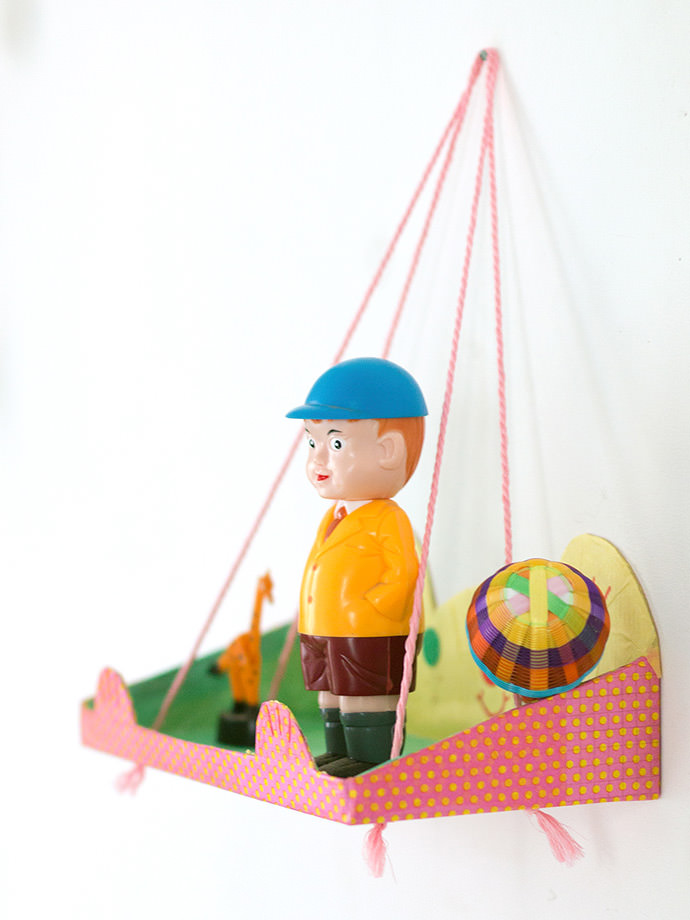
Choose your favorite animal and customize different shelves of your room!
What You Need

- Shoebox
- Cord or rope
- Decorative paper
- Deco tape
- Stickers
- Ruler
- Pencil
- Marker
- Cutting knife
- Scissors
- Glue
How-To
Step 1
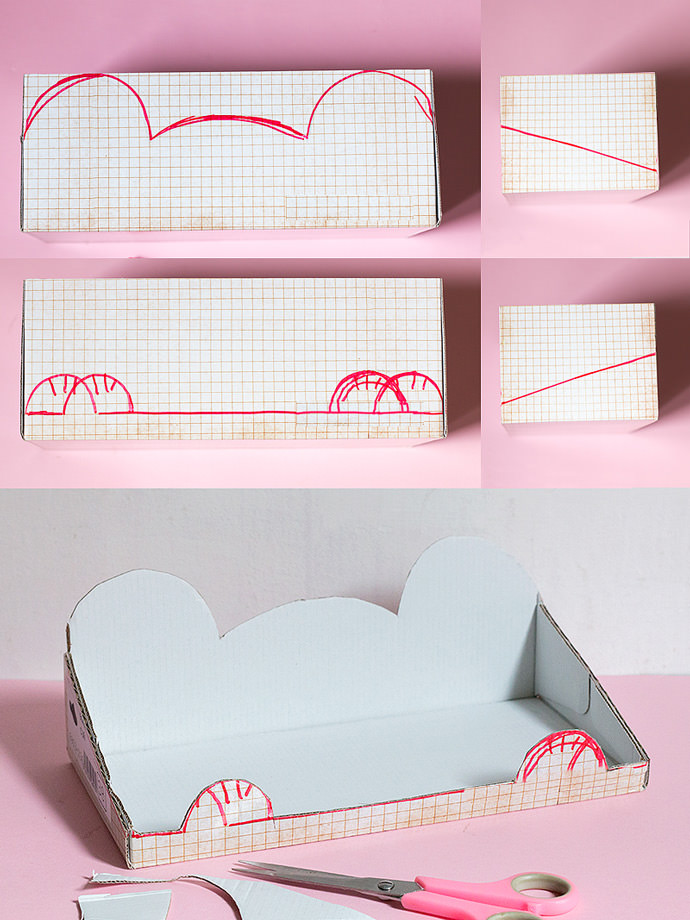
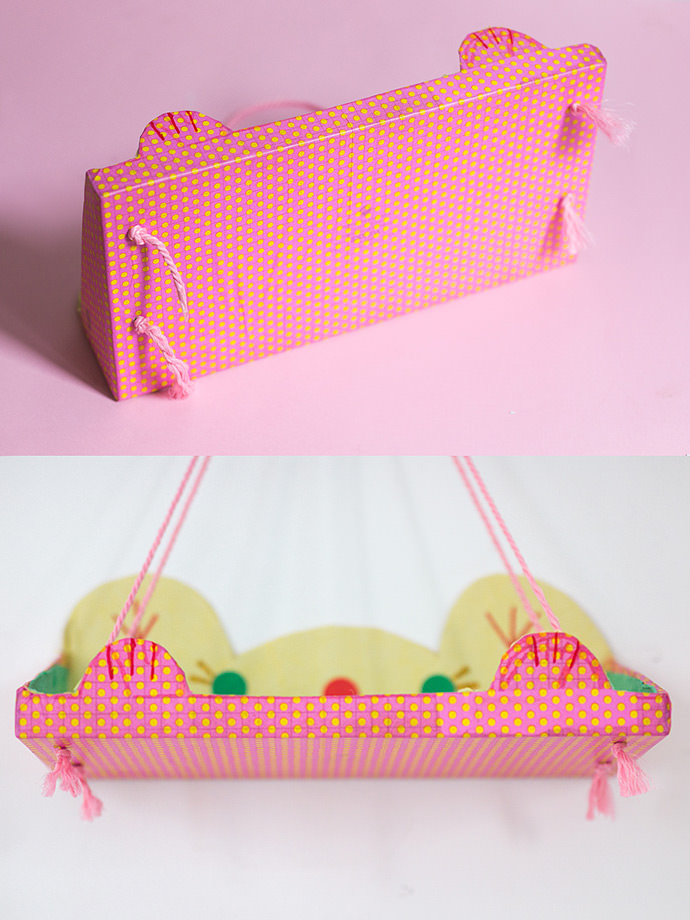
Choose your favorite animal and draw its shape on the back and front of the shoebox. Align front and back sides, drawing diagonals on left and right box faces. Cut the shoebox following the shape of your little friend.
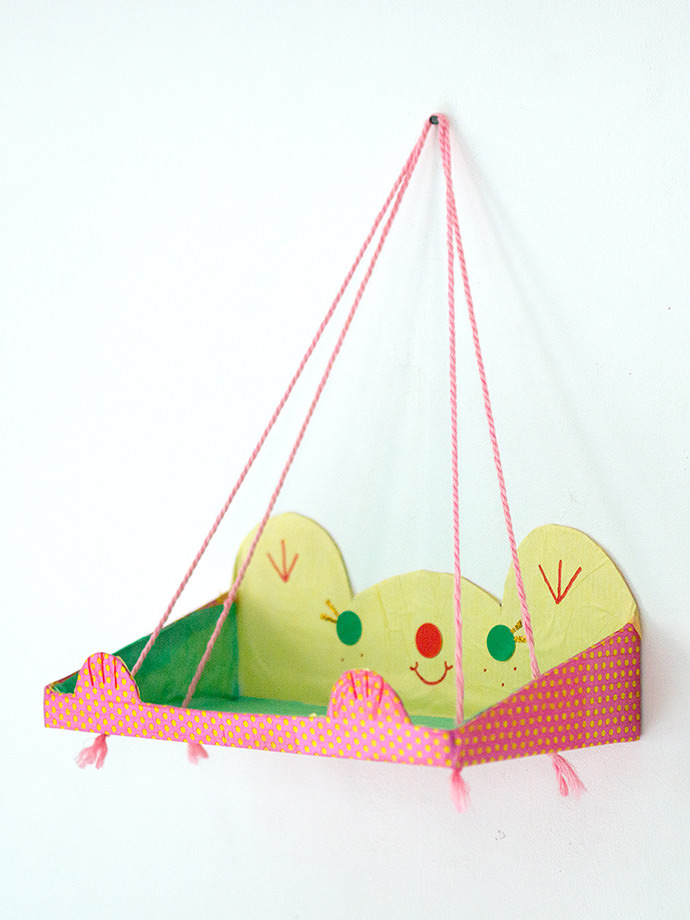
I made the backside of the box higher to make the shelf more stable. Here are the directions to draw the shape of my chosen animal, a little bear:
- On the back face, measure and trace a horizontal line 2-½“ from the bottom. Above this line, draw the top of a little animal with two big ears by making three half-ovals. A pair of big half-ovals and a small one between them.
- Turn the box and trace another horizontal line ¾” from the bottom at the front face of the box. Draw two little paws (tiny half-ovals). Then cut the shoebox all along this shape.
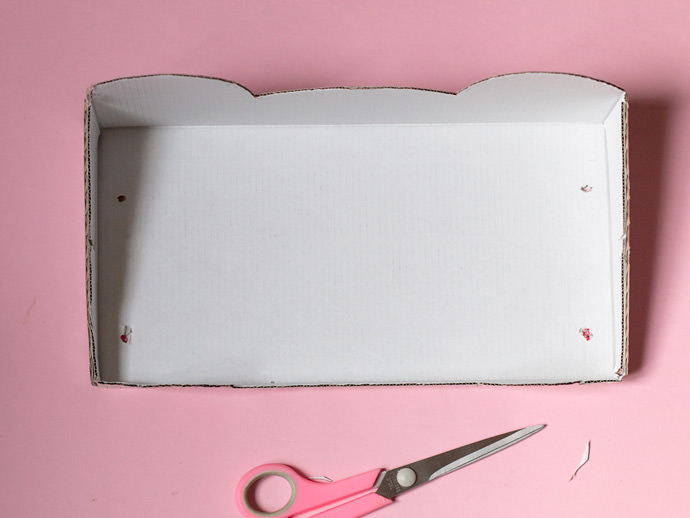
Step 2
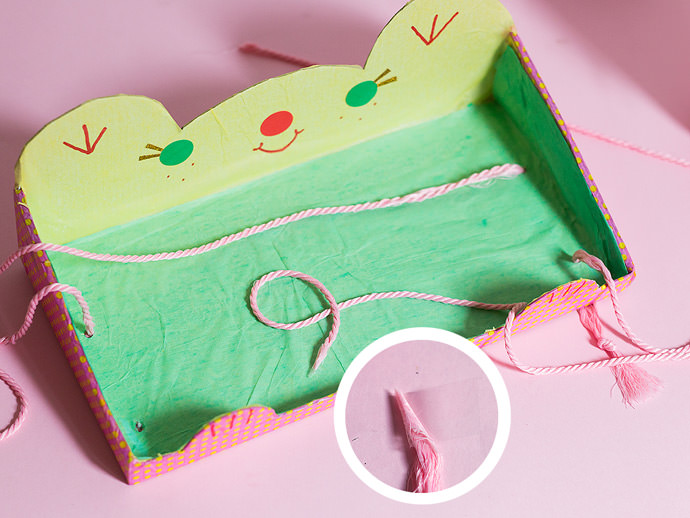
Punch two small holes at each end of the bottom of the shoebox as pictured above. Align them at ½” from each side of the box and 1” from front or backsides.
You can easily place the holes using a 1/2″ by 1″ piece of paper, lining it at each of the four corners, then drawing a dot at the opposite corner.
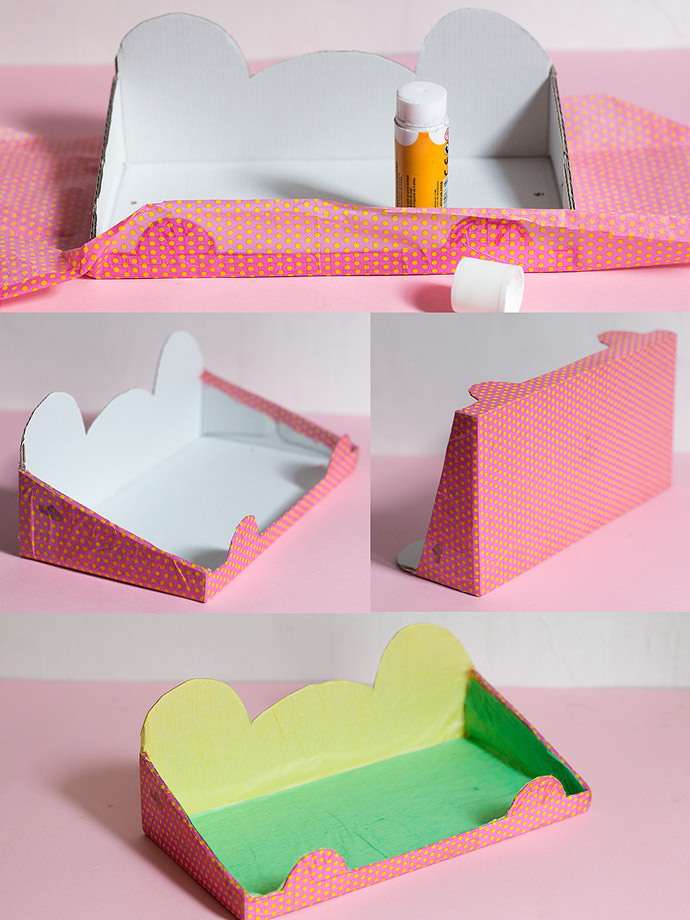
Step 3
It’s time to decorate your shelf! Wrap and glue your shelf with decorative paper. I combined different tissue papers for more color and fun. You can also use paint if you prefer.
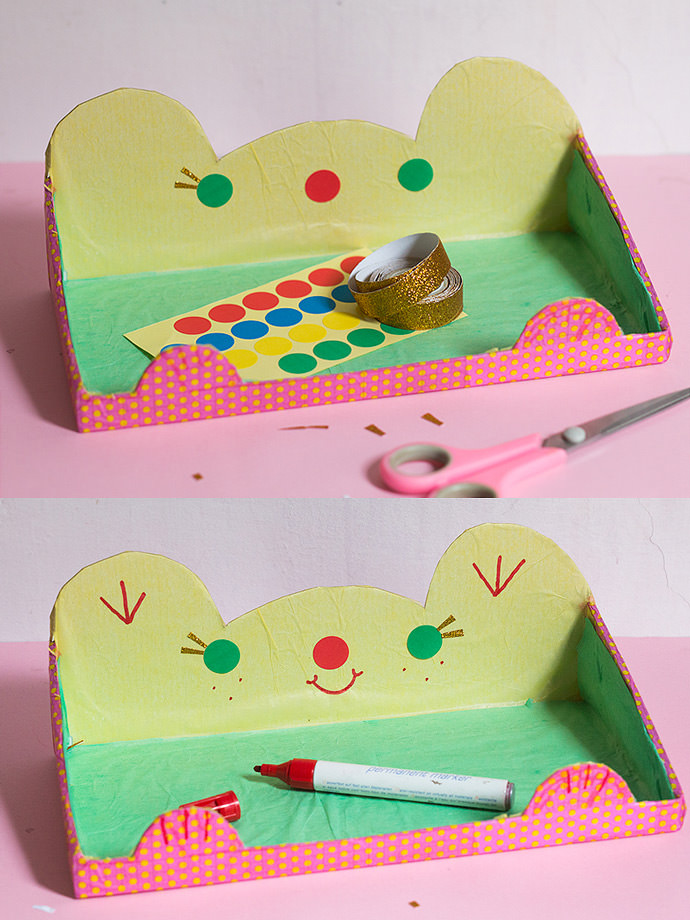
Step 4
Add stickers for the eyes and nose. Cut out tiny rectangles from deco tape (I used a charming golden tape) for eyelashes. Draw the rest of details using a big marker: a big smile, freckles, whiskers, hair, and paws…
Step 5
Measure how long you want the shelf to hang. I cut my cord in one piece of 28” length, then measured the distance between the two holes (3″, in my case) and cut another 31″ piece of cord.
Tie a knot 2” from the end on each cord. Pass cords through the holes. You can wrap cord ends with tape for easier threading.
Step 6
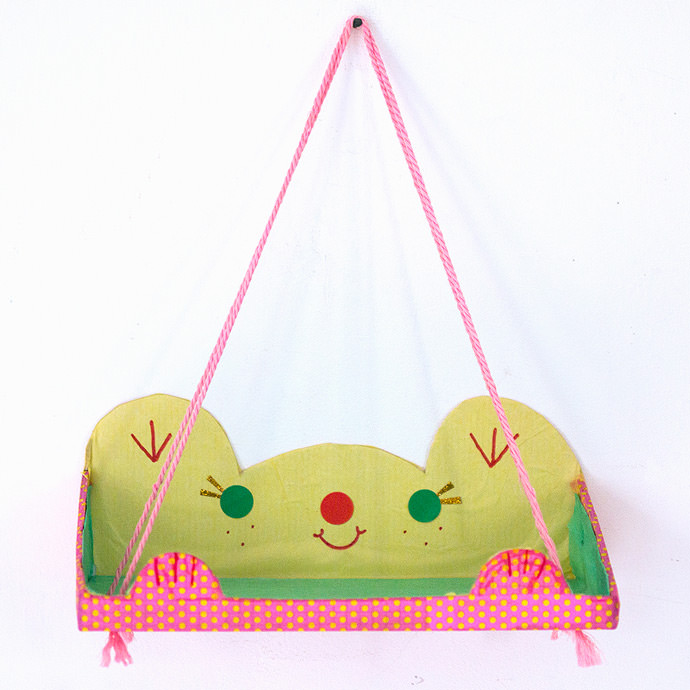
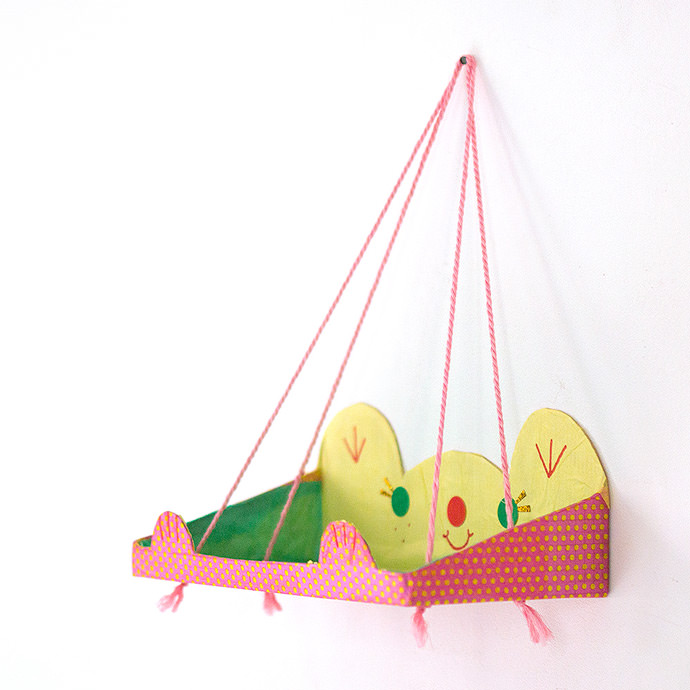
Hang the shelf using wall hooks—make sure the shelf is level before it’s tied off. Now tie knots at the other cord ends. Keep testing and adjusting the knots as necessary.
Cut excess cord and make tassels, loosening all the twists on the cord.
That’s it! Happy crafting :)