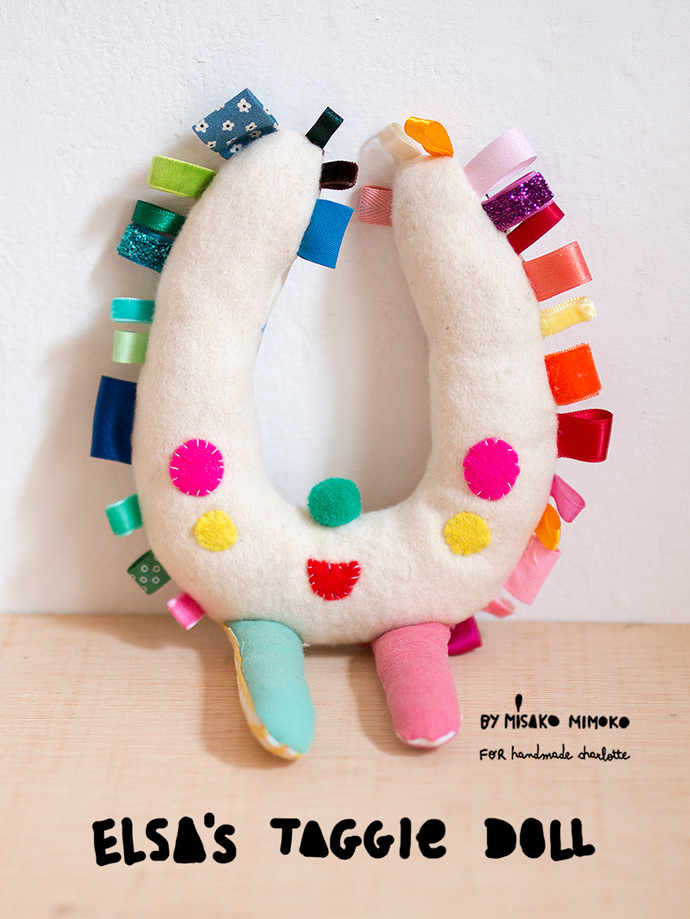
This project makes great use of your leftover scraps of fabric. Use fleece, ribbon, pompoms, and anything else you like for stuffing. It makes a perfect and personal baby shower gift. They’ll love it!
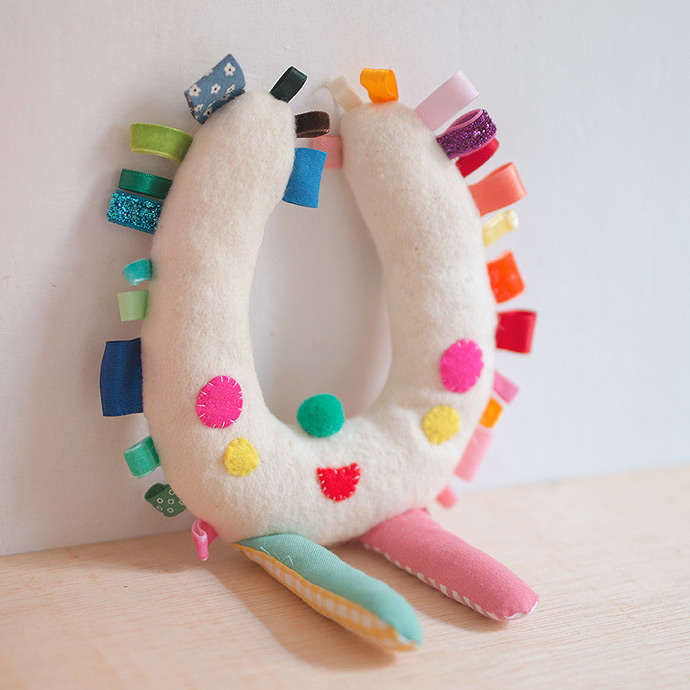
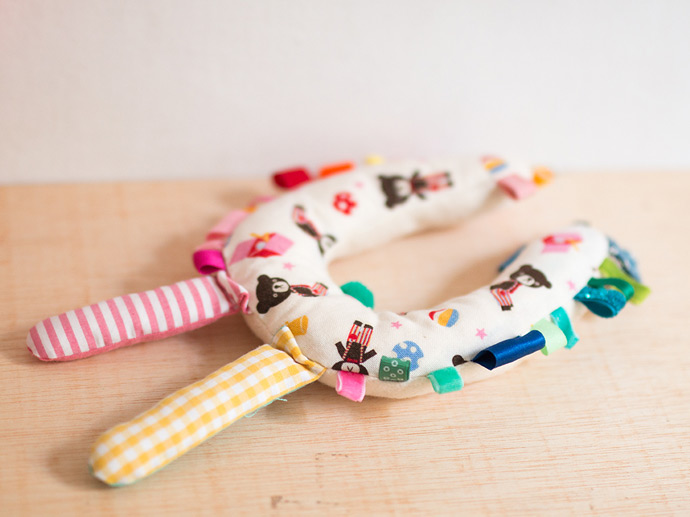
I made this one for Elsa, my cousin’s daughter, and she smiled the minute she saw it. Babies love tags! It has little ribbons with different textures, contrasting fabric at the back for visual stimulation, and two softie legs to hold and chew.
What You Need
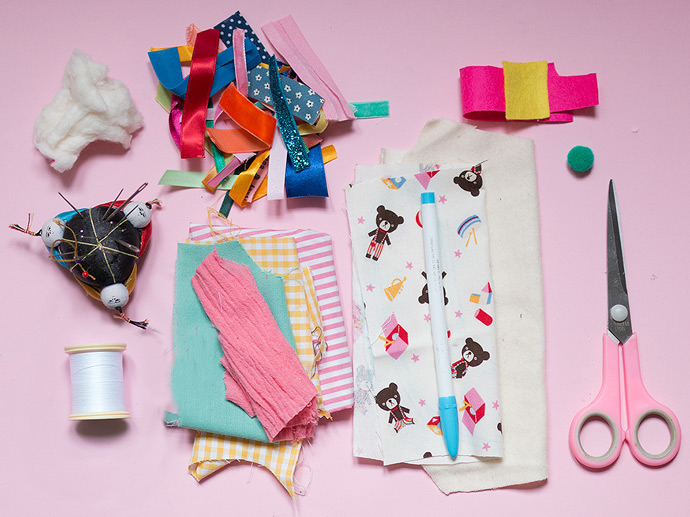
- DIY Taggy Doll template (download here)
- Fabric scraps / fleece / terry
- Ribbon
- Felt
- Pom-poms
- Needle and thread
- Markers
- Scissors
- Stuffing
How-To
Step 1
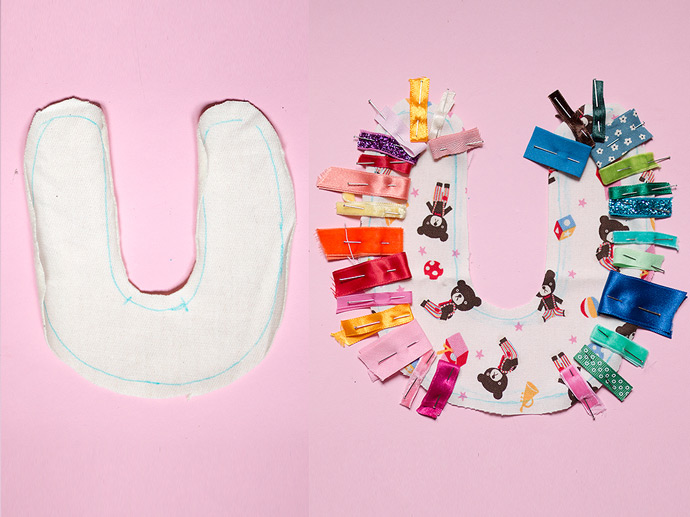
Download and print template. Cut out body shapes from two different fabrics leaving a 1/2-inch seam. I used a contrasting cotton fabric featuring toys and bears, and a soft fleece.
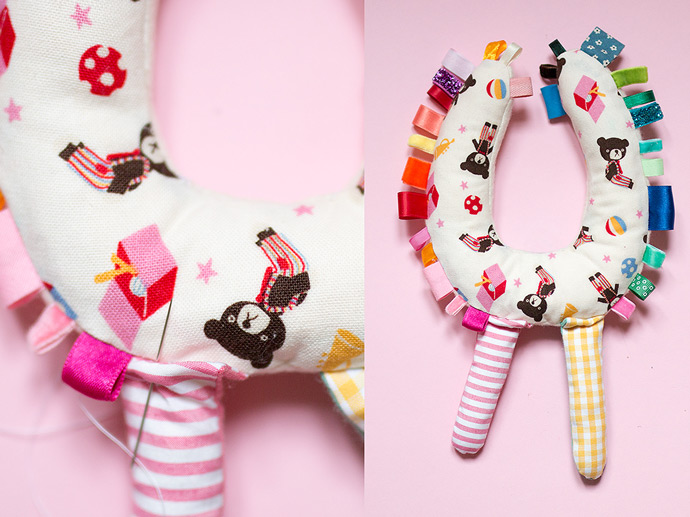
Lay down your back fabric right side up and add ribbons. Cut each ribbon 2.5 inches long, fold in half with the right side on the outside, and pin around the body edge. Pins must be placed with the top leaning out of the body, so you can take them out easily once the body is stitched. Play with colors and textures!
Step 2
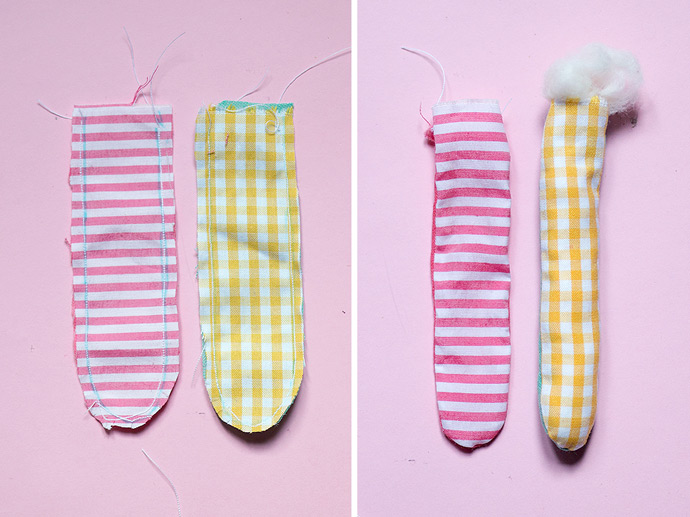
Cut four leg shapes from different fabric scraps, pin them in pairs, right sides together. Stitch legs all around leaving the top edge open, trim seams, and clip all curves. Turn legs right side out and stuff.
Step 3
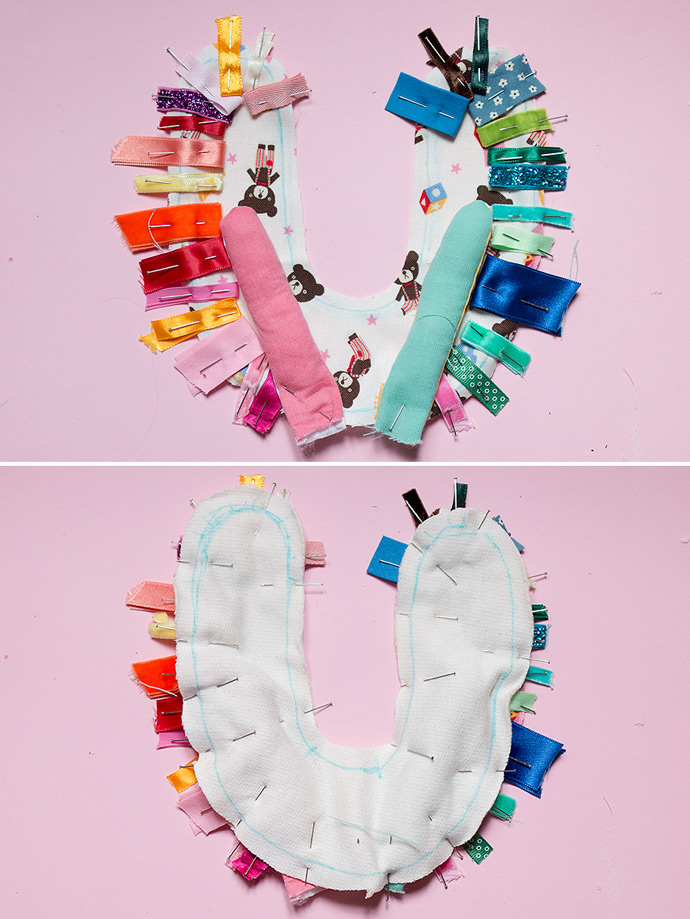
Now place two legs onto the back fabric with the pinned ribbons. Place fleece (front fabric) right side down on top of them all. Align both fabrics and sandwich legs and ribbons between them. Stitch around the body edge with a 1/2-inch seam leaving a 3 inch opening at the top center.
Step 4
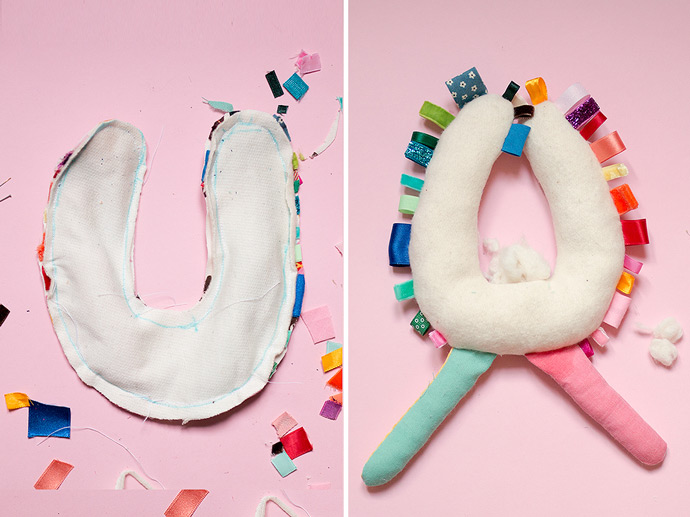
Trim seams and excess ribbon. Clip all curves. Turn body right side out and stuff. Stitch to close the opening.
Step 5
Optional: Correct legs inclination stitching one crease at the backside of each leg.
Step 6
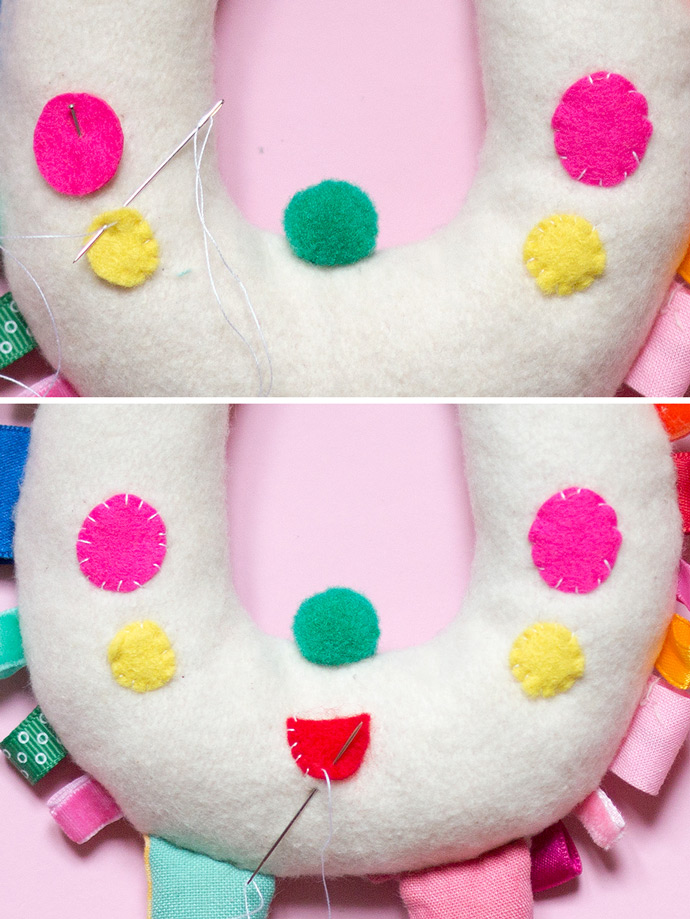
Stitch one pompom for the nose at the top center of the body. Cut out mouth, eyes, and chick shapes from felt and pin in place. Hand applique felt pieces with simple straight stitches, or glue them if you want a faster solution.
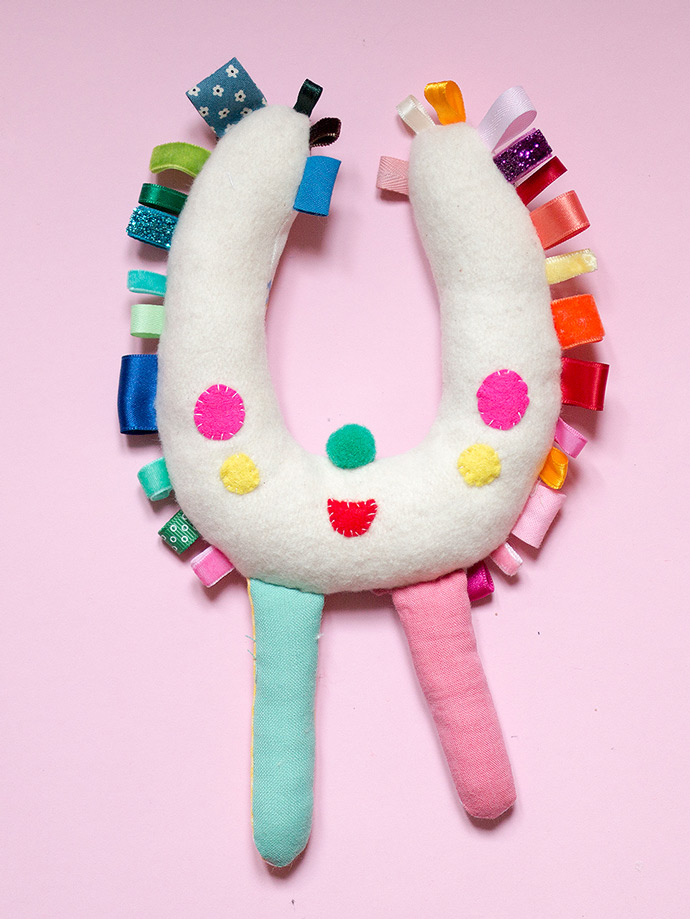
All done! Your taggy doll is ready to play. Enjoy :)