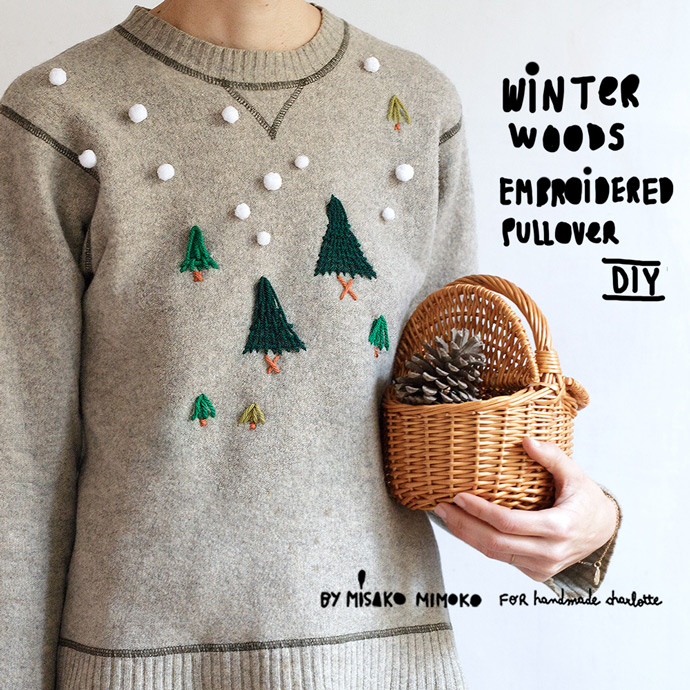
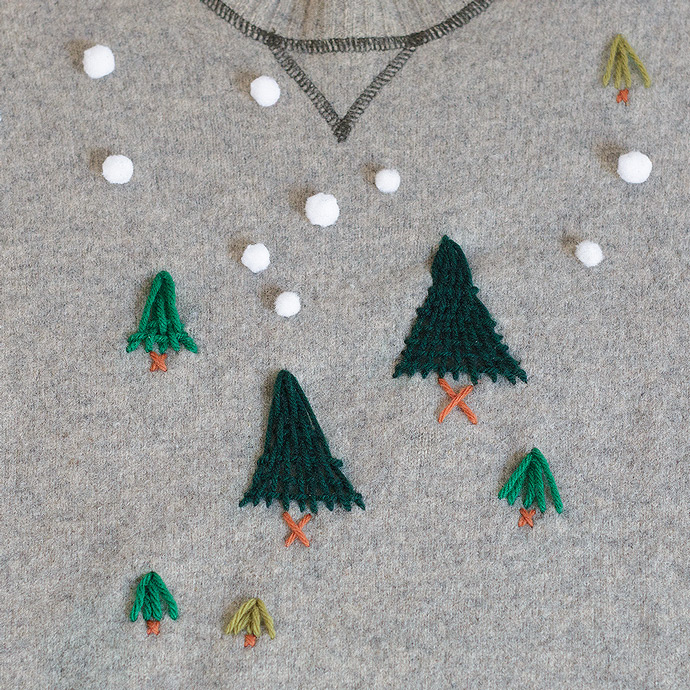
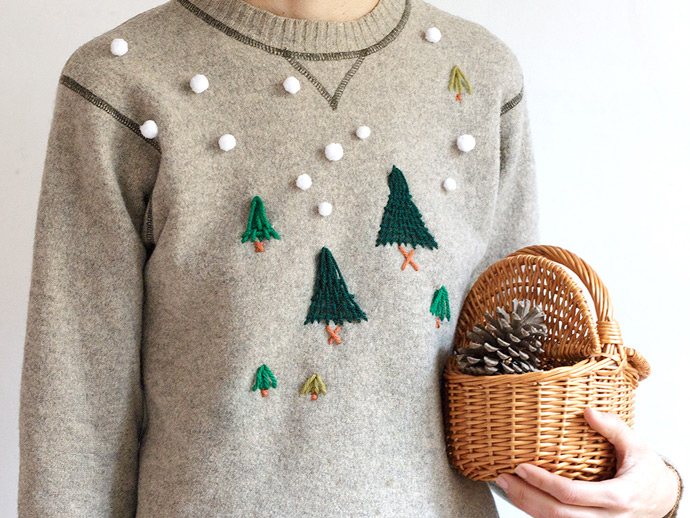
Update your plain and boring pullover with pompoms and cute embroidered trees to create a winter-inspired scene! This DIY is a really easy way to customize a sweater by adding a touch of embroidery – it doesn’t take much to add a lot of cozy charm. :)
Grab any basic sweater (you’ll find that the simplicity of the piece makes it the perfect blank canvas) and use yarn to create bold embroidery without many stitches. Get kids involved in the craft process by letting them create the forest layout and choose their own colors! It’ll be lots of fun, promise! Plus, You’ll be surprised how fast and fun this yarn embroidery technique is – you’ll be finished before you know it. Let’s get started!
What You Need
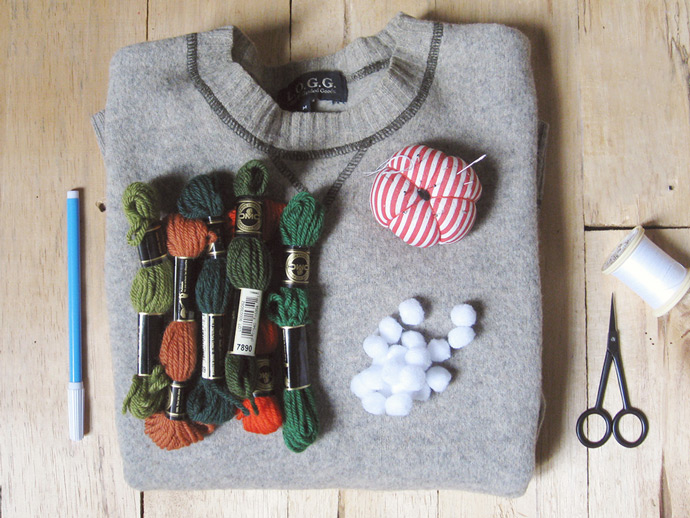
- Printable templates (download here)
- Plain sweater
- White pompoms
- Yarn
- Needles (sewing and yarn)
- White thread
- Fabric marker
- Scissors
How-To
Step 1
Download and print out the templates. Transfer them onto the fabric by either eye-balling the template and drawing the trees onto the sweater with a fabric pen or cut out the trees from the paper to make a stencil you can trace onto the sweater.
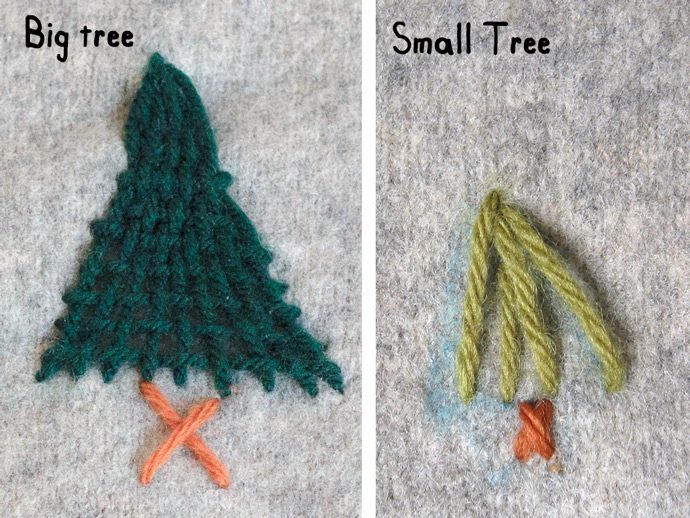
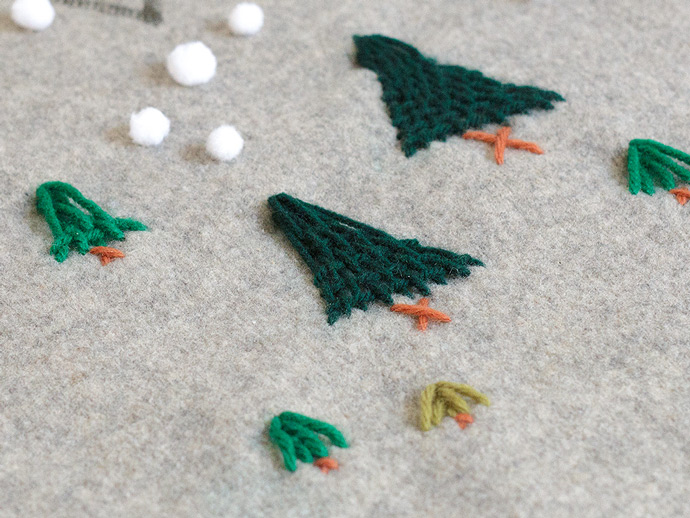
I’ve designed a big and a small tree pattern, but feel free to play around with the number of stitches to make your own variations. Big trees are stitched using a weaving stitch. First, we’ll stitch a group of vertical/diagonal stitches (straight stitches) to make a triangular shape, then we’ll weave long horizontal stitches through those. Small trees are simpler triangular shapes made of vertical/diagonal straight stitches that meet at the top of the triangle, without the weaving step.
Step 2
Big tree:
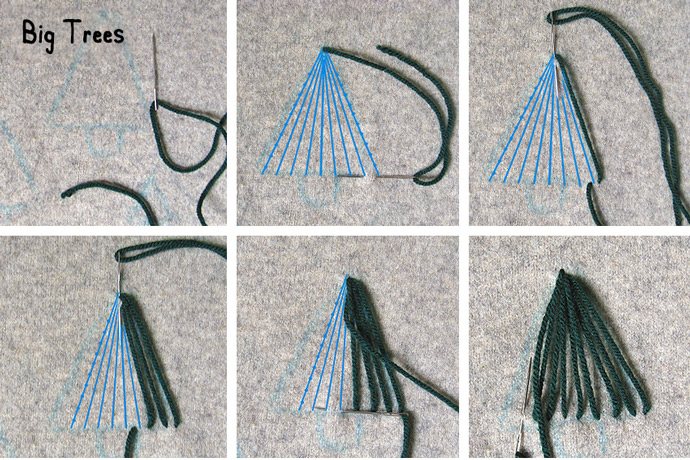
Thread your yarn needle with a beautiful green yarn and tie a knot at the end. Start at the top of the triangle and sew your first stitch up through the sweater. Pull the needle all the way through until the knot is secure inside the sweater then start stitching. Follow the stitching sequence shown on the big tree template.
Hints:
- Notice that stitches don’t meet at the exact same point at the top of the triangle, they’re just very close. If they all meet at one point, a hole can form and we don’t want a huge hole at the top of the tree!
- From the front of the sweater, the stitches should look like long loops, with small stitches on the backside following the triangle shape.
- The number of diagonal stitches and the space between each stitch depends on your preference – think of the provided template as a guide, but not the only way to make these trees. Play around with the size and density of stitches.
- Be careful that stretchy sweaters don’t bunch up while stitching.
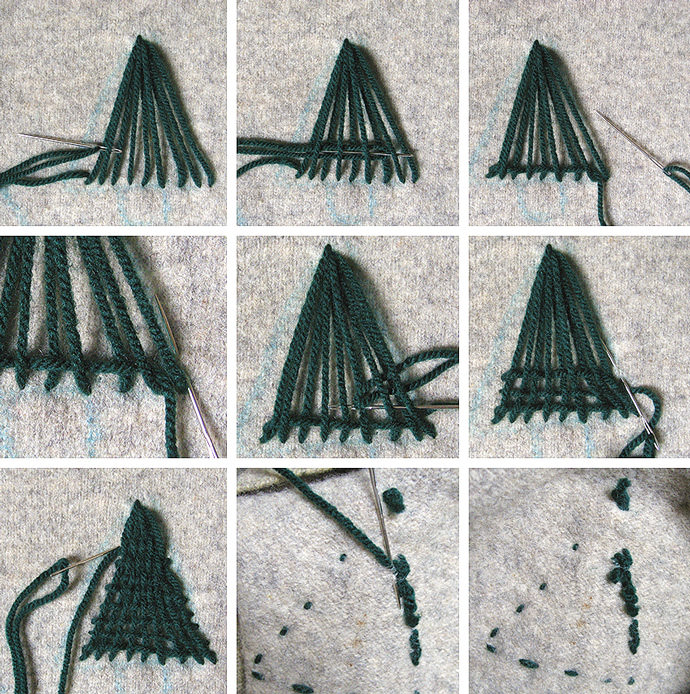
Now it’s time to make the horizontal stitches starting at the bottom of the triangle. Weave your threaded needle across by going over one vertical thread, then under the next, repeating this all the way across. When you get to the end, pierce the needle into the fabric, bring it up again just above where you went in, and then weave again in the opposite direction but this time wherever you went under a thread the first time, go over instead, and vice-versa until you reach the other side. Keep repeating this until you get to the top of the triangle. Hide your yarn tail on the inside of your sweater by weaving it back and forth through the existing stitches.
Step 3
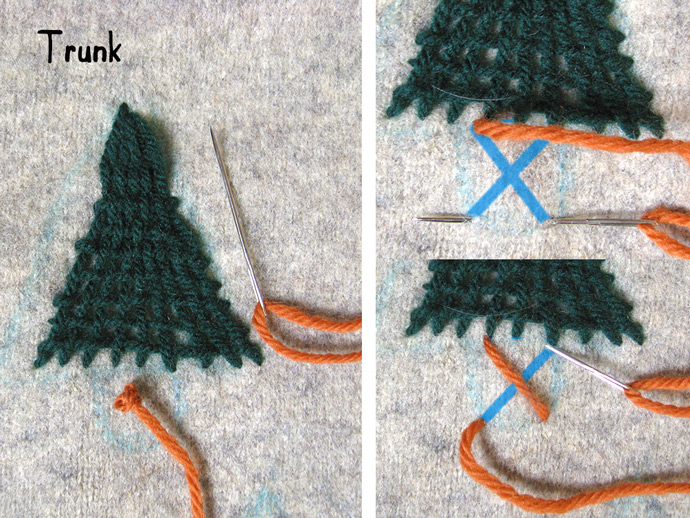
Trunk: Make a large cross-stitch in brown/dark orange yarn to make each trunk. Tie a knot at the end your yarn and then stitch the large cross-stitch centered at the bottom of the embroidered tree. Follow the sequence marked on the trunk template and when the trunk is finished hide your yarn tail in the same way as before (on the inside of the sweater by weaving it back and forth through the stitches).

Step 4
Small tree: Try using a different shade of green to make your winter forest more colorful! Thread bright green yarn onto the needle and tie a knot at the end. Start at the top of the triangle and sew your first stitch up through the sweater. Pull the needle all the way through until the knot is secure inside the sweater, then start stitching. Follow the stitching sequence marked on the small tree template. You can change the number of diagonal stitches to change the size/shape of the small trees.

Step 5
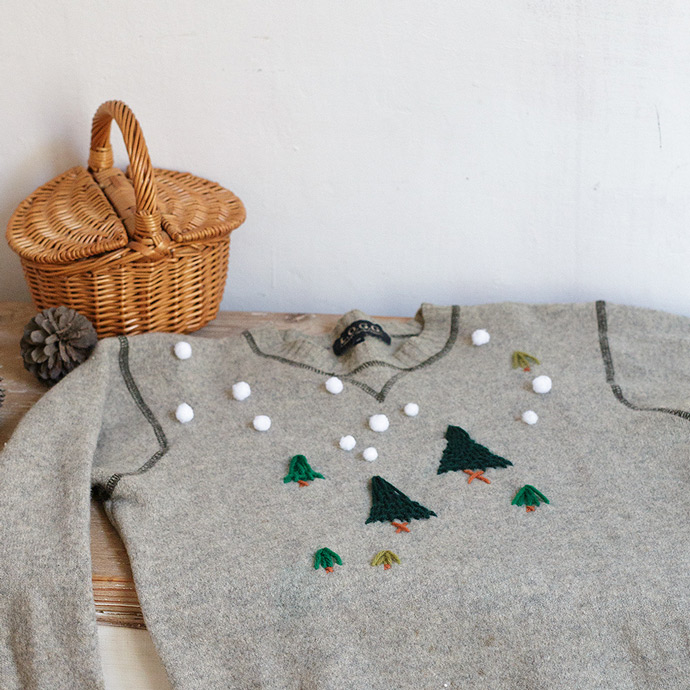
Snowflakes: Once you’ve embroidered all the trees, it’s time to add some snow to your forest! Figure out where you want to place your snowflakes and mark each position onto your sweater using a fabric pen. You can stitch the pompoms on, or if you want a faster option gluing them on works too.
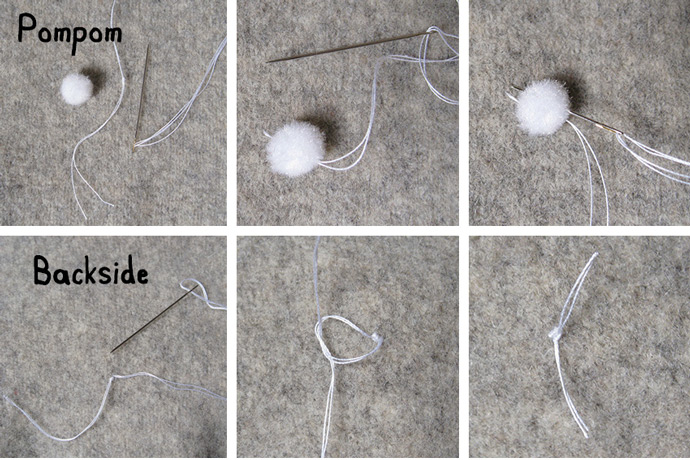
To stitch the pompoms on, thread your sewing needle and tie a knot at the end. Begin stitching up through the sweater and pull the thread all the way through until the knot is secure. Take one pompom and push the needle up through the thick center of it (not the fluffy edge). Stitch down again through the center of the pompom, and then through the sweater.
Repeat this several times to ensure that the pompom is on tight. Tie the loose ends on the backside in a double knot – you can also apply a dab of glue onto the knots for extra security. Repeat until all of your pompoms are attached, adding as many pompoms as you like.
Washing machine tips: Turn the sweater inside out, put into a pillowcase, and wash on the delicate cycle.
Happy crafting!