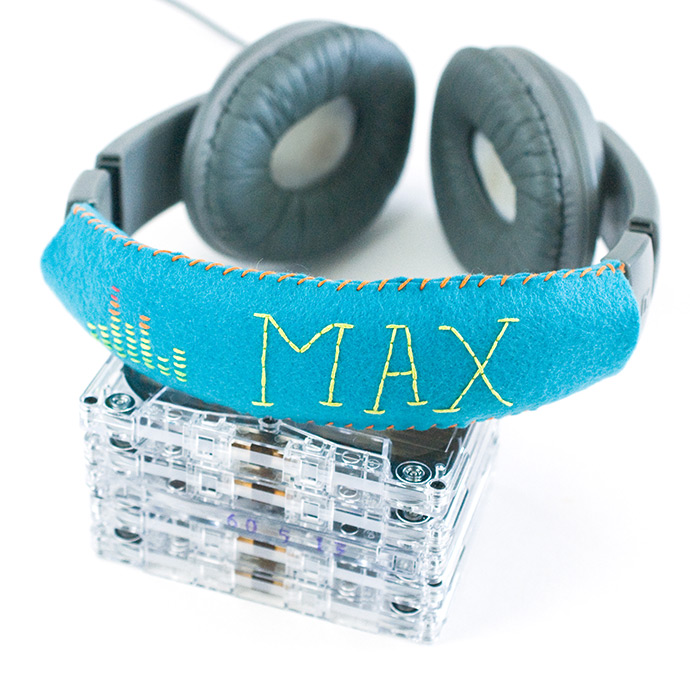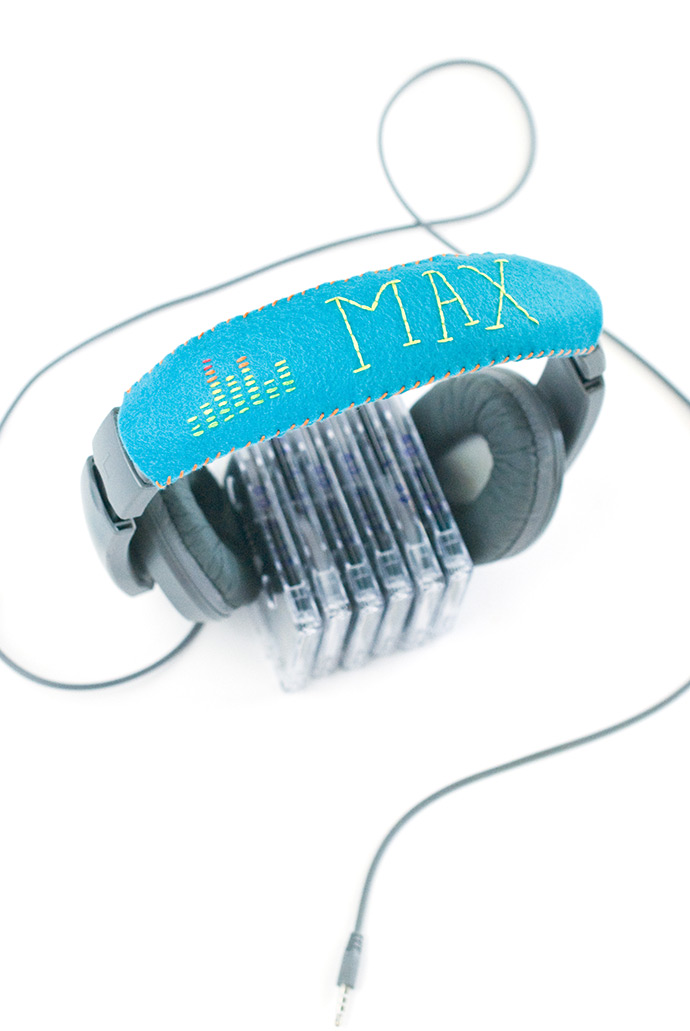
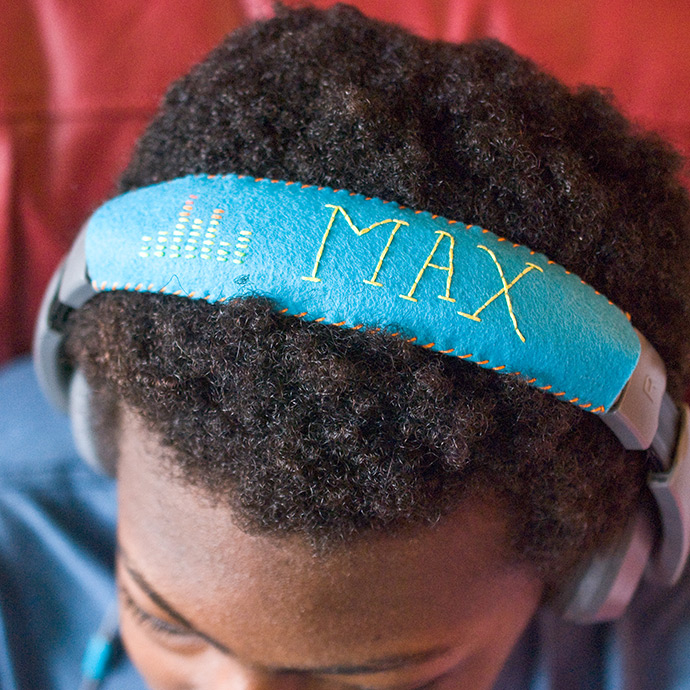
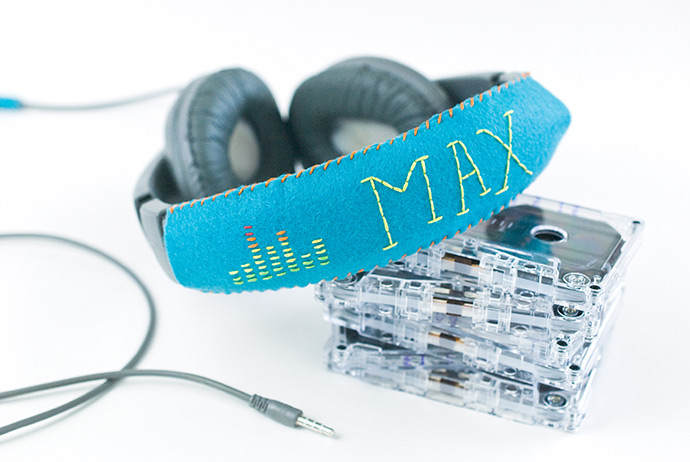
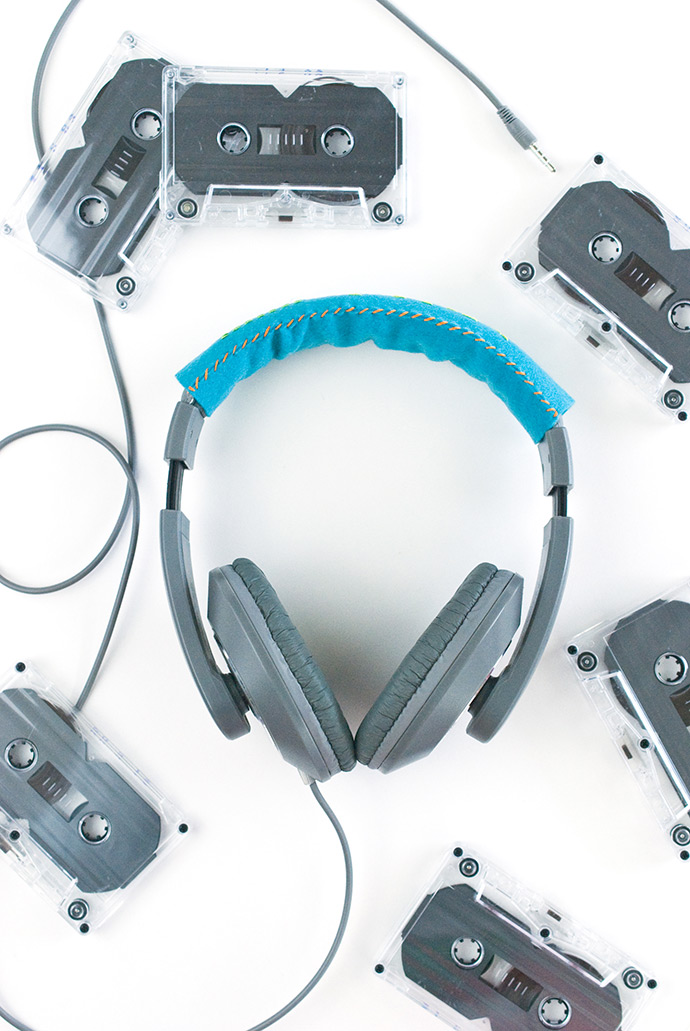
Give your headphones a custom look by embroidering a felt cover with your name and some fun musical icons! It only takes some basic stitching skills to transform a $5.00 headset into something special.
Whether you like listening to music, watching videos without bothering people around you, or gaming without distraction, having headphones is helpful. And adding a decorative band to headphones is good way to really let your personality shine through and have your sound accessory stand out.
It’s also a great way to make a customized gift for a friend! Pick up a set of simple, large-style headphones and stitch on a cover before gifting.
The template in this easy DIY should fit most headphones of this style, but you can adjust the size of the felt pieces if you need to.
Ready to dress up your headphones and listen to some tunes? Let’s start stitching!
what you need:
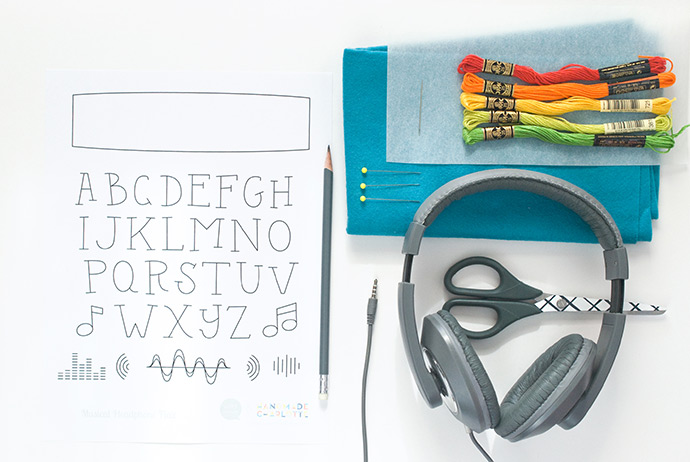
- Tracing Paper
- Pencil
- Scissors
- Felt
- Pins (for younger crafters, use safety pins)
- Embroidery Floss
- Needle
- Headphones
- Printable designs
what you need:
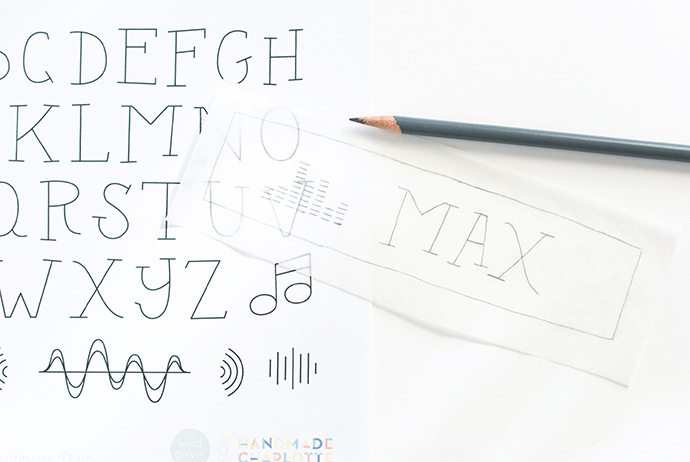
Step 1
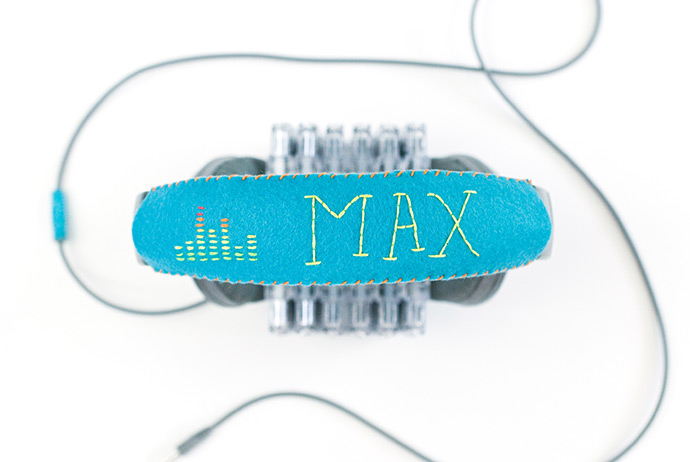
Print the headphone flair pattern page and trace the long template on tracing paper. Trace a name or any of the designs on the template shape, making sure that they aren’t too close to the edges.
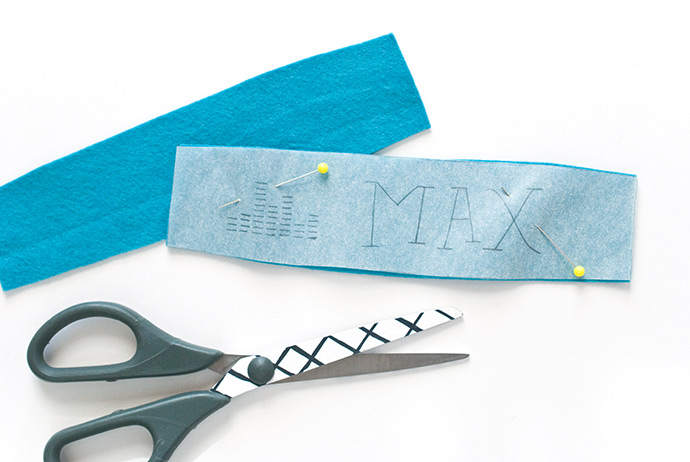
Step 2
Cut out the template and pin it onto felt. Next, cut out two of the long shapes.
This is a good time to double check that the template will fit your headphones. Hold one of the felt pieces across the top band of the headset. There should be a small amount of felt that extends on each side. It’s okay if it’s a lot bigger than the top of the headphones, but if it’s smaller, you should re-cut the template and pieces so they are a little wider.
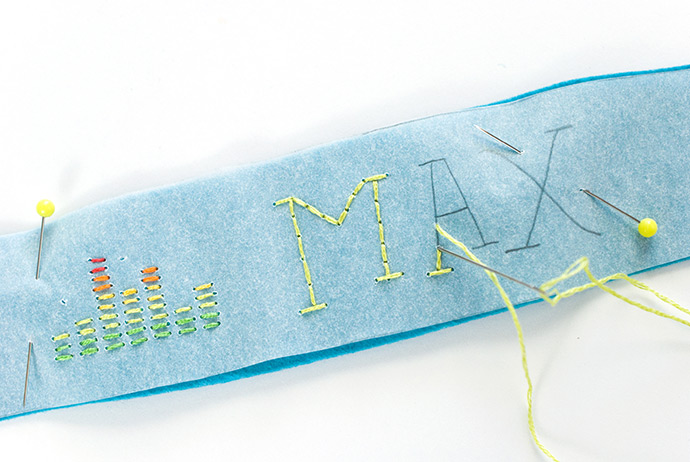
Step 3
With the tracing paper template still pinned to one of the pieces (but out of the way of where the embroidery goes), embroider the patterns you traced.
To do this, use three strands of the embroidery floss and stitch through the felt and the paper at the same time. A simple back stitch works well for all of the patterns.
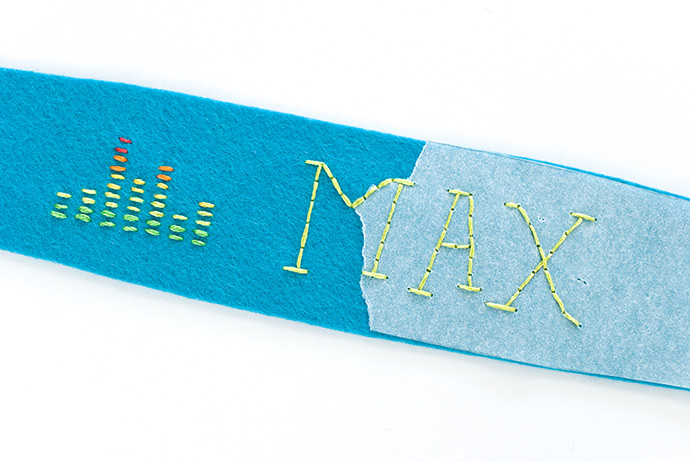
Step 4
When all of the embroidery is done, start tearing away the paper in small chunks. Tearing along the edges of the stitches makes it easier to remove. If pieces are stuck under the stitches, use the needle or a pin to get them out. Just be careful so you don’t tug at the stitches too much.
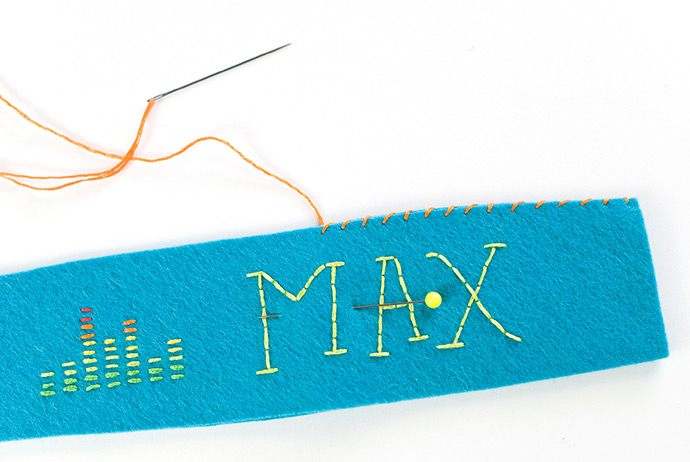
Step 5
Hold or pin the two felt pieces together. Thread the needle with three strands of embroidery floss and tie a knot in the end. Stitch along one edge with whip stitch (or any stitch you like). The stitching should be close to the edge so the cover still fits over the top of the headphones. Secure the end with a knot.
Try to hide the knots between the layers or on the back of the cover.
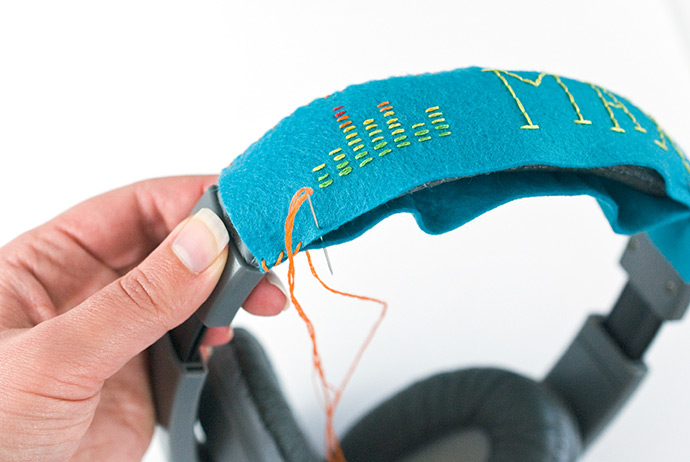
Step 6
Place the felt cover over the top band of the headphones. Pull it tight so that the sewn seam is all the way against the edge of the headset band. Make sure that the ends are even and pin the open edge.
Stitch along the open edge just as you did in step 5. Remove the pins as you go.
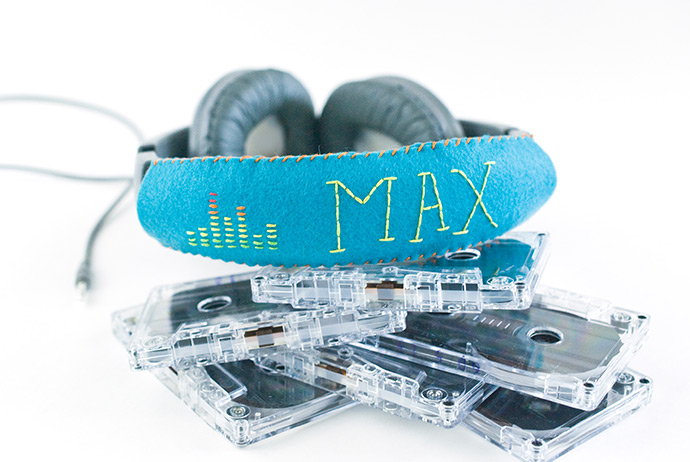
With your new headphone flair in place, your can plug them in and pop them on your head. Listen to some old-school cassette tapes or play the latest handheld video game in style!
Want to skip the embroidery part of this project? Use multi-surface or fabric paint to decorate the felt cover. You’ll still need to sew the edges, but it definitely cuts down on the stitching time. Of course, you can decorate this cover in a lot of different ways, so play some music to get the creativity flowing!