
I love antique weathervanes with roosters, moons, mermaids, or ships on top of them; they remind me of Mary Poppins, Wizard of Oz, pirate stories, and thunderstorms—all of my favorite things! I think they are kind off magical by the way they grab hold and draw attention to something so intangible as wind. Your kids will love this easy wind vane project. You can have fun and teach about the great outdoors at the same time!
Weathervanes are a great way to get your children observing and exploring the weather to see what direction the wind is coming from. This pirate octopus wind vane is made from recycled items, and also includes a fun coloring activity to promote creativity and imagination while learning. Let’s have fun!
What You Need
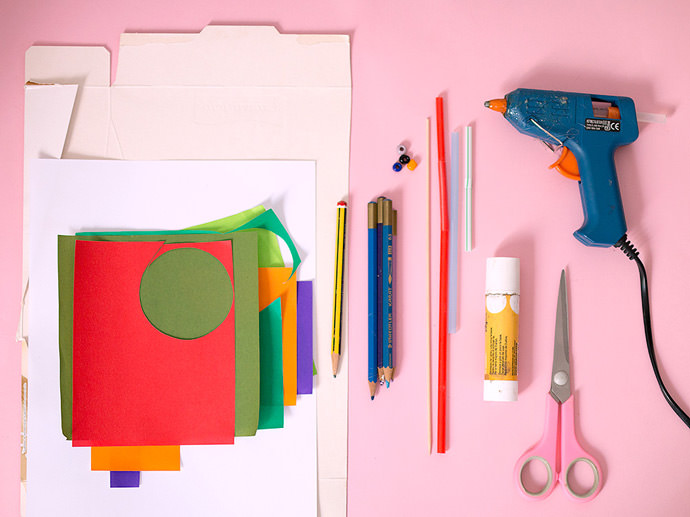
- Printable templates (download here)
- Double sided thick printer paper, or recycled cereal box + plain paper
- Colored pencils
- Colored paper
- Plastic straws (different diameters)
- Wooden skewers
- Beads
- Hot glue gun
- Marker
- Scissors
How-To
Step 1
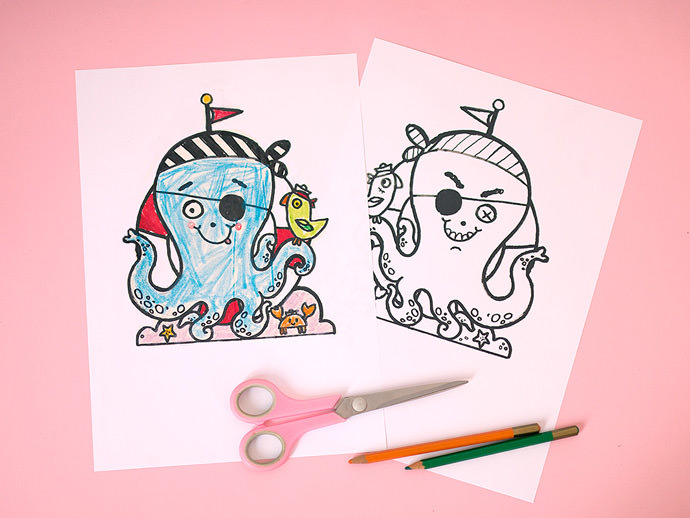
Download and print out arrow and windrose compass on paper. Print out octopus templates on doubled sided card stock, one on each side. Let the kids color the pictures in and cut them out. If you don’t have thick printer paper just print each template on one sheet of plain paper and then glue to the cardboard cereal box later.
Step 2
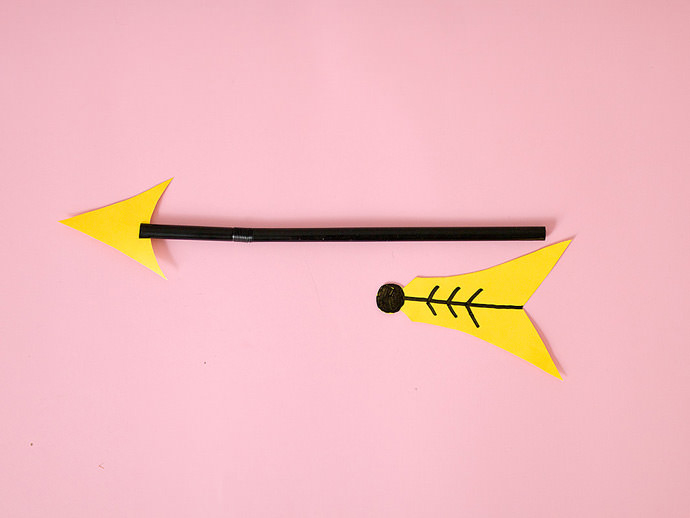
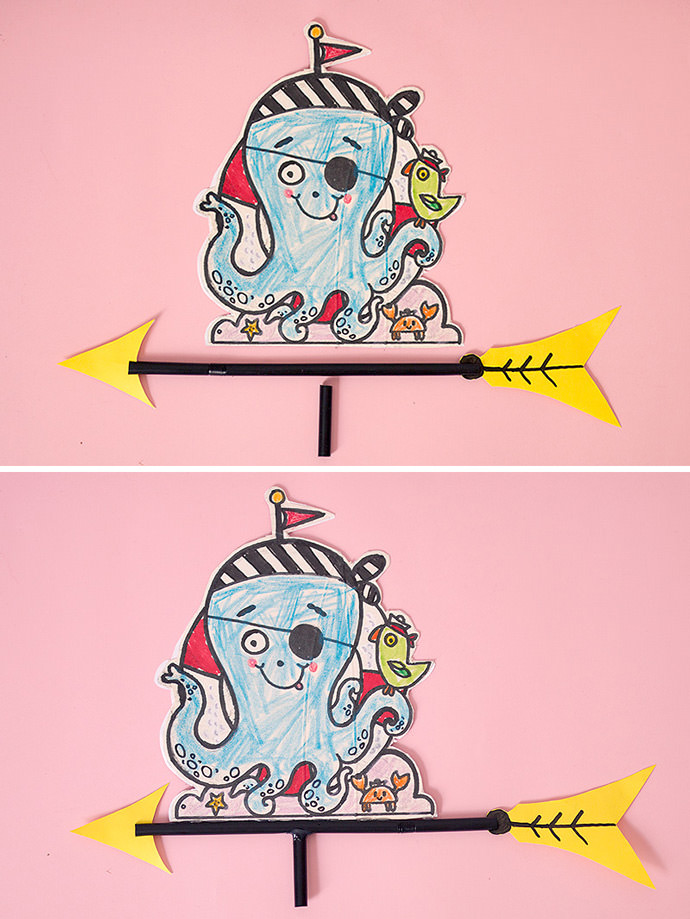
Trace arrow templates onto thick paper, paint, draw black lines and cut out shapes. Take a wide straw and make 0.4″ (1cm) cuts at each end of the straw and slide the arrow point and tail into the cuts.
Step 3
Now take your octopus shape and glue it carefully centered, and perfectly aligned to the top of the arrow. Then cut a small piece of wide straw of about 1 ¼” (3.5cm) and glue it centered to the bottom of the arrow.

Step 4
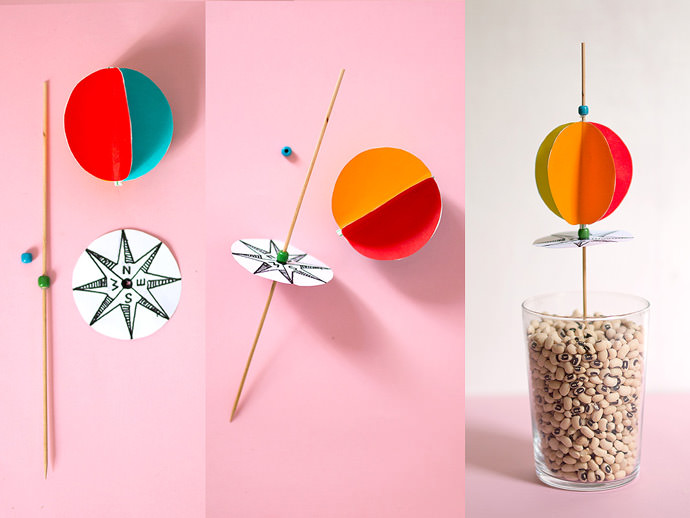
Make a cute wind paper pompom for your vane by cutting out five circles of 2¾” from colored paper. Fold circles in half. Glue their halves together leaving the last half that closes the pompom without glue, then place and glue a piece of straw along the center crease. Glue the last halves together to close your pompom!
Step 5
Cut out the windrose compass from the paper and punch a hole in the center. Slide a bead down the wooden skewer and glue in the middle. Glue the compass below the bead, then thread your pompom and glue another bead a little higher than the top of the pompom.
Step 6
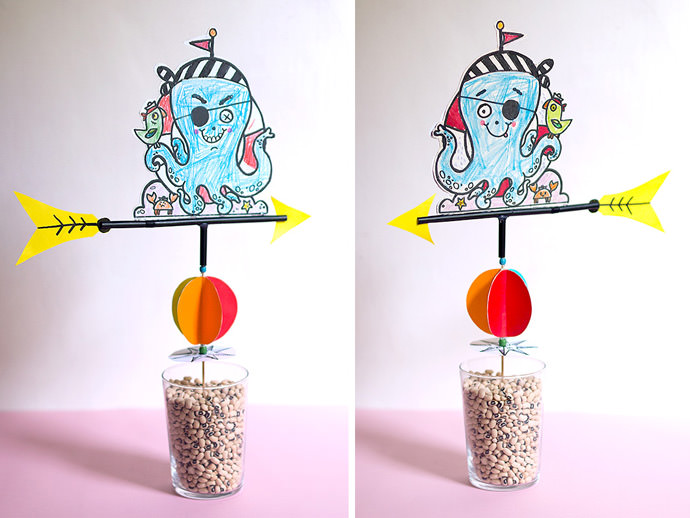
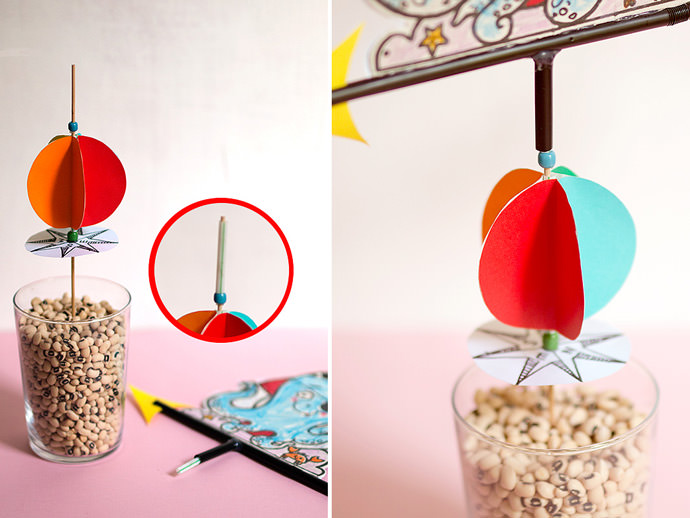
Stick the wooden skewer into a large flowerpot full of soil or any vase full of beans, flour, rice, or pebbles—or even a big modeling clay ball! Now mark your compass points with your windrose. Cut out a narrower straw of 1 ¼” (3.5cm) long and slide it to the top of the skewer, then place your octopus arrow on top.
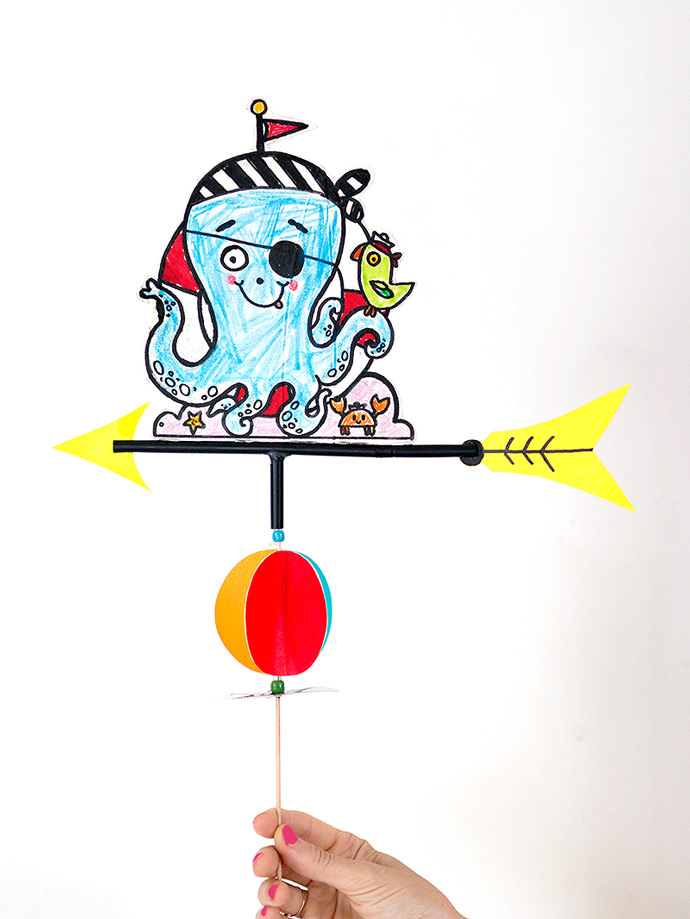
That’s it! Test out your new pirate octopus weathervane by blowing on it and making sure the arrow can spin freely. From now on the arrow of your octopus vane will point in the direction the wind is blowing. Enjoy!