
When I saw that my favorite craft store was stocking up on Christmas goodies, I tried really hard to steer my cart in the other direction…but in the end, the cart won. As sugarplums danced through my head, I began daydreaming about hot cocoa and gingerbread houses. I had a strong urge to go home and make one, but that seemed like a ridiculous thing to do in August. That’s when it hit me that there should be a summer version of a gingerbread house!
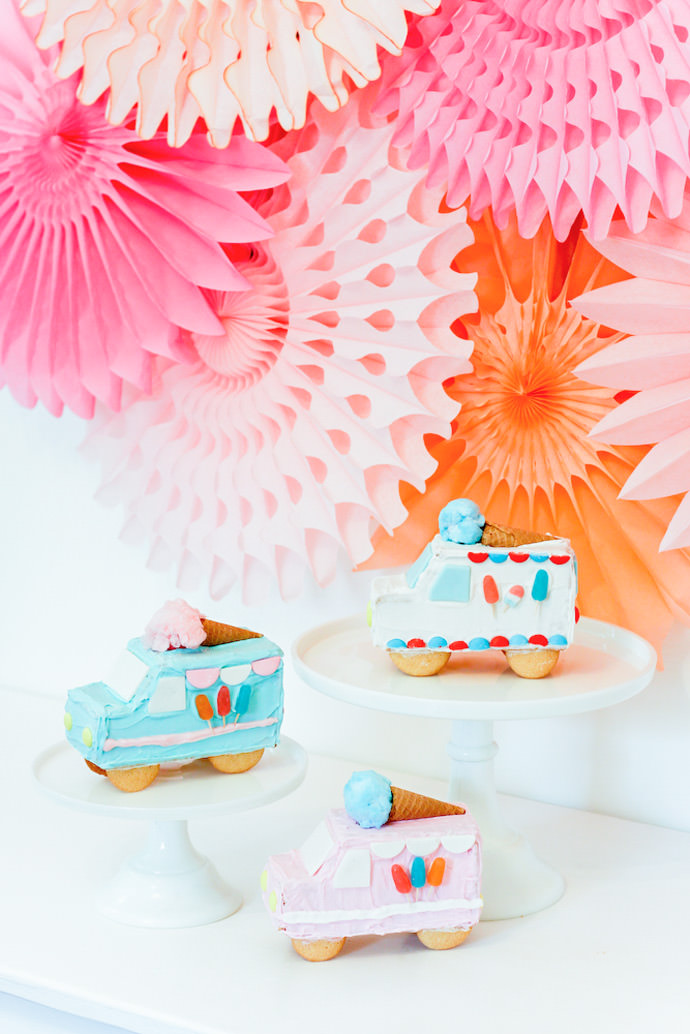
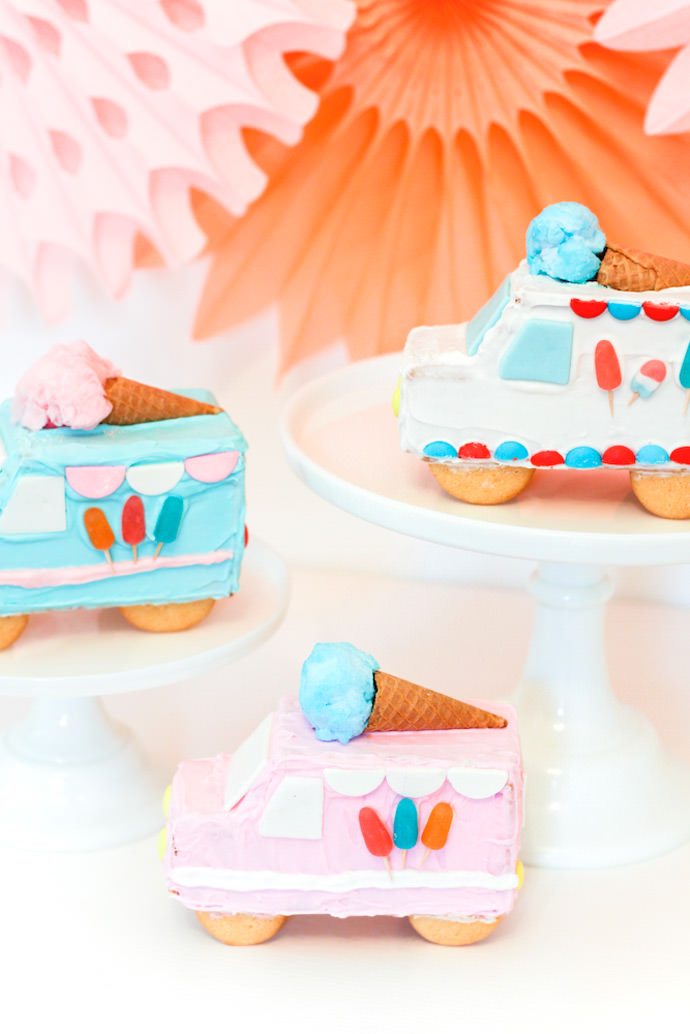
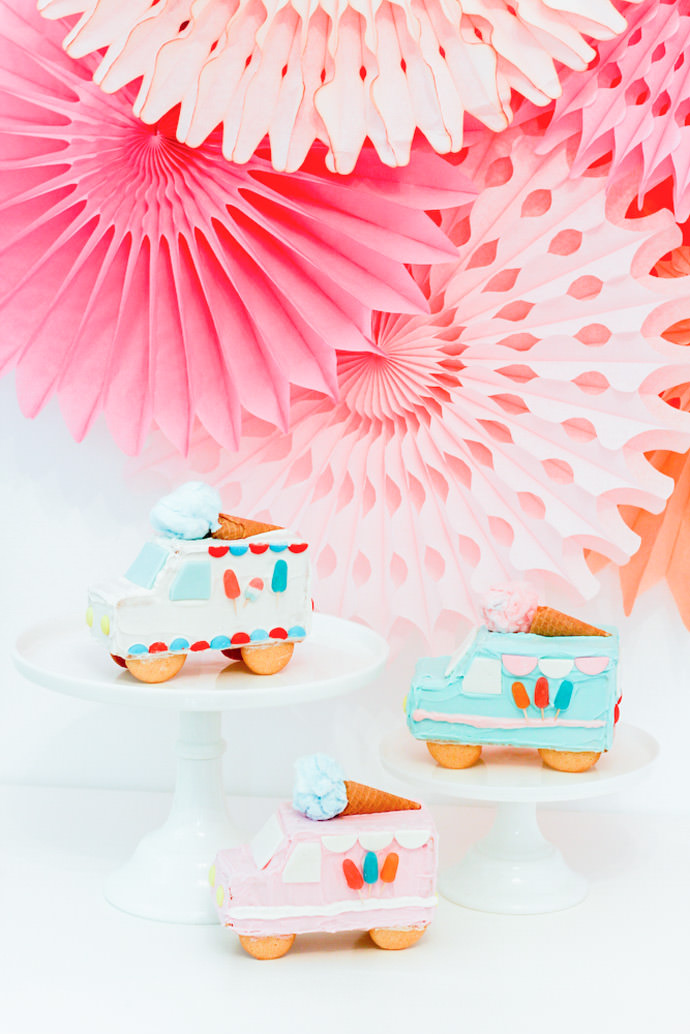
So, now you know how the “gingerbread” ice cream trucks came to life! They would be adorable as centerpieces at your end-of-summer ice cream party, or even a birthday party or baby shower. It would also be fun to pre-assemble enough for each child (or adult) to decorate their very own to take home!

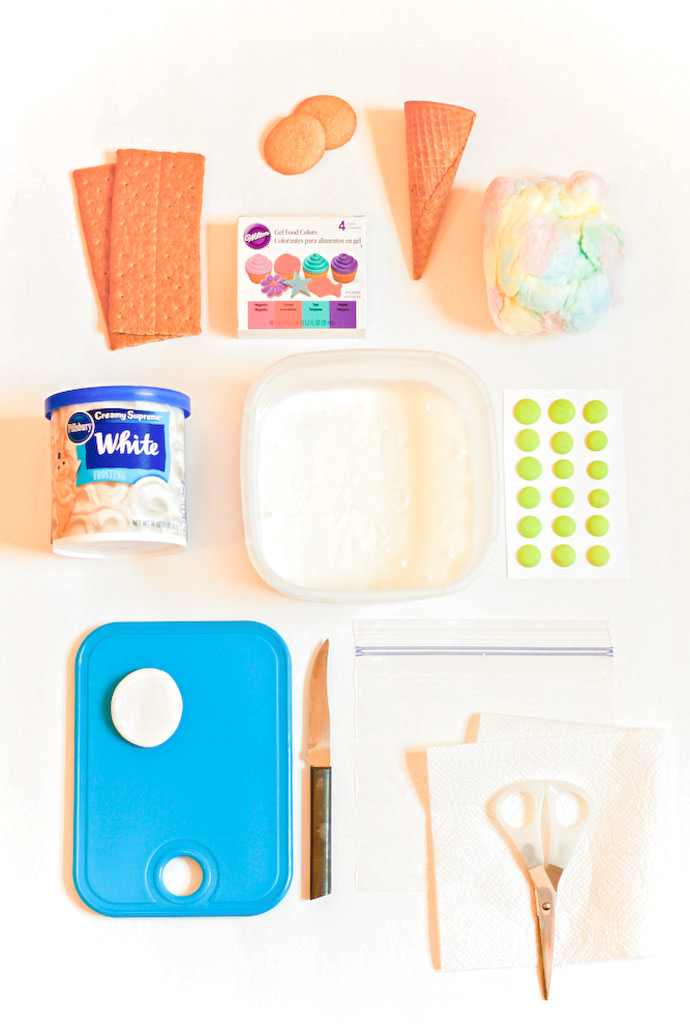
What You Need
For one truck:
- Gingerbread icing “glue” (see recipe under step 1 below)
- 1 can of icing (you will not use the entire can on one truck)
- 6 rectangular graham crackers
- 2 vanilla wafer cookies
- 1 ice cream cone
- Cotton candy
- White fondant
- Cutting board
- Sharp knife
- Microwave
- Microwavable plate
- Paper towels
- Plastic sandwich bag
- Scissors
- Food coloring
- Mega sours candy buttons (or other small, round candy for head and tail lights)
Optional:
- Necco wafer candies
- Bubble tape gum
- Mini alphabet stamps
- Cupcake icing
- Mike and Ike candies
- Toothpicks
- Cookie cutter
- Any other candy your creative heart desires!
How-To
Step 1
Make your icing “glue” using this recipe:
- 2 lb. bag of powdered sugar
- 1 tsp. cream of tartar
- 3 egg whites
- ¼ cup of water
Combine the sugar and cream of tartar, then add egg whites and water. Mix well on high speed, and put some frosting in a plastic bag. Once you have sealed the bag, cut off a tiny piece of one corner, and set aside.
Step 2
Run a paper towel under warm water, then squeeze it out very well. Place 2-3 graham cracker rectangles on a microwavable plate, and cover them with the damp paper towel. Microwave for about 10-15 seconds to soften the graham crackers for cutting. You will need to repeat this step for each graham cracker that you cut.
Step 3
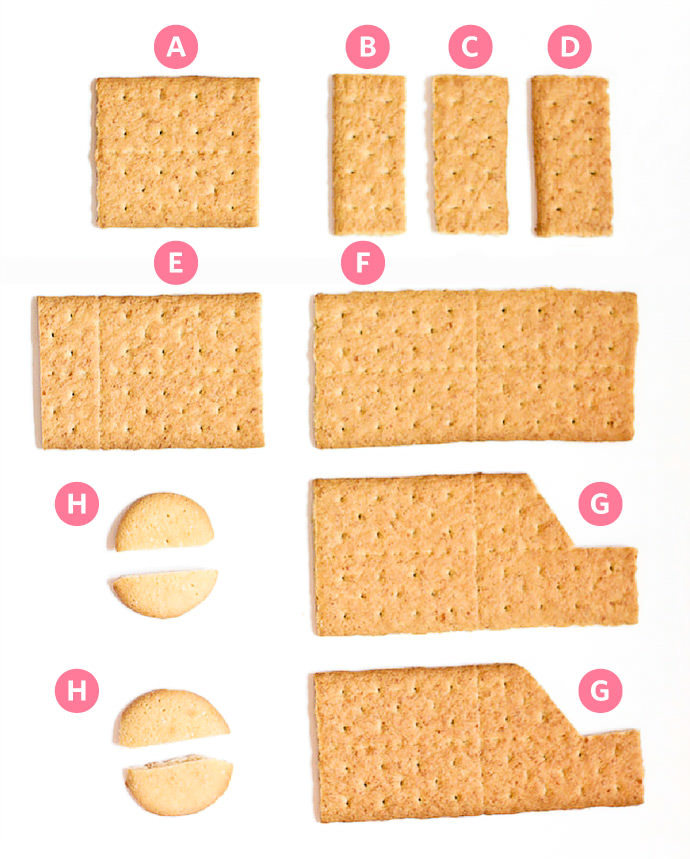
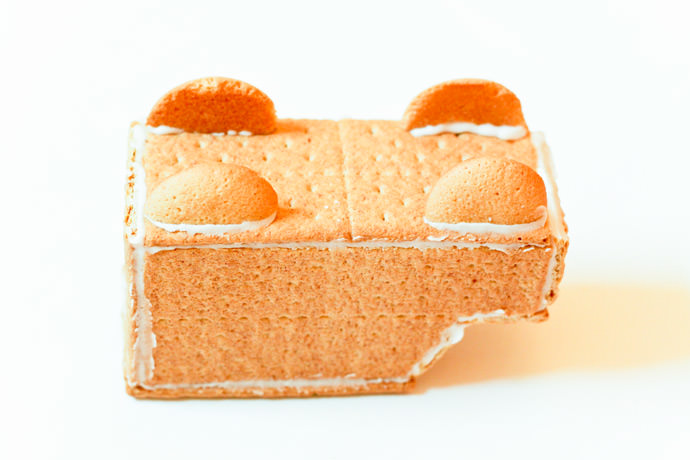
Cutting the graham crackers & wafers:
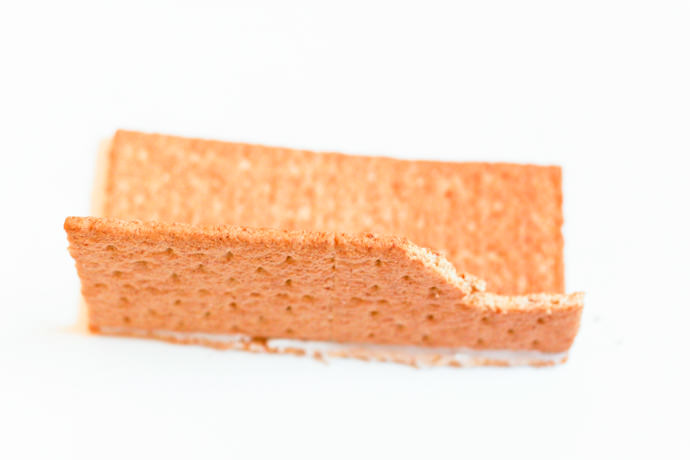
- Sides (G)
Using a sharp knife, take your first graham cracker rectangle, and from the middle of a short end, cut toward the center about 1 ¼”, or to the third row of “dimples”. Turn your graham cracker to the long side, and starting from the end of your first cut, make a diagonal cut toward the top of the cracker at about a 45 degree angle. Repeat this step on a second rectangle, but be sure to lay your first cracker over the second to use it as a template when you make the diagonal cut. You definitely want your angles to match perfectly!
- Back (A)
Cut one graham cracker in half, so that you have two squares. Set one aside as the back of your truck.
- Front (B,C,D)
Take the second square, and cut it in half using the perforations. Take another graham cracker, and cut one more quarter, using the perforations as well. You should now have 3 pieces, each a quarter of a rectangle.
- Roof (E) & Base (F)
Set aside two whole rectangles; one for the bottom of the truck, and the other will be cut later to create the roof.
- Wheels (H)
Now, cut both vanilla wafers in half and set aside.
Step 4
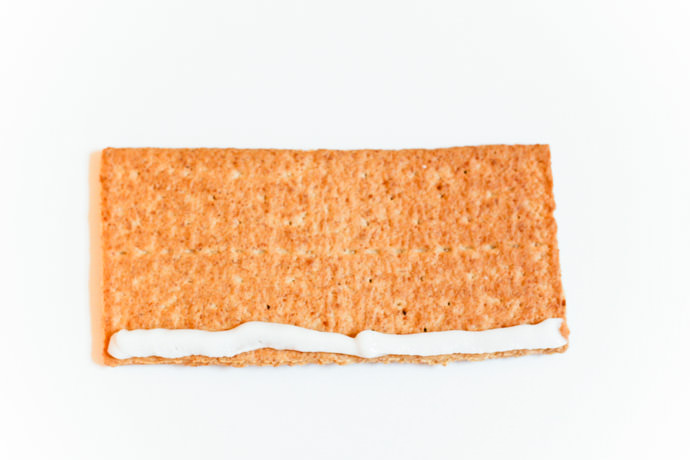
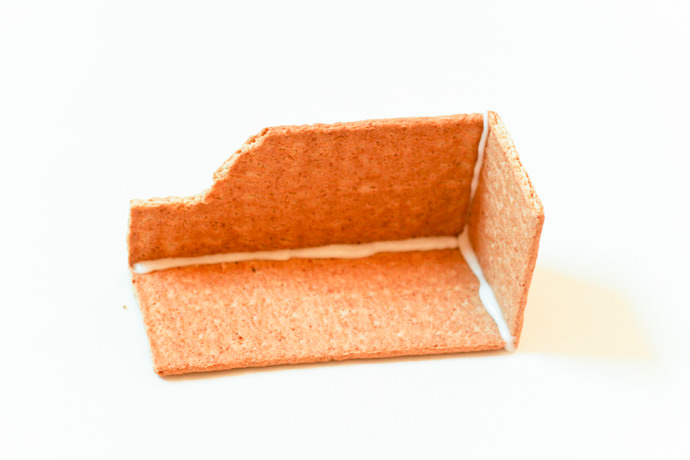
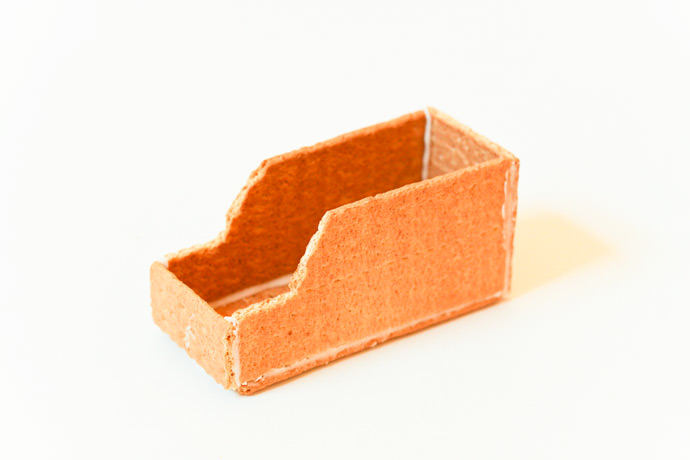
Take the bag of icing glue, and squeeze a line of frosting on one long side of your bottom piece.
Take one of your sides, and line it up with the frosting, adjusting it to make sure it is as close to the edge as possible, without hanging over. Always wipe off any excess frosting with a paper towel. Hold it in place, allowing it to dry enough that it will stand on its own. The square piece that was set aside for the back will NOT sit on top of the bottom cracker. It will be placed on the back edge of that cracker, and the back edge of the side. Hold the square up to the back to make sure it lines up perfectly, and trim any edges if necessary. Next, apply your icing glue to the two edges that will touch the square. Line the square up, and make any adjustments necessary to create a 90 degree angle with the back and side before the icing glue dries.
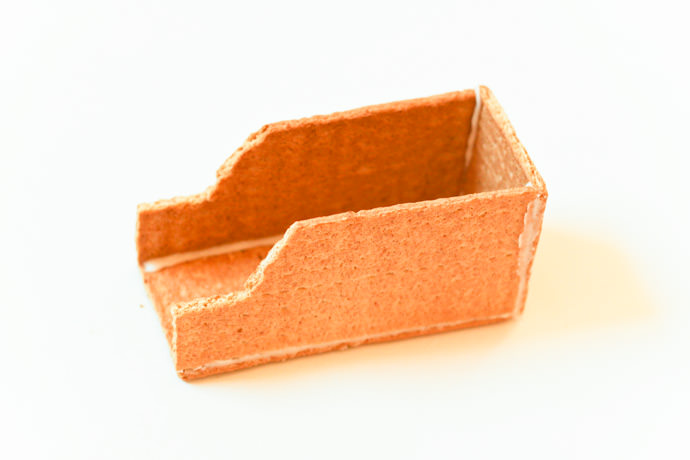
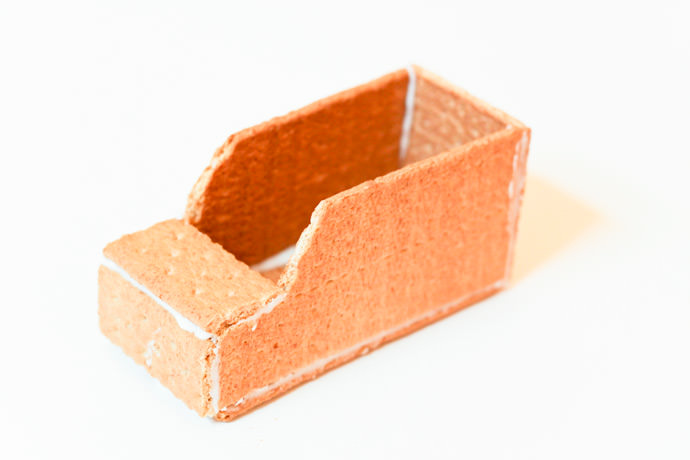
The bottom edge of the side will be placed on top of the bottom graham cracker. Squeeze a line of icing glue on each edge that your graham cracker side will touch, and attach the second side, making sure that it mirrors your first side.
Now you will need one of your quarter pieces for the front of the truck. Before using any icing, hold this piece up to the front, and either measure or eyeball how much you may need to trim off to make it line up perfectly with the two edges of your sides. Once you have trimmed it down with your knife, go ahead and attach it to the front.
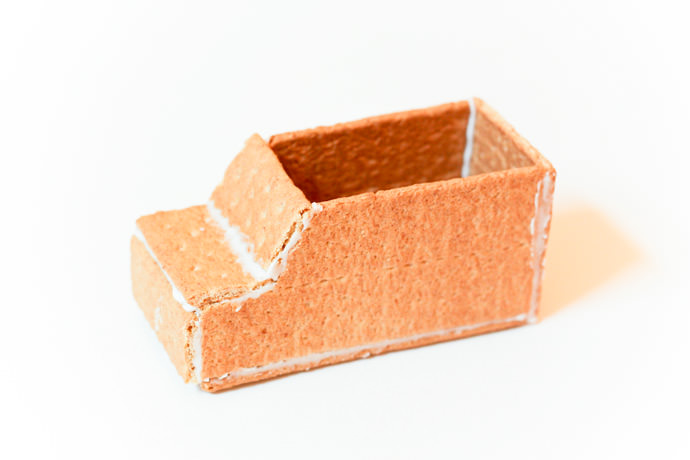
Repeat the previous step with the “hood” of the truck, using another quarter piece.
Once you have glued the hood, repeat this step again with the “windshield”, using your final quarter piece.
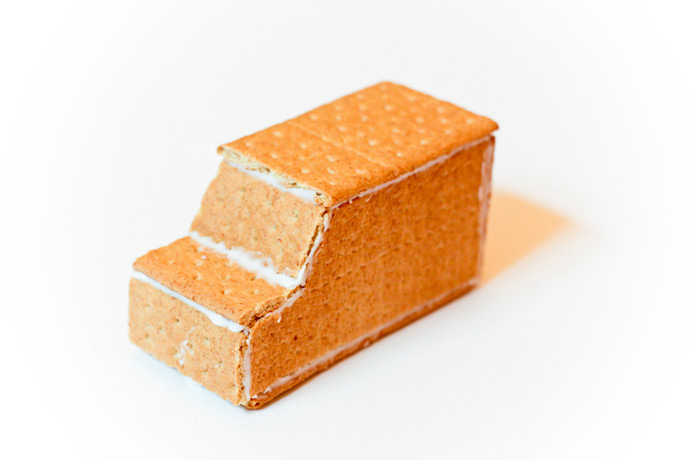
You will need to measure your final rectangle against the top of the truck, and cut it accordingly to fit on the four edges, creating the roof. Once you have glued it down, allow it to dry for several minutes, before flipping the truck over to attach wheels.
Once the truck has had time to dry, stand it on its roof, and apply icing to each edge of your vanilla wafer halves. Attach to each corner of the bottom of the truck, placing them close to the corners and edges, with the flat sides facing inward.
Step 5
Once the wheels have dried, you are ready to flip the truck over and begin the fun part…DECORATING! Get creative with your candy decorations, but I do have a few hints and ideas to get you started!

Frosting
You can use a can of store bought frosting, but I highly recommend stirring it vigorously, and even adding a few drops of water to thin it out. You can place it in bowls, and add food coloring.
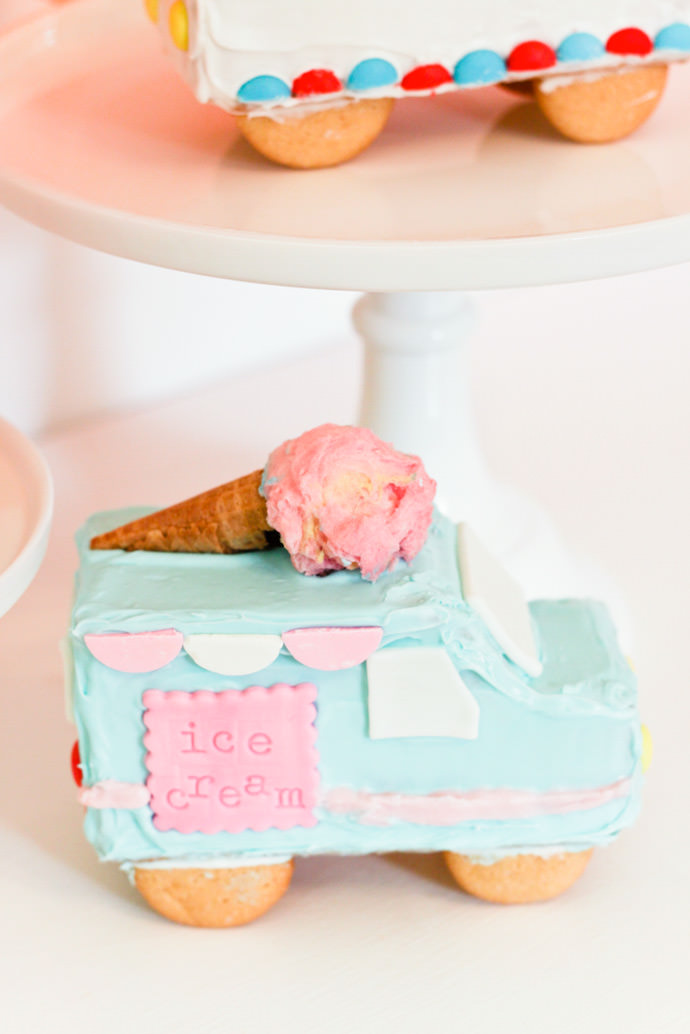
Fondant
I have to admit that I was intimidated by fondant, but it’s just as easy to work with as playdough! I rolled it out to a fairly thin layer, and cut windows for the truck. The back window measures a little over 1 ½ “ x 1”, the windshield is just under 2”x 1 1/8”, and the side windows are slightly over 1”x1” with angles cut to match the slant of the windshield. I also used fondant, a cookie cutter, and mini alphabet stamps to create an ice cream sign.
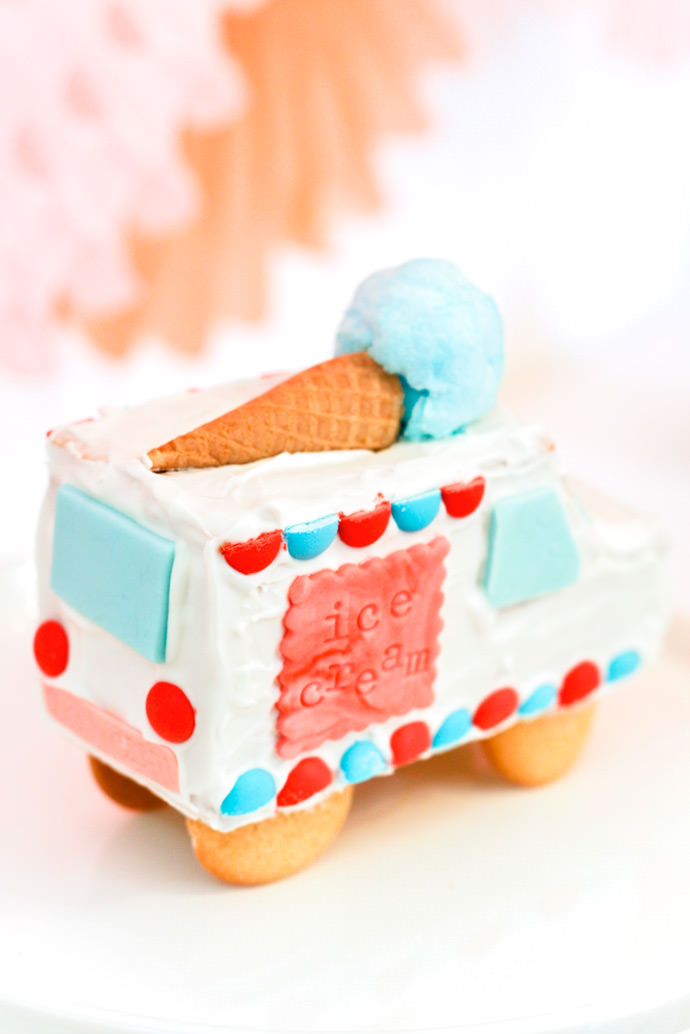
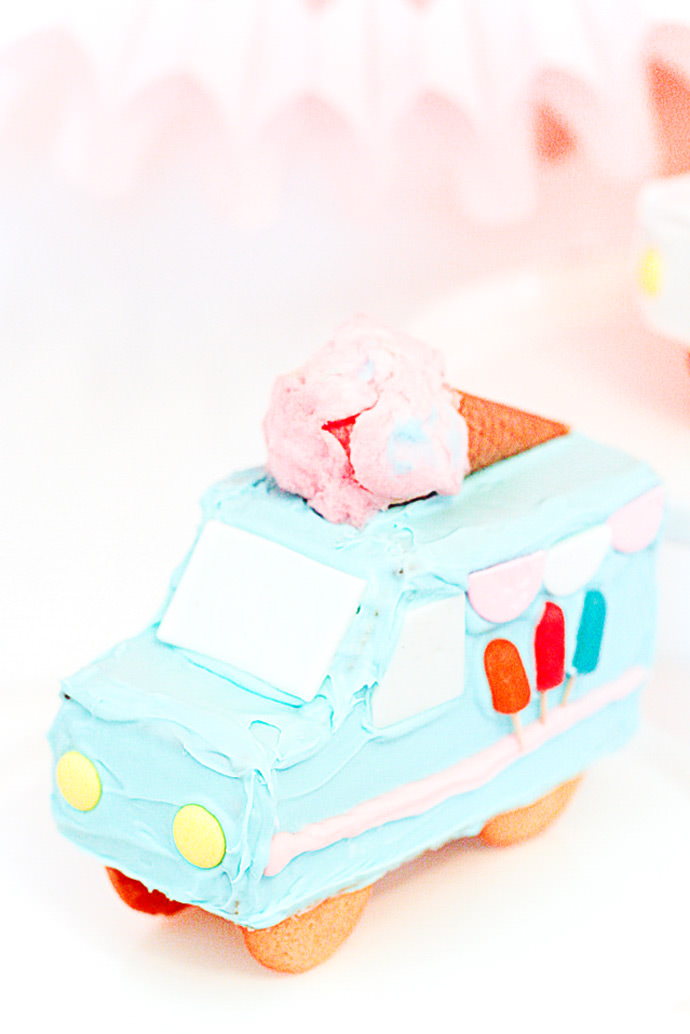
Headlights & Taillights
Use mega sour candy buttons for the head and tail lights. One package includes yellow for the front, and red for the back.
Scallops
Cut Necco wafers in half for the large scallops, and the mega sour candy buttons for the mini scallops. The wafers are a beast to cut without breaking them, so I recommend sawing with your knife on both sides, before pushing down for the split!

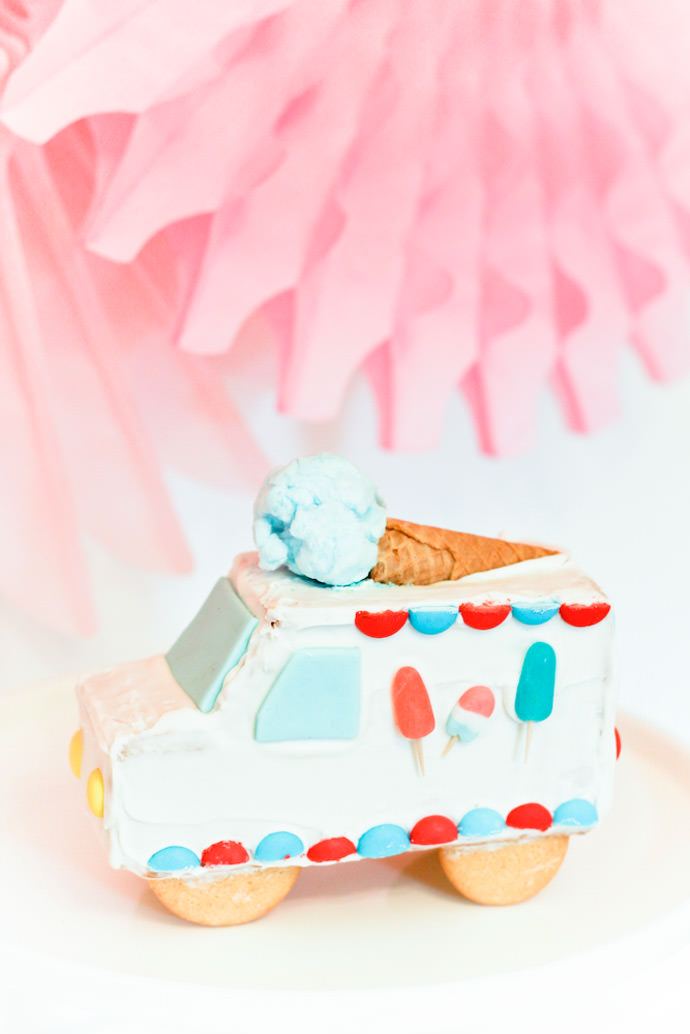
Ice Cream Cones
Cut off the top of an ice cream cone to shorten it, and add a ball of cotton candy for the ice cream. Attach it to the roof.
Popsicles
Cut toothpicks in thirds, and stick them in Mike and Ike candies to make popsicles. I made the red, white and turquoise Popsicle using fondant rolled in food coloring. You can use cupcake icing, or whatever you please to create the lines on the sides of the truck.
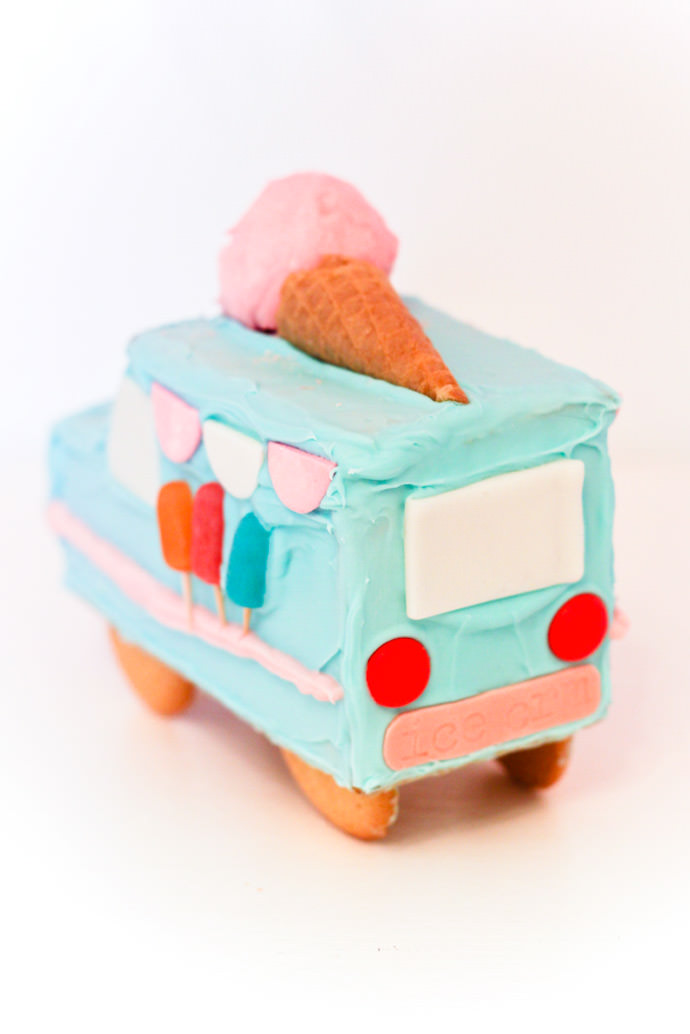
License plate
Using bubble tape gum and mini alphabet stamps, stamp “ICE CRM” into a strip of gum, then cut it into a rectangle.
Since I ate way too many sweets, next time it’s “tofu trucks.” Enjoy!