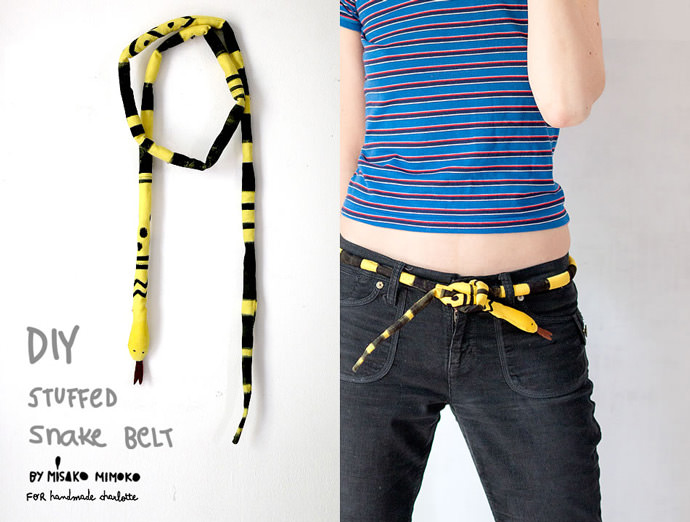
Let’s take a trip to the jungle by making a super simple snake belt! As easy as it is fun, this one is for the entire family. You (or older children) can help with the easy-sew portion of the project, and then the younger ones can go wild decorating! Don’t worry – this is the friendliest snake you’ll ever meet – and will look adorable wrapped around your little one’s waist.
Don’t be afraid to play around with different designs and colors according to your favorite kind of snake. To add an educational twist, you could even make several, kids all about identifying different species. Alright, you ready for an adventure?
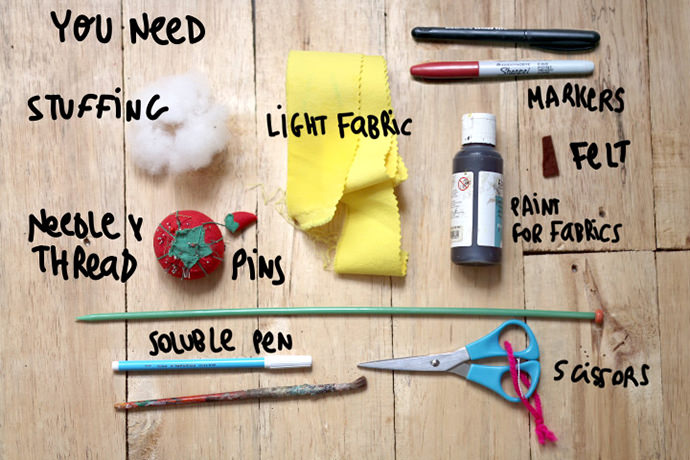
What You Need
- Printable template (download here)
- Light cotton fabric
- Felt (red, for tongue)
- Fabric paint or markers
- Paint brush (if using paint)
- Scissors
- Water soluble marker
- Sewing machine
- Needle and thread
- Knitting needle or wood stick
- Pins
- Polyfill stuffing
How-To
Step 1
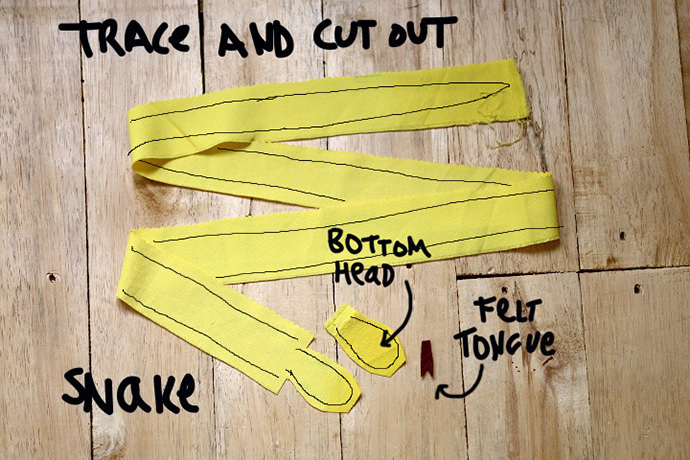
Download, print, and cut out templates. Choose a lightweight fabric for this project – the lighter and thinner your fabric is, the easier it will be.
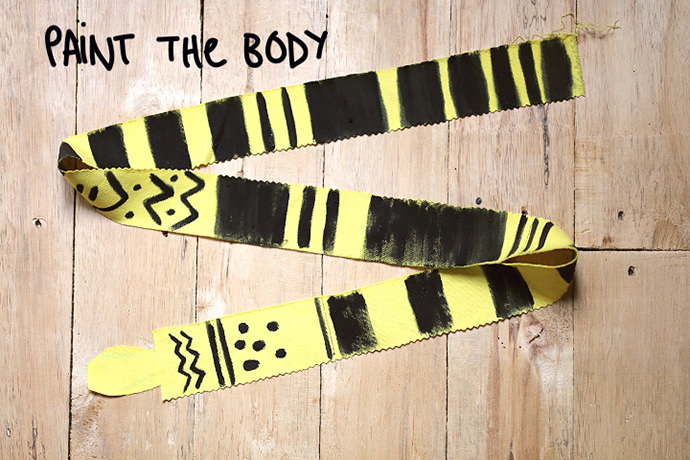
Cut a rectangle (approx. 53 inches long; 2 inches wide). Using your marker, trace the snake head onto one end, then keep tracing the body down your strip of fabric (as shown above), leaving the last 6 inches or so for the tail. From there, simple make your body shape narrower and narrower until the lines meet and the tail is formed.
Cut out the back head piece from the template and trace it onto the same fabric. Trace and cut out the snake tongue from felt.
Step 2
Here’s the fun part! Paint stripes, circles, and zigzags to get create a tribal pattern all along the body.
Step 3
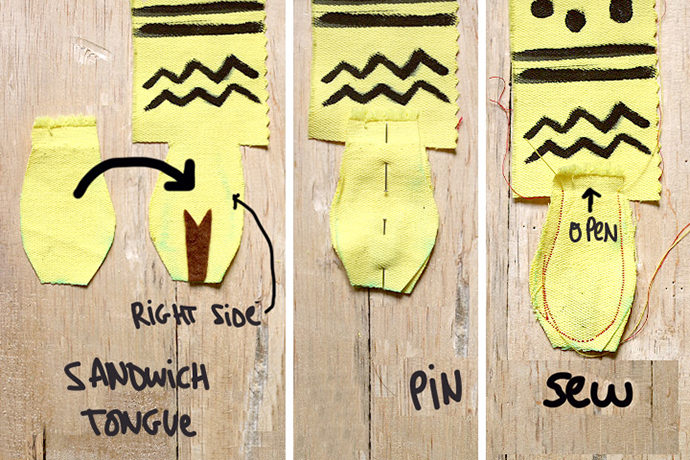
Set the felt tongue in place, sandwiched between the two head pieces. With your needle and thread, stitch around the head, making sure to also stitch the tongue securely in place.
Step 4
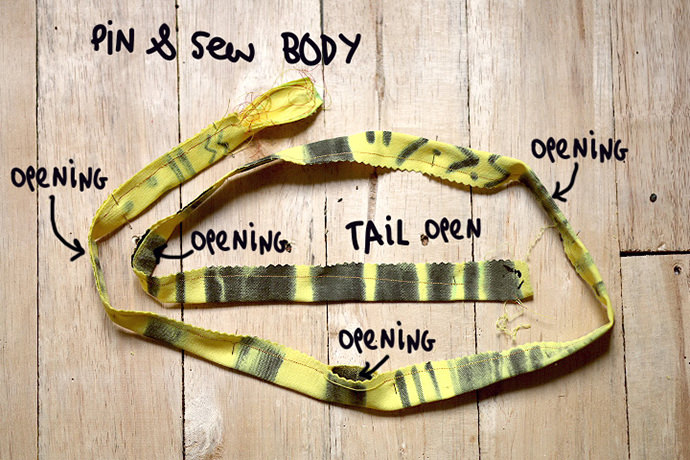
Fold the fabric in half length-wise. Pin and sew down the tube. Leave both ends open and several 1.5’ openings along the tube (so that you can easily fill it with stuffing when time).
Step 5
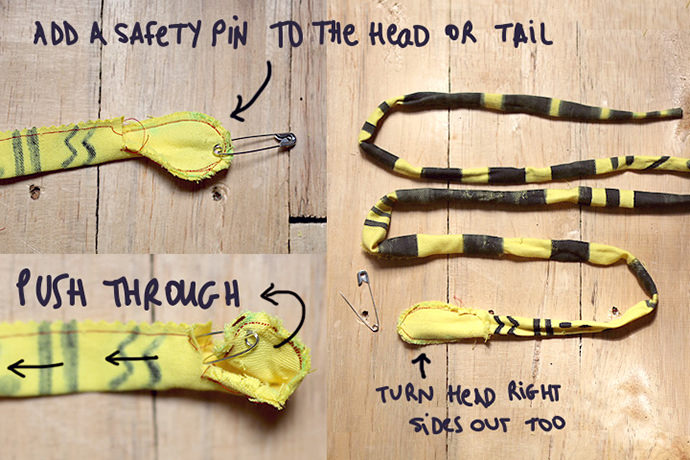
Turn the tube right-side-out. This is most easily done by clipping a safety pin on one end (head or tail) and pushing it through until you reach the opening on opposite side.
Be sure to turn your snake’s head right-side-out, too.
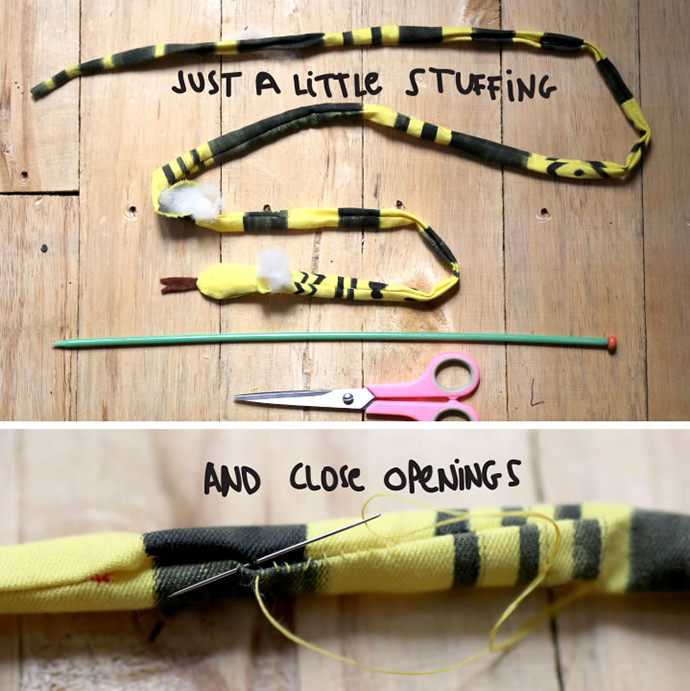
Step 6
Stuff snake’s body with polyfill (just a little – you still want the snake to be flexible enough to wrap around and use as a belt). A knitting needle or wooden stick will help this process. After filled with the desired amount of stuffing, stitch close all openings.
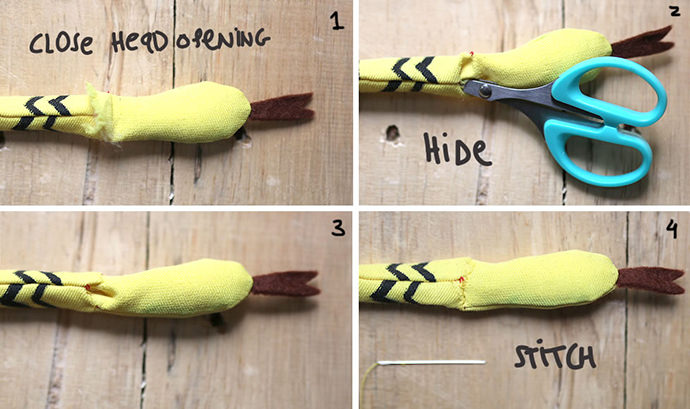
Step 7
Tuck the end of the back head piece inside the body and stitch it into place.
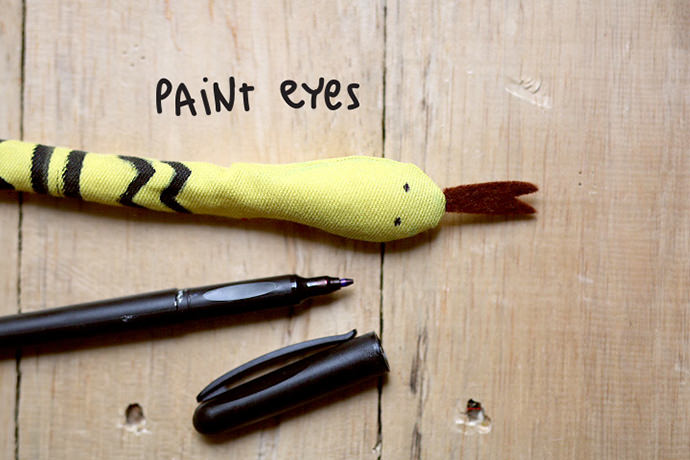
Step 8
Paint or draw two little eyes and say hello to your new slithery sidekick!

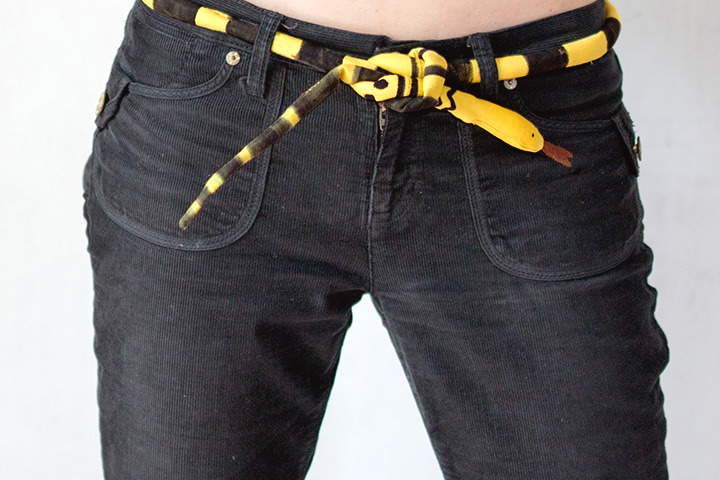
Use magic powers to enchant your snake and wrap it around your favorite trousers or dress. Tie a double knot with the head and tail and get ready to embark on your next big adventure!
Happy Safari!