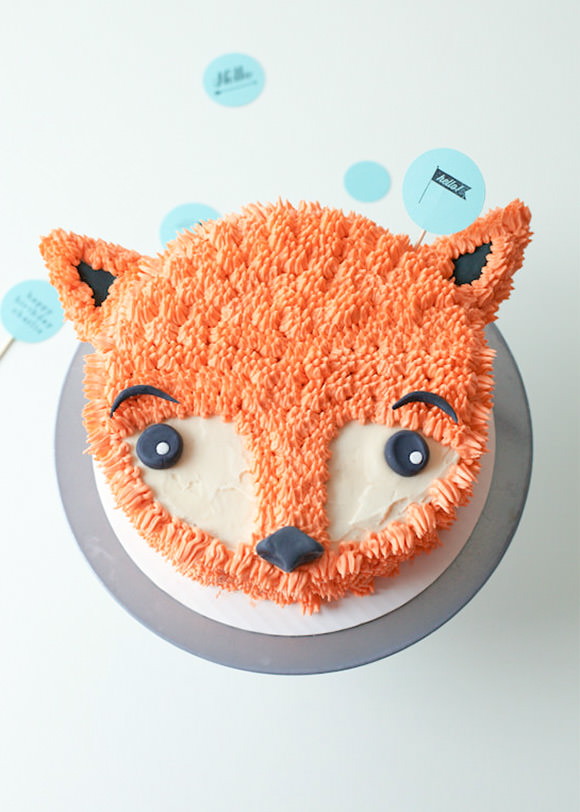
This sweet and friendly fox cake is perfect for your little one’s next birthday. It can fit into so many themes, including a cute woodland party, a Fantastic Mr. Fox movie night, or a forest friends fete. Roll up your sleeves and get your piping bag ready—it’s orange fur time!
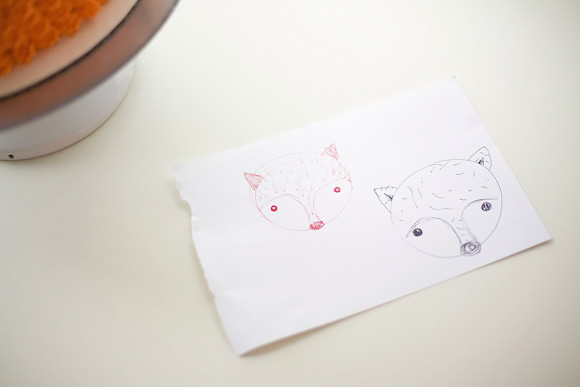
Note: Often I will make a drawing of what I imagine the final cake to look like. This helps me in creating the finished product. You can always refer to your computer screen for a picture of this fox cake, though!
What You’ll Need
- A baked and cooled 2-layer cake of your choice (I used an 8-inch vanilla cake)
- Offset metal spatula or butter knife
- Piping bag fitted with a large multi-opening tip (I used a Wilton #233)
- Wooden BBQ skewers
- Gel food coloring in orange
- Bench scraper tool to smooth your buttercream (optional)
Ingredients
- 5 cups of vanilla buttercream or 3 cans of frosting
- 4-inch ball of white fondant
- 3-inch ball of black fondant
- A small amount of cornstarch for working with fondant
Step 1
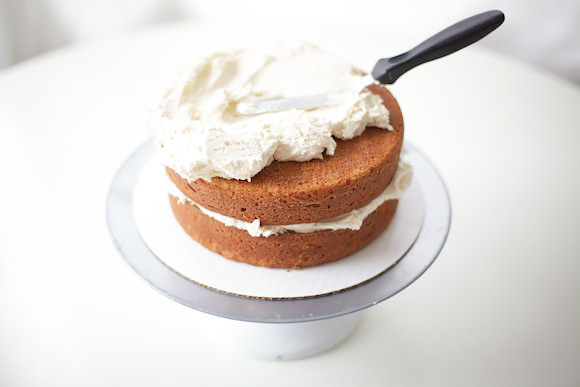
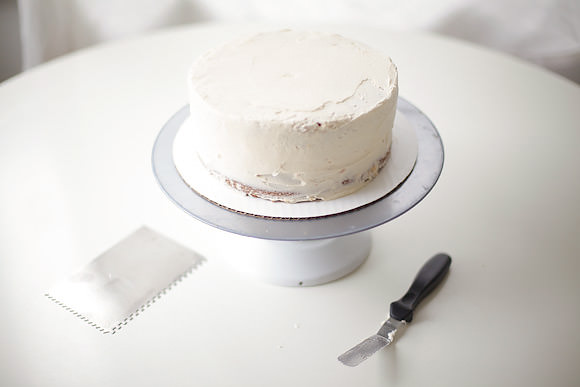
Begin by filling and frosting your baked and completely cooled cake with plain white vanilla buttercream. Using a bench scraper tool or your spatula to ensure the top of your cake has a smooth surface, as part of it will be exposed!
Step 2
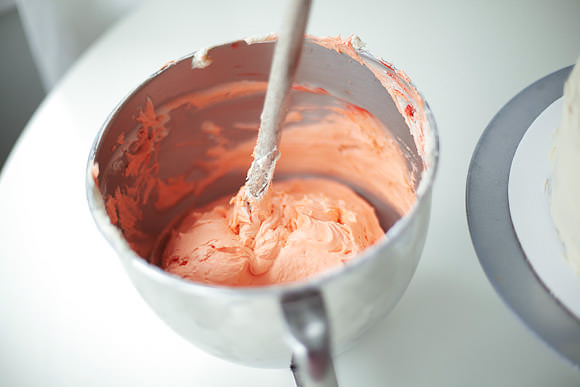
Tint the remaining buttercream orange. You can make it as light or vibrant as you like—gel color is potent, so start with a smaller amount and add more as needed.
Step 3
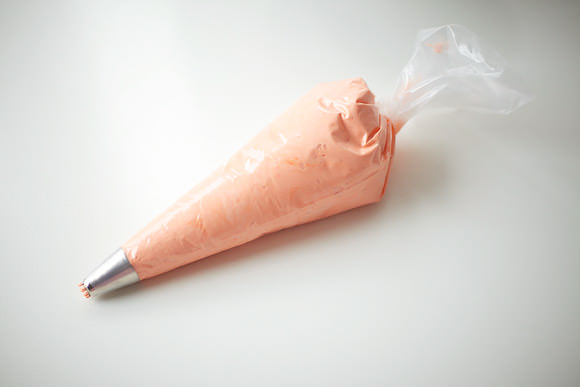
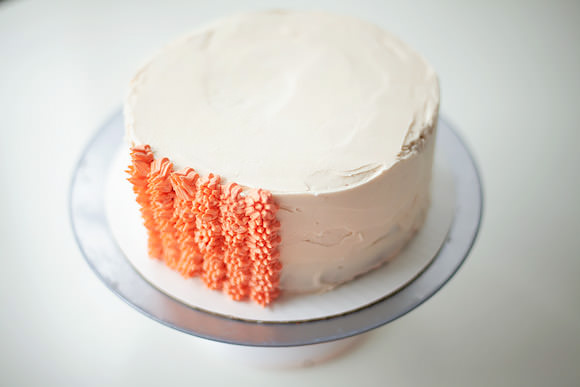
Load your orange buttercream into your piping bag fitted with the multi-opening tip. Starting on the sides of the cake, begin to pipe your fox “fur.”
Step 4
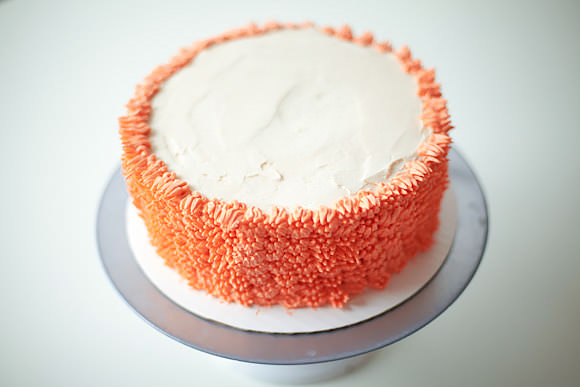
Continue piping all around the sides of the cake.
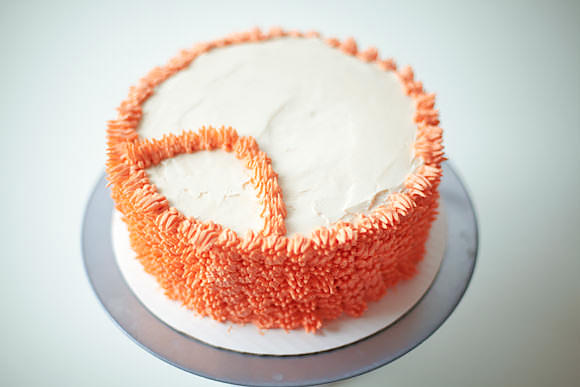
Step 5
On the top, imagine the cake to be a fox face that you are staring down at. Begin piping at his chin and work your way upward in a curved line.
TIP: If you like, you can use a toothpick and poke a dotted line into the white buttercream as a guide for your orange buttercream piping.
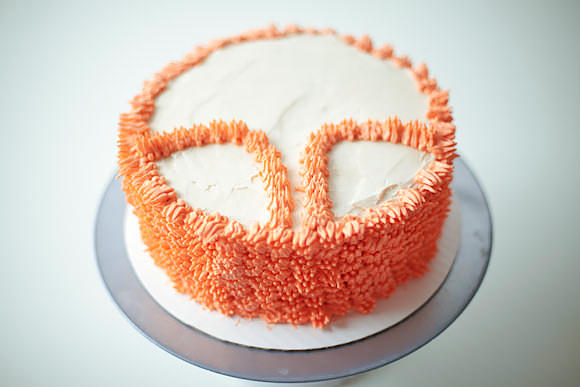
Step 6
Using your piping bag, pipe a mirror image of the curved line on the other side of your cake face.
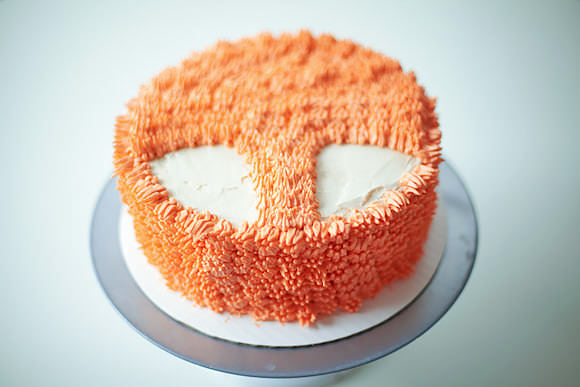
Step 7
Now, continue piping and fill in the rest of the cake as shown above, leaving the fox’s cheeks as plain white vanilla buttercream.
Step 8
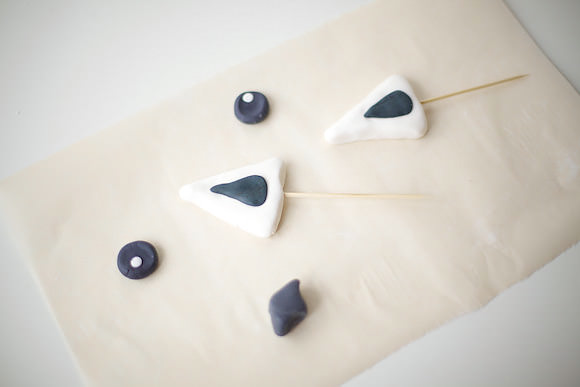
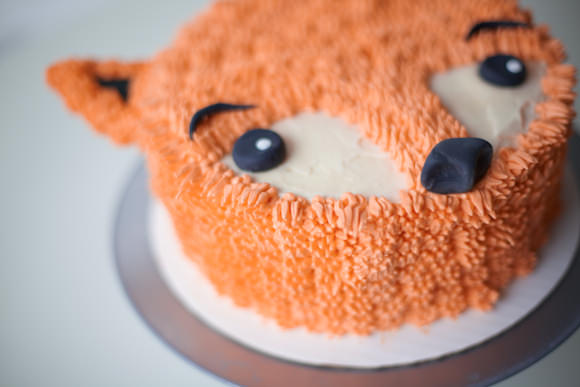
Make your fondant accent pieces! Two black flattened circles for the eyes, a black fondant nose, and white fondant triangles for the fox’s ears (you’ll be piping over the ears with more fur). Cut a wooden BBQ skewer in half, and insert a skewer into each ear. Using a tiny amount of water, adhere the black triangle “inner ear” on top.
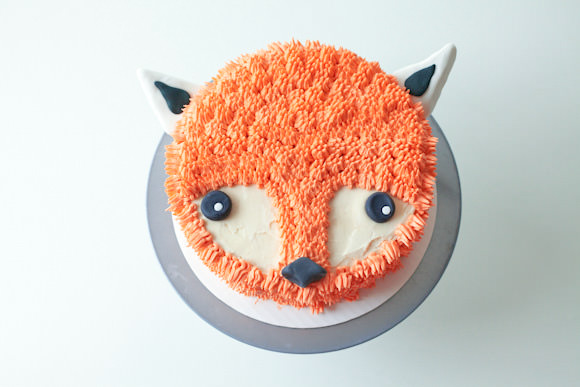
Step 9
Place your ears into the sides of the cake, gently press the black nose into the buttercream, and lightly press the eyes into the white part of the fox’s face to adhere.
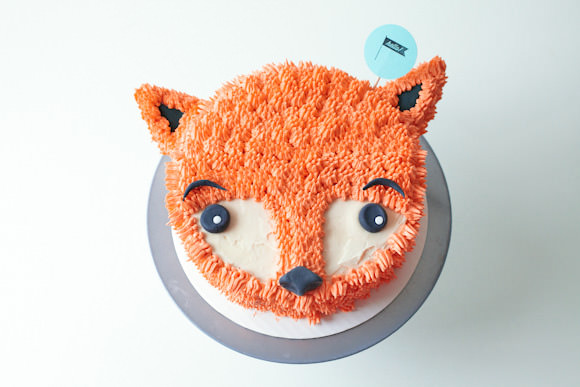
Step 10
Now, pipe more orange buttercream fur around his entire ears to cover up the white fondant, leaving the black “inner ears” visible. I also added some black fondant eyebrows for more character, and you can add a cute little message flag too, if you wish!
Just look at this cutie pie! I’m in love with his foxy cute face. Let him be the hit of your kid’s next super awesome birthday party! For a woodland themed party, I think these mushroom toadstool toppers would make a fine accompaniment on some cupcakes, too.
Hope you guys enjoyed this fox cake DIY. See you real soon with more cute cake insanity!