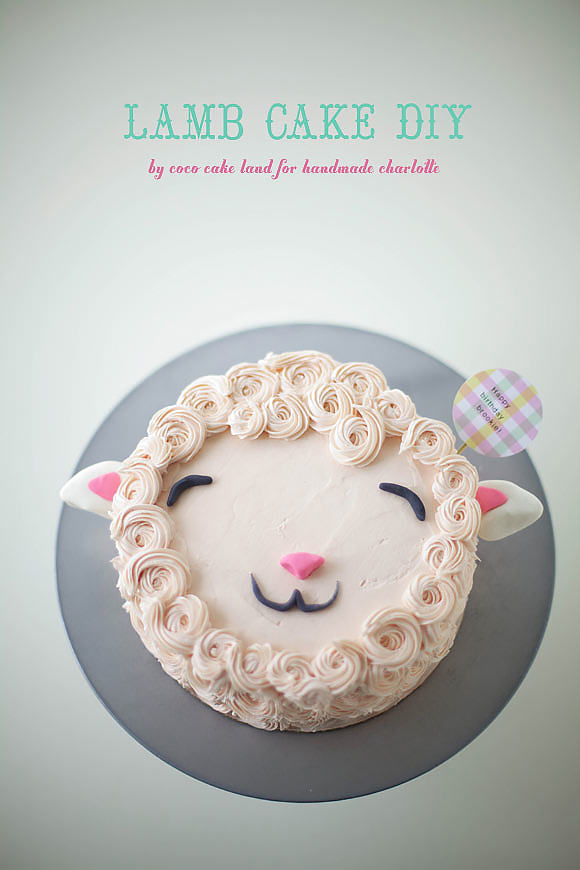
Hi everyone! It’s Lyndsay from Coco Cake Land, and I’m so excited to be a new contributor to Handmade Charlotte. I’ll be around twice a month with some super cute, fun cakes and other baking DIYs created just for you—sweet! So here goes my first post: my little pink lamb cake DIY. This lamb was based on my 2-year-old niece Brooklyn’s can’t-sleep-without-it stuffie named Lamba!
Don’t be intimidated by piping—you can practice first on a plate before trying it on the cake. Readymade fondant, gel food coloring, and piping supplies can all be found at your local craft superstore or online.
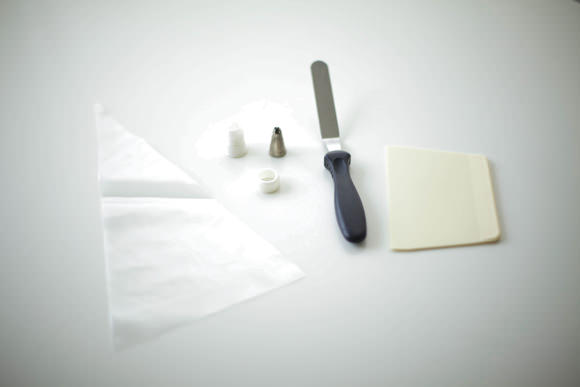
Left to right: piping bag with plastic ring, coupler and piping tip; offset spatula, bench scraper
What You Need
- A two layer, round cake recipe of your choice—baked from scratch or from the box.
- 4 cups of vanilla buttercream or 2 cans of frosting
- Pink gel food coloring
- An offset spatula or butter knife
- A bench scraper
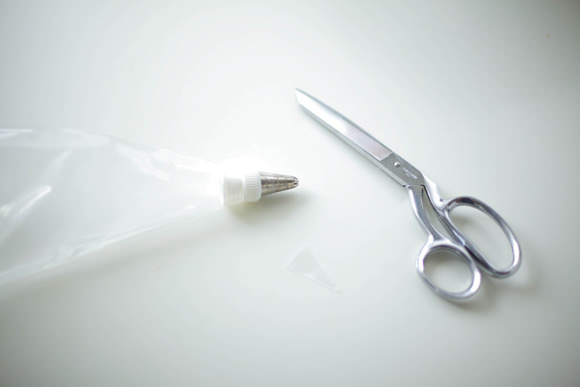
- A piping bag fitted with an open star tip—I used the Wilton No.22 Tip
- A 4-inch round ball of fondant
- Parchment paper
- Cornstarch for working with fondant
- A long wooden BBQ skewer, cut into two equal-length sticks
Step 1
Bake your cakes according to the recipe instructions. Let cakes cool completely on wire racks in their pans.
Step 2
Make your buttercream according to recipe instructions. Add a tiny bit of pink gel color (a little goes a long way with this stuff!) to tint it baby pink.
Step 3
Place a dab of buttercream on a cake plate or cardboard cake board.
Step 4
Carefully remove your first cake layer from your cake pan. Use a serrated knife to level your cake so the top is flat.
Step 5
Place the cake cut-side-up on the cake plate (the dab of buttercream acts as glue).
Step 6
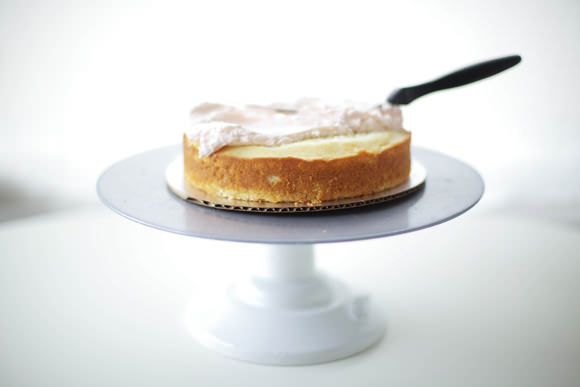
Using an offset spatula or butter knife, spread a nice creamy layer of buttercream on top.
Step 7
Remove your second cake layer from your cake pan. Level your cake layer as you did with the first layer. Place the second layer cut-side-down onto the first frosted layer. Begin frosting the top.
Step 8
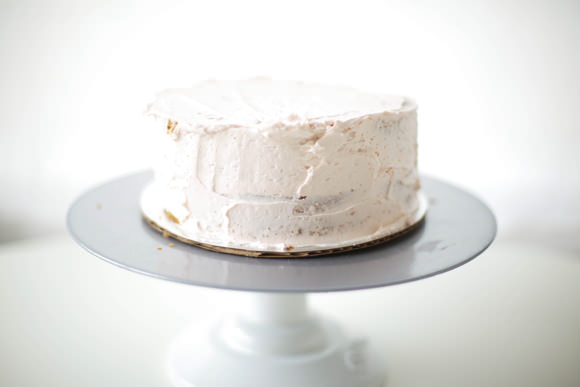
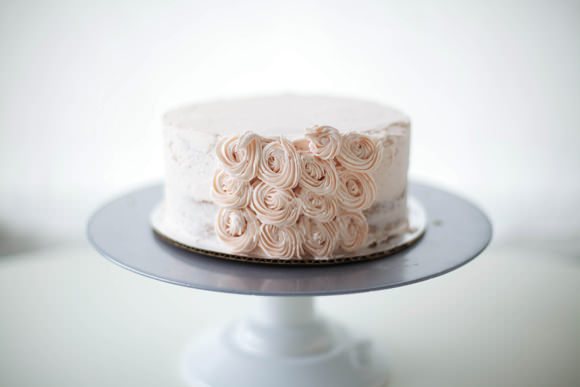
Continue frosting until the entire exterior is covered in buttercream.
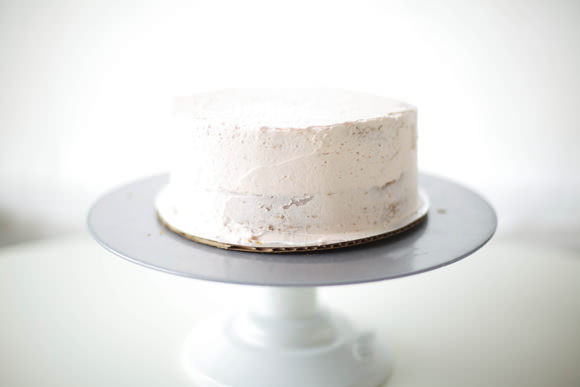
Step 9
Hold your bench scraper upright against the side of the cake and scrape all the way around to smooth out the buttercream frosting. Now you’re ready to pipe your sweet, rosy, swirly lamb “fur”!
Step 10
Using scissors, snip an inch off the pointy end of a disposable piping bag. Place the open star tip on top of the coupler and place inside the piping bag so the tip is sticking out of the end. Screw the plastic ring onto the coupler (over the outside of the bag) to keep the piping bag in place.
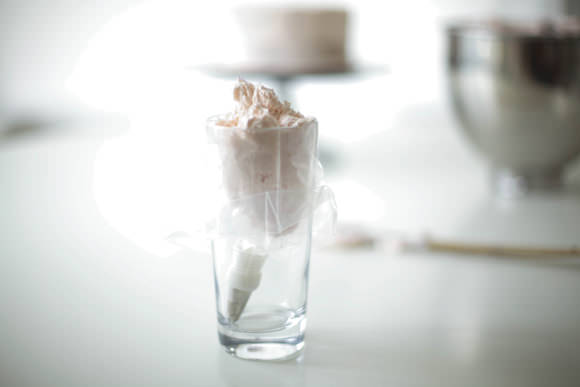
Note: I use this nifty trick for filling my piping bags: I fold my bag over a glass or yogurt container and use a spatula to fill the bag.
Step 11
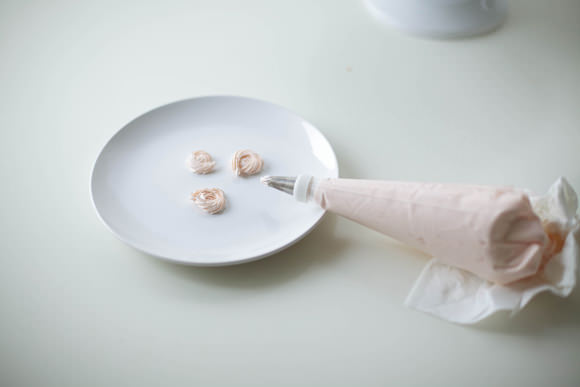
Ready to pipe! Yay! Practice your rosette swirl a few times on a plate if you like. Hold your piping bag upright and pipe starting from the inside out in a counterclockwise circle to create a mini rosette.
Step 12
Start piping your cake! I always start from the bottom and go up in lines.
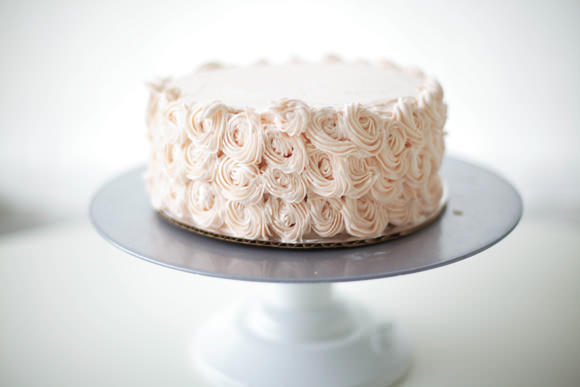
Keep going until the exterior sides of your cake are covered in rosettes.
Okay, now on to the face and the floppy lamb ears!
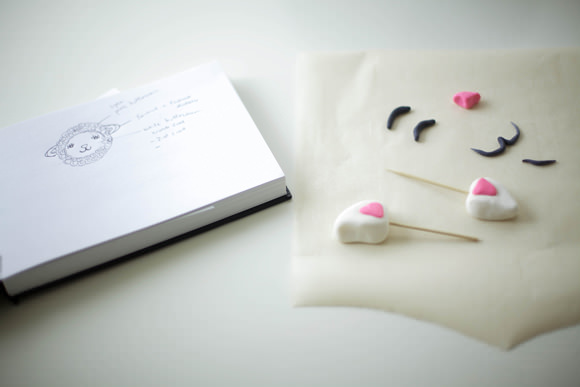
For the ears: Using your hands and a bit of cornstarch to avoid stickiness, mold two pieces of white fondant into ears. Color a little bit of fondant pink by kneading a tiny bit of gel food coloring into the white fondant, then make two tiny triangles for the “inner” ears. Adhere the pink triangles to the white ears with a drop of water. Using your wooden BBQ stick, cut into two. Place each ear onto a stick (kind of like a marshmallow).
For the nose: Use the pink fondant to make a little triangle and your fingers to make indents for nostrils.
For the sleeping eyes and mouth: Roll some black fondant in between your hands until it is thin and even. Shape it into lines for the eyes and mouth.
Make The Face!
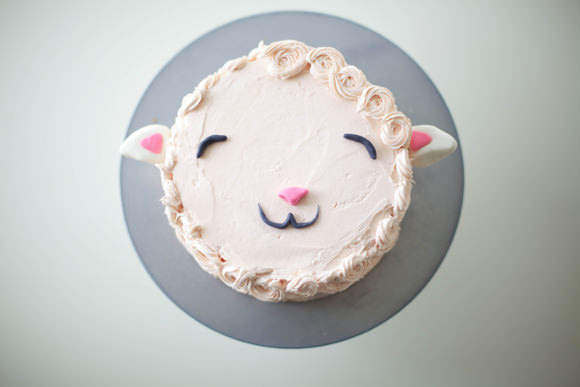
On the top of your cake, place your eyes, nose, and mouth. The fondant will stick to the buttercream so you needn’t worry about adhering it. Gently push the wooden stick ears into the sides of the cake for floppy lamb ears.
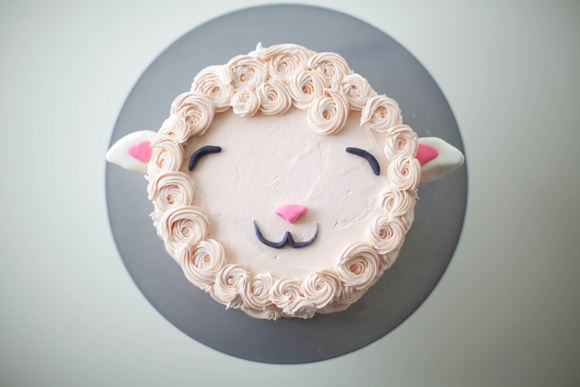
Finally, pipe around the edges to create some more “furry” rosettes, to frame in your lamb face. Ah, the cuteness!

Front view of your new pal Lamby!
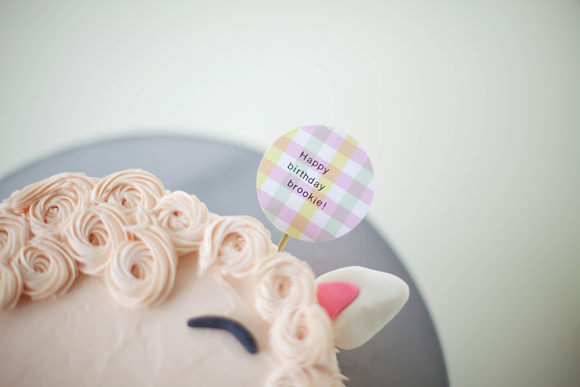
I always make a little custom birthday flag for my cakes: simply write a personal message on a piece of craft paper and tape it to a wooden BBQ skewer. For this one I used a 2-inch wide circle craft punch.
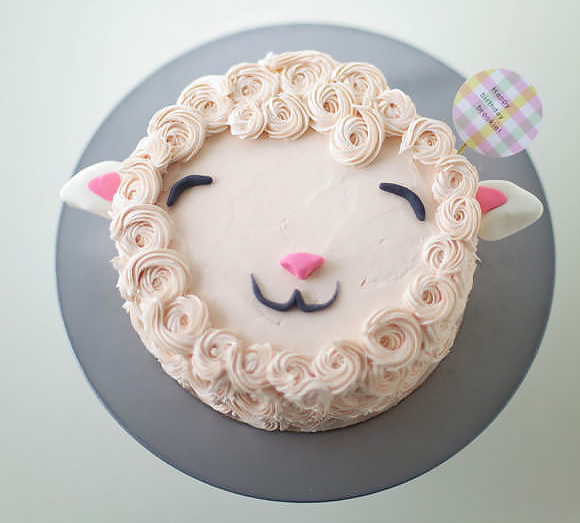
Hello, happy lamb! All ready to party. Hope you enjoyed this tutorial, see you again real soon!