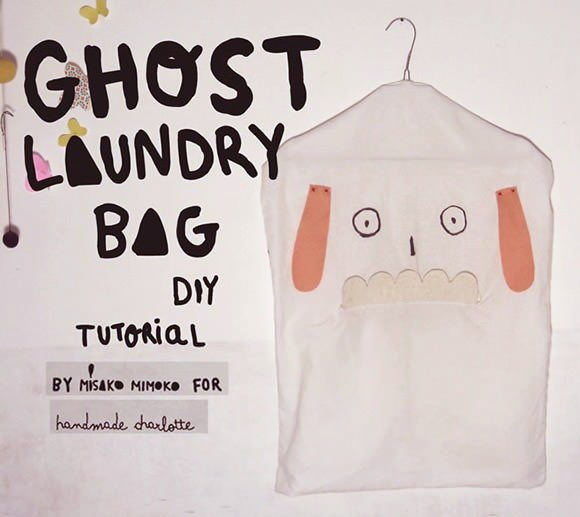
Tired of nagging your kids to pick their clothes up off the floor? Misako Mimoko is here to save the day by showing you how to turn old pillowcase into a super fun ghost laundry bag.
Break out the craft supplies, it’s time to give your old bedtime pal a new lease on life!
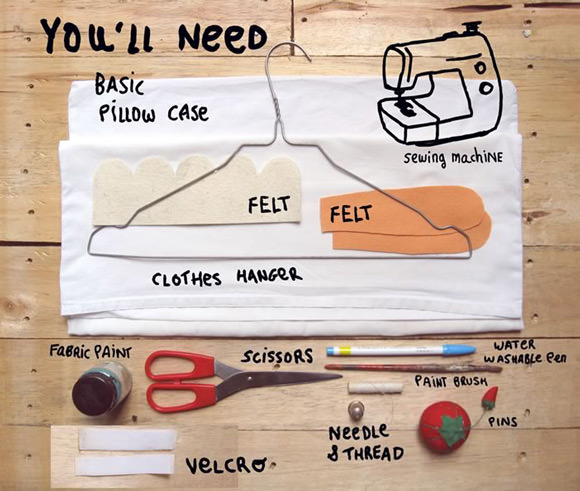
Materials
- Printable template (download here)
- Pillowcase
- Clothes hanger
- Felt
- Needle and thread
- Scissors
- Washable water-soluble pen
- Sewing machine (optional)
- Fabric paint
- Paint brush
- Velcro sew-on tape
Step 1: Print & Cut
Download and print the template. Cut out the template and use the pattern to mark two ears and teeth on the felt, using thicker felt for the teeth. Cut the felt pieces.
Step 2: Make The Mouth
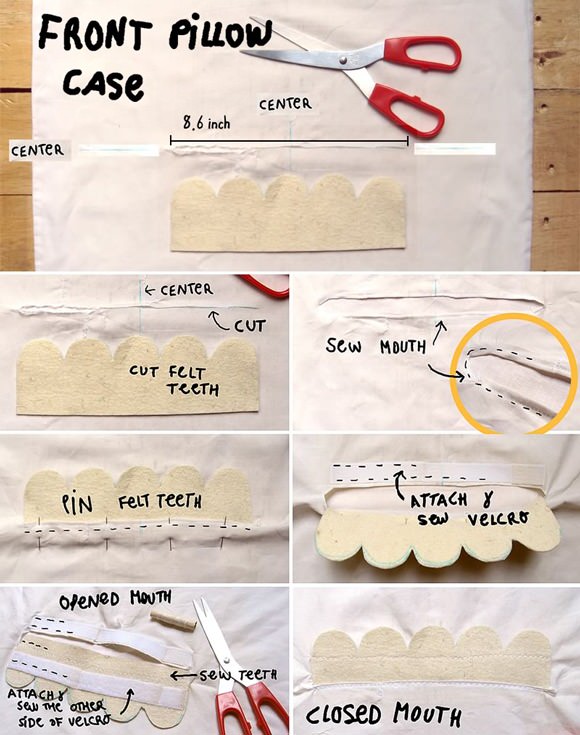
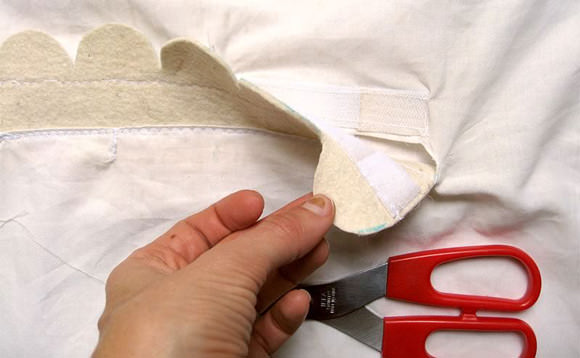
In the center of the pillowcase, cut a horizontal line the same length as the felt teeth for the mouth. Hem the cut edge and insert the felt teeth .8 inches deep into the mouth. Pin and sew the teeth to the bottom of the mouth.
Next, cut a strip of Velcro sew-on tape the same length as the mouth. Sew one half of the Velcro tape on the top of the mouth and the other half to the back of the teeth. Make sure the velcro overlaps.
Now you can open and close the mouth of your ghost!
Step 3: Add The Hanger
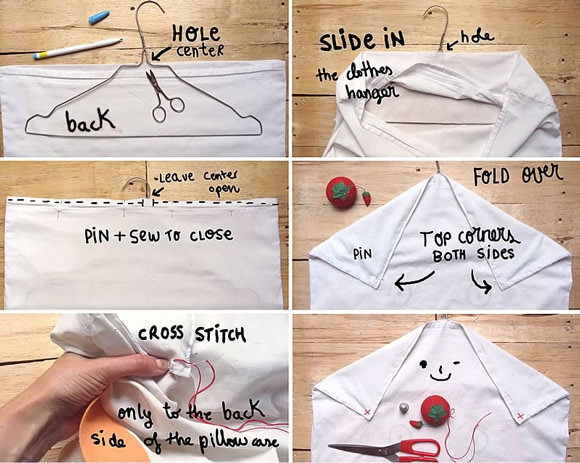
Turn back the pillowcase and place the clothes hanger in the middle of the top. Cut a small hole with your scissors.
Slide the clothes hanger into the opening and pass the hook through the hole. Close the opening of the pillowcase (make sure it is lined up correctly). Pin and sew, leaving the center open.
Following the shape of the clothes hanger, fold over the top corners of both sides. Pin and stitch the corners to the back of the pillowcase using two large cross stitches. For better stitching, place your hand inside the mouth.
Step 4: Give It A Face
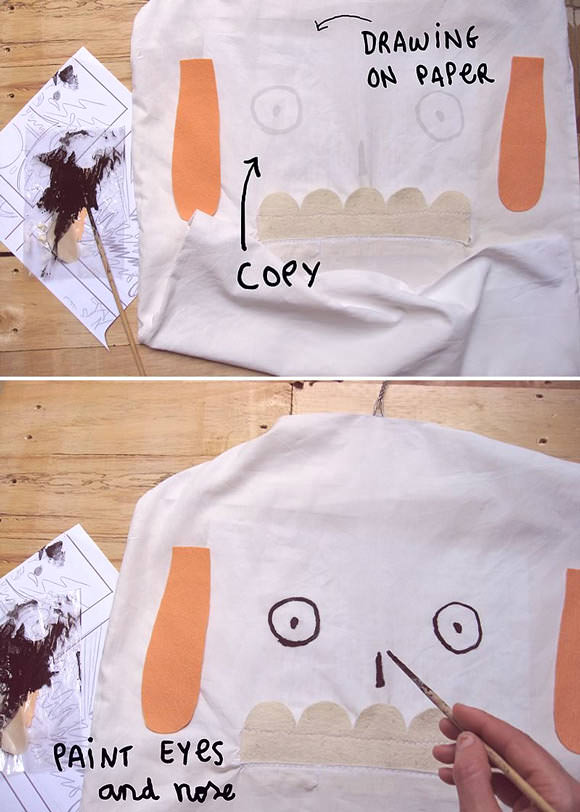
Paint the eyes and nose on the front of the pillowcase. If necessary, you can draw these on paper first and then trace through the fabric.
Step 5: Finish It Off With The Ears
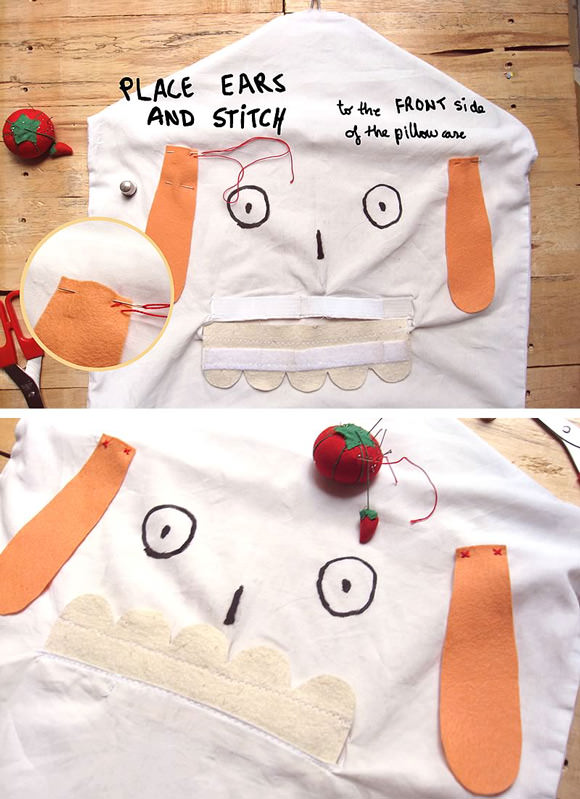
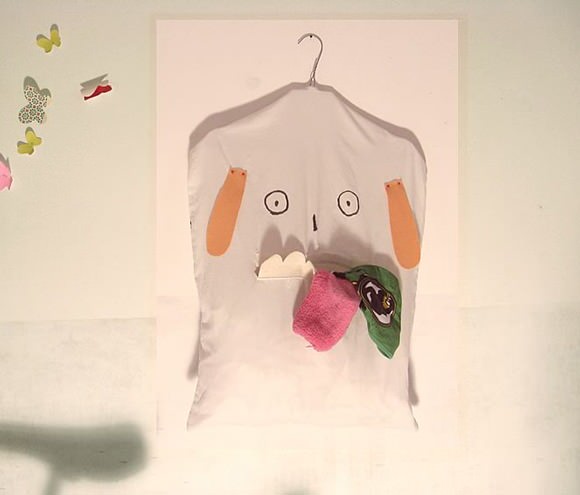
Place the ears wherever you like and stitch. That’s it! Just be sure to feed your spooky little friend a steady supply of dirty clothes, he gets cranky when he’s hungry…
Happy crafting!