Did you catch any of the Winter Olympics opening ceremony? We weren’t able to watch it live, but can’t wait to see some of the highlights and begin watching the winter games! To celebrate, we’re also sharing three fun and easy winter Olympics crafts that you can make with your kids.
Make mini Olympic rings to top cupcakes (we painted pasta again!), turn metallic kitchen sponges into gold, silver, and bronze medals, and make a mini hockey player poster! If you’re as excited about the Olympics as we are, these crafts will be a super fun way to keep busy over the coming weeks. Do you have a favorite winter sport? Let us know in the comments below, and keep reading to see the full instructions for each of these projects!
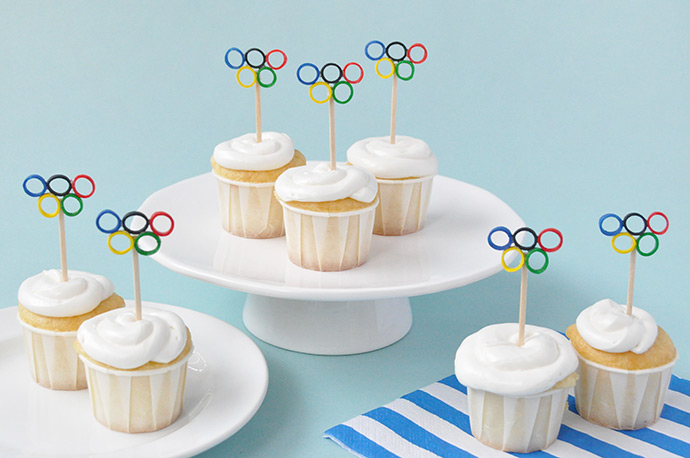
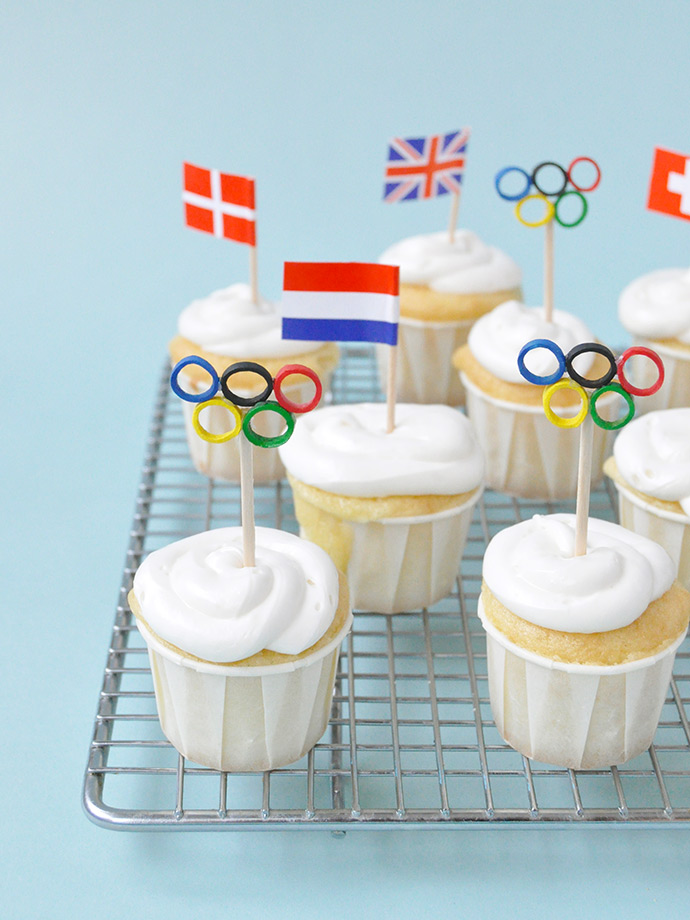
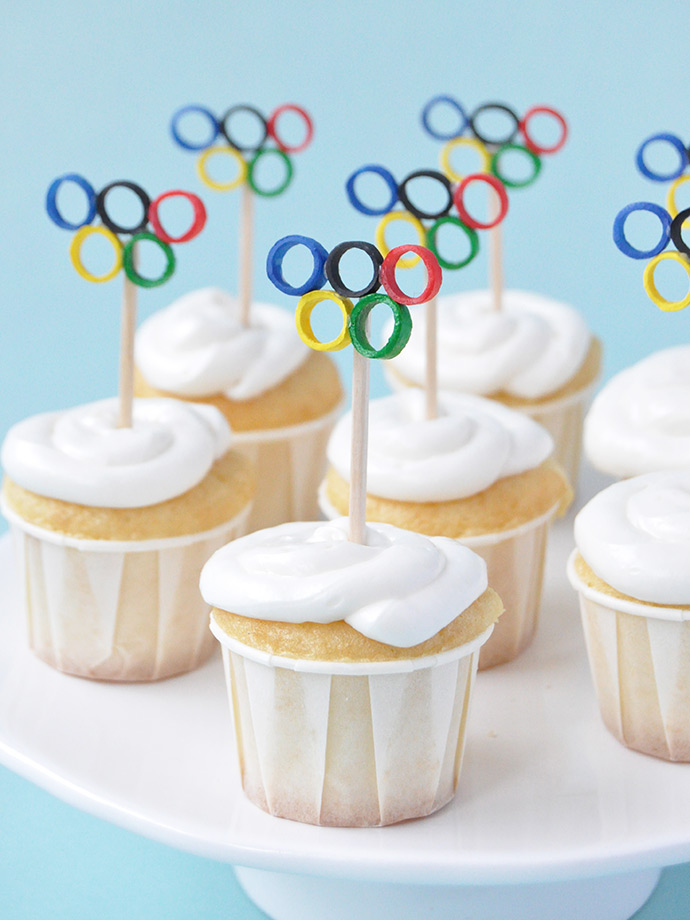
olympic cupcake toppers:
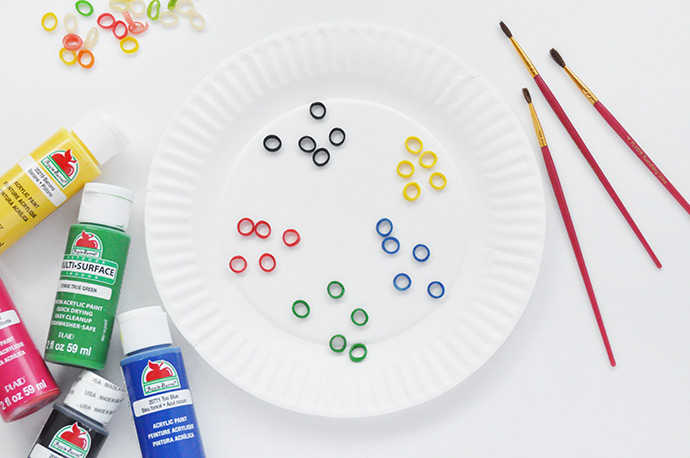
what you need:
- Apple Barrel Acrylic Paint Set
- Paint Brush
- Loop/ring shaped pasta
- Toothpicks
- White glue / hot glue gun
how-to:
Step 1
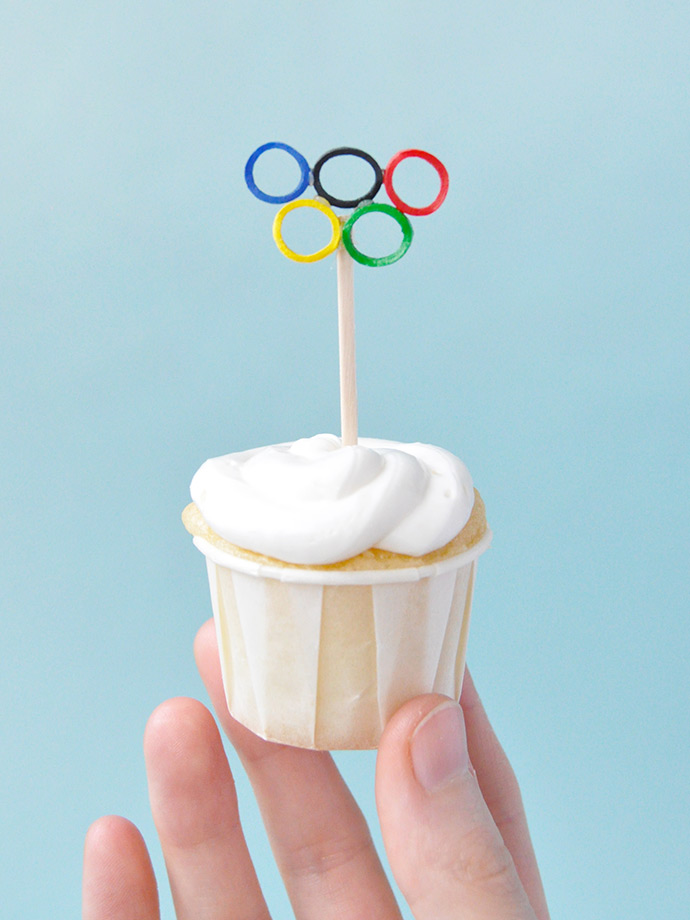
First you’ll want to paint your pasta! We got these ones at a specialty grocery store, but if you aren’t able to find something similar, you could use wire jump rings or a cut-up paper straw instead. Paint the pasta in black, red, green, blue, and yellow. Let dry.
Step 2
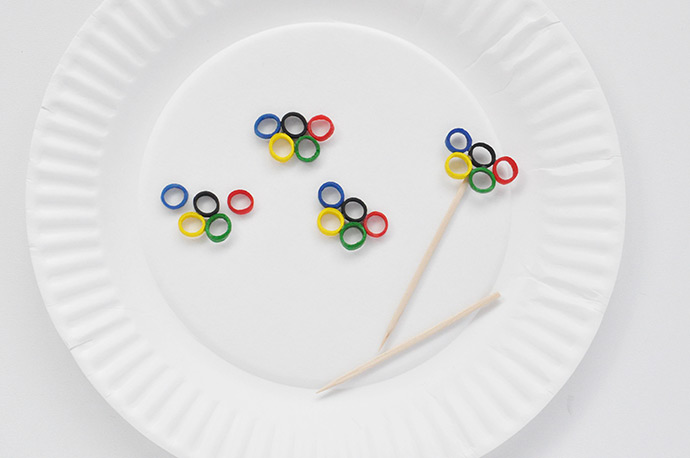
Once dry, arrange the painted rings into the correct layout and use tiny dabs of hot glue to attach the rings together, and then onto a toothpick. White glue also works, but you’ll want to let them dry on wax paper (or similar) so that if any glue leaks onto the surface while drying, you can just peel the rings off without much trouble.
Stick into mini cupcakes along with flag toothpicks – we got these from the dollar store.
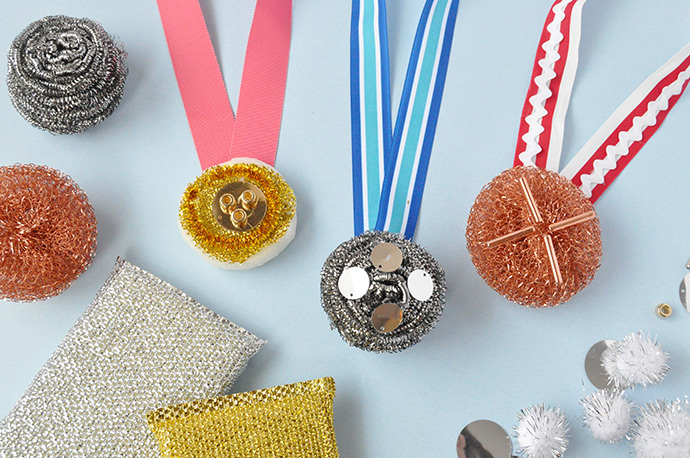
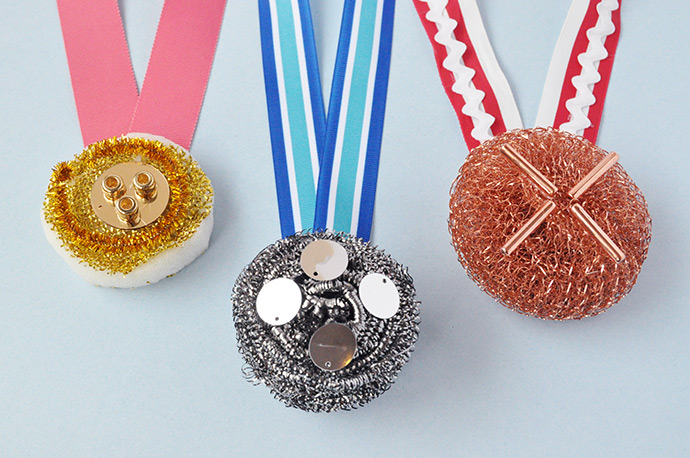
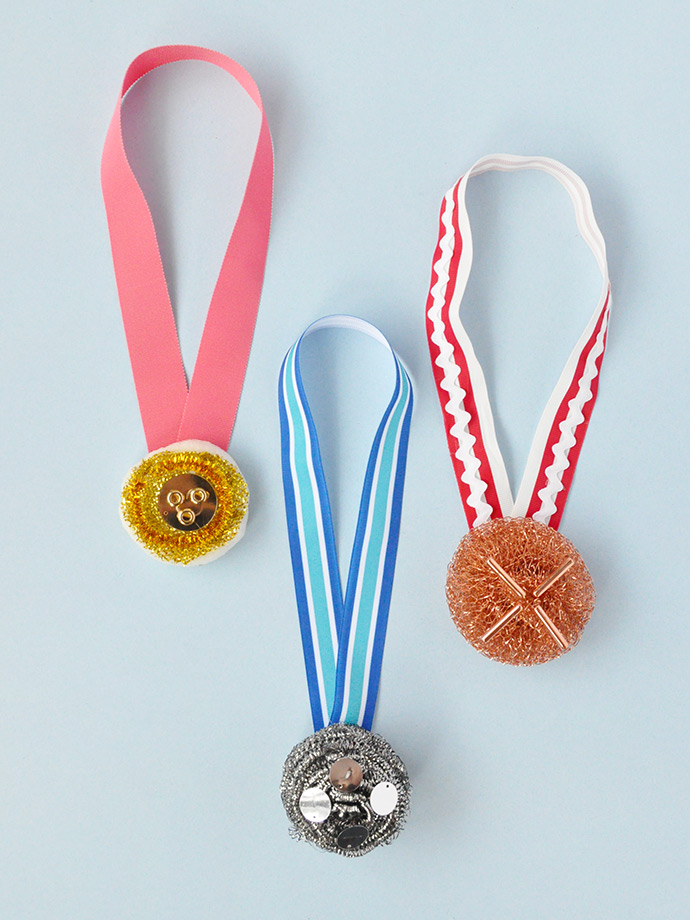
kitchen sponge medals:
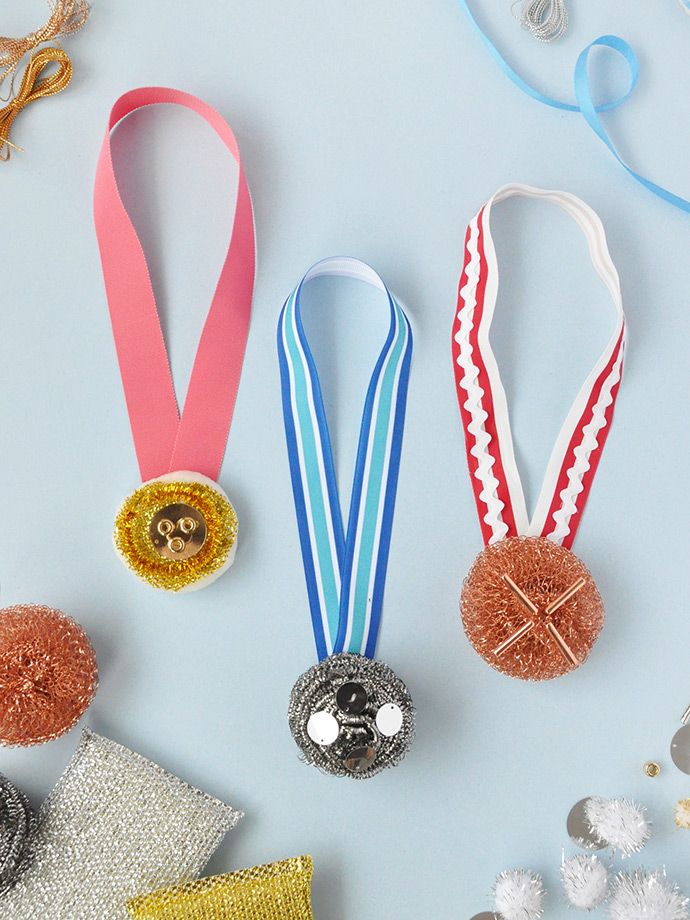
what you need:
- Metallic kitchen sponges (gold, silver, and bronze)
- Assorted ribbon
- Metallic sequins, beads, trim, etc (we used the Metal Mash-Up kit from Kid Made Modern)
- Hot glue gun
- Scissors
- Needle and thread (optional)
how-to:
Step 1
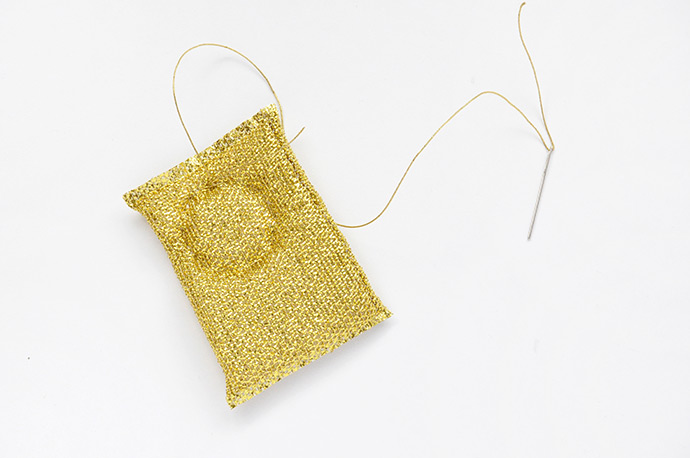
If you weren’t able to find circular metallic sponges in all shades (we found silver and bronze circles, but only golden rectangles) you’ll need to prep your sponge to be cut. The golden scrubbie layer is basically like a pillowcase over a regular sponge, so if we cut it into a circle as is, all the layers would just fall apart. To prevent this, we used a large needle and golden thread to stitch a quick circle through the sponge, attaching all layers together. Tie the thread securely and then use scissors to cut around the stitched circle you just made. Voila!
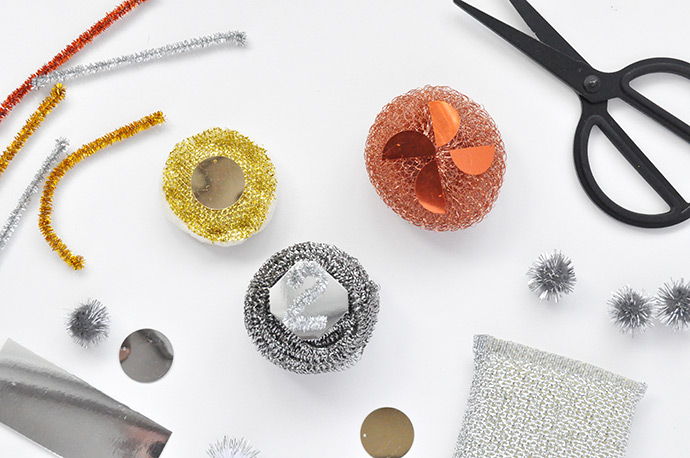
Step 2
Now that all your circles are ready to go, it’s time to decorate! Use metallic pipe cleaners, sequins, pom poms, whatever you have around, to add details onto the medals.
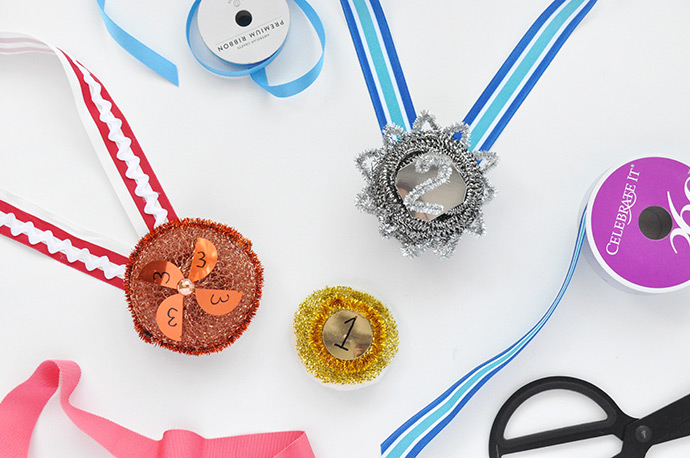
Step 3
Next, cut a piece of ribbon long enough to fit around your head and glue the two ends onto the back of the medal.
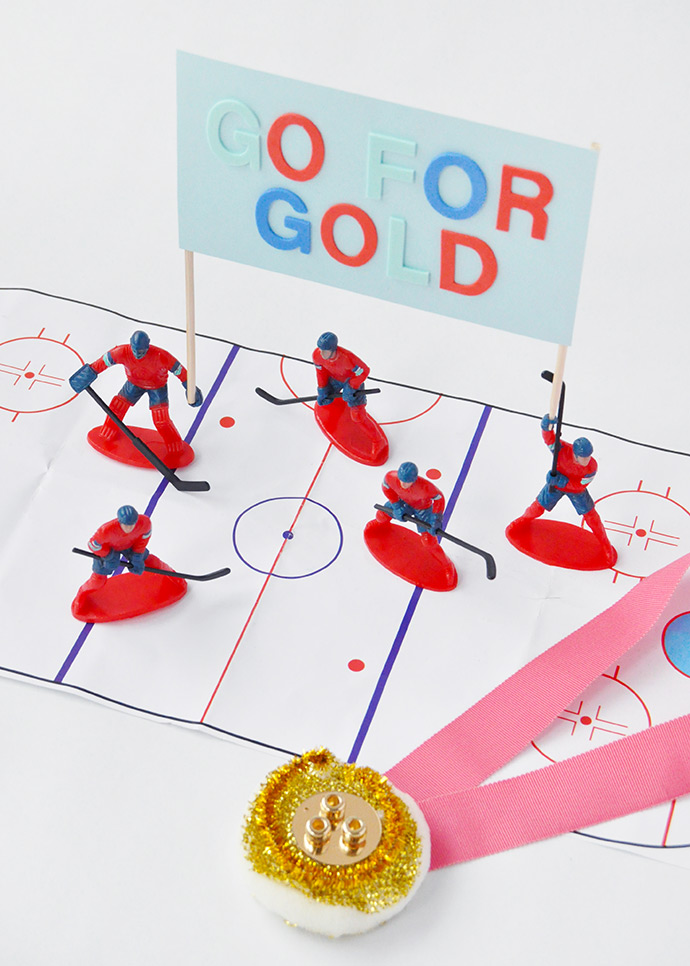
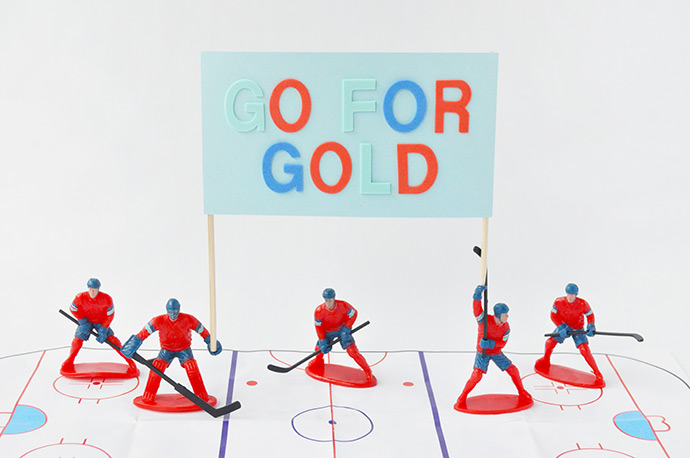
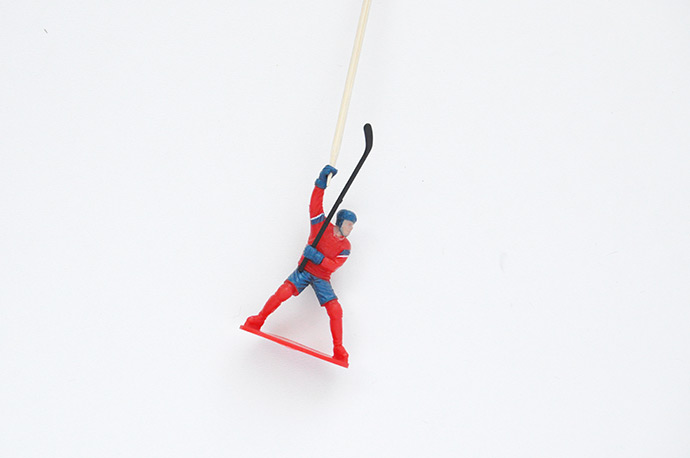
mini hockey poster:
what you need:
- Mini hockey player toys
- Wooden skewers
- Hot glue gun
- Cardstock
- Adhesive foam letters (or marker, stamps, etc)
- Scissors
how-to:

Step 1
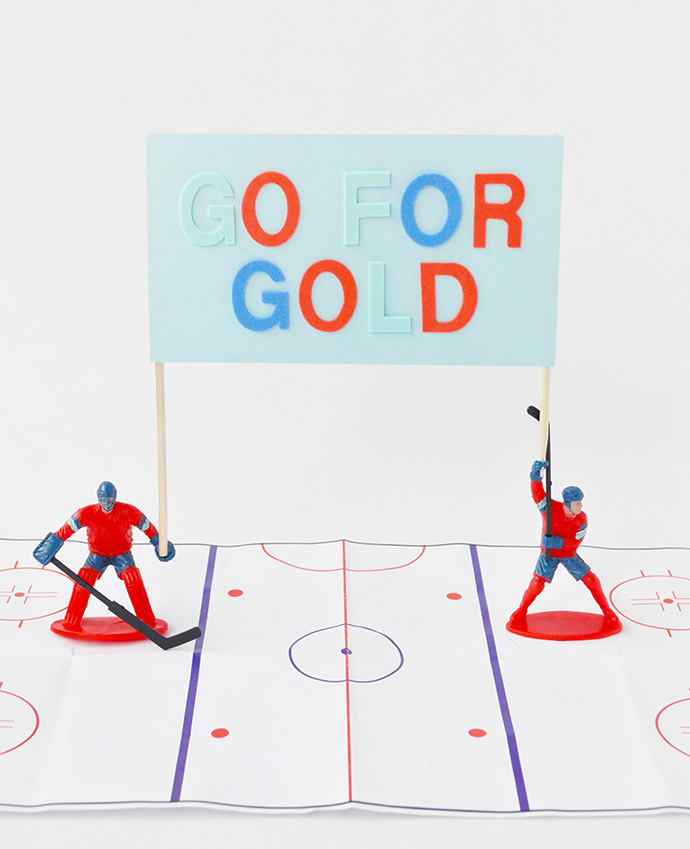
Start by attaching your message onto cardstock – we used adhesive foam letters to spell “Go for the gold” but you can write whatever message you like! Markers and stamps are fun ways to customize the signs as well.
Step 2
This step will vary a little bit depending on your mini hockey figures – we got ours from the dollar store (the party store might have them too!) and they each had little predrilled holes in their hands for the hockey sticks. We rearranged the player above so that he holds the hockey stick in one hand, and a wooden skewer in the other. Similarly, we glued the other skewer into the goalie’s empty hand. If your toys aren’t the same, you could instead just hot glue the wooden skewers onto the backs of two players.
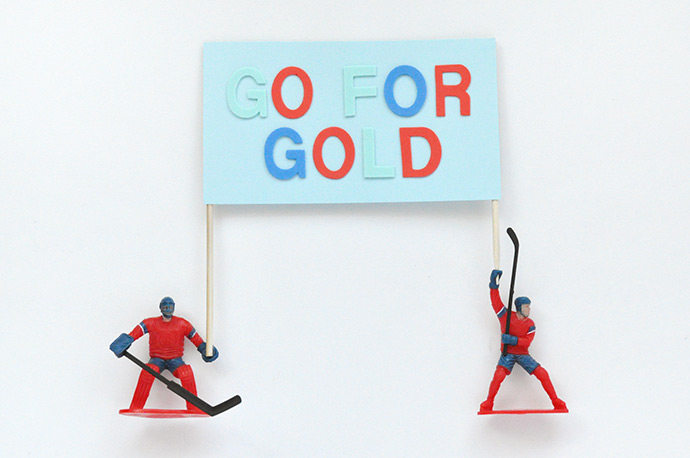
Step 3
Next you need to arrange the two toys so that they’re even and then use hot glue to attach the paper poster to each skewer. If either of the skewers is too long, use scissors to trim.