
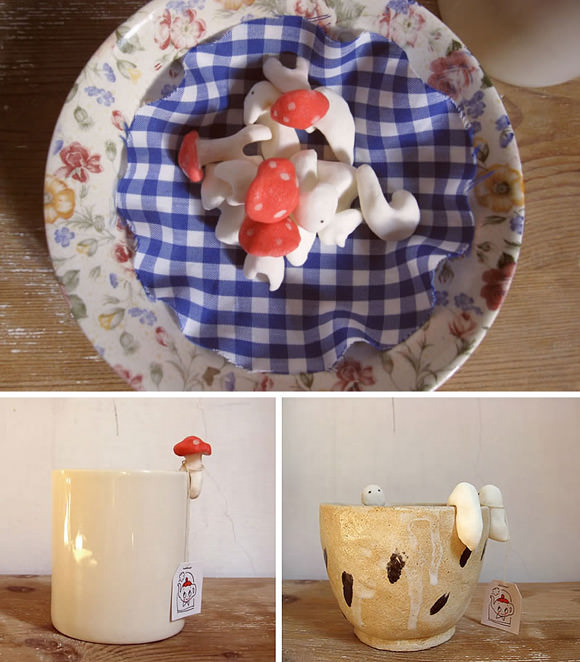
Use three everyday ingredients from the kitchen to make these cute tea bag holders! You and your kids will enjoy making and shaping baking-soda clay into mushrooms, ghosts, and birds for teatime companions.
This dough is smooth and silky, nice to manipulate. It’s nontoxic and safe for kids of all ages. It can be baked or you can leave it out to dry. Once dry it can be sanded and painted. It takes kindly to acrylic paints and pens of all sort and can be stamped and sealed with varnish or Mod Podge.
It’s better than salt dough if you’re looking for a porcelain finish. When completely dry, it is white, sparkly, hard, and sturdy enough to be handled but still delicate. It’s cheap, simple, and beautiful!
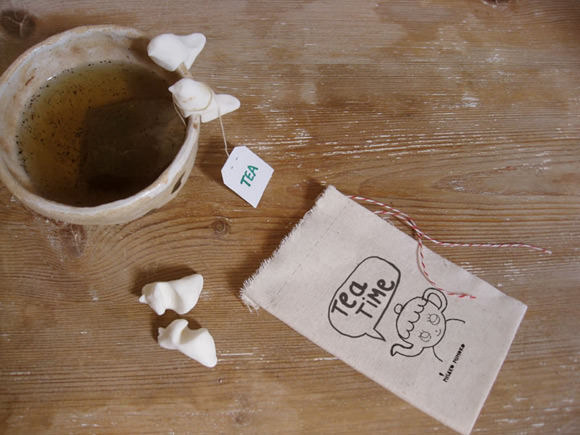
Make a batch of tea bag holders and put into a tiny cotton bag for gift giving! Or make your own Halloween ghosts to enjoy a spooky tea.
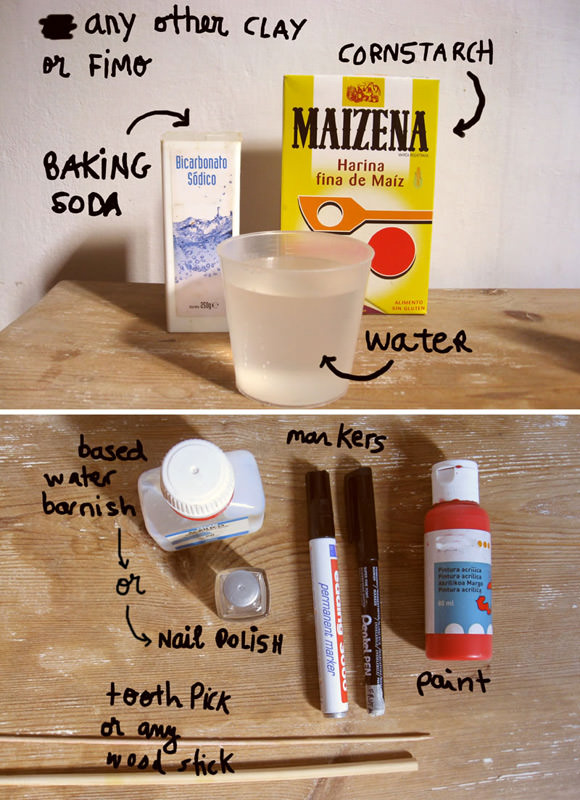
What You Need
For the Cornstarch Dough
- 2 cups baking soda
- 1 cup cornstarch (corn flour)
- 1 1/4 cup cold water
- Big sauce pan
- Spoon
- Parchment paper
- Plate
- Damp cloth
For Modeling
- Toothpick or bamboo skewer
- Marker, paint, food coloring, glitter
- Varnish, shellac, or nail polish
Note: If you want a really tough material try air-dry clay, porcelain, or Fimo.
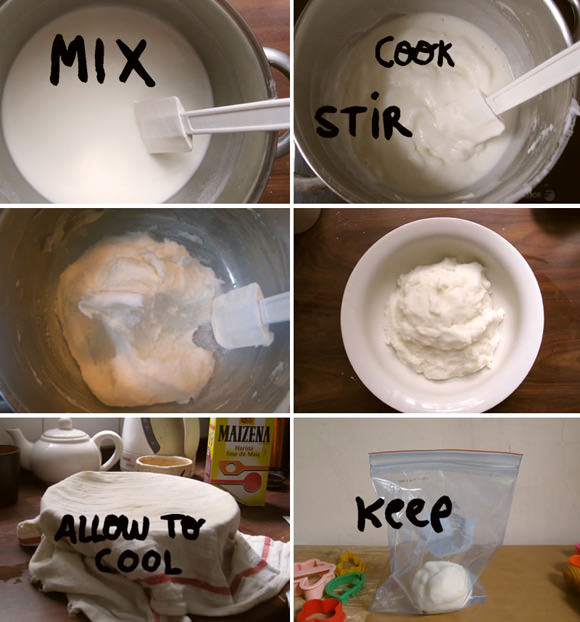
Baking Soda Dough Recipe
Step 1
Mix ingredients on medium heat and bring to a boil, stirring constantly for 1-2 mins until mixture is similar to mashed potatoes. Transfer to a plate. Cover with a damp cloth and allow to cool (about 40 minutes) or spread it on parchment paper to cool faster. You can keep leftover dough in a Ziploc bag in your fridge.
Step 2
Knead the dough on parchment paper (adding a bit of water if it’s dry or more cornstarch if it’s sticky) until it’s a nice smooth texture.
Your dough is now ready to shape!
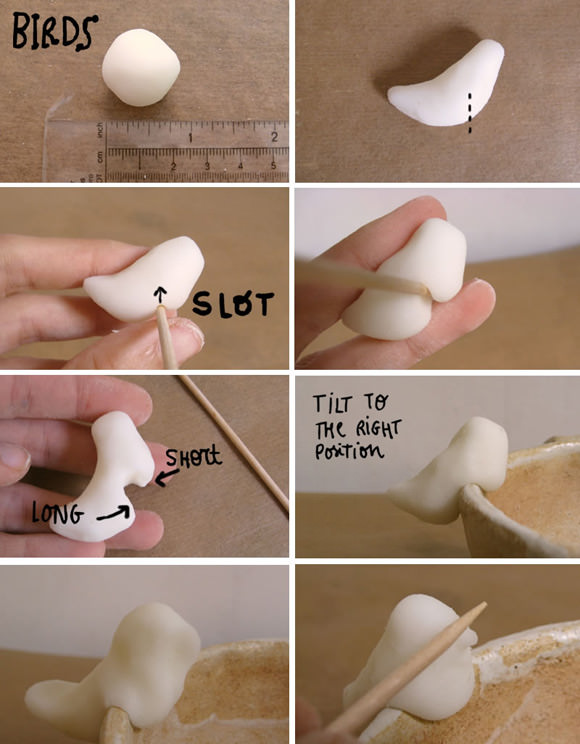
Birds
Step 1
Roll the dough into a 1-inch ball.
Step 2
Shape the dough with your hands as shown above.
Step 3
Make a slot by pushing a toothpick up into the bottom of the clay. Make sure the front flap of the slot is shorter than the back flap to prevent the bird from tipping backward.
Step 4
Fit your molded dough on the edge of a thick cup; keep molding until you get a nice birdlike shape.
Step 5
Use a toothpick to shape the beak.

Drying
Let the birds dry on the edge of the cup for one day; remove and wait until they’re completely hard, 2 to 4 days, depending of the size and thickness of your finished piece. (Mine took 4 days.) Or bake them with the birds on the edge of the cup one of the following ways to speed up the drying time: at 175 degrees for one hour, 150 degrees for 2 to 4 hours, or heat the oven to 350 degrees and turn it off, letting the clay cool in oven. (My air-dried birds were harder than the baked ones.)

Ghosts
Follow the same steps for making the ghost, modeling and making the slot. Let them dry on the edge of a cup for one day or bake as described above. Once dry use a pen to draw the eyes.
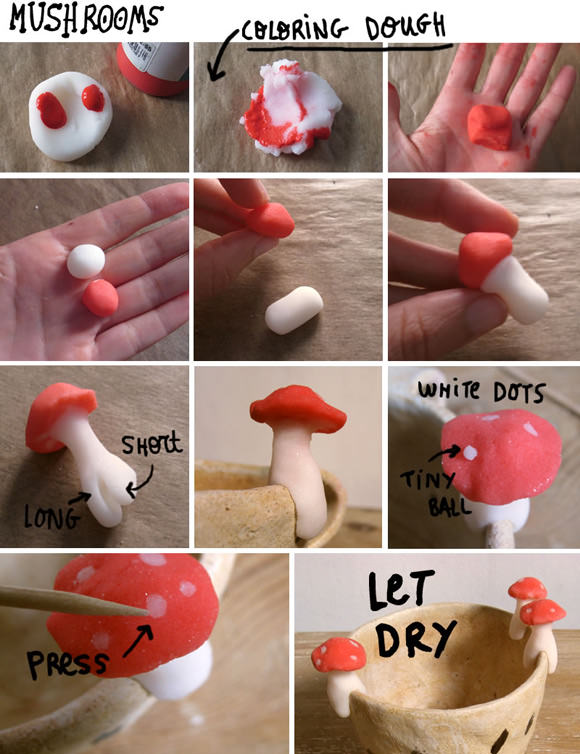
Mushrooms
Step 1
Coloring dough is easier than painting finished pieces. Tint dough with a tiny amount of acrylic paint, food coloring, or powdered paint. Knead into the dough and keep kneading until you have a homogeneous color.
Step 2
Take one red-colored dough ball and another white dough ball. Join them and shape until you have a nice mushroom. Make a slot and decorate the red top with dots by pressing in tiny white balls.
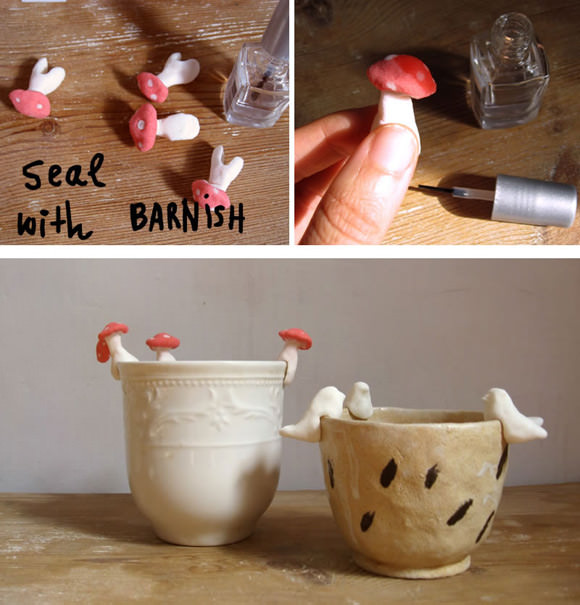
Varnishing
Once dry, coat pieces with varnish, nail polish, or shellac to protect, seal, and intensify the colors.For a good seal apply 3 to 4 thin coats of polyurethane varnish.
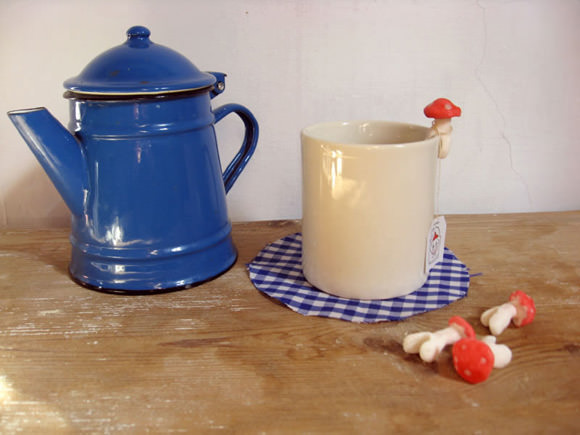
Your tea bags are now ready to party! Enjoy!