
Well hello there, Mr. Happy Sun! You are such a radiant and adorable cake, plus so easy to make! Perfect for a weather themed birthday party, this kawaii sun cake will make your guests beam with delight. “Kawaii” means cute and lovable in Japanese—the perfect description for this cake!
What You Need
- One baked and cooled two layer round cake
- 2 cups of vanilla buttercream tinted yellow
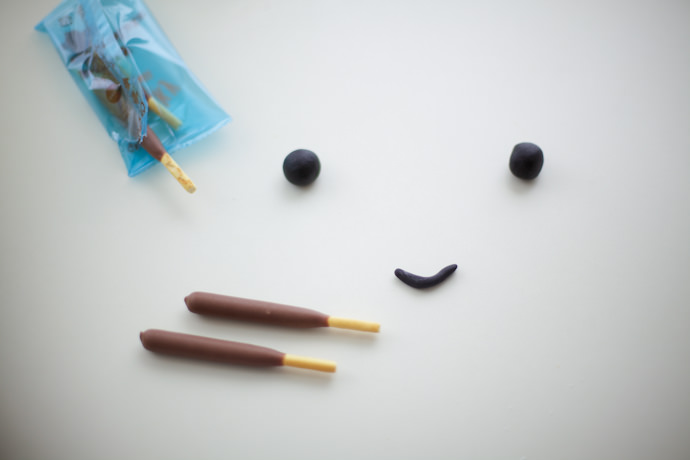
- 1 package of Pocky midi sticks (or regular Pocky sticks), or any longer pretzel type sticks.
- ½ inch ball of black fondant
- An offset spatula
- Cake scraper
- Blue craft paper, scotch tape and BBQ stick (optional)
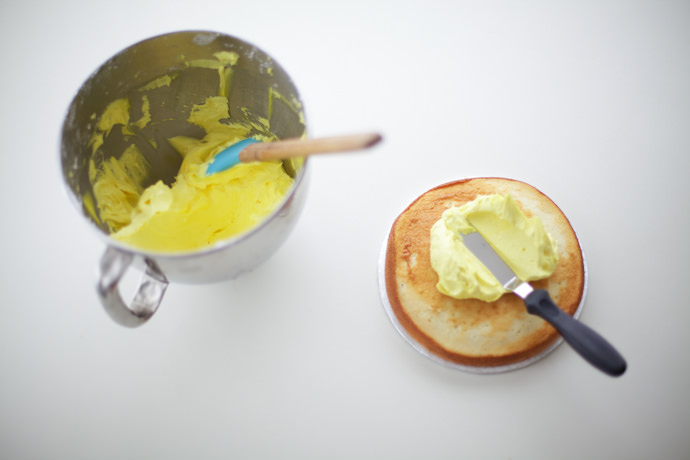
Step 1
Frost and fill your baked and cooled round cake with yellow vanilla buttercream.
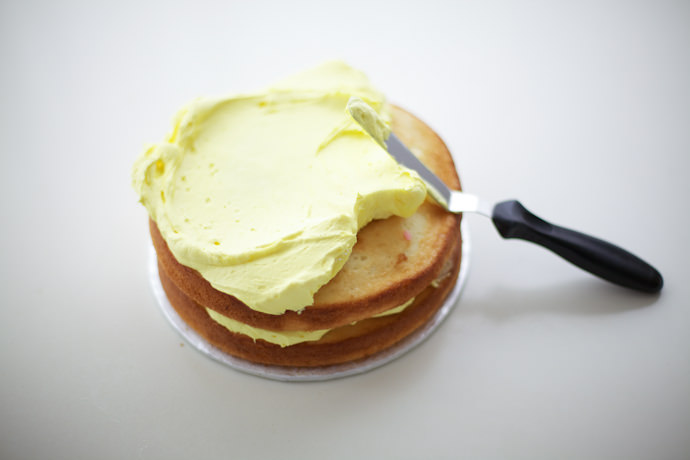
Step 2
Add the second layer and frost the entire cake with buttercream.
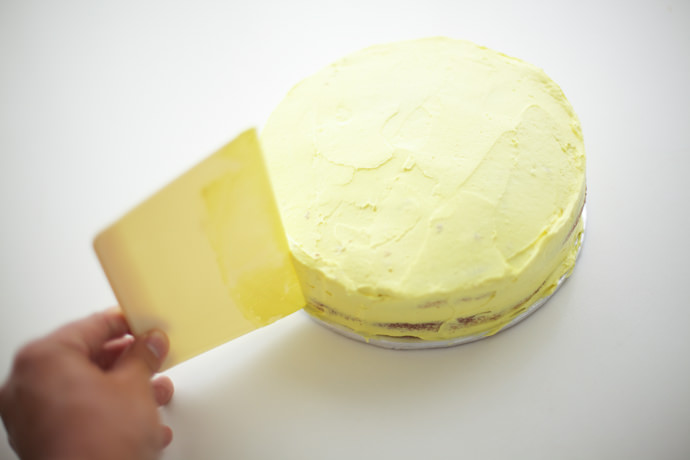
Step 3
Use the cake scraper to go all the way around the cake, smoothing out the frosting. Place the cake in freezer to chill for 15 minutes.
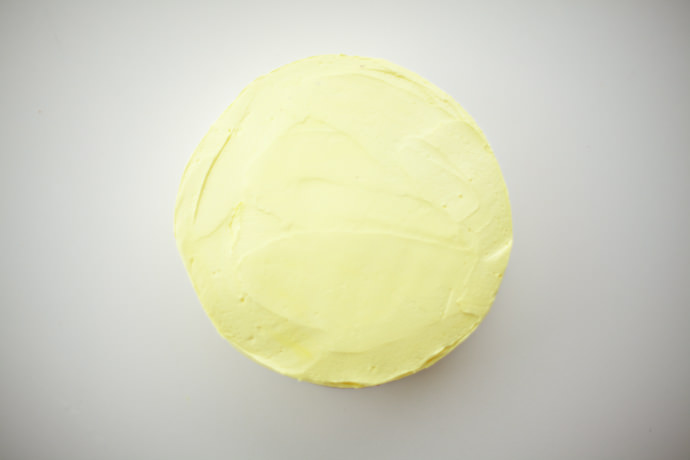
Step 4
Remove the cake from the freezer. Do one final coat all around the cake, using the cake scraper once again to smooth the edges and the top.
Step 5
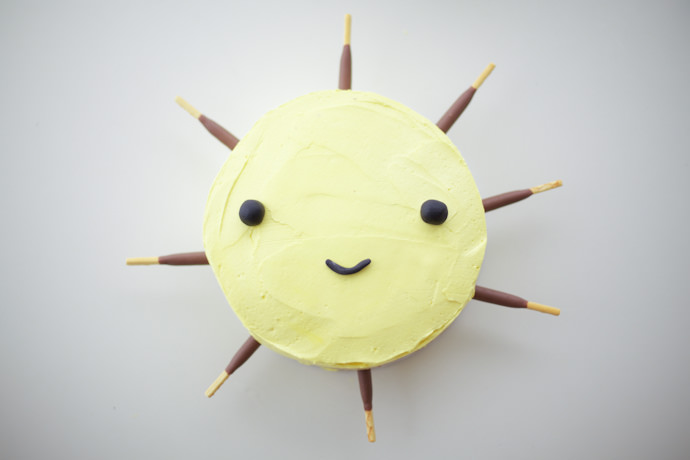
Using a small amount of cornstarch to avoid sticking, divide the black fondant into three parts: two equal parts for the eyes and a smaller piece for the mouth. Roll the two equal parts into balls for eyes and roll the smaller piece in between your hands to make a snake-like piece for a mouth.
Step 6
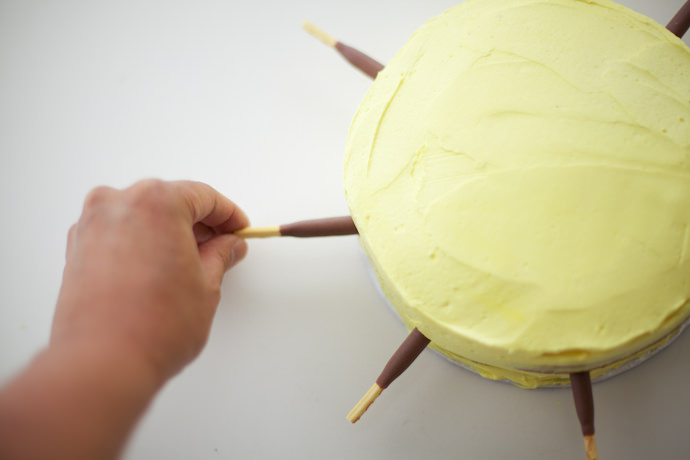
Place the Pocky sticks evenly around the entire sides of the cake, chocolate-side-in! (this will make them easier and less messy to eat later.)
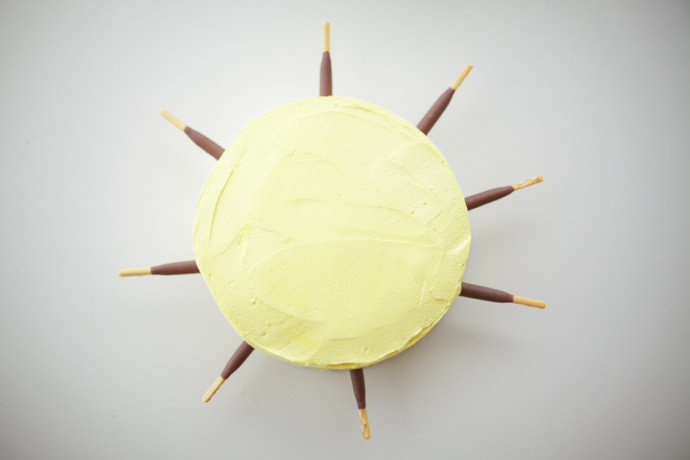
Pretty cool, right?
Step 7
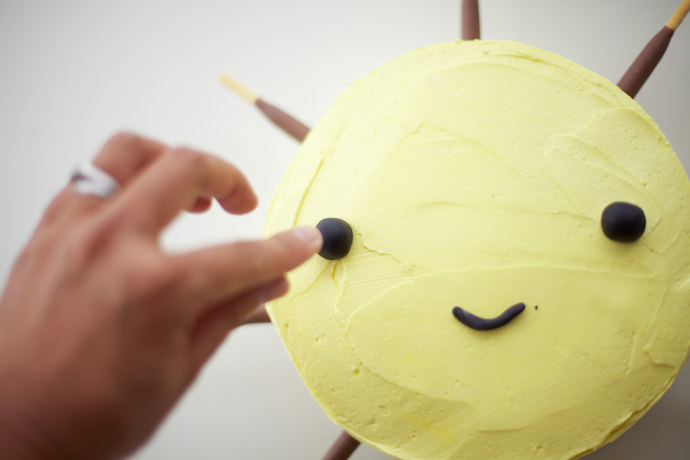
Add the eyes and mouth to the top of the cake. Press in gently to adhere to the buttercream.
So kawaii cute!