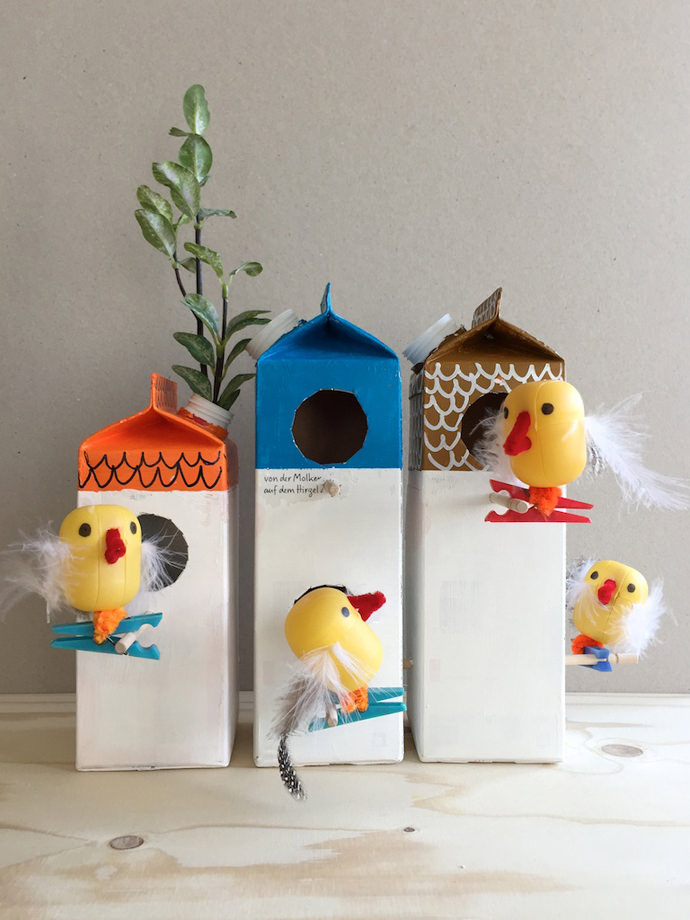
“What do I do with all the empty milk cartons and juice boxes piling up in the recycling bin? There’s got to be something crafty I can make before sending them away never to be seen again!” Sound familiar? Here’s your answer: Make a birdhouse! And funny little birdies to go in it. Watching baby birds flutter around my yard and perch on the windowsill is one of my favorite springtime activities. This is the perfect way to bring some of that magic indoors.
What You Need
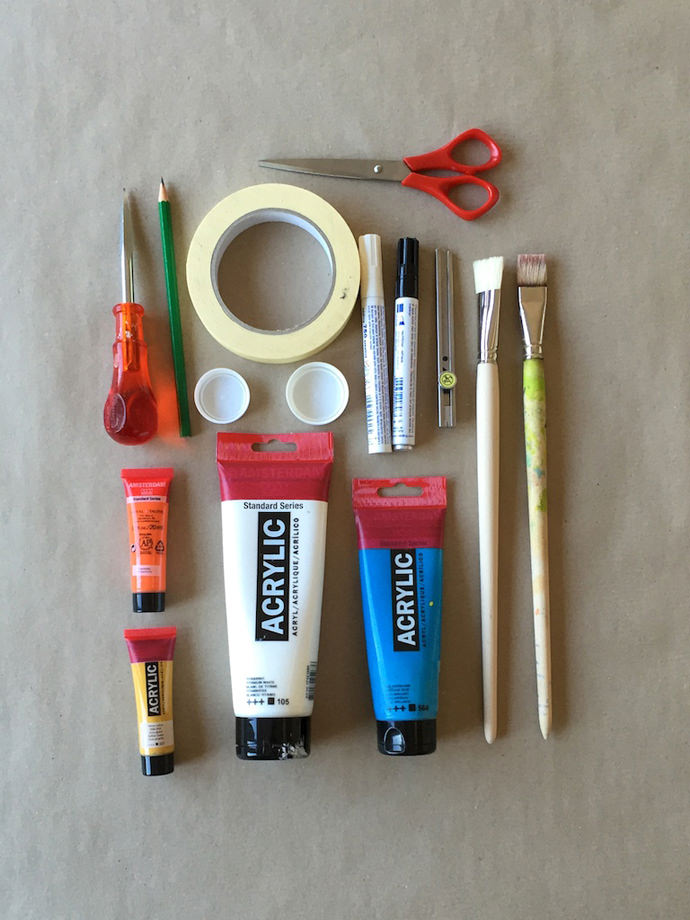
For the birdhouses
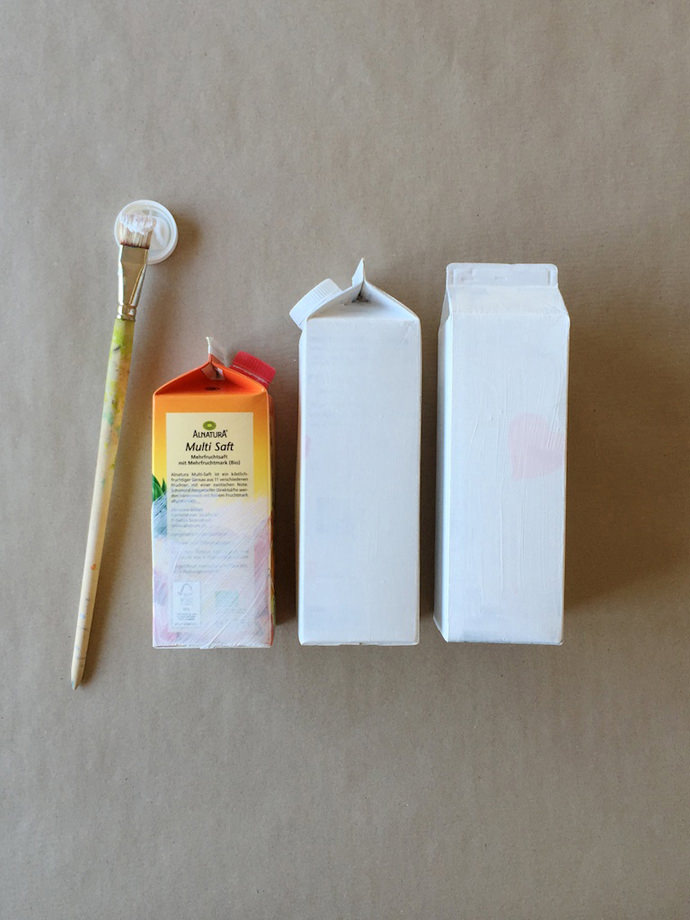
- 3 empty milk cartons (juice or creamer cartons will work, as well)
- 5 chopsticks
- Acrylic paint (white, orange, blue and brown)
- Painters tape
- Craft knife or small kitchen knife
- Reamer
- Scissors
- Permanent marker or paint pen (black and/or white)
- Pencil
- Paint brushes
- Bottle caps (palette)
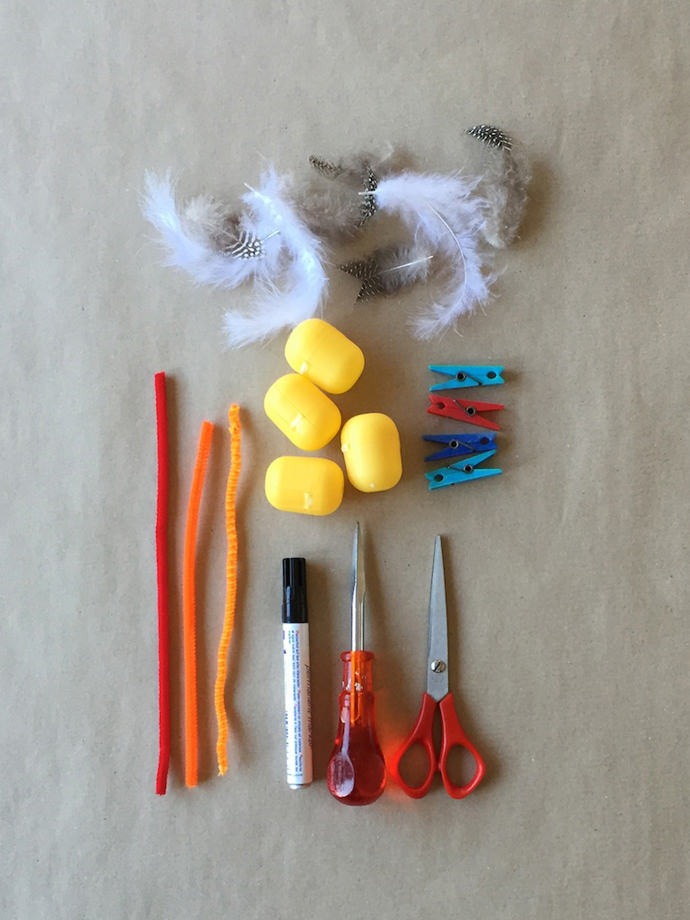
For the birds
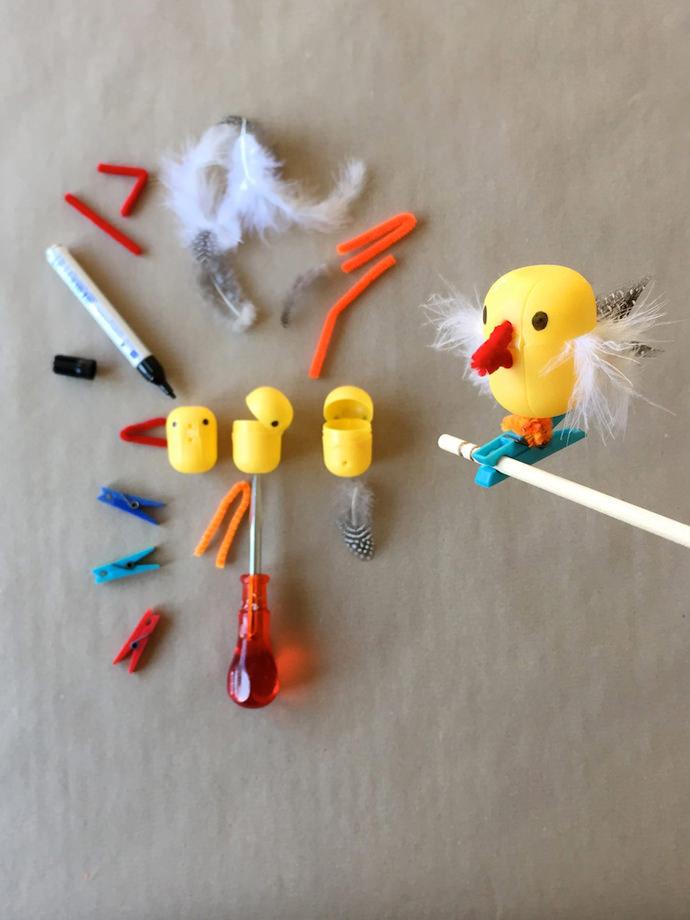
- 4 small plastic eggs
- Feathers
- Pipe cleaners (1 red, 2 orange)
- 4 clothespins (small)
- Reamer
- Scissors
- Black permanent marker
Know that there are a lot of small pieces to this project and that craft knives/reamers should always be used with supervision.
How-To
For the birdhouses
Step 1
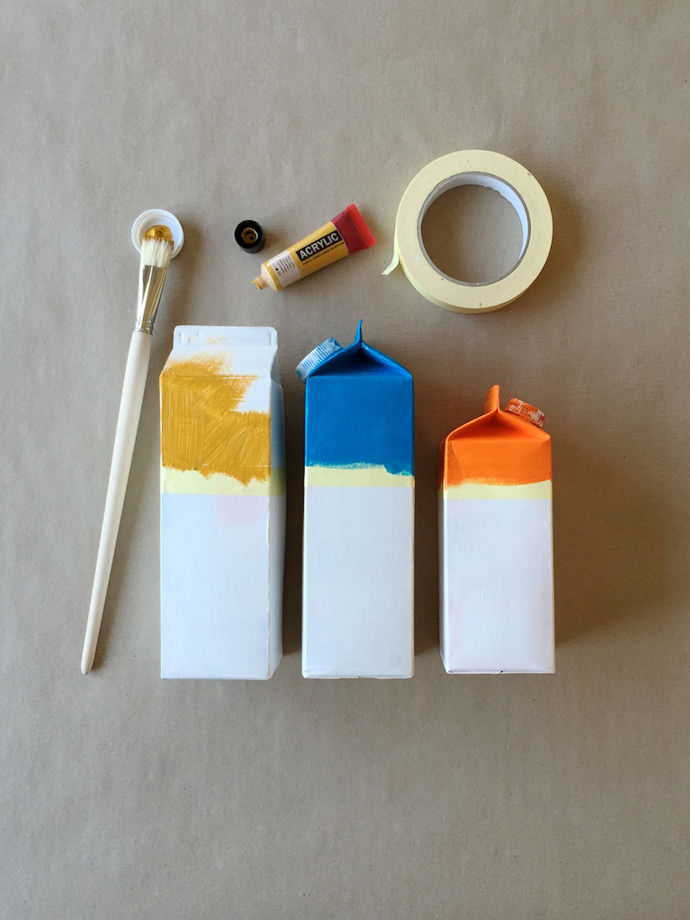
Cover your cartons evenly with white paint. Let dry and repeat 3-4 times or however many coats it takes until the surface is completely opaque. If it’s a sunny day, paint outside to speed up the process. (Tip: rub the boxes with sandpaper first so that the color will hold better.)
Step 2
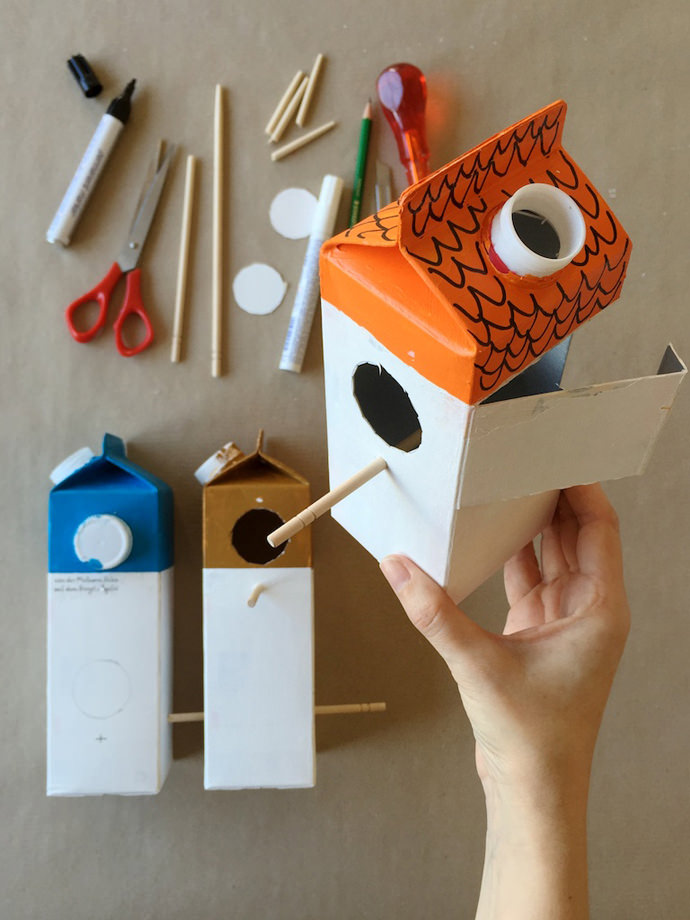
Wrap one piece of tape around the top fourth of your carton (about 3/4 the way up), sectioning off the roof from the rest of the house. Paint these top sections with your orange, blue, and brown paints. Let dry. Remove the tape, slowly and carefully.
Step 3
With a pencil, trace your bottle cap where you want the opening of your house to be. Also make marks for the chopstick perches. Use your craft knife to cut out the circles with small stitches. Make holes with the reamer to fit the chopsticks. Slide the chopsticks completely through the packaging to create your perch (you may need to use scissors to shorten the sticks.) Draw on roof tiles with black or white marker.
Your houses are ready for birds to move in!
For the birds
1. Use your reamer to make four holes in the plastic egg: two for the beak (one right above the hinges and one right below the hinges – so that your birdie’s mouth can open and close); another hole on the very bottom for the legs; and the last hole at the back for the tail. Repeat for each egg.
2. Cut the red pipe cleaner into fourths and fold each of these pieces in half (these will become the beaks for your four birds). Stick one free end into the hole above the hinges and the other end into the hole below the hinges. Voila! Your bird has a beak. Repeat for each bird.
3. Cut the orange pipe cleaners in half, then fold each piece in half again. Stick the center fold of one pipe cleaner into the bottom hole of one egg. These are your bird’s feet. Repeat for all birds.
4. Open up the egg and lay a long feather across the opening so that an equal amount of feather is sticking out on either side. These will be your bird’s wings. Add a smaller feather for the tail and close the eggs so that all feathers stay in place.
5. Wrap the free ends of the pipe cleaner legs around one side of a mini clothespin and twist to secure. The bird will now be able to sit pretty up on its perch!
Time for your birds to decide on a home! I cut a door on the side of each house so that the birds can get a better look inside when house-hunting (and so that you’ll have a place to store your feathery friends when not using.)
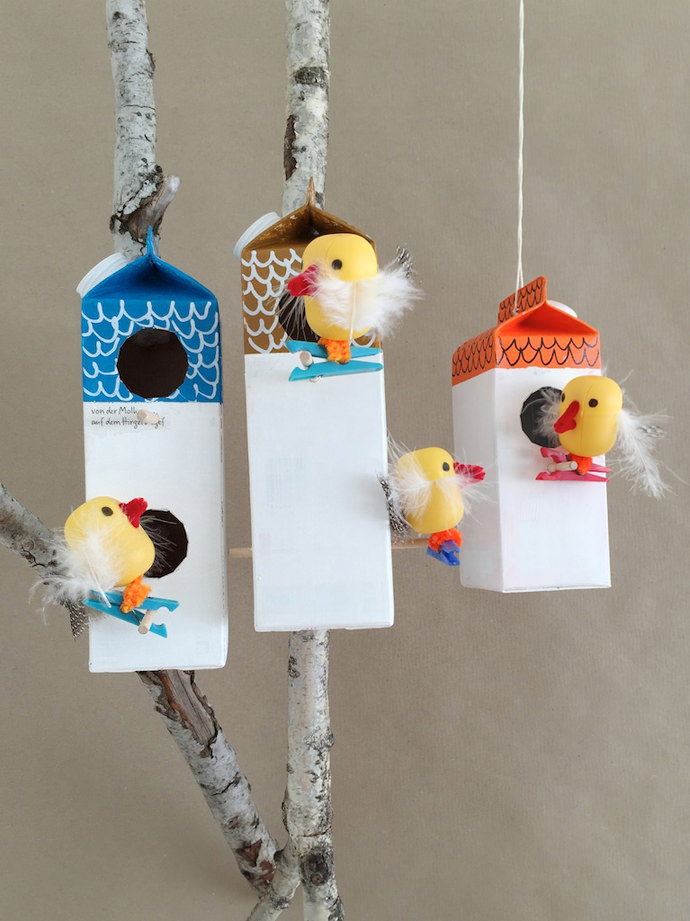
Happy playing :)