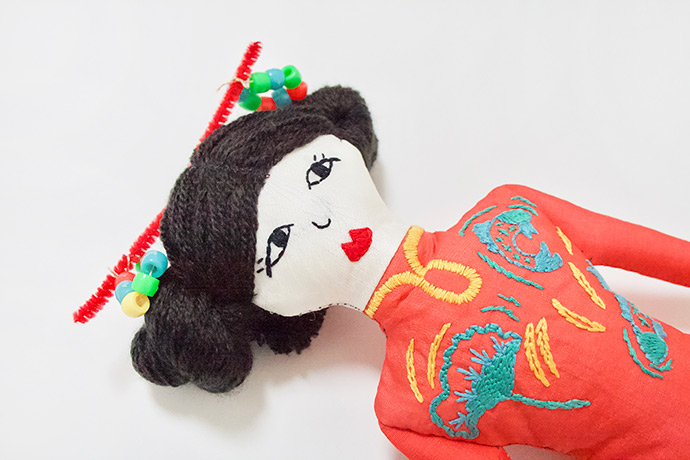
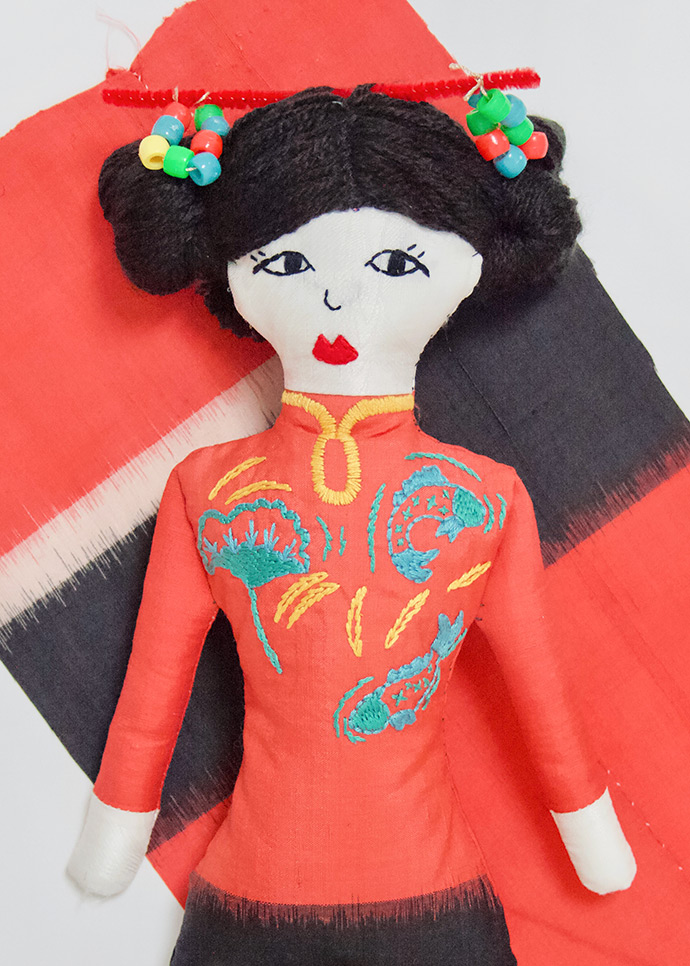
Firecrackers, lion dances and beautiful lanterns all spring to mind with thoughts of Chinese New Year. This handmade doll tutorial is inspired by the riot of colour and energy that makes the celebrations. It also draws inspiration for the embroidery from traditional Chinese patterns.
Keep reading to learn how to make your very own doll inspired by Chinese New Year!
what you need:
- Paper pattern download
- Printable stitch guide
- Light pencil and air erasable fabric pen
- Piece of black cotton fabric
- Piece of colourful silk or satin fabric (note: it’s a good idea to back this with iron-on fabric backer to give it a little more weight when you come to embroider it)
- Piece of cotton fabric for skin (this can be any colour, depending on what skin tone you’d like your doll to have)
- 4” embroidery hoop
- Embroidery needle and threads in black, red, yellow, green and blue
- Small ball of black wool
- Large, sharp scissors
- Sewing machine with white cotton thread
- Polyester stuffing
- Dressmaking pins
- Small piece of pipe cleaner and beads
how-to:
Step 1
Once you’ve downloaded the paper pattern, cut out the pattern pieces and draw around them following the instructions on the pattern for fabric choices. Don’t cut anything out yet!! (because you need enough fabric around some of your pieces to fasten and pull them tight in the embroidery hoop and pieces will be too small if you cut them out first)
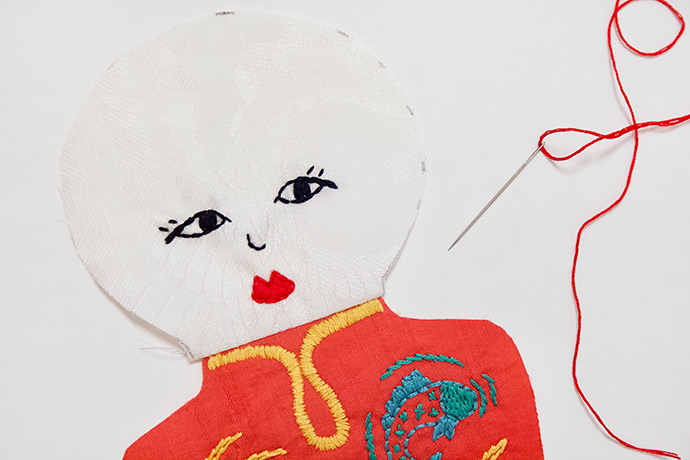
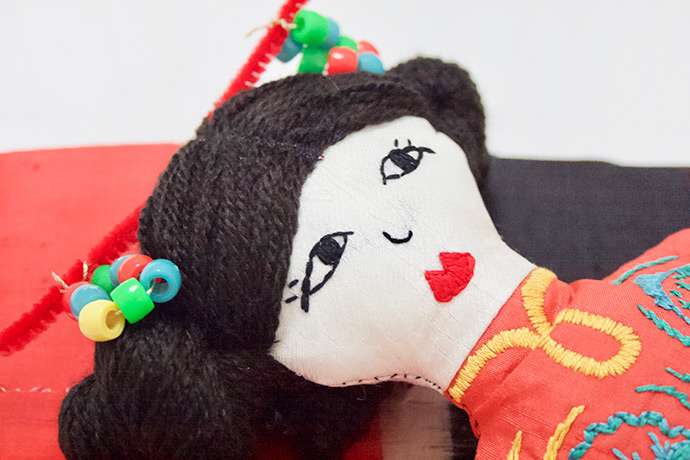
Trace the facial features onto the front of the head. Also trace the embroidery pattern onto the front body piece. The easiest way to do this is to tape the paper pattern to a window, then tape your fabric piece over the top. Use a light pencil or air erasable pen to transfer the design.
Step 2
Do your embroidery first. Start with the face and fix your pattern piece into the embroidery hoop with features in the middle. Use back stitch to outline the eyes and satin stitch to fill in the mouth in red thread.
Step 3
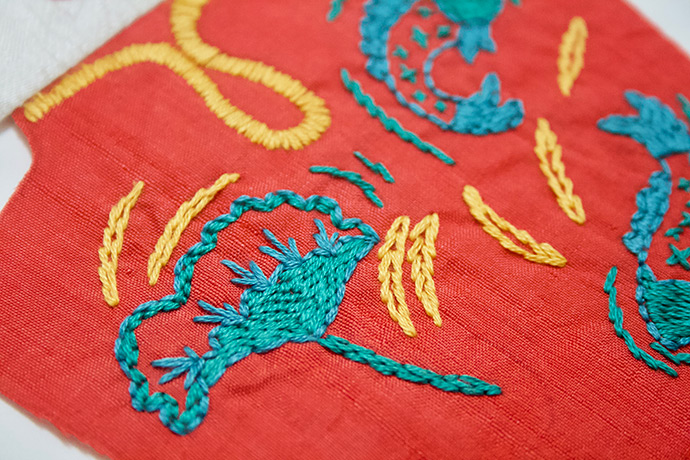
Remove your face piece from the hoop and give it an iron flat. Now start work on your embroidery design on the body by fixing it into your hoop in the same way. You can download the stitch guide here for details of which embroidery stitch to use where and how to do the stitches.

Step 4
The next step is to make up the doll. Cut out all your pattern pieces, then take head and body pieces and match right sides together. Line up edge A of the front head to edge A of the front body and sew together in a straight line with 0.75” seam allowance. You can do this by sewing machine or by hand with a neat back stitch. Repeat in the same way with back head and back body pieces.
Step 5
Next, take the arms, legs, hands and feet. Place the right sides together and match edge ‘A’ of foot and with edge ‘A’ of leg and sew together. Repeat in the same way for arms matching edges ‘B’. Sew together the legs, arms and body following steps 3-5 of the Paris doll tutorial here.
Step 6
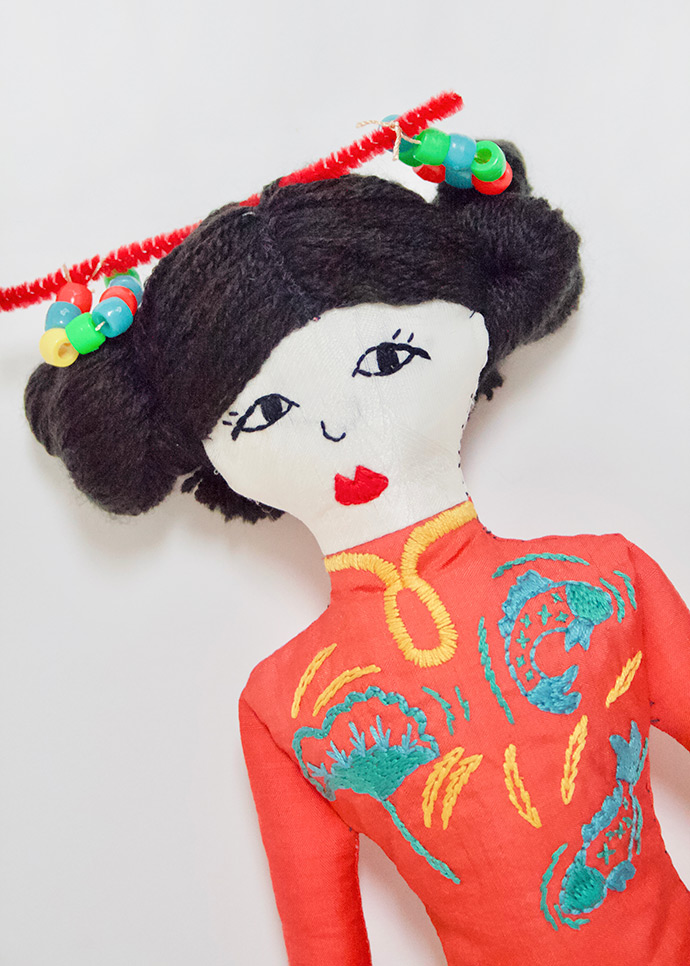
Now for the hair. Take your black wool and follow steps 6-8 of the Paris doll tutorial to make and twist your Chinese doll’s hair into a smart, high up bun. Cut down a colourful pipe cleaner, slot through hair at top of head and tie on pretty beads to make the decorations.
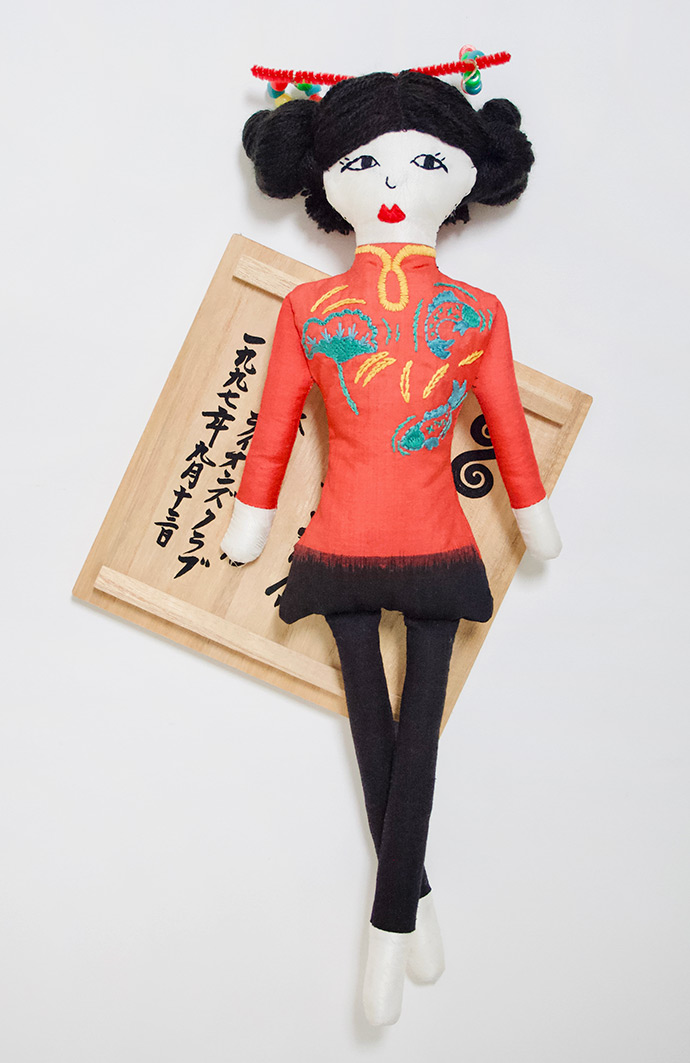
Get set to welcome in the Chinese New Year with your colourful handmade doll ready to join the celebrations!