This post is sponsored by Kid Made Modern.

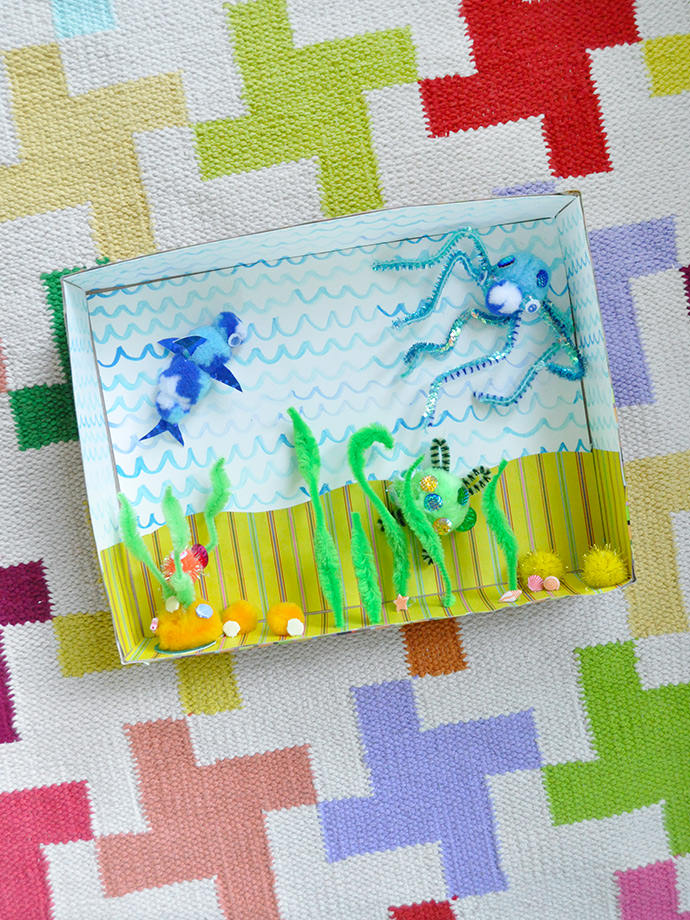
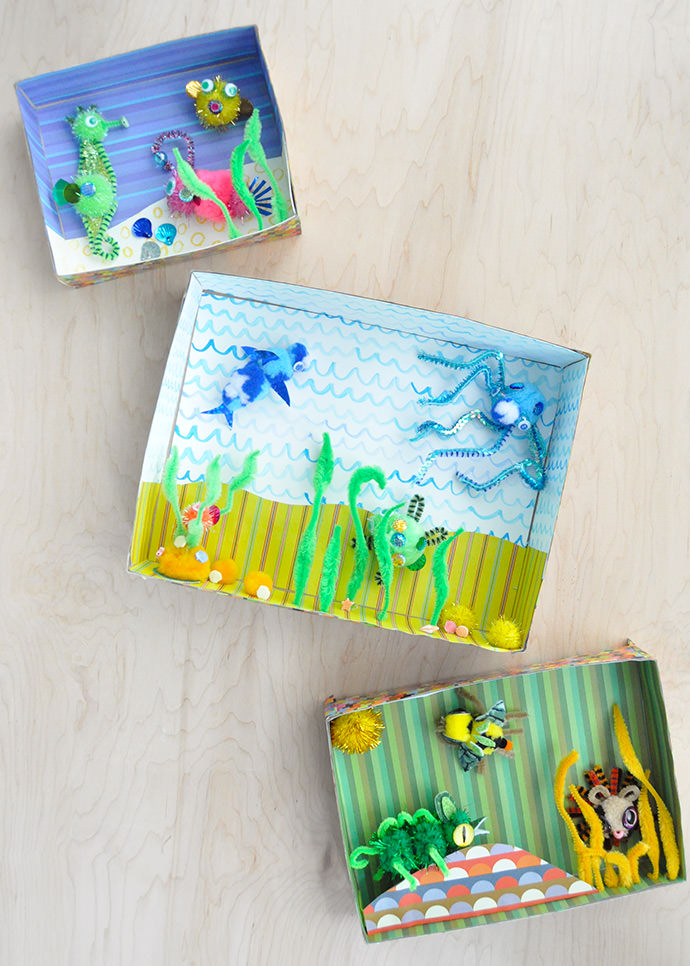
Three cheers for dioramas! We seriously have the best time dreaming up and putting together dioramas – we’ve shared a few DIY dioramas in the past and today we’re back with our most recent project: these cereal box wall art dioramas! Because the boxes are so shallow, they’re perfect for hanging on the wall or putting on the shelf as decor in a kids’ room.
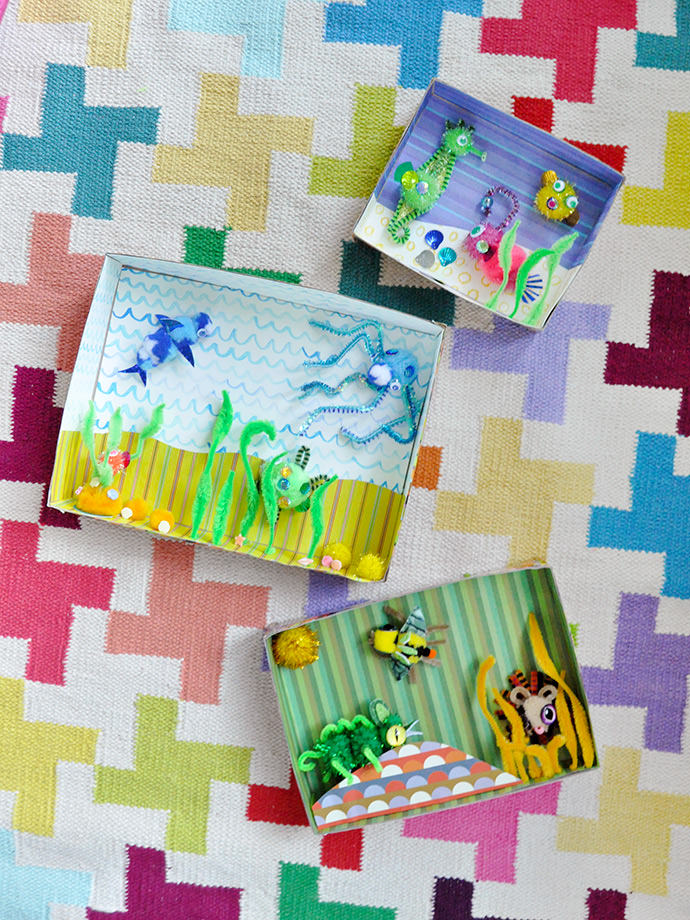
And Kid Made Modern’s new craft kits include all the supplies you need to make these little critters, so making them is a piece of cake. We used both the aquatic kit and go wild kit to make these different scenes. Kids will love crafting their own custom dioramas to display in their rooms! Scroll down to see the how-to video below, and keep reading for full written instructions below.
what you need:
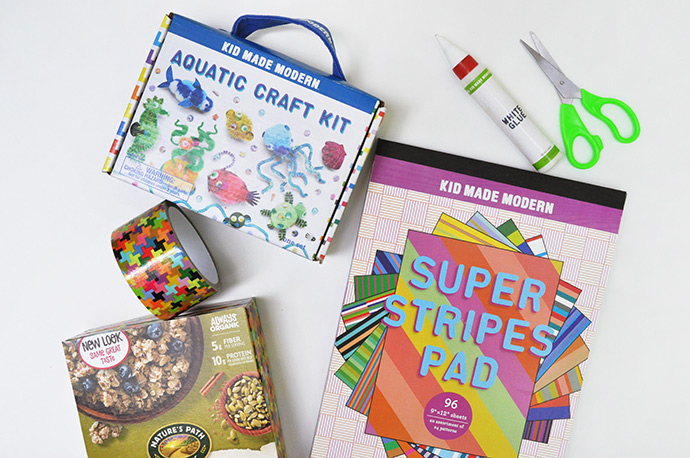
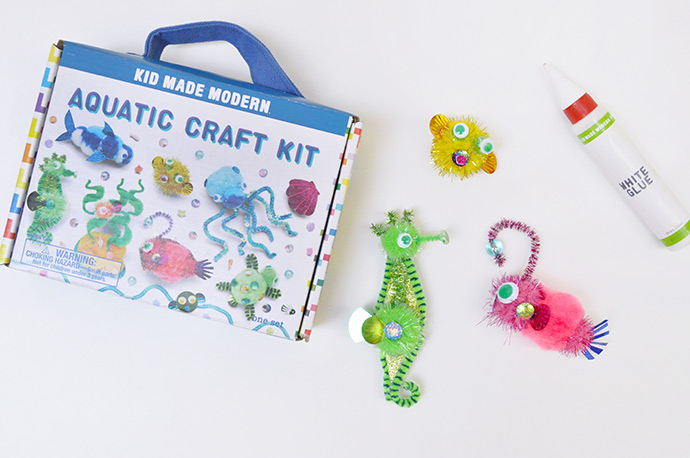
- Kid Made Modern Aquatic Craft Kit and/or Go Wild Craft Kit
- Kid Made Modern Super Stripes Pad
- Kid Made Modern Arts and Crafts Supply Library (scissors and glue)
- Kid Made Modern Duct Tape Kit: Geometric
- Empty cereal or cracker boxes
how-to:
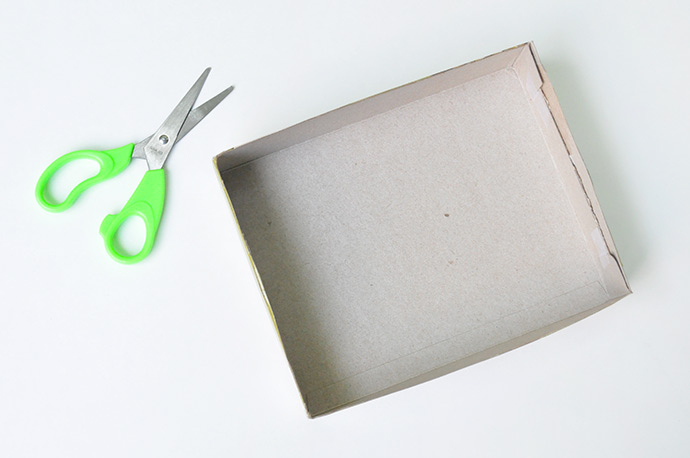
Step 1
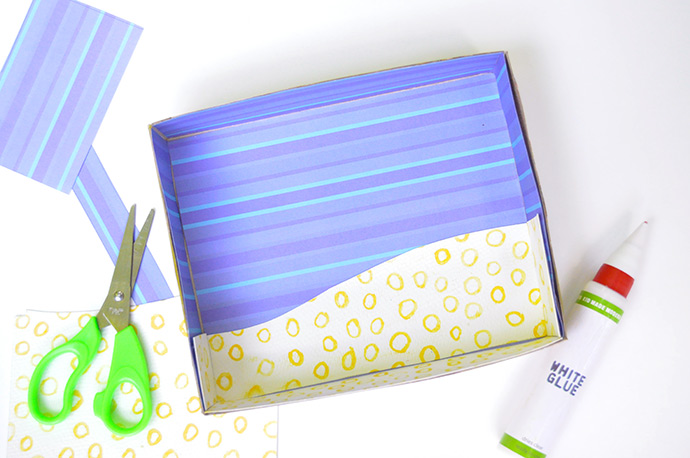
Begin by preparing your box to be the diorama frame. Use scissors to carefully cut out the big front side of the box. You may have to disassemble the box to do this nicely, but no worries – just glue it back together again so that it looks like the box above.
Step 2
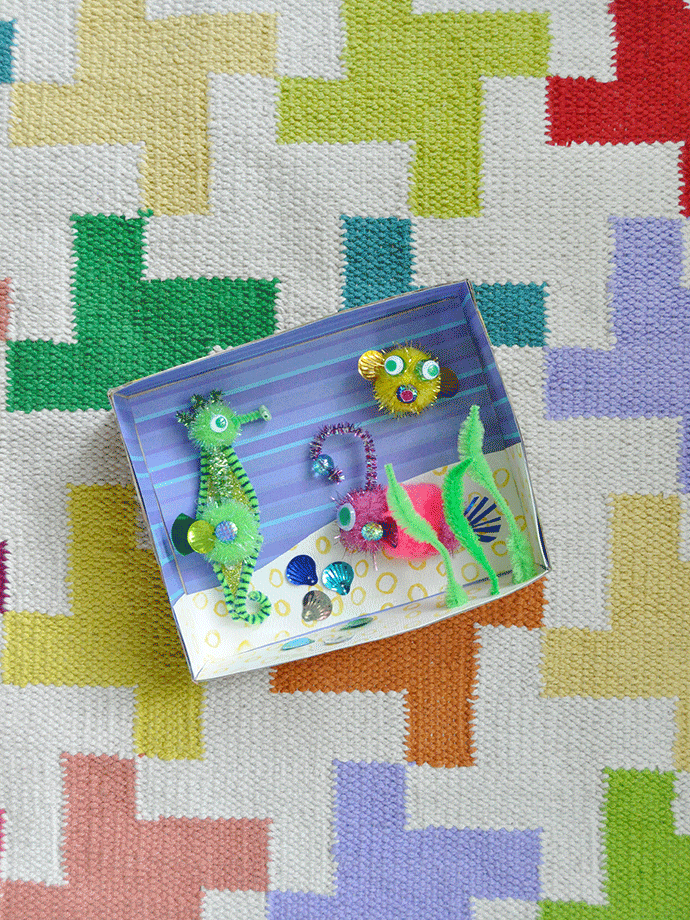
Time to set the scene! Use patterned paper to design your own custom backdrop for your diorama. For the blue water in this aquatic diorama, we use blue paper from the Super Stripes Pad. You can use any paper you like, and we decided to have even more fun with it and paint our own paper to look like sand – we did this with the Wondrous Watercolor Kit. Cut your paper to fit inside the box, both the big background but also the sides, top, and bottom so that your diorama is really 3D. Use glue to attach inside.
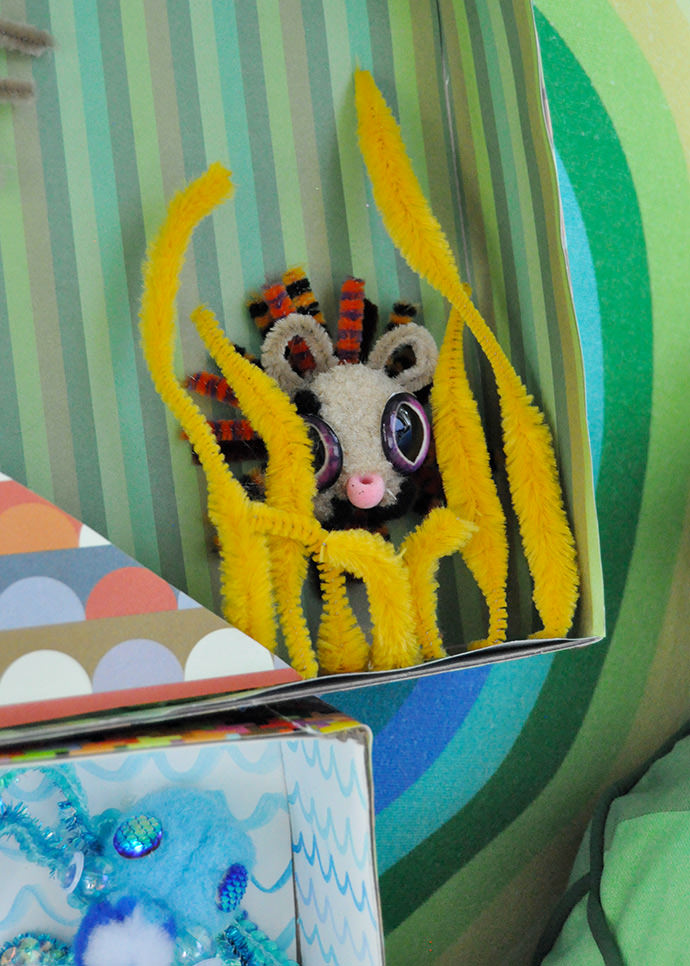
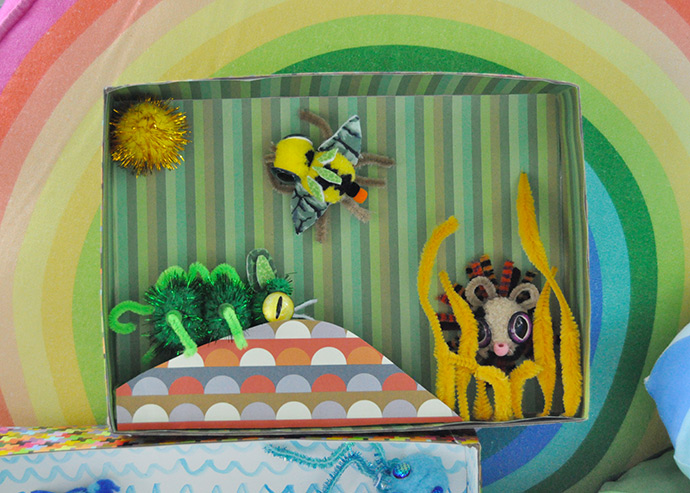
If you want to add a little more depth like we did in our safari box, you can cut hill shape from the leftover cereal box cardboard and cover the front of that with patterned paper. To attach into the box, attach small pieces of duct tape onto the backside of the hill and attach into the box, leaving space between the hill and the background.
Step 3
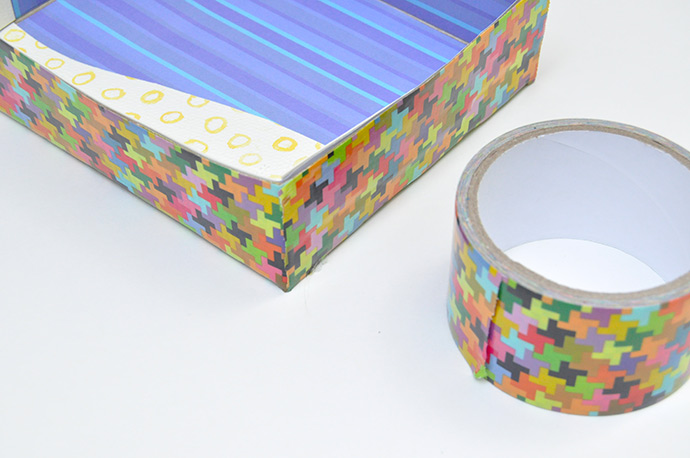
Finish up the outside of the dioramas with a few pieces of duct tape to cover up the cereal cardboard.
Step 4
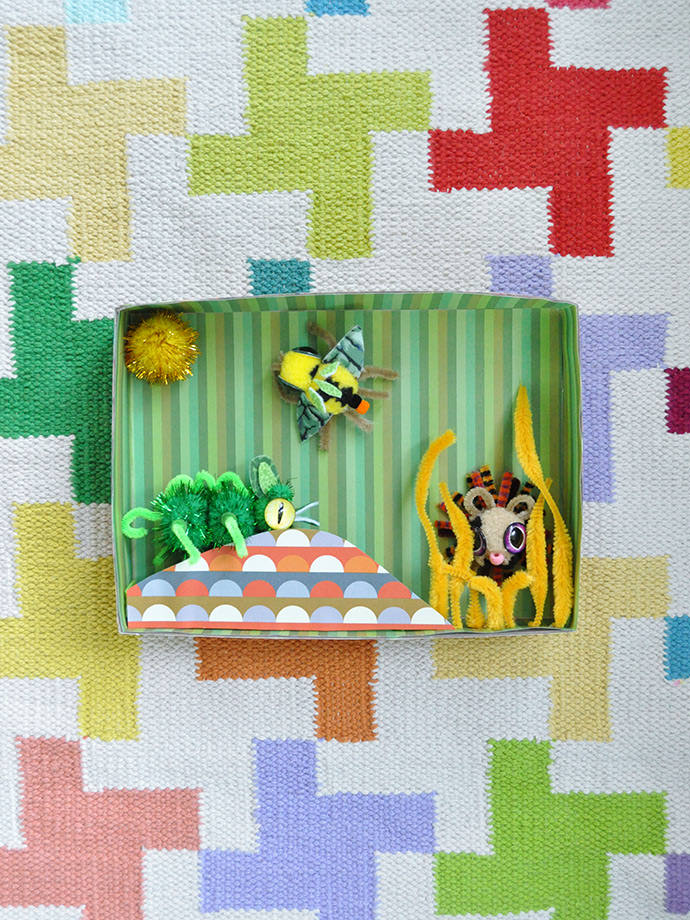
This is our favorite part: assembling the animals! You can literally create whatever sea creature that you like – do a quick image search online for more inspiration if you like! We loved the look of the animals on the box, so we using the materials provided in the kit, we mixed and matched pom poms, pipe cleaners, sequins, googley eyes, and beads to make these playful little guys. Don’t worry too much if they aren’t exact replicas! Let all your glue dry completely.
Step 5
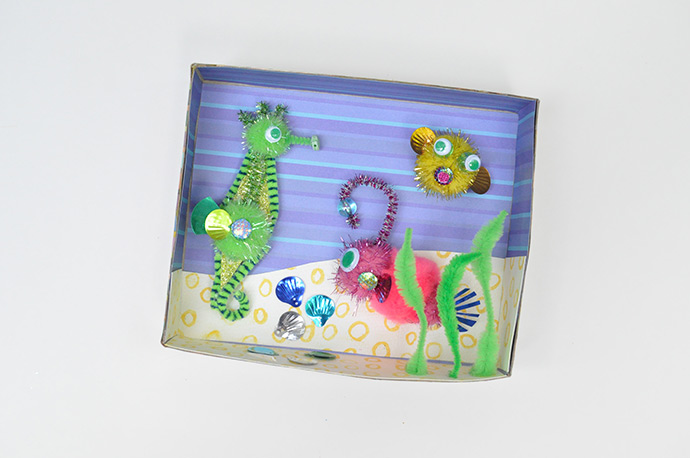
Arrange all your finished creatures in the diorama. You can leave them loose for kids to play with or glue them down like we did. Then add a few finishing details – we glued in some sequin seashells and cut a few green pipe cleaners down and attached them in to look like seaweed!
Arrange your finished dioramas on the shelf as art, or use duct tape and a pipe cleaner to form a little hanger on the back that can easily be hung on a nail on the wall.
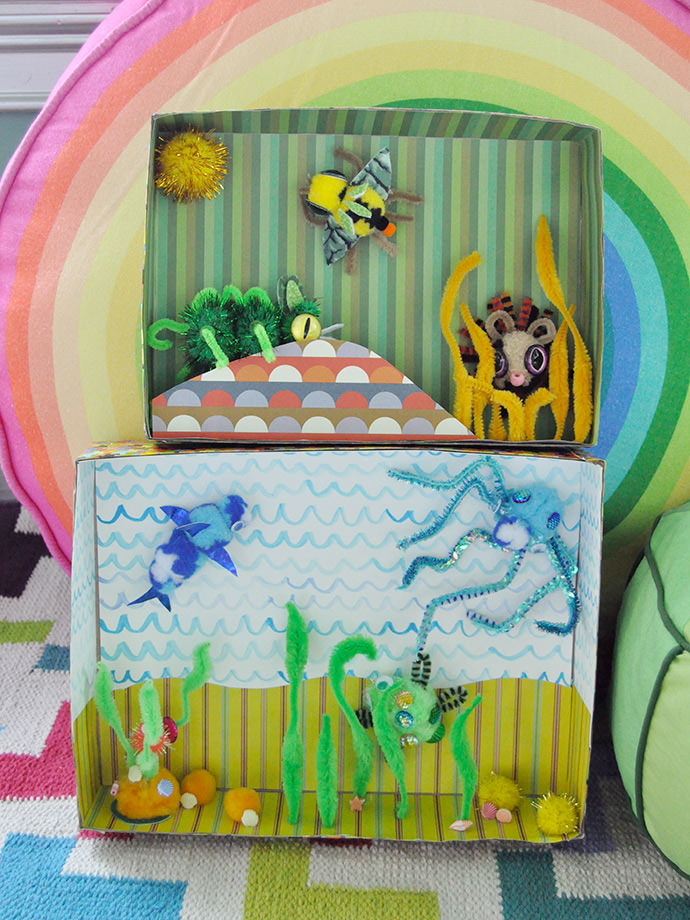
Don’t the dioramas look great with Kid Made Modern’s new line of home decor items? The colors and patterns go together perfectly! Pictured here you can see the Rainbow Houndstooth Woven Rug as well as the Rainbow Circles Floor Cushion and Emerald Floor Cushion.
Happy crafting!