This post is sponsored by Kid Made Modern
Have you decorated your house for Halloween yet? Well, how about making your own custom Halloween dollhouse too? If you love decorating for Halloween you’ll have a blast with today’s DIY. The best part is that almost everything you need comes in Kid Made Modern’s Modern House Kit!
Making things in miniature is one of our favorite things – last week we made dioramas, and this dollhouse is really just like an even bigger and spookier diorama! Keep reading for the full instructions on how to make your own spooky dollhouse, and make sure to watch the video below!
what you need:

- Kid Made Modern Modern House Kit
- Kid Made Modern Print Palooza
- Kid Made Modern Black and White Pad
- Kid Made Modern Super Stripes Pad
- Kid Made Modern Arts and Crafts Supply Library
(scissors, pom poms, beads, pipe cleaners, embroidery floss, felt, & more!) - Pencil
how-to:
Step 1
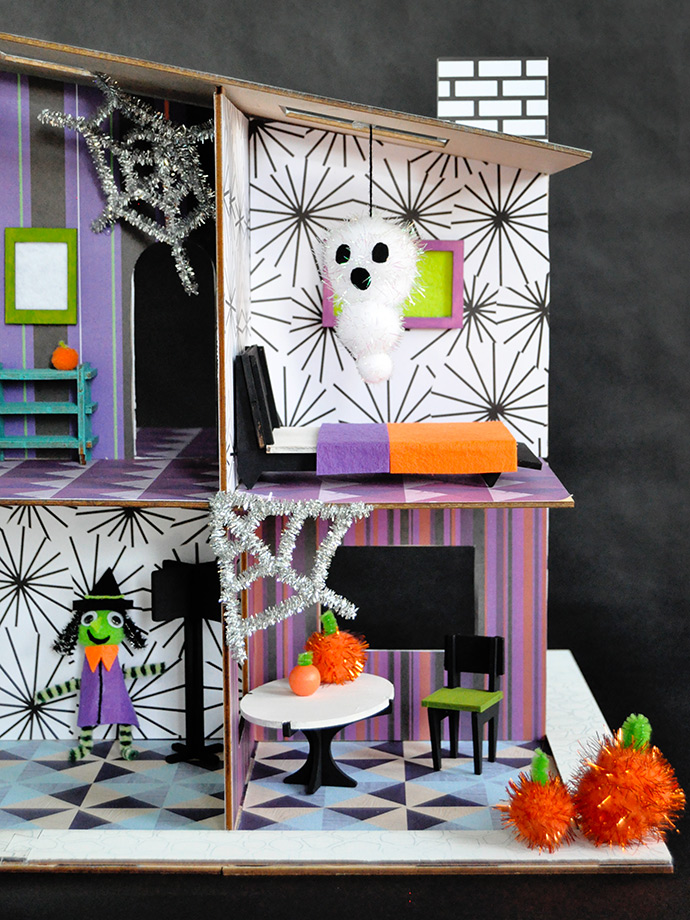
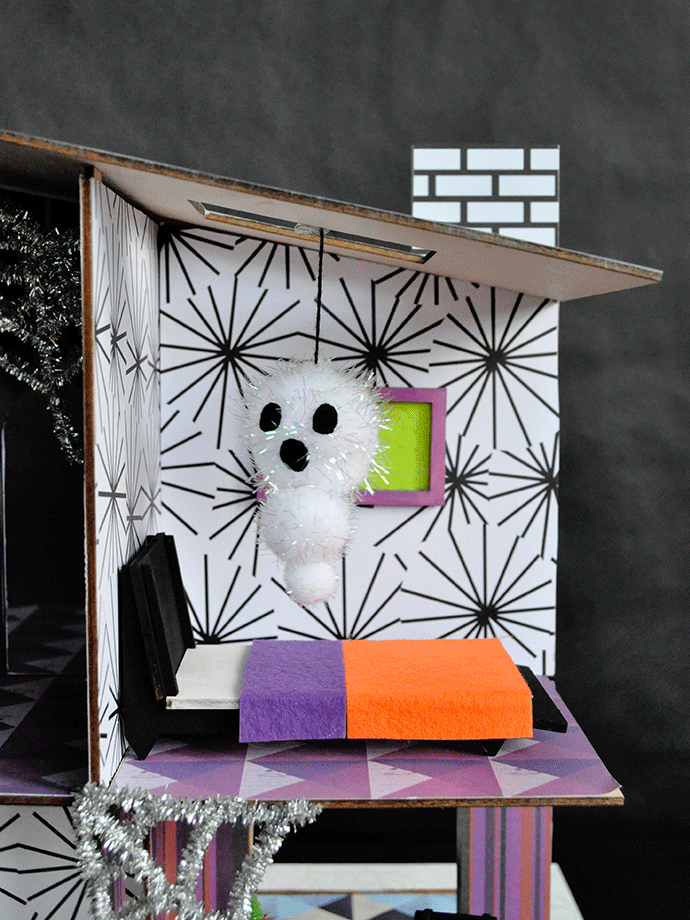
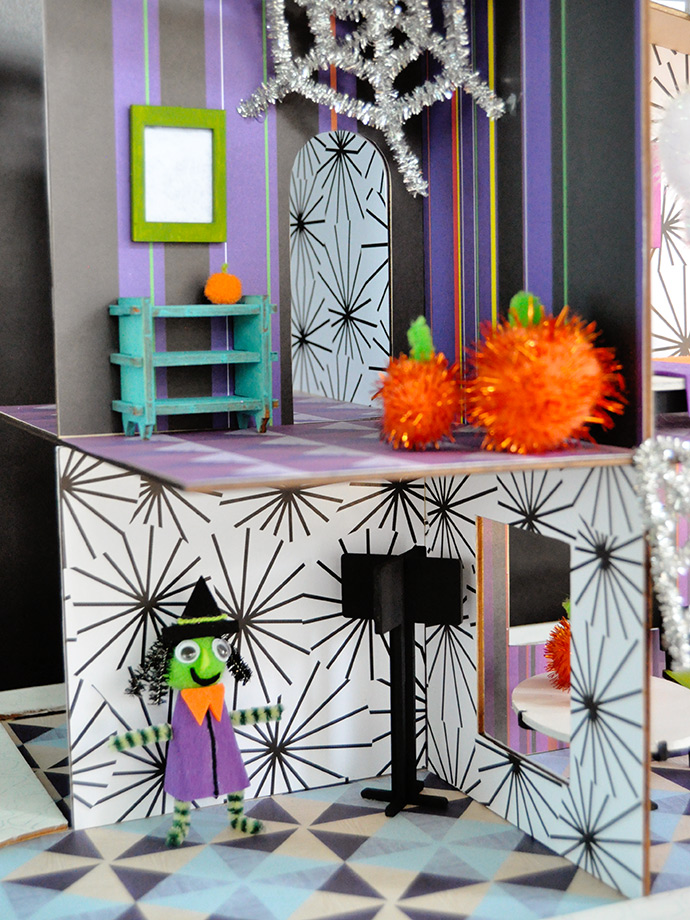
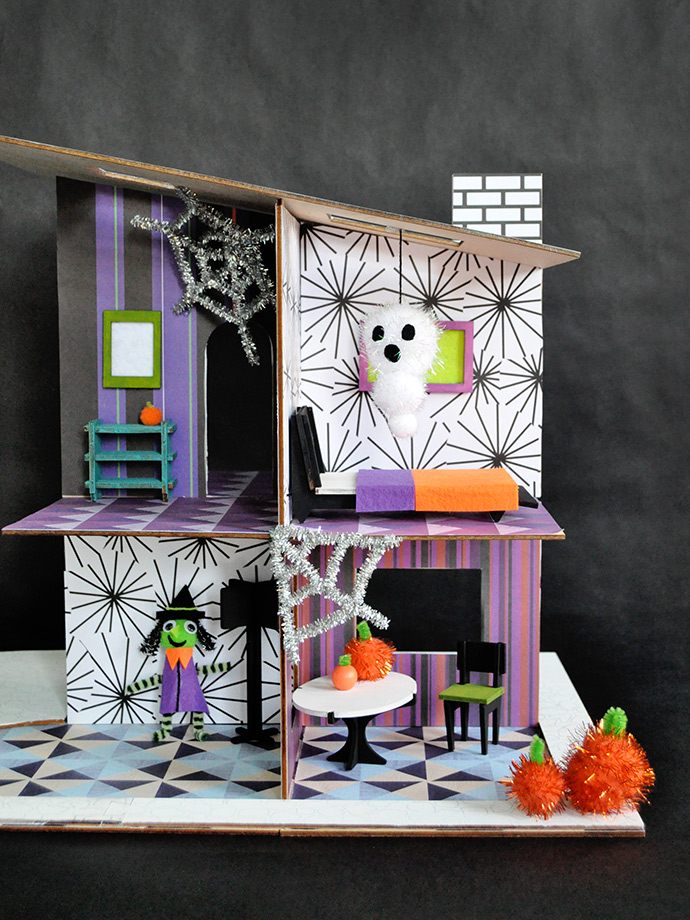
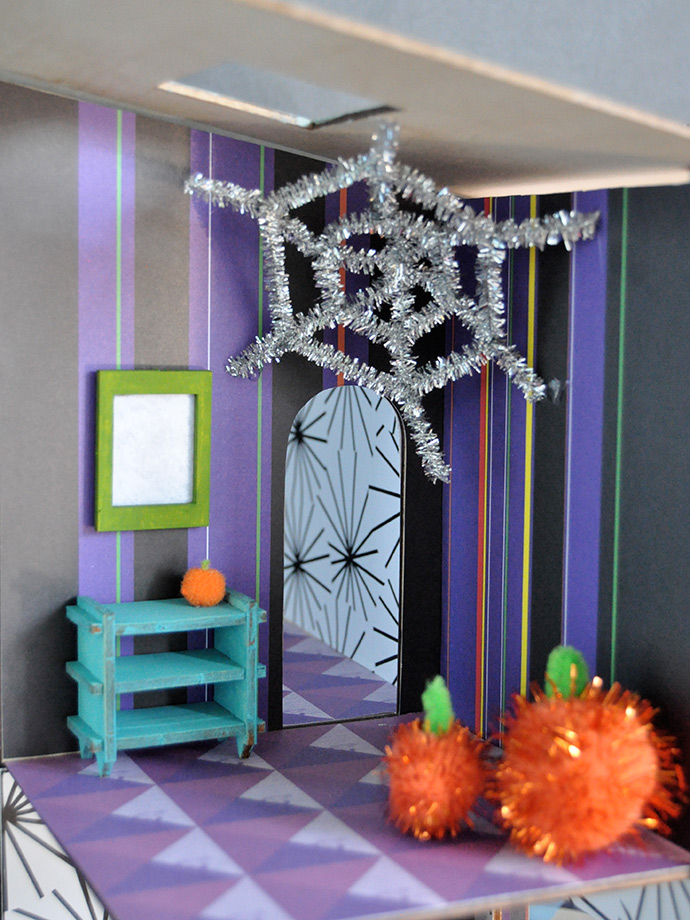
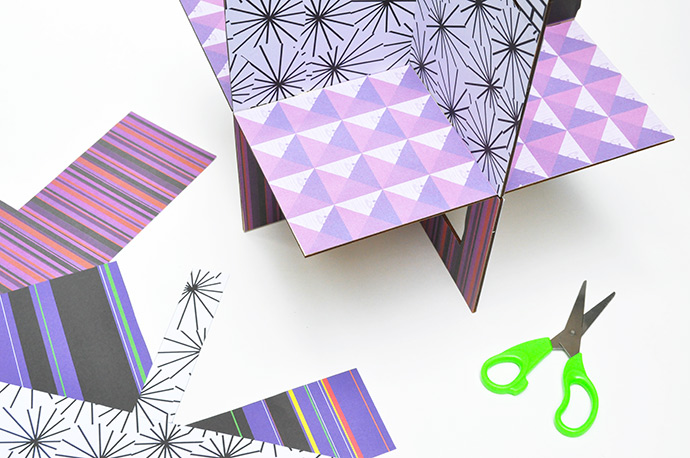
Begin by wallpapering and adding flooring to your house! Mix and match all your favorite papers like we did, or you can also use the paints provide in the house kit to make your own custom designs right on the wood. We used these purple and blue papers from the Print Palooza pack for the floors (don’t they look just like tiles?) and for the walls, we used a couple different purple sheets from the Super Stripes Pad as well as these awesome cobweb-looking papers from the Black and White pad. We even covered the house’s chimney with brick-inspired paper from the Black and White pad too!
Covering the walls and floors neatly can be time-consuming and quite detailed in some spots, so we suggest doing this step ahead of time and asking your little ones to help pick out the papers. Older kids can definitely help trace the floor and wall shapes onto the backs of the papers, and glue them down in place too. We liked to do all this while the house was mostly disassembled, but put it back together every once in a while to make sure everything was still lining up.
Step 2
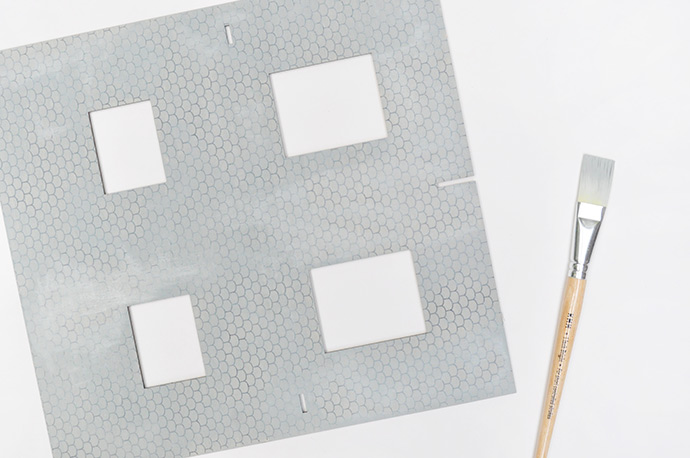
While the glue dries on all that wallpaper and flooring, use the paint provided in the modern house kit to paint the roof and stone patio area. We used grey on the roof and white on the stone, applying both in light coats so that the patterned details were still visible through the paint. Let dry.

Step 3
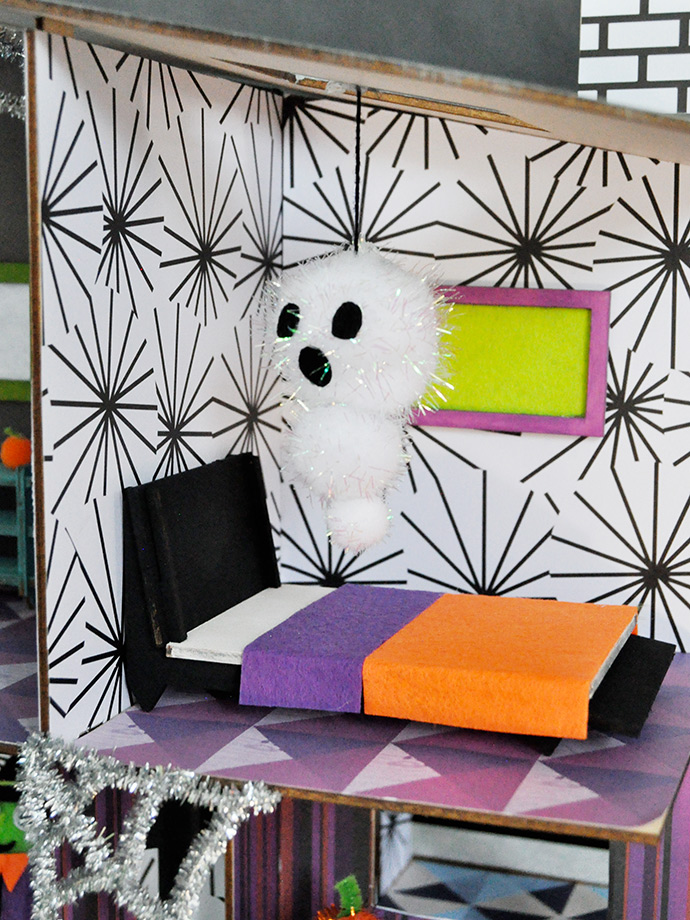
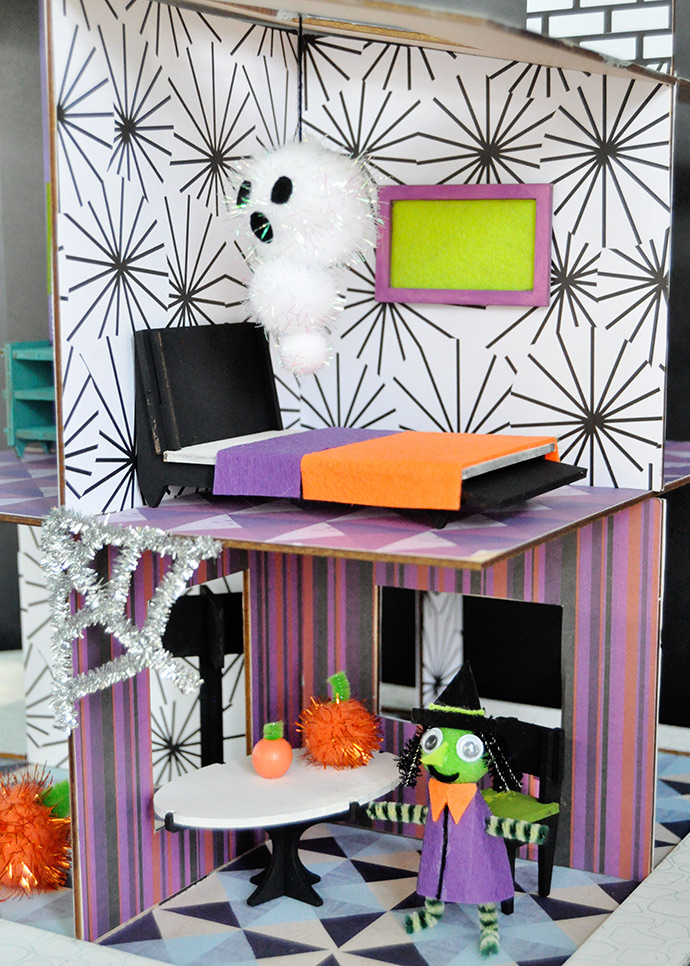
Furniture time! Pop out the wooden shapes for each piece of furniture in the kit and assemble according to the diagrams. Once assembled, get painting! To keep with our spooky haunted house vibe, we used black and mostly cool colors for the furniture. Let dry.
Step 4
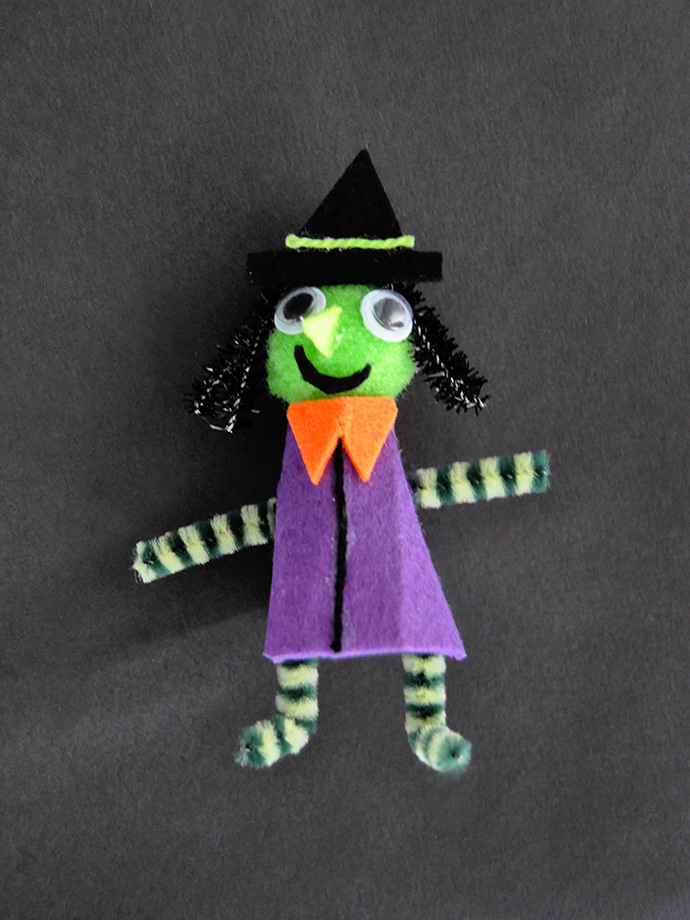
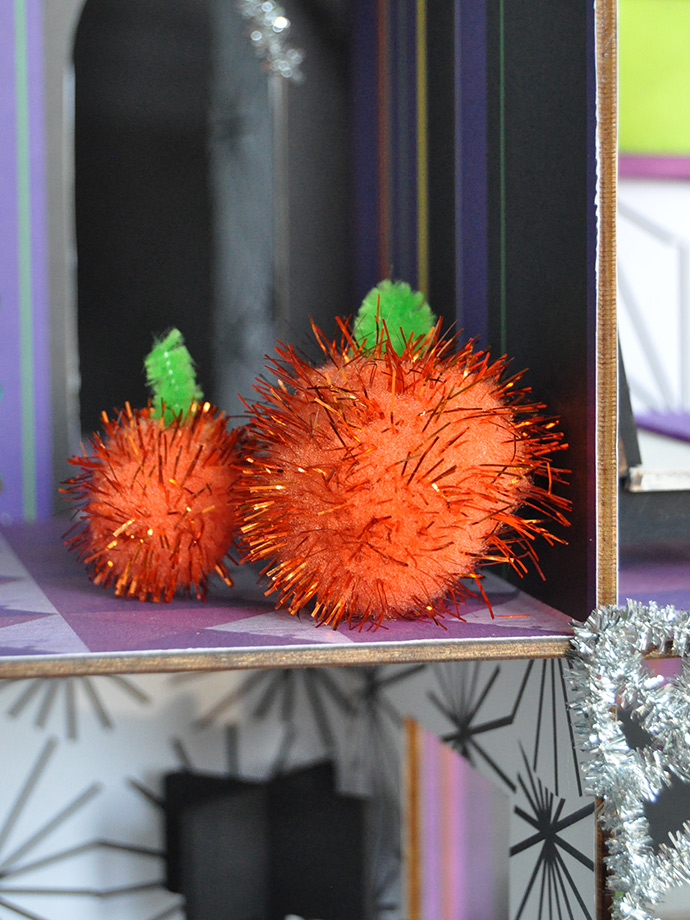
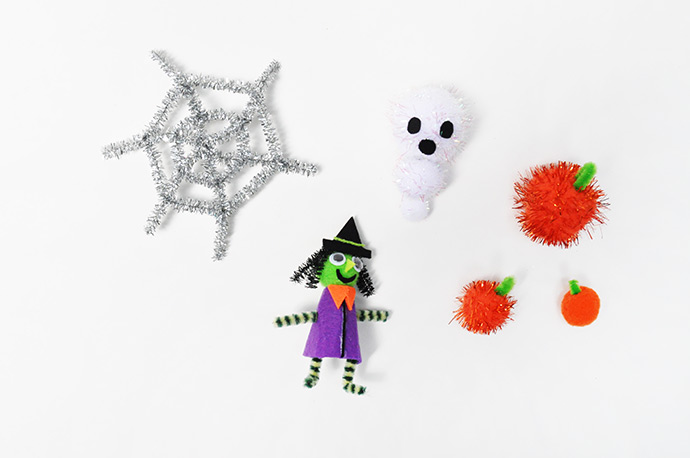
Make some Halloween accessories and people! We mostly used materials from our Arts and Crafts Supply Library for this and you can really do whatever you like. For the pumpkins, all you have to do it cut a short piece of green pipe cleaner and pierce one end into an orange pom pom. For the ghost, we glued 3 white pom poms together, cut a face out of black felt, and glued it on. Then glue a piece of string from the ghost’s head into the ceiling of the dollhouse and he’s ready to haunt! For the spiderweb, we simply shaped pipe cleaners into web shapes and glued them into a few corners of the house. For the witch, we use a green pom pom as a head and rolled some purple felt into a cone-shaped body, trimming the excess so it looked even. Add pipe cleaners for arms and legs, and decorate her face with googley eyes, felt, and more pipe cleaners.
Arrange all the furniture and accessories into the house, gluing in pieces as necessary, but leaving as many free as possible for lots of playing options. Ta-da! A super spooky modern dollhouse!