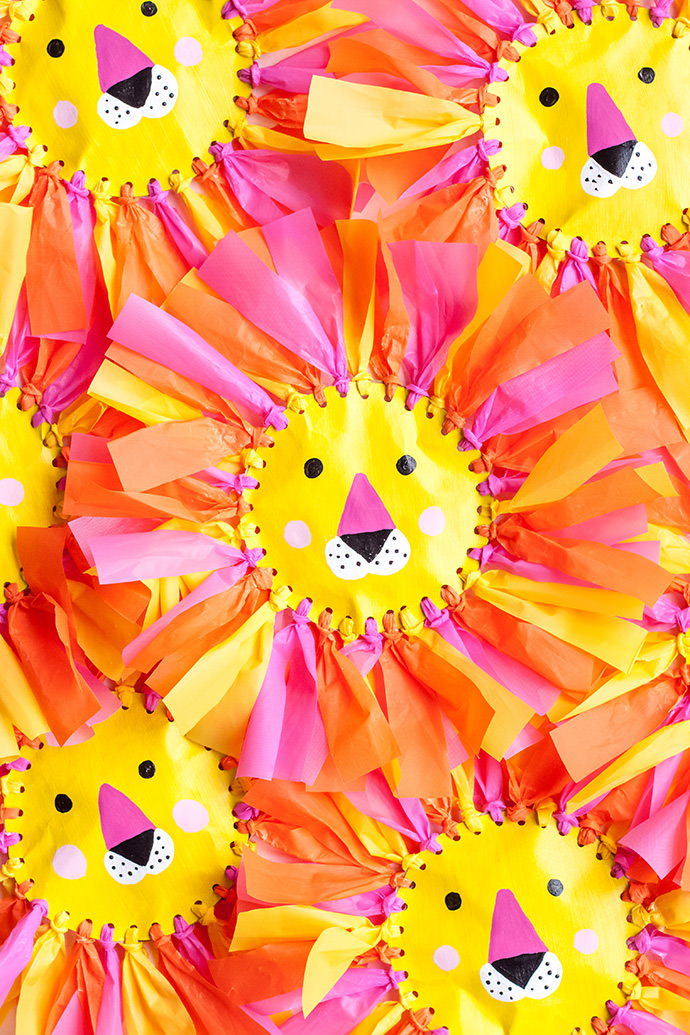
They say spring comes in like a lion, and I’m ready for it. Bring it on! These fun favor pouches were inspired by the saying, but there are so many occasions that could use a little handmade lion. I can imagine making them for a circus, safari, or jungle party! They would be adorable for a baby shower as well. Although Valentine’s Day is over, you can save the idea for next year, and that will give you plenty of time to make enough for a class party! Add a tag that says, “I’m not lion when I say I like you”, or make one for the guy in your life and tell him he’s your “mane man”!
You can create your own color scheme too. Fill the pouch with candy, temporary tattoos, or small favors of your choice, and delight your guests with some wild packaging!
what you need:
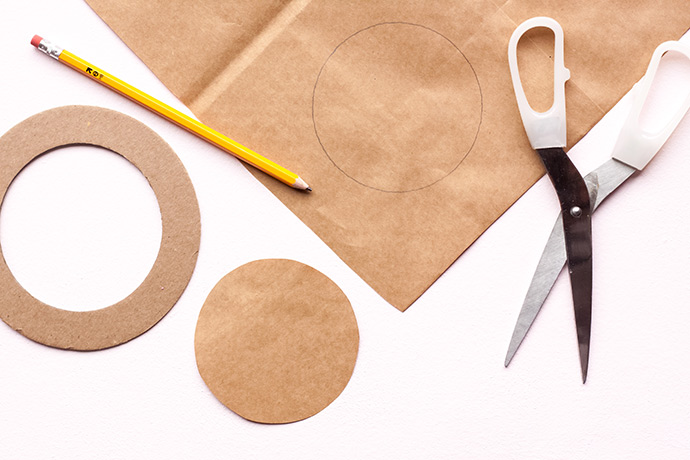
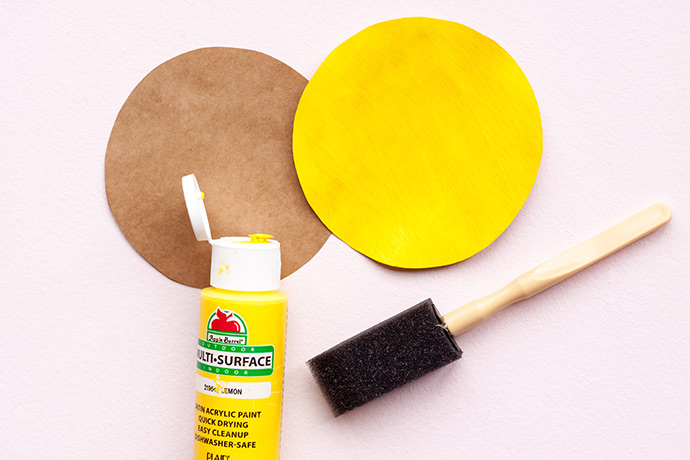
• Brown paper grocery bag
• Scissors
• Cardstock or cardboard (a cereal box would work!)
• Pencil
• Apple Barrel Acrylic Paint (yellow, hot pink, black, white, light pink)
• Sponge Brush
• Paint brushes
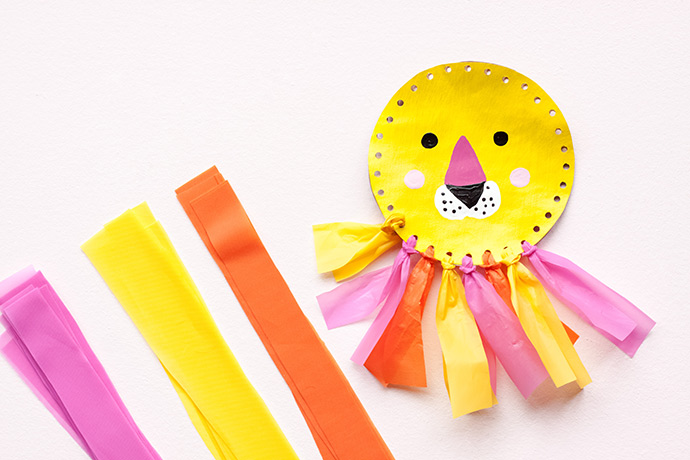
• Plastic tablecloths cut into 6 ½” x 1” strips (yellow, orange, pink)
• Small hole punch
• Candy or small favors
how-to:
Step 1
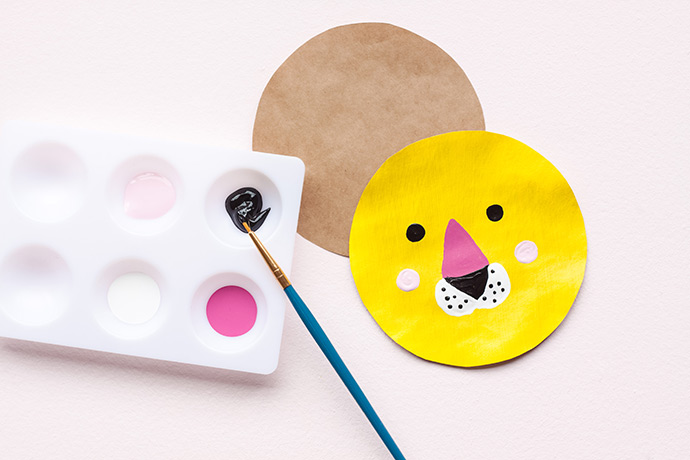
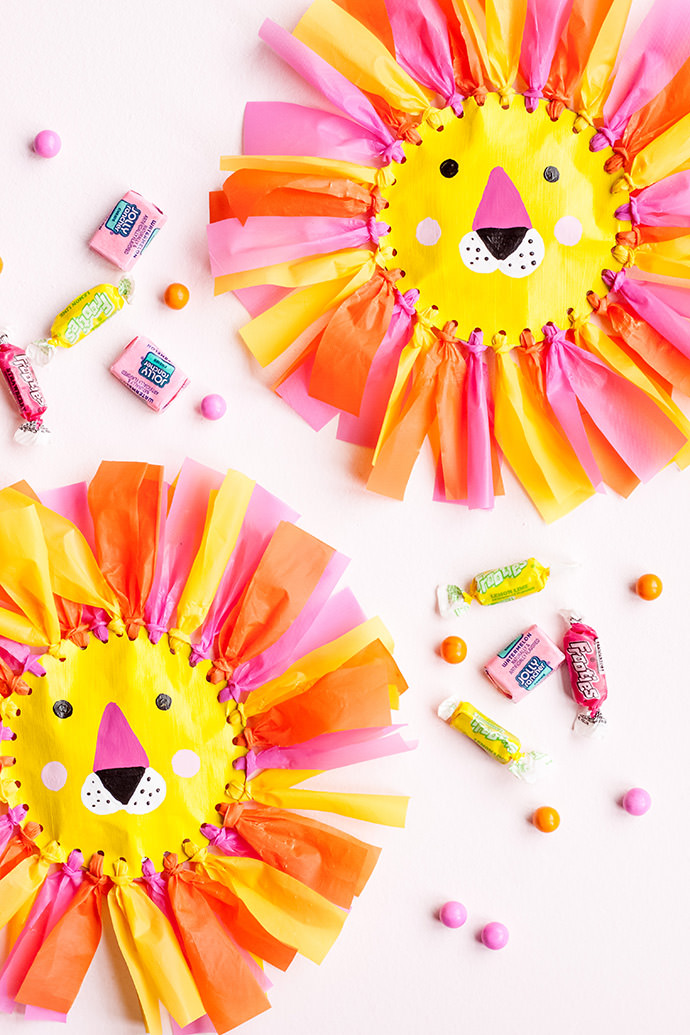
Create a 4” circle template using cardstock or cardboard, and then trace the circle onto a brown paper bag two times. Cut out your circles.
Step 2
Paint one circle yellow using a sponge brush and acrylic paint.
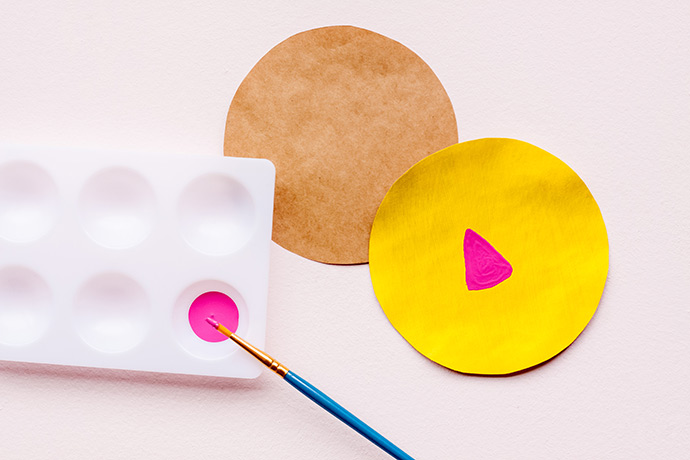
Step 3
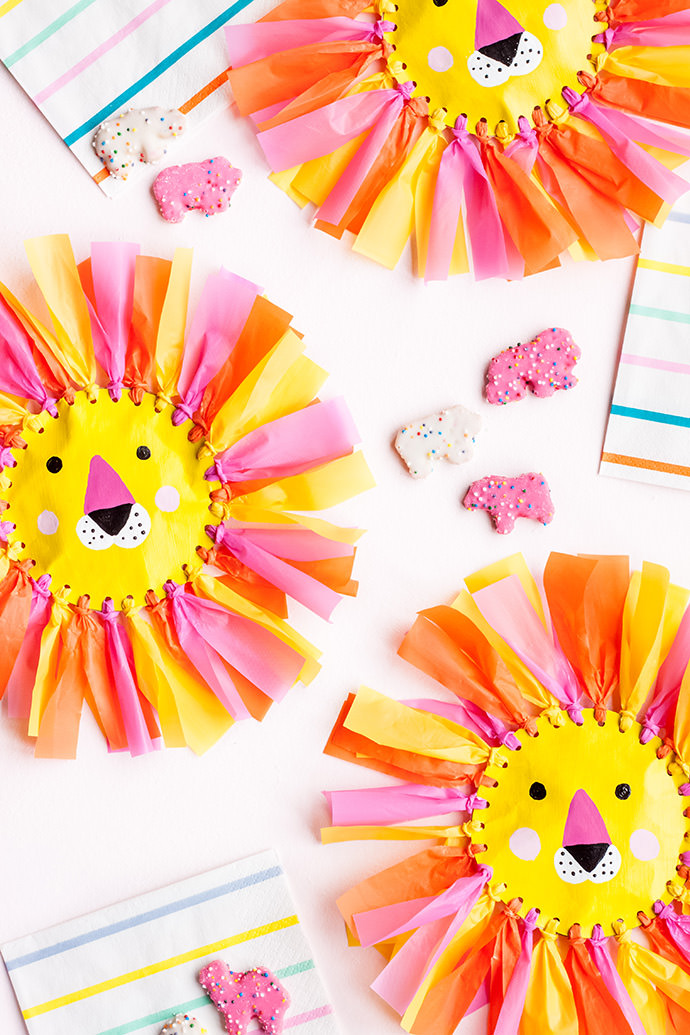
In the middle-ish of the circle, paint a hot pink triangle with “soft” or rounded edges.
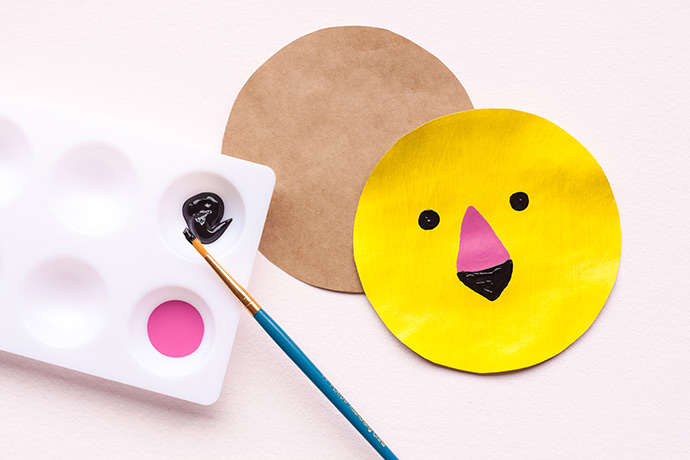
Step 4
Once the triangle is dry, paint a smaller black triangle at the bottom of the pink one, facing the opposite direction. Paint two small black eyes on each side of the hot pink nose.

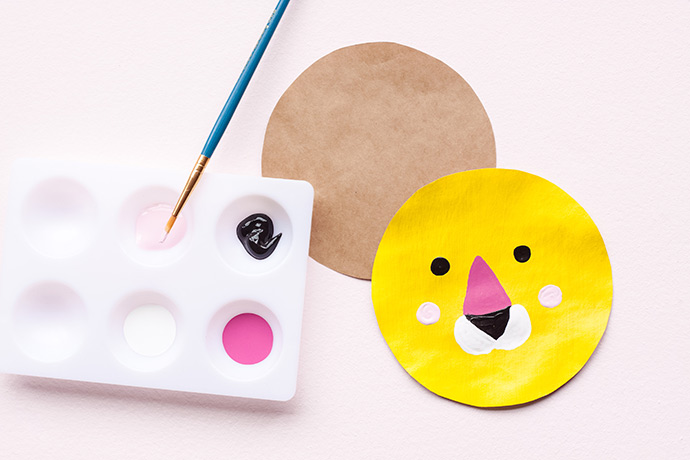
Step 5
Once the black triangle is dry, paint a white half-circle coming off each of the two edges. Connect them a bit at the bottom.
Paint a small, light pink cheek on each side of the bottom of the hot pink triangle.
Paint some tiny black dots in each white half-circle, once the white paint is completely dry.
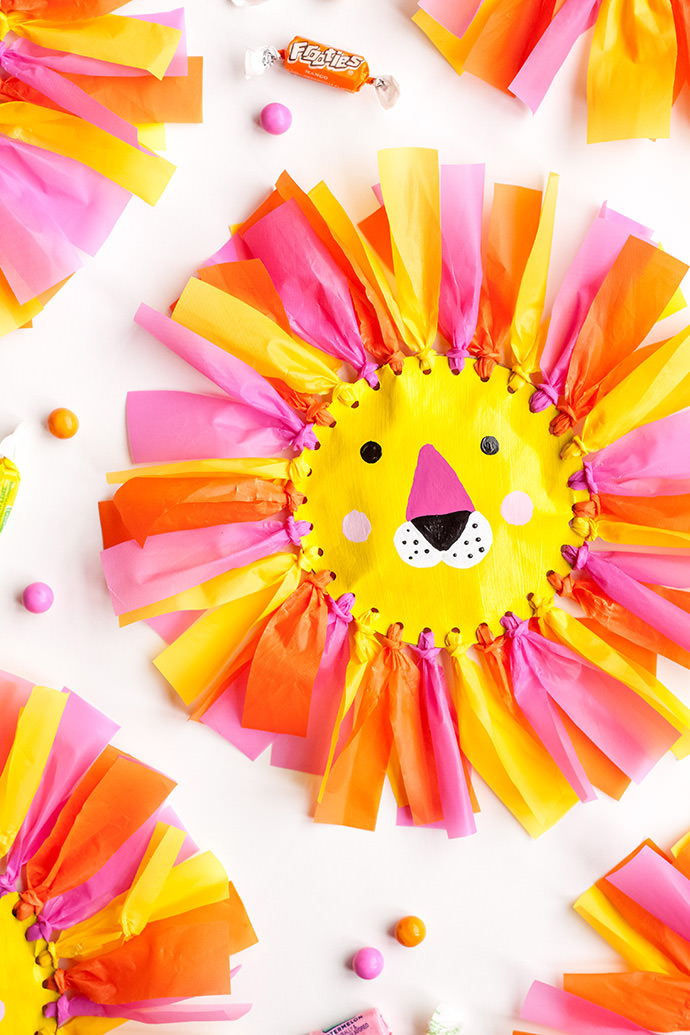
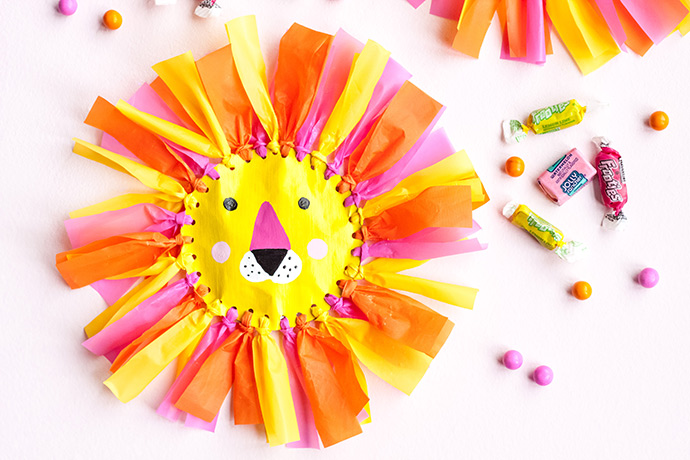
Step 6
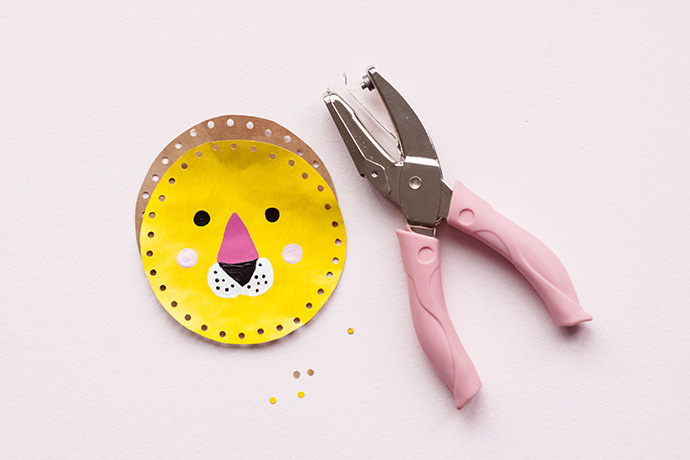
Place the yellow circle with the face directly on top of your second circle, and while holding the two firmly together, punch evenly spaced holes all around the edge of the circles – a little over ¼” apart. The holes should line up perfectly on the two circles.
Step 7
Continue holding the two circles together. Alternating colors, you will tie your tablecloth strips through each hole. Each strip should go through both circles. Start by folding the strip in half, and twisting the end to make it skinny enough to fit through the hole. Place the strip through the first hole, from the top (going through the yellow circle with the face, first). Once it is through, pull the loop apart, and place the loose ends of the strip through the loop. Pull gently, until you have a knot at the circle, with two strips hanging down. Repeat this step with alternating colors of tablecloth strips, until you get to your last 5-10 holes. STOP!
Step 8
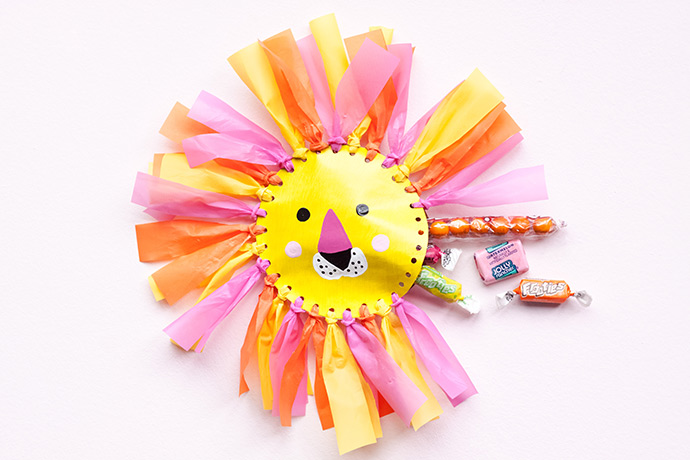
Fill the pouch with small candy and prizes, and then continue tying the tablecloth strips through the holes, until the circle is completely sealed.
TIP: Friends will need to untie a few strips to retrieve prizes, so I might suggest including a few extra tablecloth strips (7 or so), in case your friend wants to “sew” the lion back together again!

Voila! Your lion is complete. Happy crafting!

For even more lion-tastic DIY ideas, check out these paper lion masks, this adorable lion cake, and how about this crazy cute no carve lion pumpkin from by Ashley Toth for Parents!!