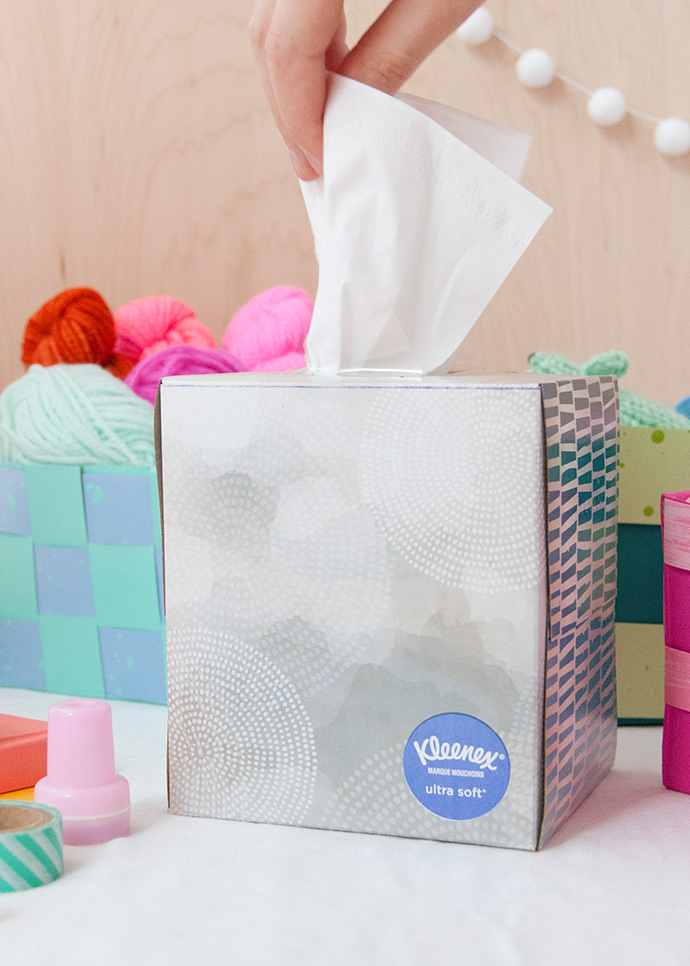
This post is sponsored by Kleenex ®. All thoughts and opinions remain my own.
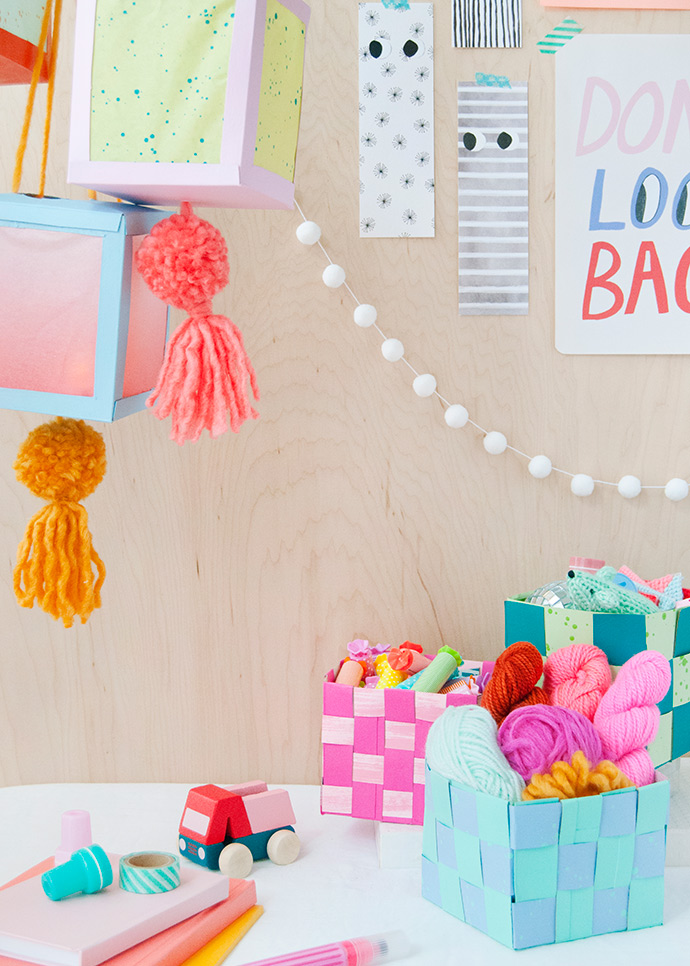
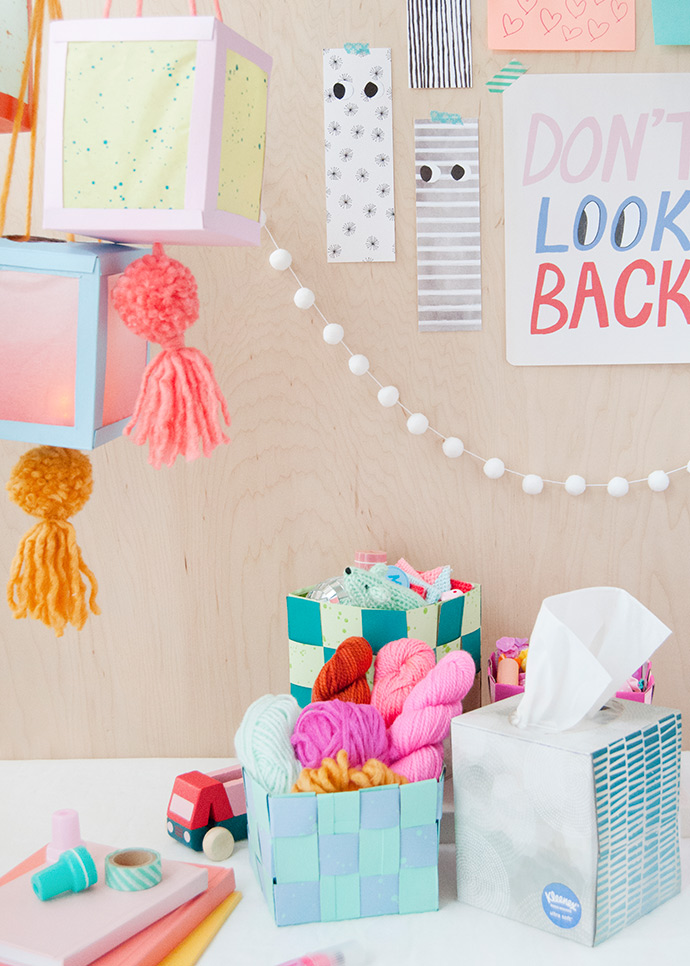
There is nothing we love more than crafting with recyclable materials. In fact, we have a whole bin dedicated to saving empty bottles, cans, and boxes that we just know will make the perfect craft! Today we’re super excited to be sharing two really fun ways to repurpose Kleenex® Facial Tissue boxes, right in time for Earth Month!
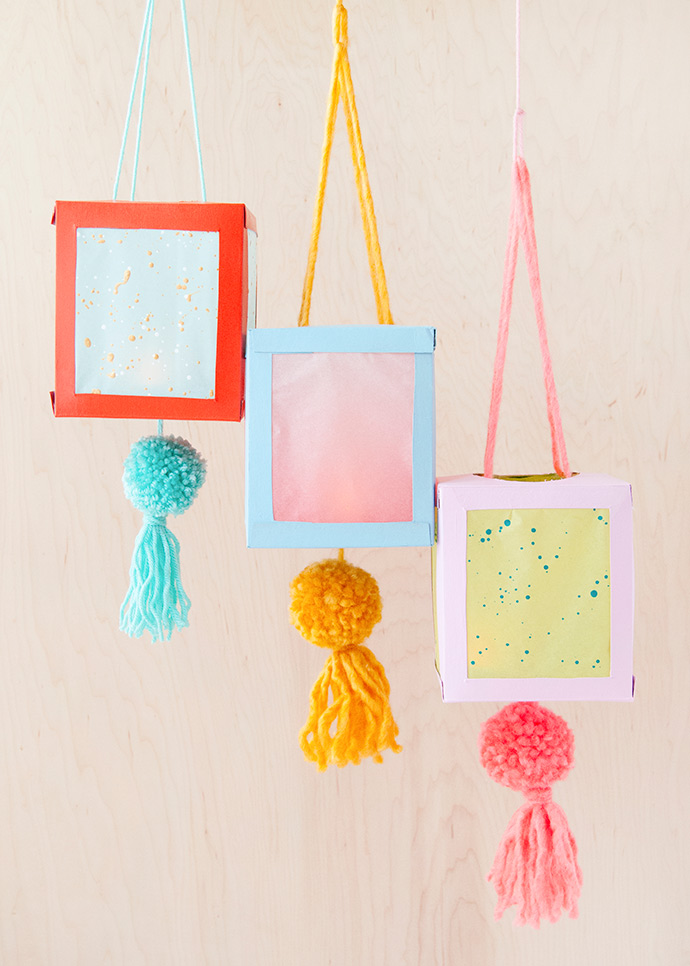
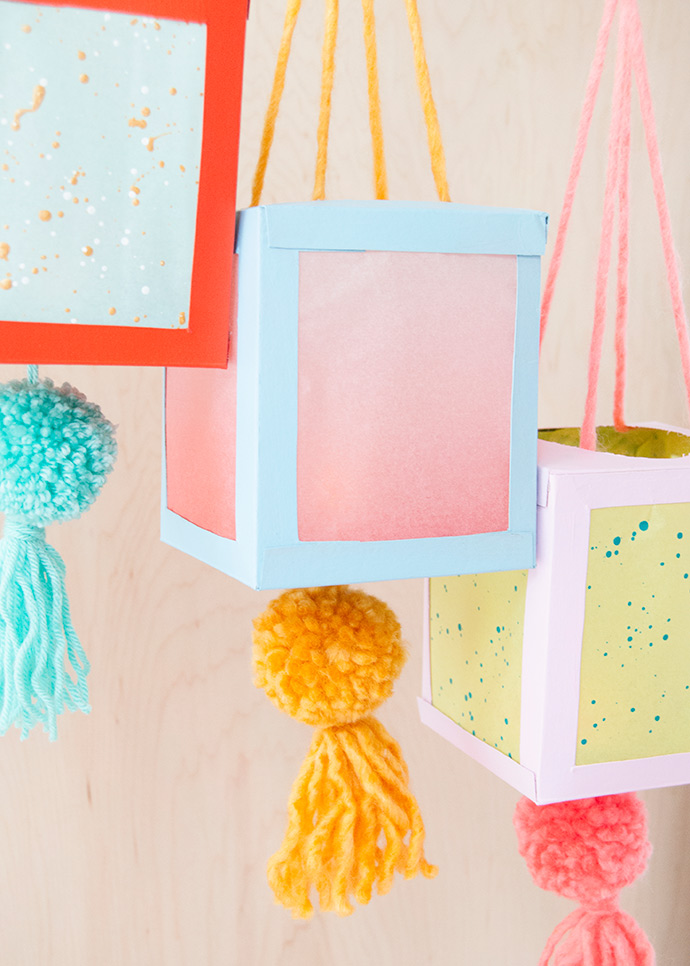
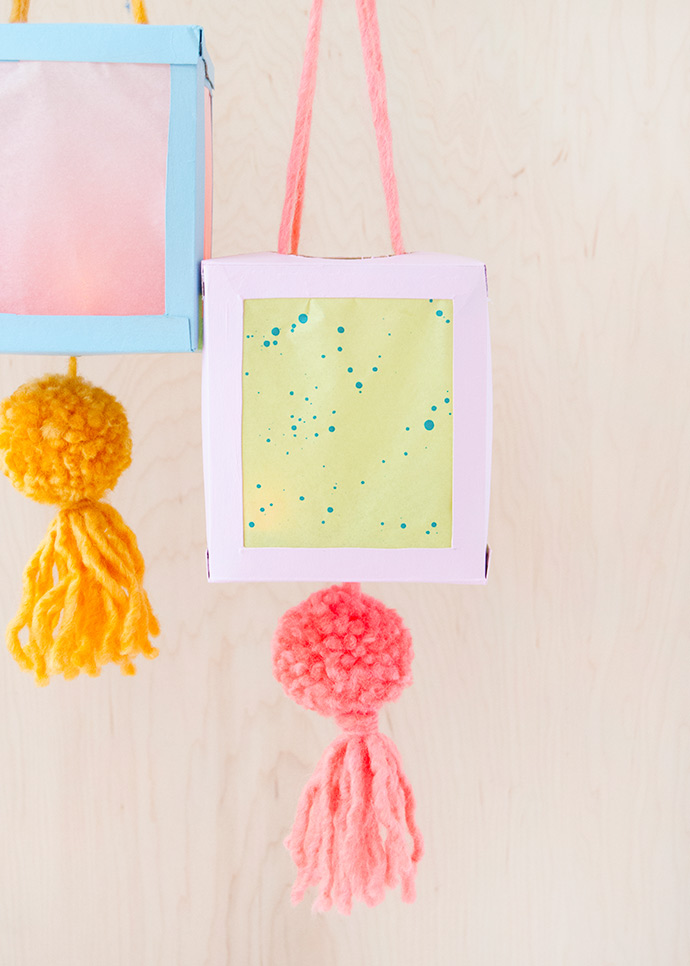
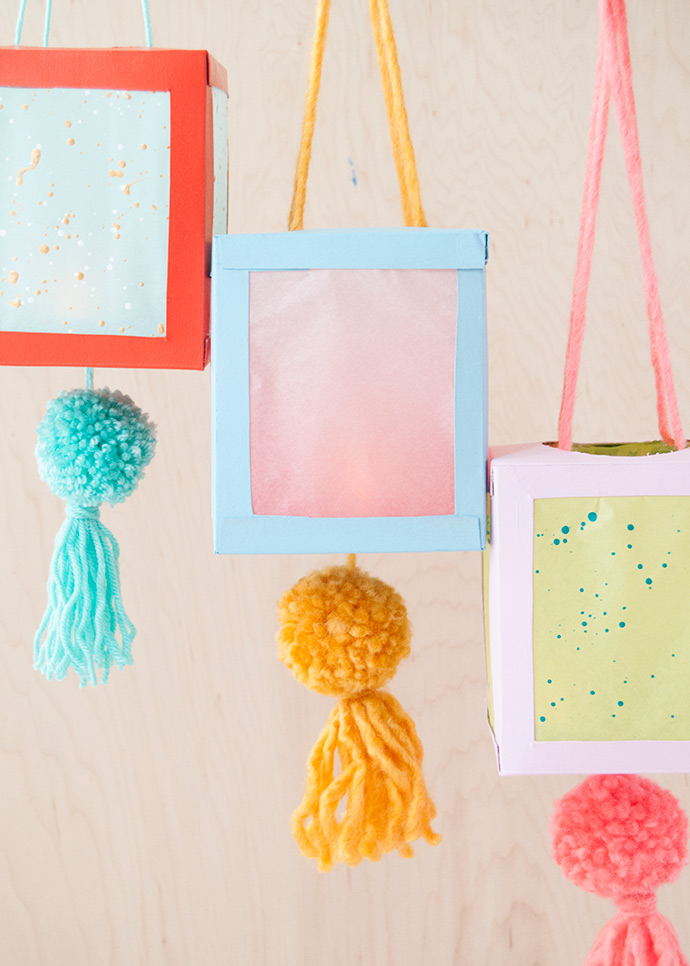
Lanterns have got to be one of our all-time favorite crafts to make and reusing the empty boxes here was a real game changer! The oval-shaped opening in the top was the perfect way to attach the yarn for hanging, and allows for easy access to the flickering light inside. We mixed and matched a few shades of paint, tissue paper, and yarn that we already had on hand, and you can come up with some really show stopping color combos this way!
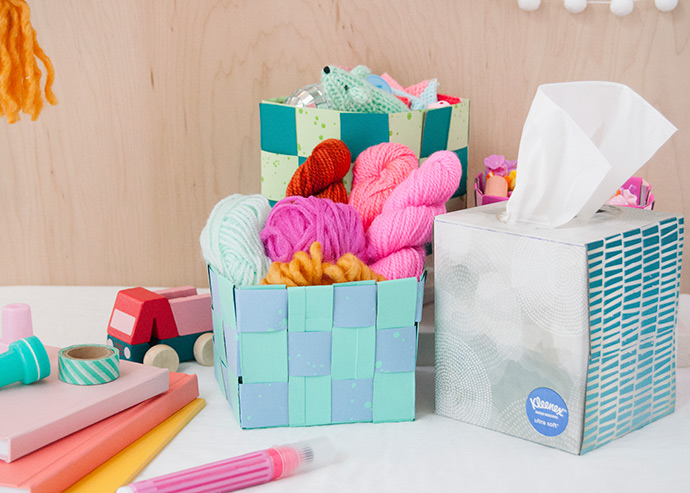
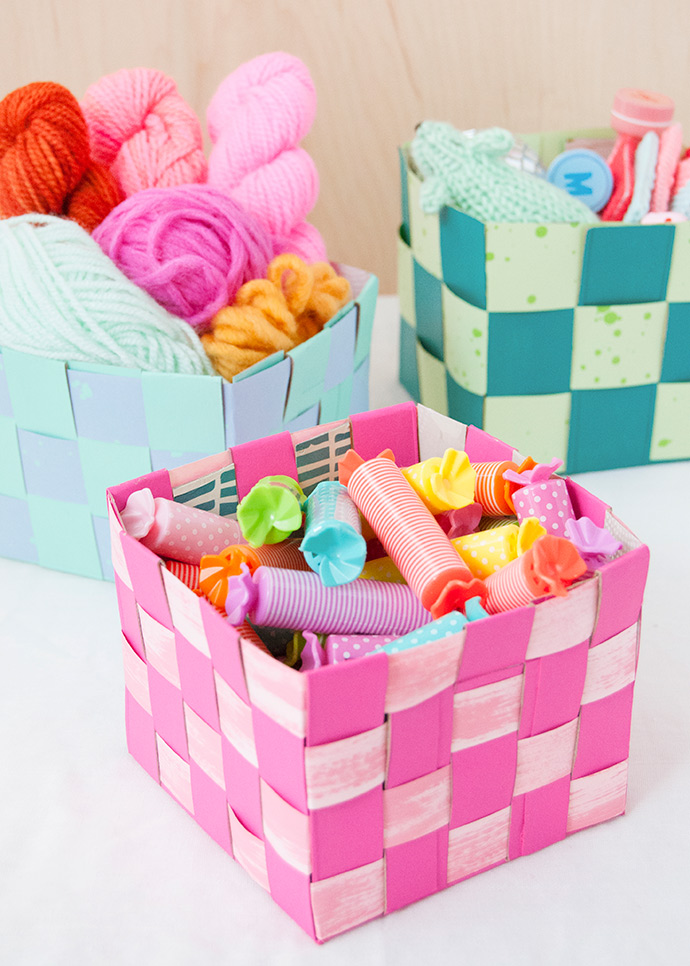
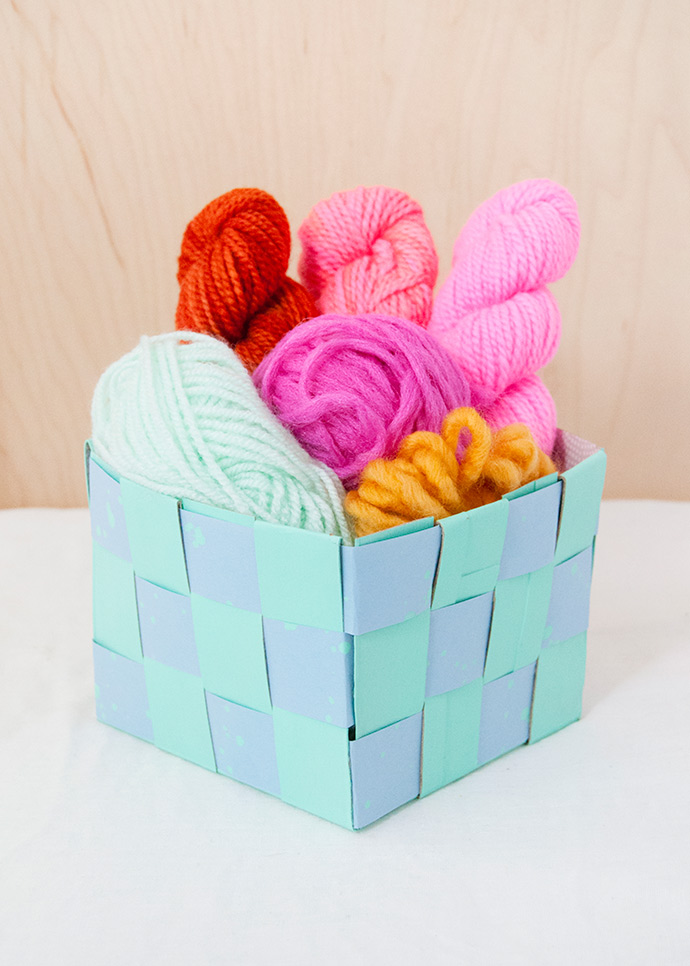
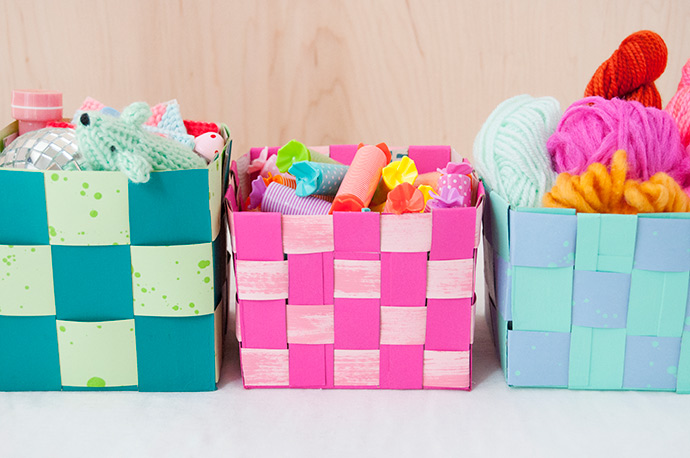
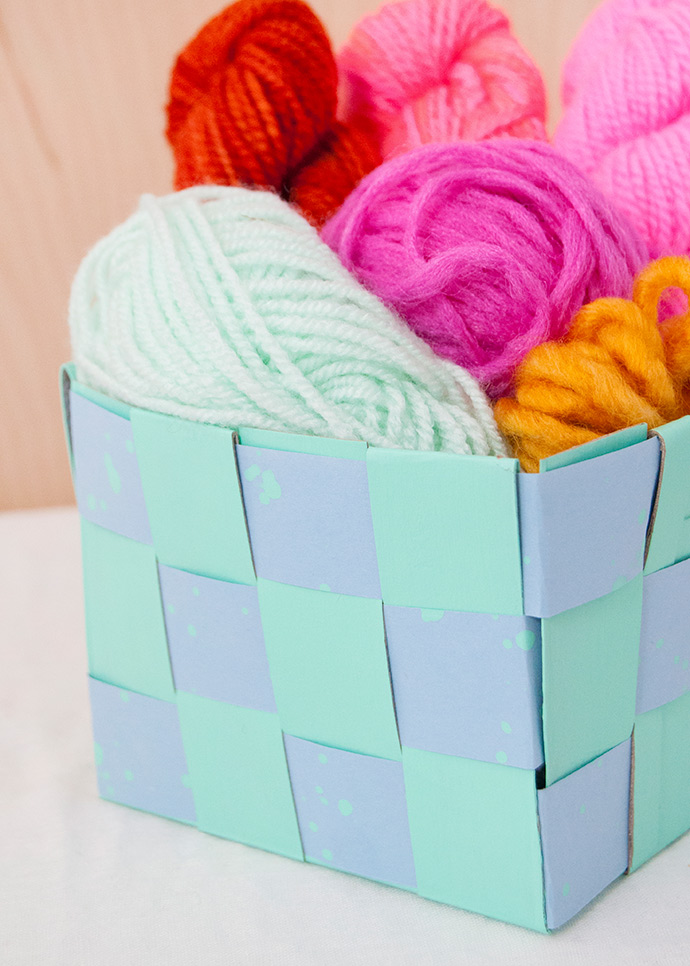
And of course, we can’t forget these mini woven storage baskets! Weaving with paper and cardboard instead of cloth or yarn is a great introduction to the technique for little ones. And now is the time to stock up on limited edition Kleenex® tissue designs at Costco. From 4/17 to 5/12, Costco members will save $4 on America’s softest facial tissue – Kleenex® Ultra Soft, Trusted Care and Soothing Lotion tissues.
So keep reading to learn all our tips and tricks for making both crafts using recycled boxes!
woven storage baskets

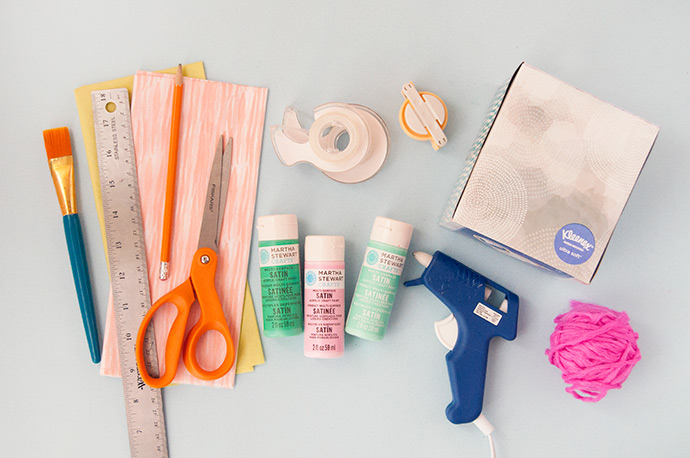
what you need:
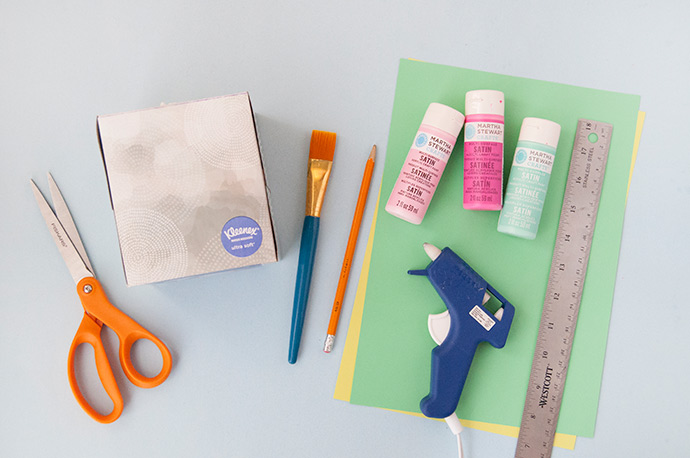
- Empty Kleenex® Facial Tissue boxes
- Colored paper
- Scissors
- Ruler
- Pencil
- Paint
- Paintbrush
- Hot glue gun
how-to:
Step 1
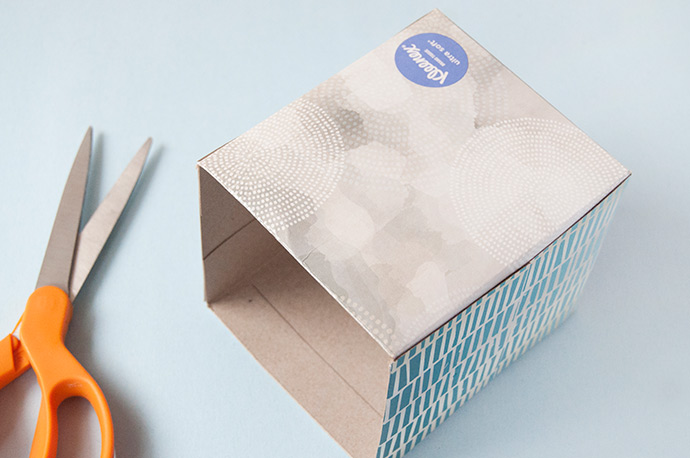
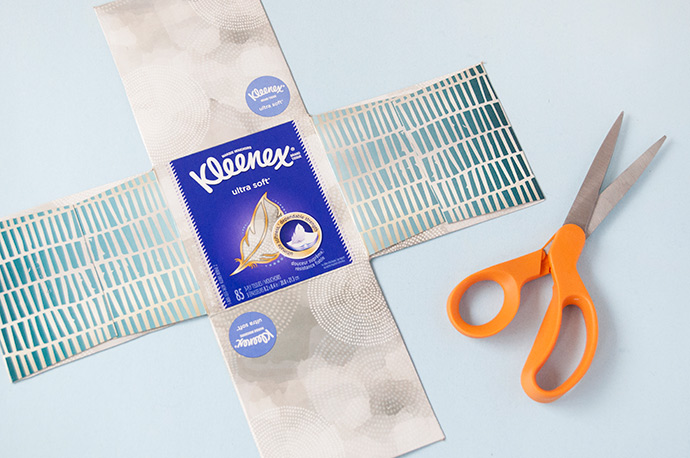
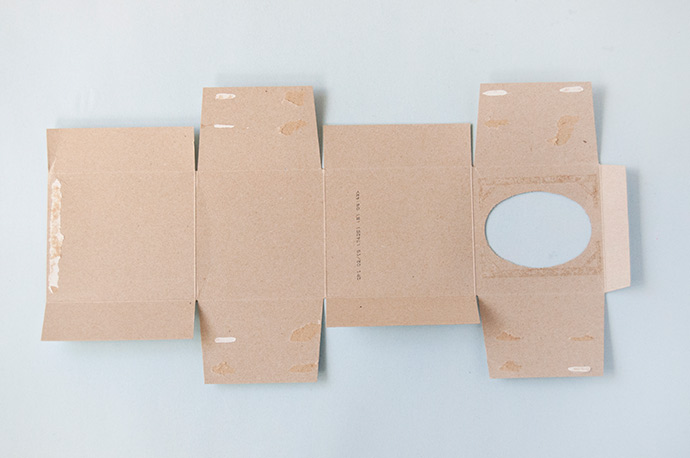
Use a pair of scissors to carefully cut the top off of the box and set aside – you won’t need this to make the baskets.
Step 2
Continue to deconstruct the box by cutting down each of the four edges so that the box sits flat on the table, like a big plus sign.
Step 3
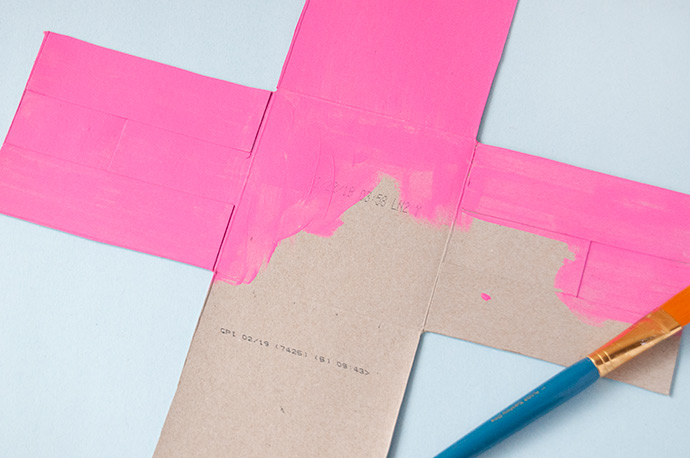
Pick a color of paint and apply all over the plain side of the box. You can paint both sides if you like, but we left the patterned side as is – this will later be the inside of the box and not visible once you’ve filled the baskets.
Step 4
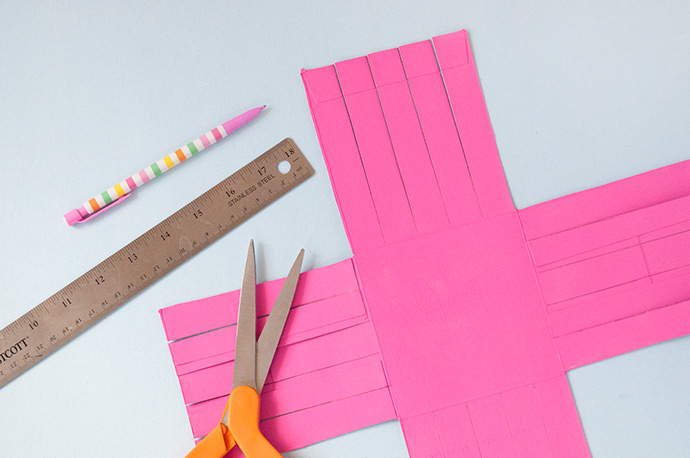
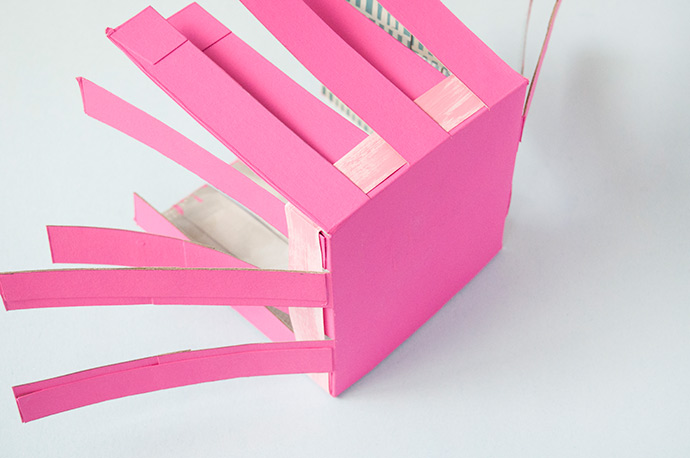
Once the paint is dry completely, use a ruler and pencil to mark evenly spaced lines onto each of the four sides. You can make as many as you like, as each will provide a different look. For these baskets, we tried a different number of strips on each basket so that each one would be unique. After drawing these lines, cut down each one.
Step 5
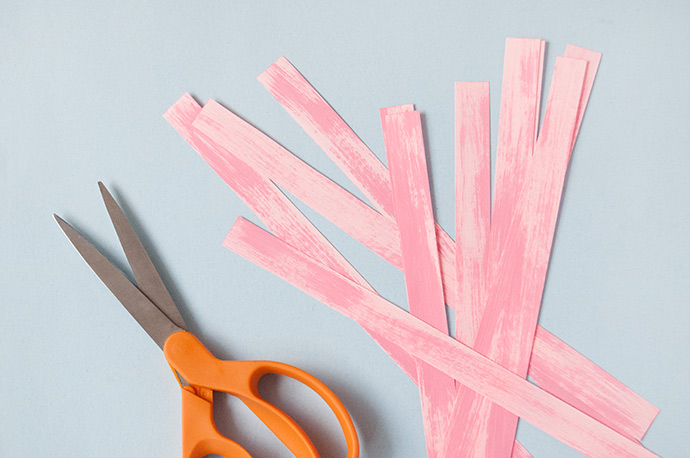
Pick another piece of colored paper and cut that into strips of a similar width. You can give your paper a quick paint if you like for extra detail, like we did. If you’re using regular printer-sized paper, you’ll need to cut the whole sheet into strips. Then, take two strips and glue one end of each together, forming a double long strip. Do this with all the strips, so that you have a handful of double-long strips.

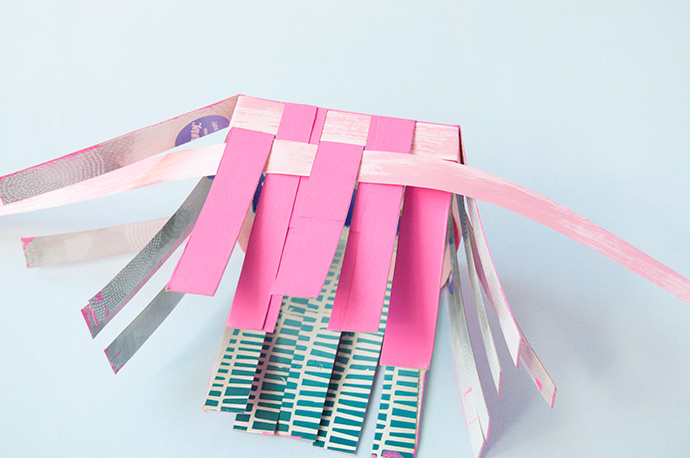
Step 6
Time to start weaving! We started by adding a small dab of hot glue onto the seam of one of the double-long strips and sticking it in place behind one of the center strips of cardboard, as shown above. Continue weaving the paper through the other cardboard strips until the bottom row of one side is all woven together.
Continue weaving the strip along the other side, folding it at the corner for a nice crease. This first row is the trickiest one and the strips will be moving around a little bit, so feel free to use glue as needed to help hold this together for you. Once the strip meets itself, cut off any excess and glue the ends in place, hidden behind another strip if possible.
Step 7
Repeat the same process for the next row. This one should be a little easier since the first row is helping hold everything together.
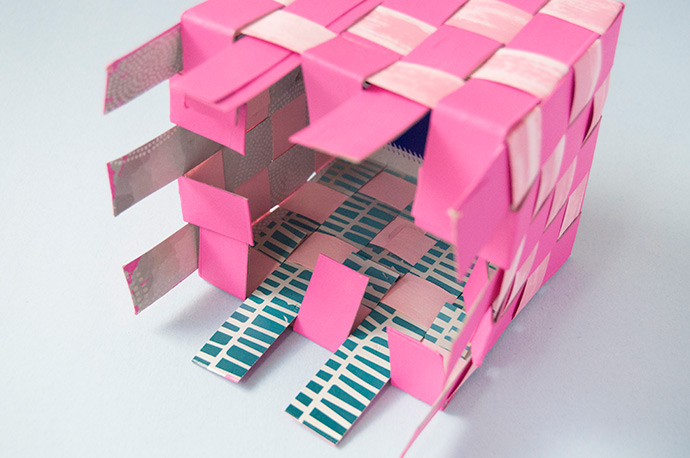
Continue weaving in paper strips until you’re happy with the height of the basket – we did four rows on this one. Fold the excess cardboard strips inside the basket as shown, and use hot glue to secure in place.
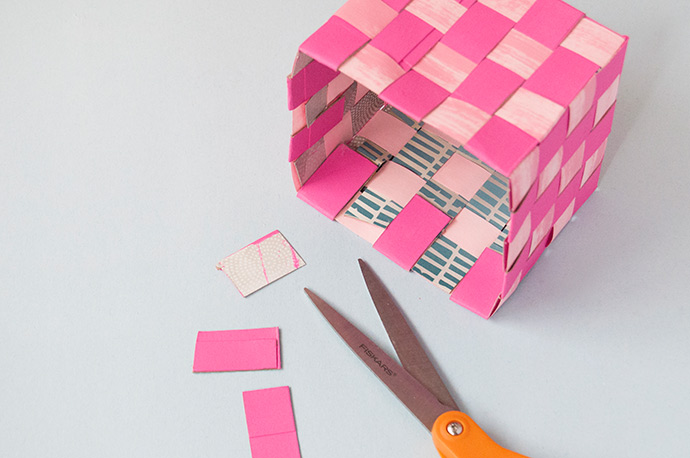
Step 8
Continue weaving in paper strips until you’re happy with the height of the basket – we did four rows on this one. Fold the excess cardboard strips inside the basket as shown, and use hot glue to secure in place.

paper lanterns

what you need:
- Empty Kleenex® Facial Tissue boxes
- Tissue paper
- Scissors
- Paint
- Paintbrush
- Ruler
- Pencil
- Yarn
- Pom pom maker
- Hot glue gun
- Tape (regular and double-sided)
how-to:
Step 1
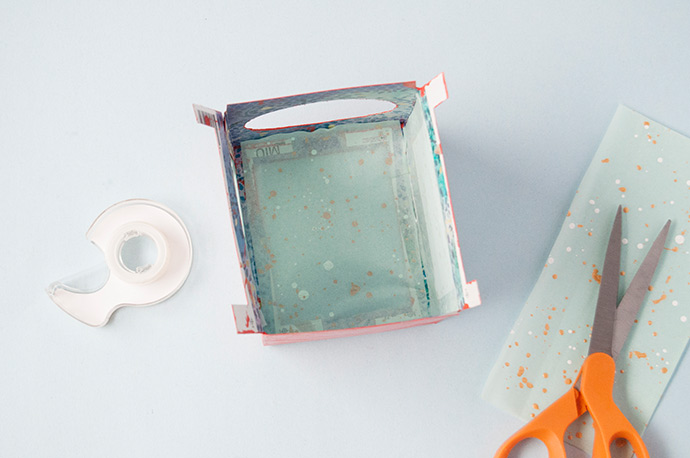
Carefully unfold the empty box, keeping all panels and flaps intact. Remove the plastic cover from the top opening.

Step 2
Use a ruler and pencil to draw out the design for your lantern. We kept it simple with ½” borders – you’ll want to draw these lines ½” away from the folds on the front and back panels (not the bottom or top) and then carry these lines over onto the side panels as well. Once these flaps are folded in later, they’ll form the exact same border as the front and back pieces.

Cut along these lines so that you end up with a piece that looks like the shape shown above.
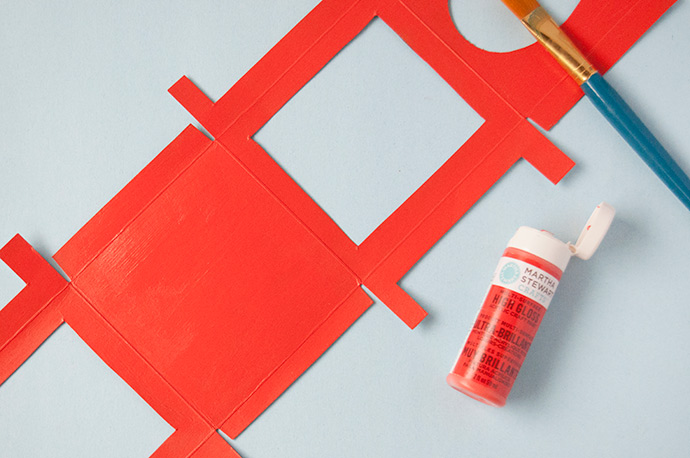
Step 3
Pick a color of paint and apply a coat over the plain side of the cardboard – the patterned side won’t be visible later. Let dry.

Step 4
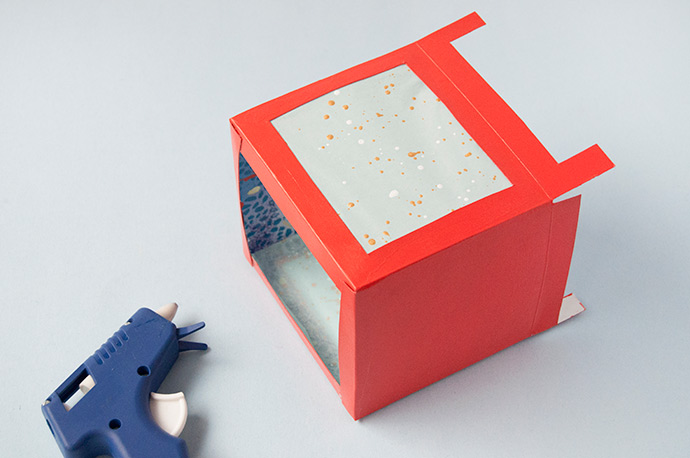
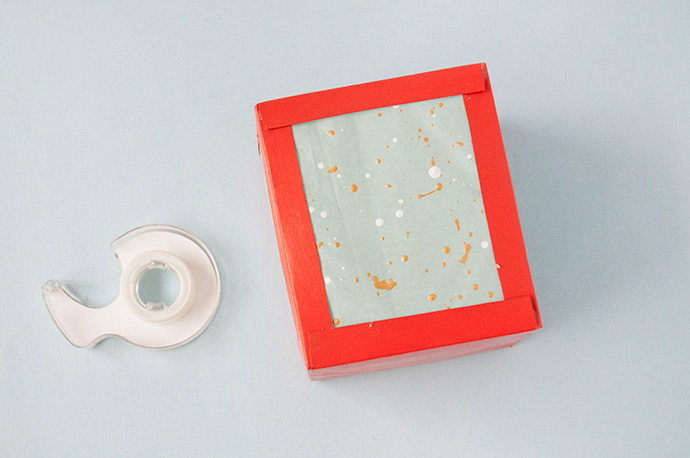
Select a color of tissue and cut rectangles that are the size of the front side of the tissue box. These don’t need to be exact, but make sure that they are at least bigger than the opening. Apply double-sided tape along the edges of the opening and carefully press the tissue paper in place. Repeat for the second opening. Make sure to leave the oval hole in the top uncovered.
Step 5
Once you have the first two sides covered with tissue, use the hold glue gun to begin reassembling the box. For now, leave one side open so that you have easy access to this new third opening.
Step 6
As before, apply lines of double-sided tape along the inside edges of the third side and then carefully place the rectangle of tissue inside, pressing to adhere.

Step 7
Finally, finish assembling the box with the hot glue gun so that all sides are how together.
Step 8
Apply the double-sided tape as before, this time working from the top oval opening. Adhere the tissue in the same way, again through the oval. This side is the trickiest to get, so younger kids may need assistance.
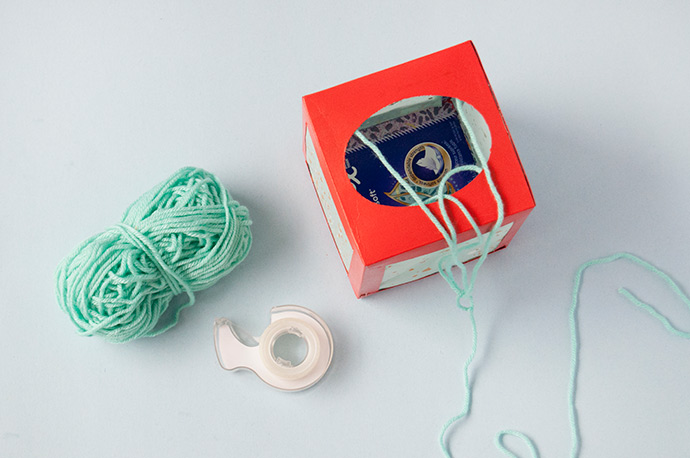
Step 9
Cut two pieces of yarn, each about 12” long. Tape the ends of one piece into opposite corners, on the inside of the box. Do the same for the second piece of yarn into the remaining two corners. Cut a third piece of yarn and tie it around the place where the other two yarns cross.
Step 10
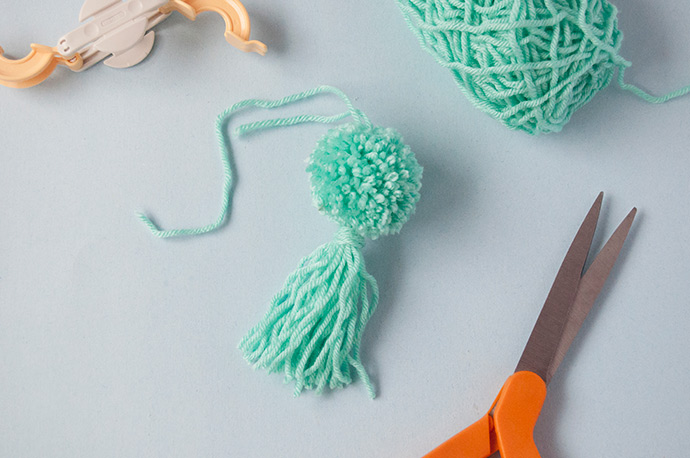
To decorate, use a pom pom maker and yarn to form a pom pom, leaving the tails you tied off with long for now. To make the tassel, wrap the same yarn around a postcard several times and then carefully slide the yarn off the card. Use another piece of yarn to tie one end together and cut the loops on the other end. Attach the tassel to the bottom of the pom pom with hot glue.
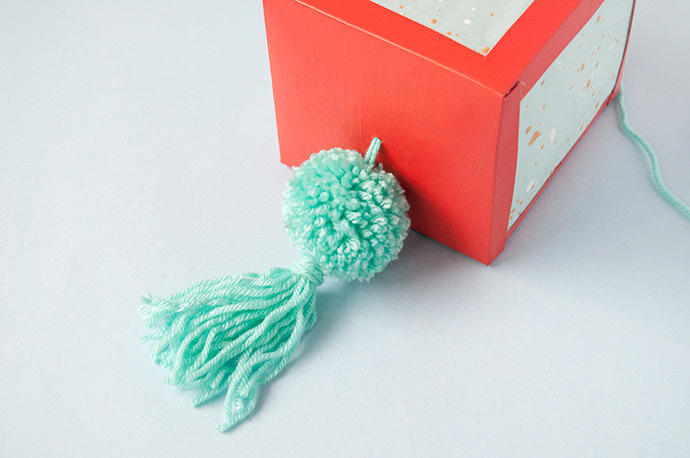
Use the tip of a pair of scissors to poke a small hole in the center of the bottom of the lantern. Stick the yarn tails up inside and use tape to secure. Place a small battery-operated tea light inside the lanterns and they’re ready to hang!
How are you celebrating Earth Month? Using recycled materials as much as you can while crafting is an easy way to make a difference! Empty boxes are an amazing blank slate that can be turned into beautiful projects – what will you create?