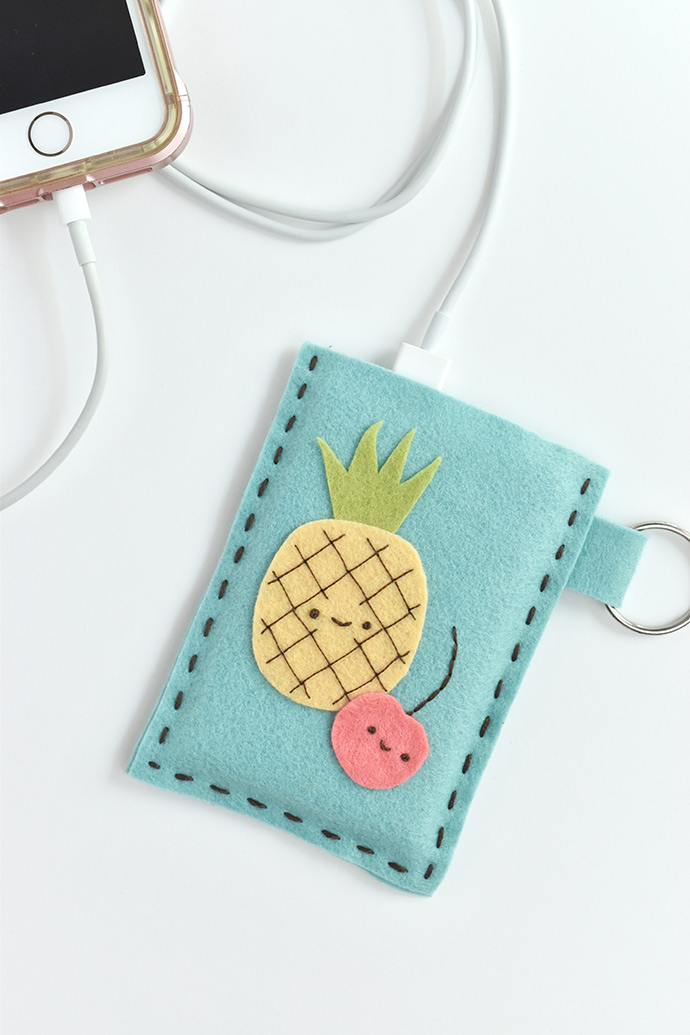
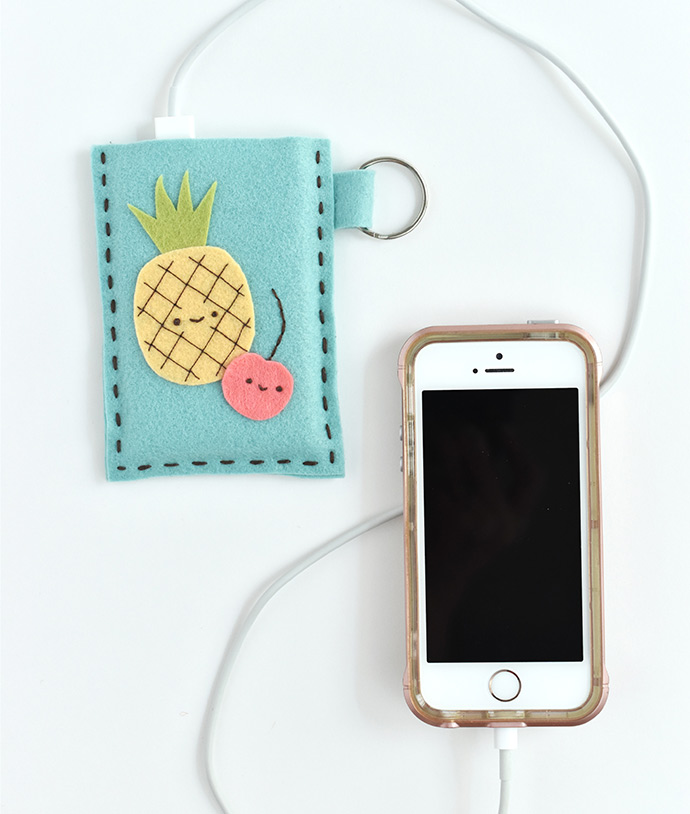
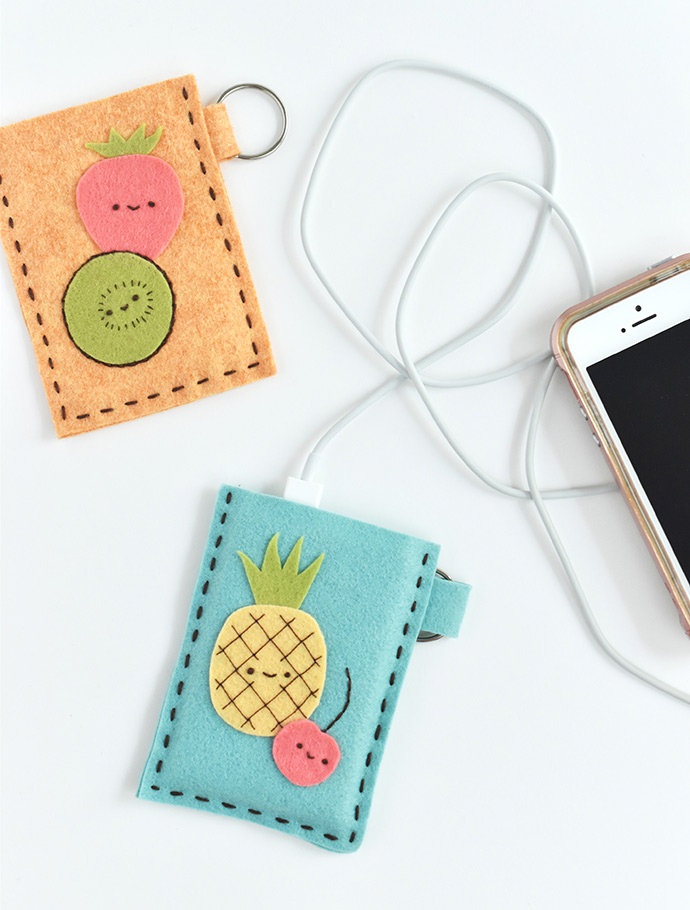
What do you do when your phone runs out of juice? Plug it into an extra power bank disguised as a juice box! This felt case can clip onto a lanyard, backpack, or keys so you always have some battery power close by. Plus, the fruit makes it kawaii cute!
Power banks come in different shapes and sizes, but you can make this case to fit your backup battery. For the juice box effect, the flat rectangular ones work best, but you also shrink the fruit shapes if you need to fit them on a smaller case.
Ready to make your power bank extra cute? Grab some felt and get started!
what you need:
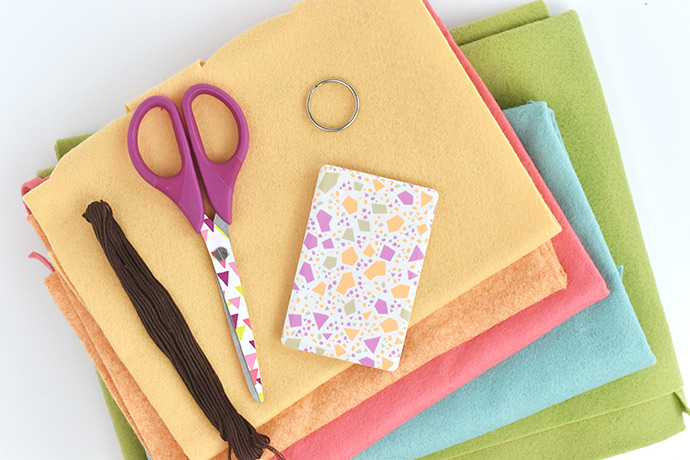
- Felt (wool blend felt will hold up better long term)
- Rectangular Power Bank (works best if the plug is on the short end)
- Embroidery Floss
- Key Ring or Small Carabiner Clip
- Ruler
- Scissors
- Tracing Paper
- Needle
- Craft Glue
- Printable template
how-to:
Step 1
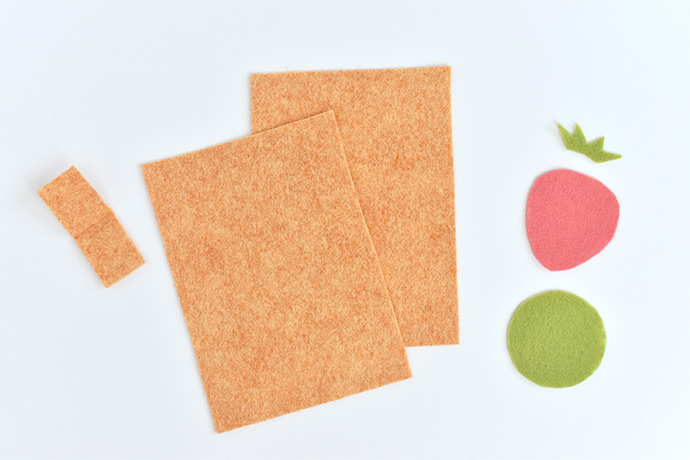
First, measure your power bank. Round up the dimensions to the nearest 1/4 inch. Add 3/4″ to the width and 1/2″ to the height. Finally, add the thickness of the power bank.
For the sample, the power bank measures just under 2-1/2″ x 3-3/4″, with a thickness of 1/4″. Adding the extra amounts for the seams and thickness, the juice box pieces are 3-1/4″ x 4-1/2″.
Use these dimensions to cut out the front and back of the juice box. Cut out a matching small rectangle from the template page, plus any fruit you want for the juice box.
Step 2
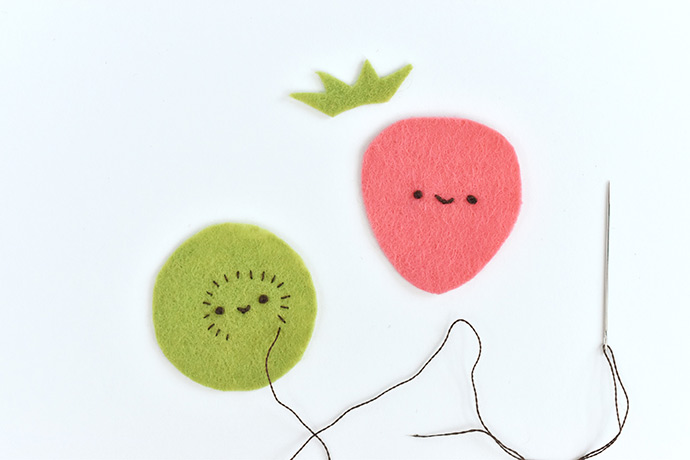
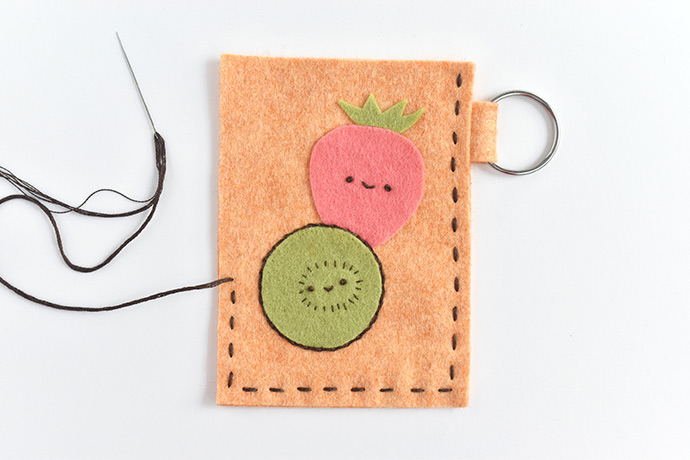
Embroider the faces and any extra details on the fruit pieces. Don’t worry about the details around the outside of the fruit just yet.
For the faces, we used 3 strands of embroidery floss, and for the extra lines, we used just one strand.
To embroider on the felt, trace the designs on tracing paper, then stitch through the felt and the paper at the same time. After you finish the embroidery, carefully tear the paper away.

Step 3
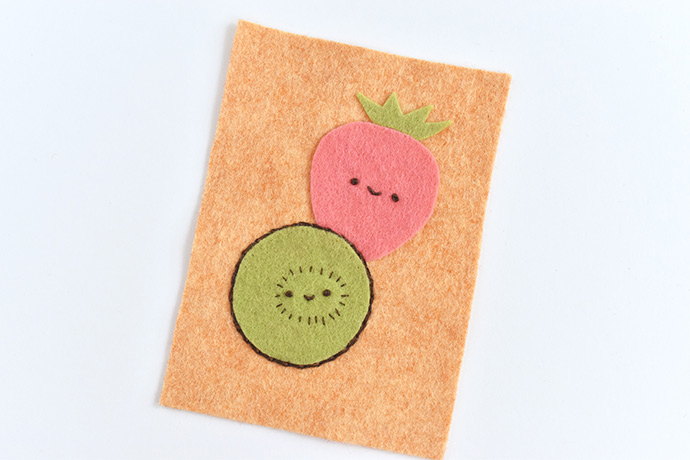
Glue the fruit pieces to the front juice box rectangle. Let the glue dry for a few hours before the next steps.
Step 4
Embroider any extra elements around the fruit. For the kiwi, add a border of brown around the outside for the skin, add a stem to the cherry and orange, and a vine to the grapes.
Use three strands of embroidery floss for this.
Step 5
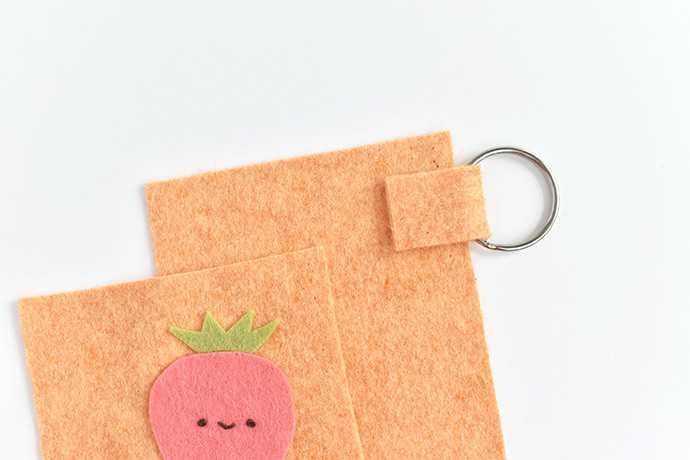
Fold the small rectangle in half and slide the key chain or clip into the fold. Place the folded tab between the front and back layers of the juice box.
Step 6
Stitch around the sides and bottom of the juice box with running stitch. Keep the stitches a little less than 1/4″ from the edge and be sure to stitch through the tab with the ring.
Use six strands of embroidery floss. Try to hide the beginning and ending knots between the layers or on the back.
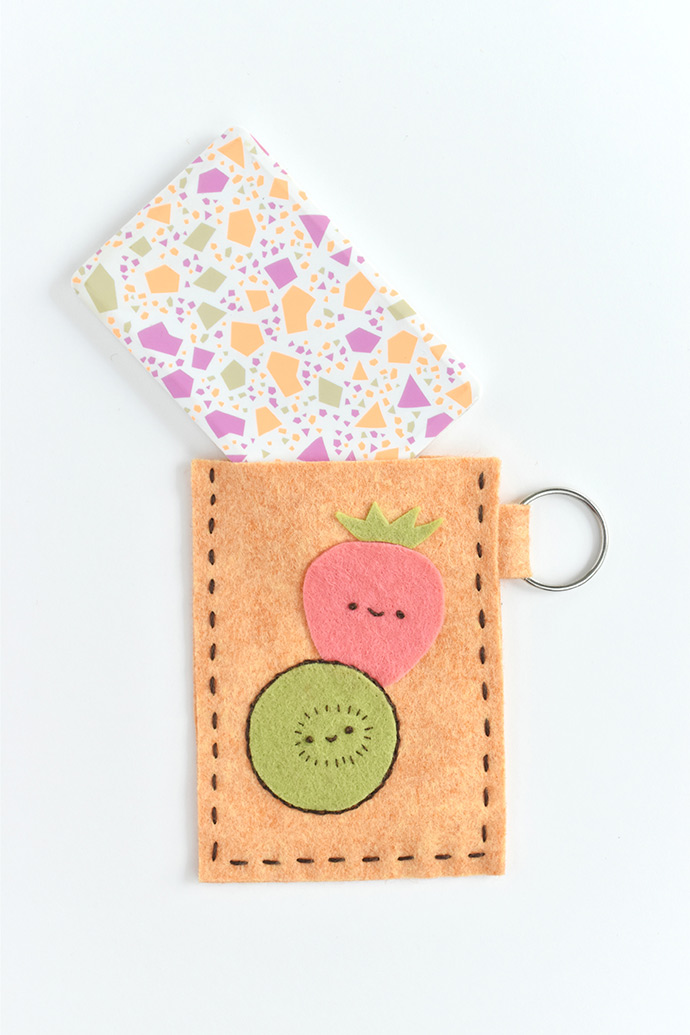
Slide your power bank inside the case. It should fit snugly so it doesn’t slide out.
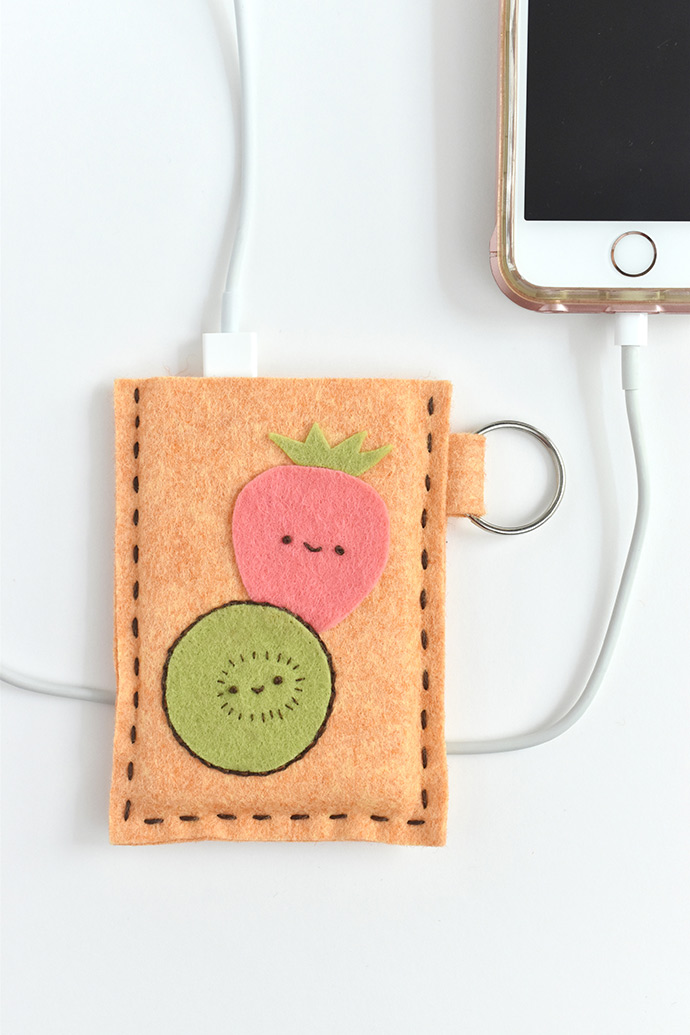
Plug in your power cord as the juice box straw, and give your phone the refreshment it needs!
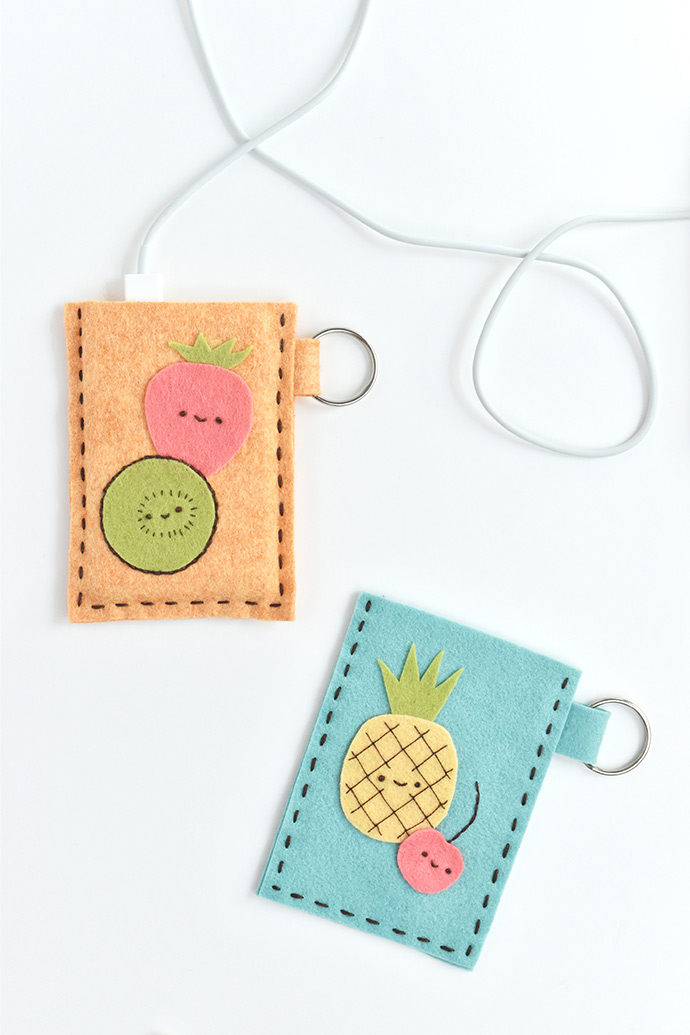
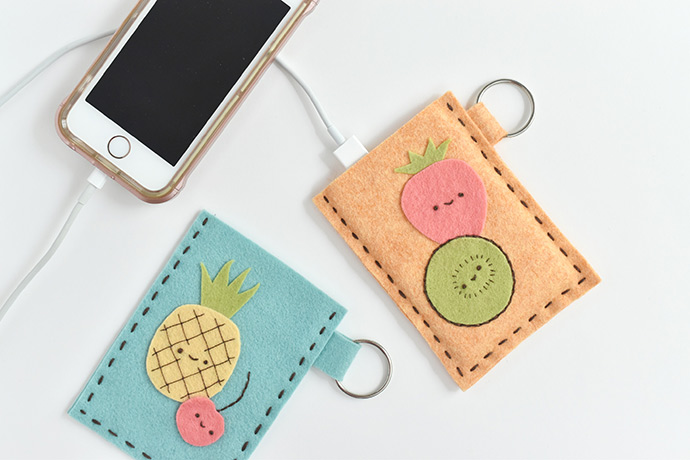
There are lots of flavors of juice, so choose your favorite for the juice box. You can even mix a few for a fruit punch! And if your favorite fruit isn’t in the pattern, make your own pieces…or make something a little silly. After all, who knows what kind of juice your phone likes to drink?
Happy crafting!