It’s hard to think of a dessert that’s as fun and silly as Jell-O. It’s a one-of-a-kind treat that’s vibrant and refreshing (plus it’s got some great dance moves, too)! Though it’s already known to be a summertime staple, you can now take your Jell-O to the next level by transforming it into a beautiful and flavorful color wheel.
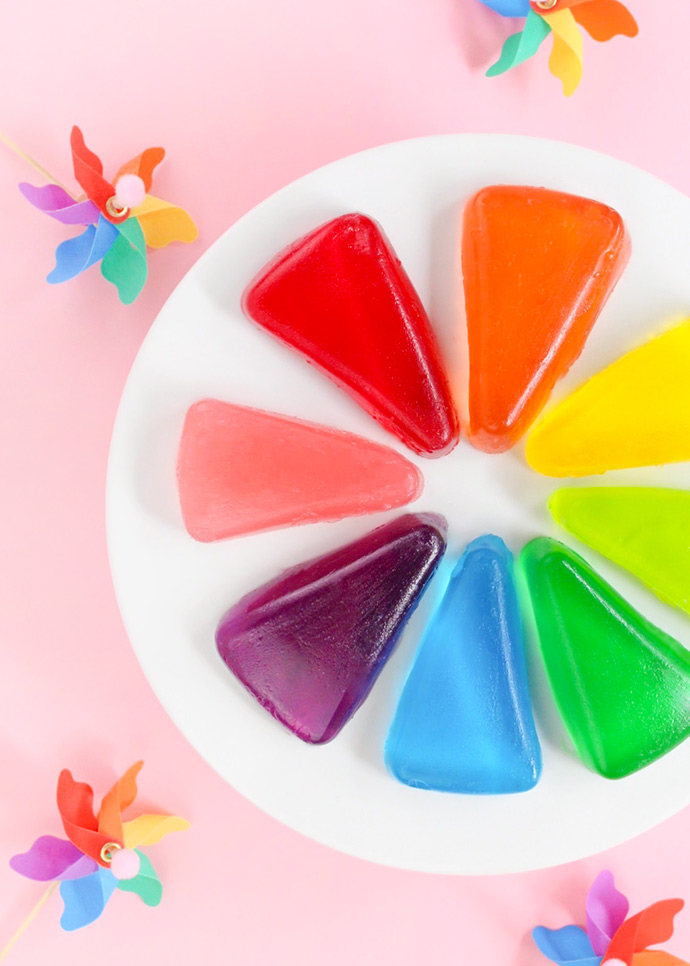
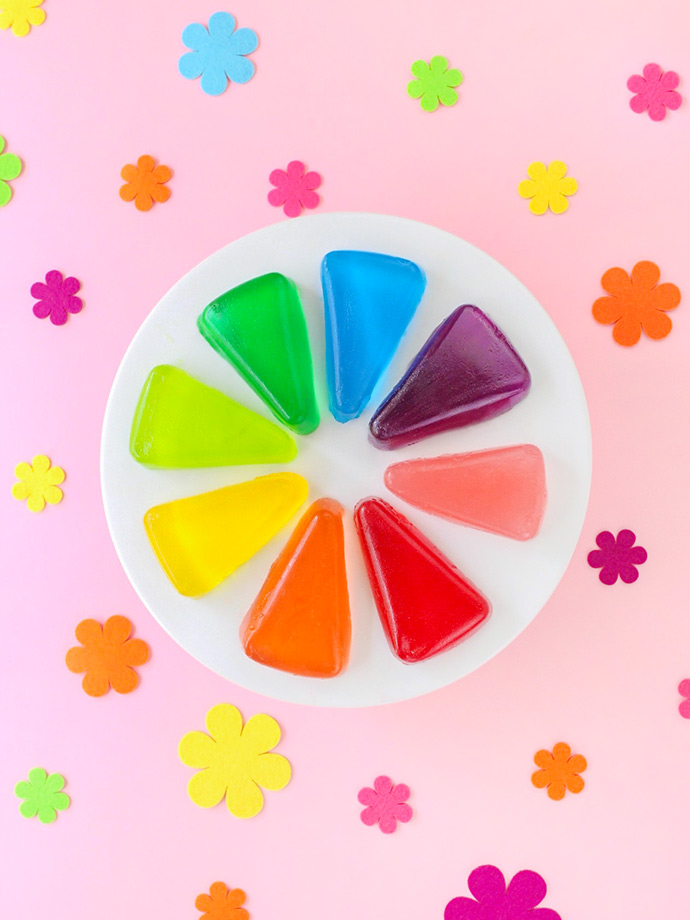
My favorite thing about Jell-O is how bright and bold the colors can be. This is why it makes such a great base for the color wheel. And did I mention the best part about this sweet treat? Since the different colors represent different flavors, guests have more of a variety to choose from. That means even the pickiest eaters should be able to find a flavor in there that they’d like to try. After all, what’s better than having the colors of the rainbow to pick from?
what you need:
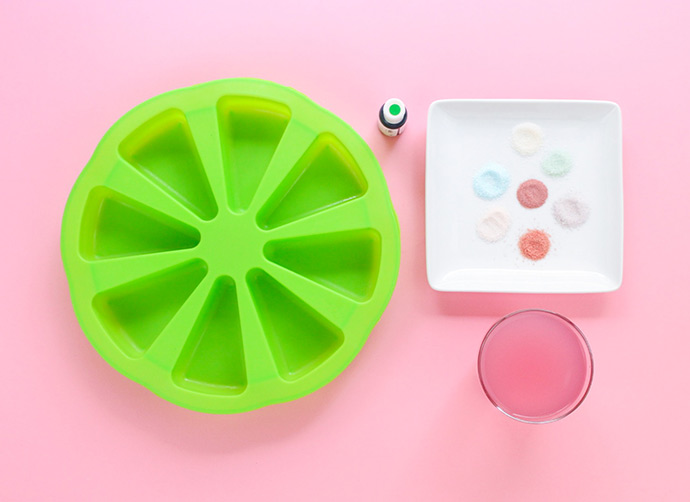
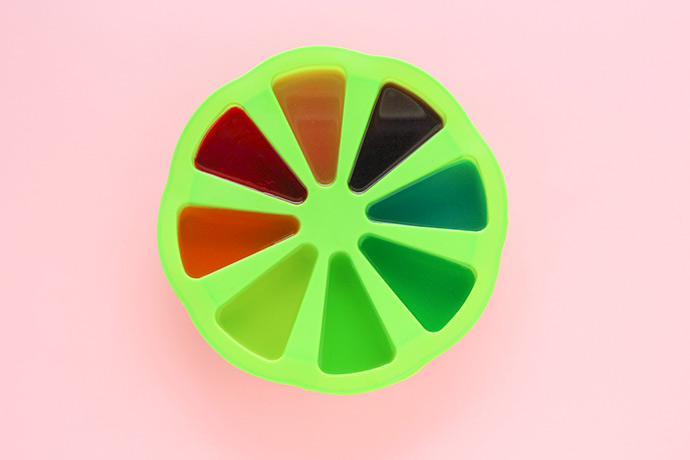
- Silicone 8-slice mold
- Red, orange, yellow, green, blue, and purple 3oz packages of Jell-O
- Green food coloring (for the light green portion of the wheel)
- Pink juice + clear gelatin (for the pink portion of the wheel)
- Cooking spray
- Knife
what you need:
Step 1
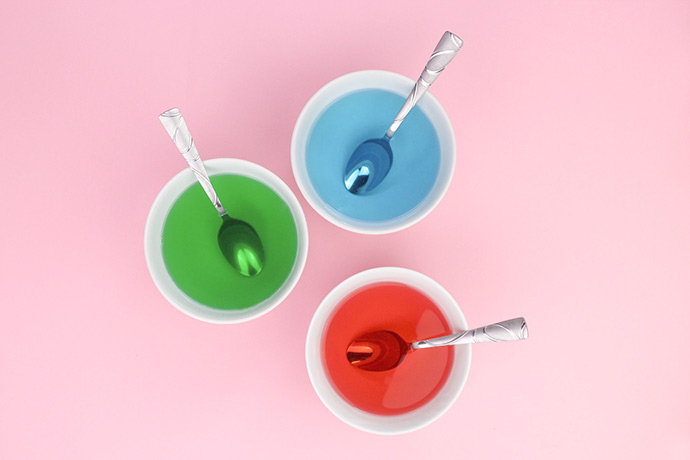
Prepare the Jell-O one color at a time following the package directions. Since you only need one slice of each color, you can cut the recipe in half so that you can save some Jell-O for another day! Note that I did make the entire package of yellow because I used half as yellow and the other half as light green. I added the smallest amount of green food coloring to turn the yellow to light green. I also used clear gelatin and pink juice and followed the directions on the back of the gelatin package to create the pink portion, too.
Step 2
Spray the silicone mold with cooking spray and brush it along the sides of each slice portion (this makes it easier for the Jell-O to come out of the mold after it has chilled). Next, place the mold onto a plate that is at least as round as the mold is (this makes it easier to move the mold to the fridge after you have filled it with all of the liquid Jell-O). Fill each slice with a different Jell-O color so that it resembles the color wheel. The colors should go in this order: red, orange, yellow, light green, green, blue, purple, and pink. After you’ve filled each slice of the mold, refrigerate according to package directions.
Step 3
Take your mold out of the fridge and very carefully use a knife to loosen up the sides of the Jell-O slices. Then, fill a large bowl with hot (not piping hot) water and dip the mold in the water for about 20 seconds (do not completely submerge it). Remove the mold from the water and put the plate you want your Jell-O to be presented on right on top of the mold. Carefully flip it over. Your Jell-O should come out smoothly to form the color wheel!
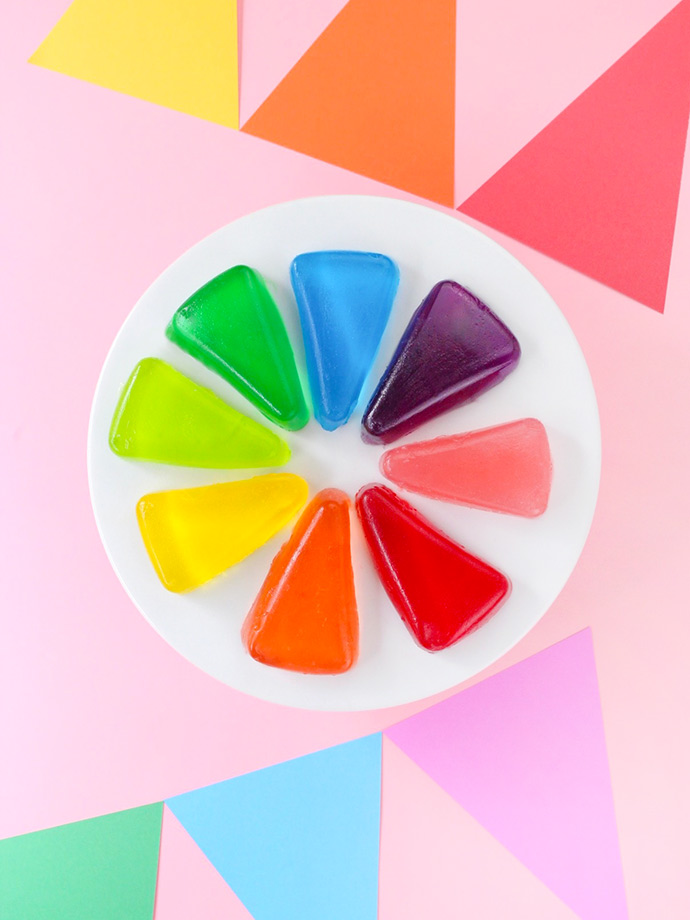
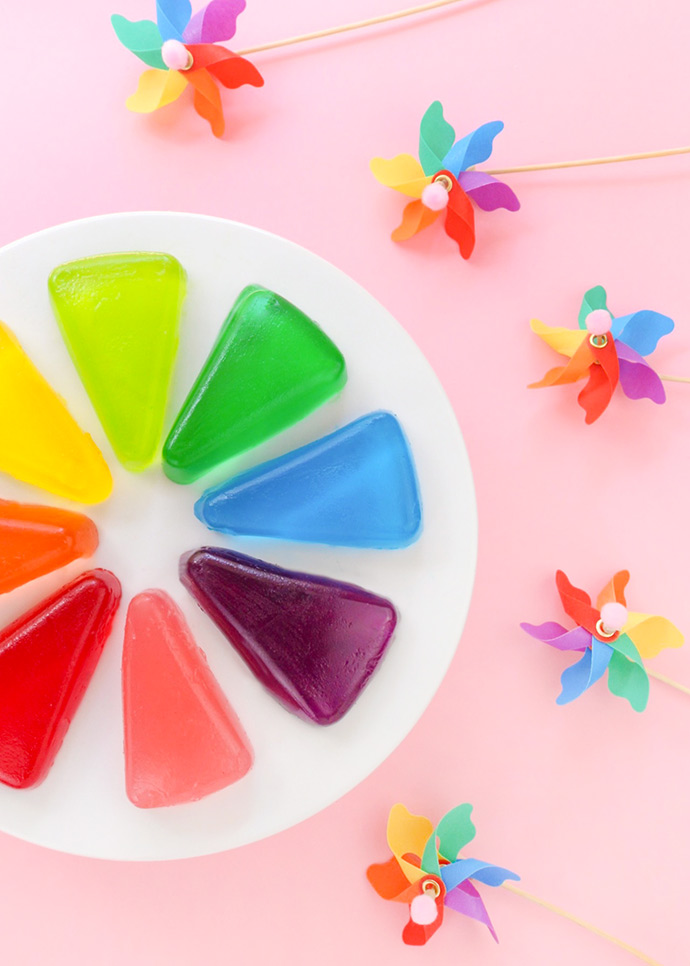

Grab a colorful slice and enjoy with friends and family! Happy summer!