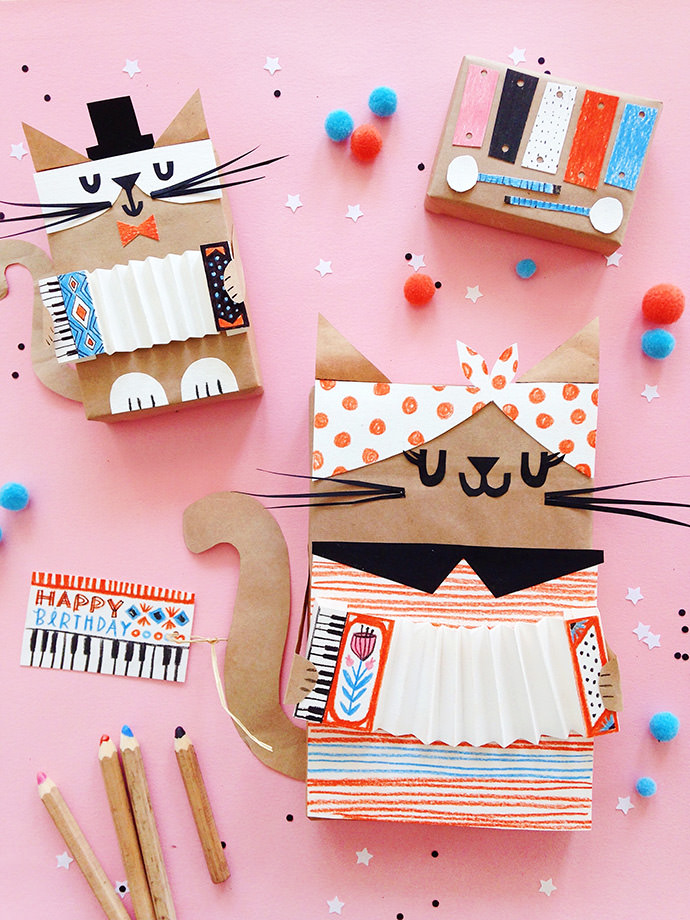
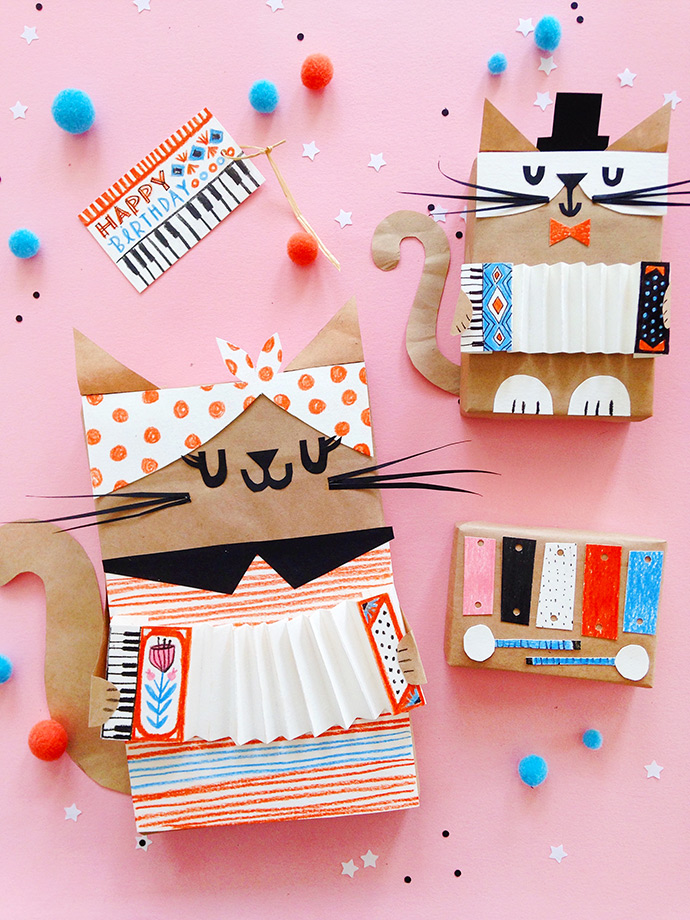
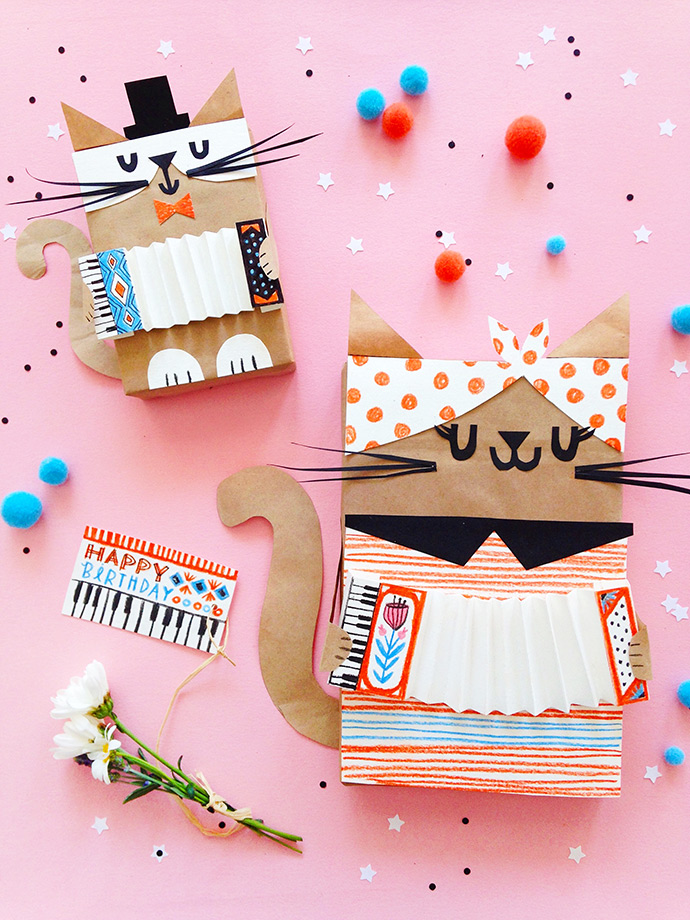
Meet your best new cat friends: Bandana Kitty and Top Hat Tomcat! Use a kraft paper bag and just a few tools from your craft cupboard to make the most adorable gift wrap you’ve ever seen! Whoever receives these beautiful will definitely love the wrap as much as whatever gift you put inside. If you want to keep your kitties on display, you can even adapt these instructions to wrap an open-topped storage box instead!
A few notes before we begin:
All sizes will vary according to the specific size of your box, so I tried to also include general proportions in addition to measurements for my 8.5” X 5.5” (22cm X 14cm) box.
I strongly recommend making ALL your pieces before gluing down. You can see how everything looking before committing and will avoid the chance of gluing small pieces underneath larger ones.
Since this tutorial features two variations, follow step 1 through step 7 for both designs. At Step 8 you can choose your own adventure!
what you need:
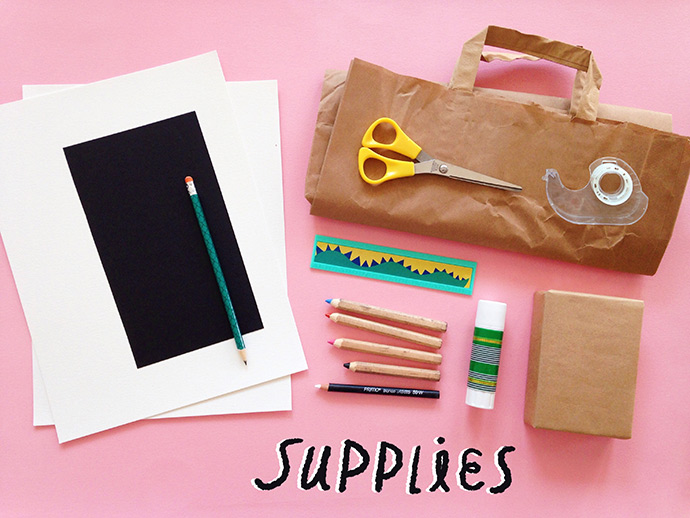
- Gift or box
- Paper bag or kraft paper
- Scissors
- Glue (I prefer glue stick)
- Black construction paper/cardstock
- Pencil
- Contrasting paper (I chose white)
- Clear tape (for wrapping the gift)
- White pen/pencil (optional)
- Printable template 1 and template 2 (optional)
what you need:

Step 1
Wrap gift/box with a paper sack, kraft paper, or solid color gift wrap. I used a paper grocery bag.
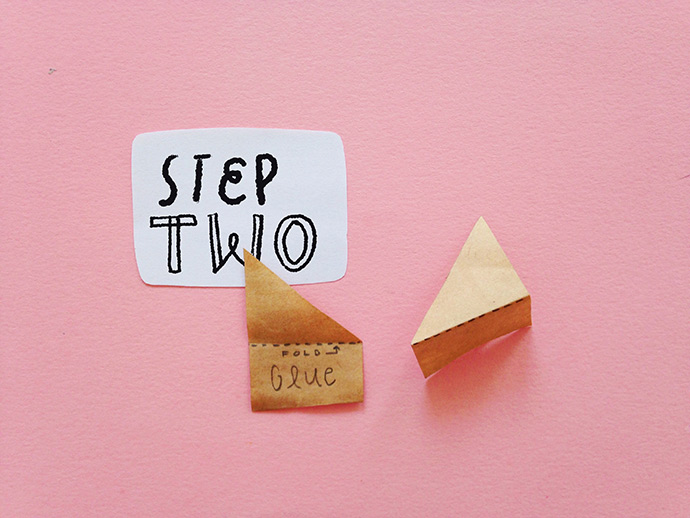
Step 2
Use extra paper scraps to cut out two triangular ear pieces. I made each of the ears approximately ¼ of the box’s shortest side: 1.5” or 4 cm for a box 5.5” or 14cm wide. You can use the printable template, or make your own by drawing a right-angle triangle, then adding an extra rectangle on the bottom (where you will put glue to attach it).
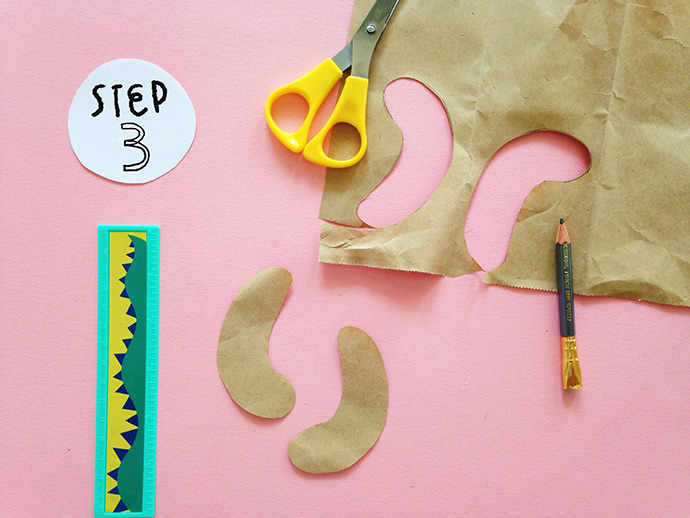
Step 3
Use extra paper scraps to cut out two arms. Use the printable template, or make your own by drawing a wonky macaroni noodle shape with one end (the paws) a bit bigger than the other (the shoulder).
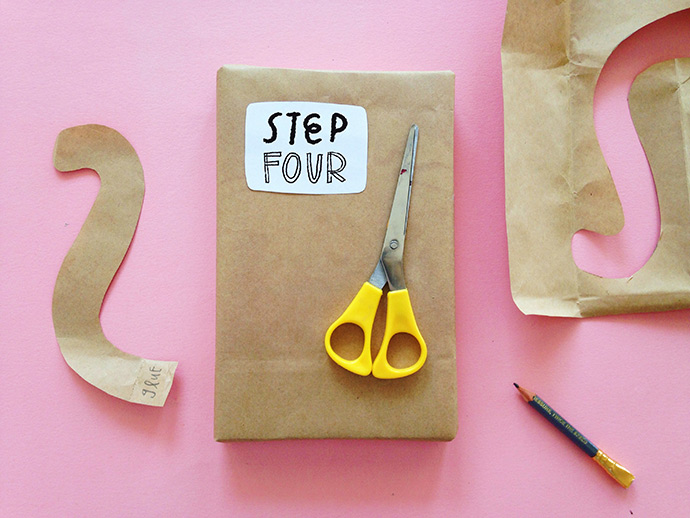
Step 4
Make a tail from scrap paper. Use the printable template or draw your own squiggly “S” shape.
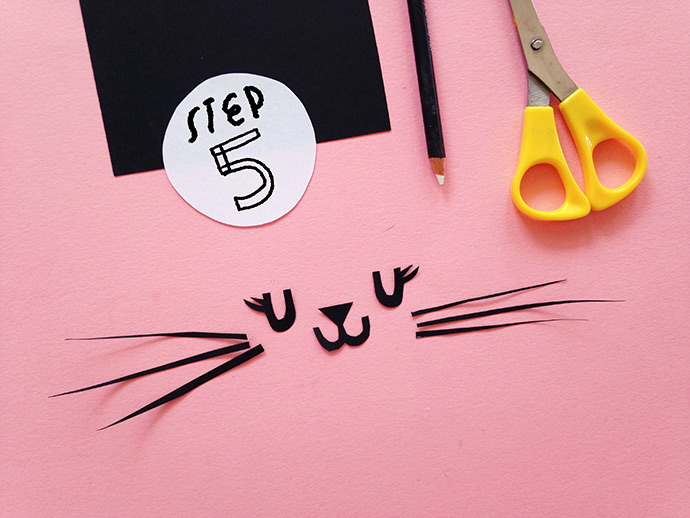
Step 5
Using black paper or cardstock, cut out eyes, nose+mouth, and six thin whiskers (I like to make my middle whiskers a bit longer than the tops and bottoms). Use printable template or experiment with drawing your own. A white pen or pencil can make it easier to see markings on black paper.
If you hate handling tiny bits of paper, the face and whiskers can alternatively be drawn onto the box with a black marker.
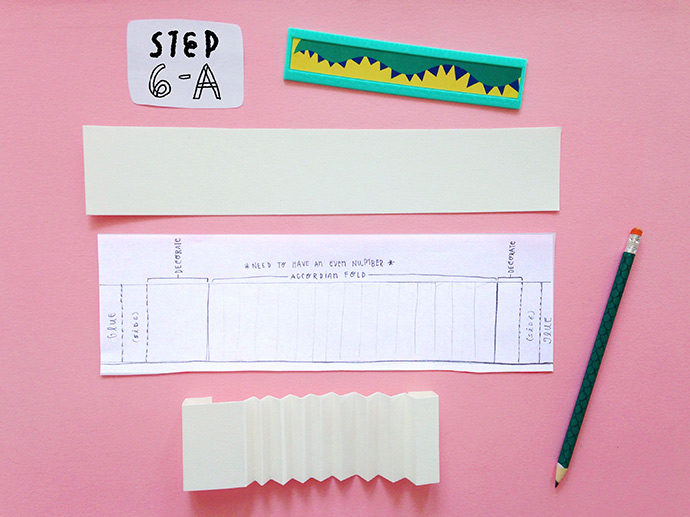
Step 6
Time to make the accordion! Cut a long strip of white paper or cardstock. It should be at least twice the length of the box’s shortest side. Follow the template or photo to make the necessary folds.
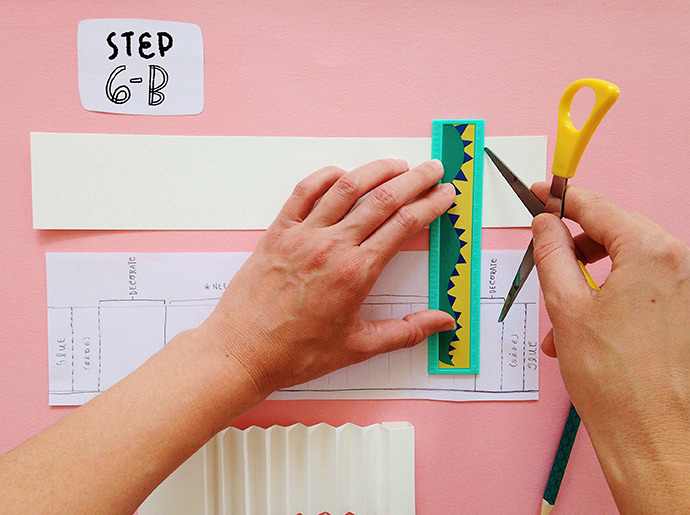
If using cardstock, I find it very helpful to carefully score the paper with scissors or the back of a craft knife, or a bone folder.

Create the “accordion fold” by alternating folding the paper to the left and right. IMPORTANT: Be sure the first fold of the “accordion fold” area (which would be the third line) is folded DOWN from the first “decorate” area. You can improvise your accordion, but you need to have an even number of folds in the “accordion fold” area.
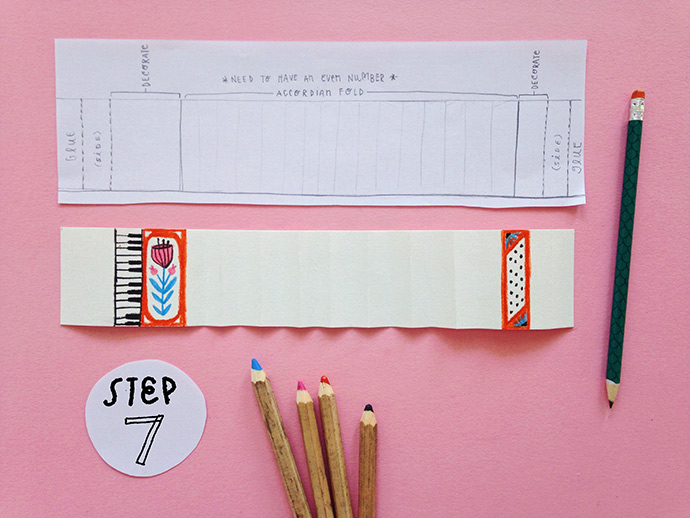
Step 7
Flatten your accordion out and decorate the designated “decorate” areas to your liking. Add keys, buttons, and whatever designs you like.
And now it’s time to CHOOSE YOUR ADVENTURE! This tutorial features two variations. Directly below are the instructions for the “Bandana Kitty.” Skip ahead to Step 10 for “Top Hat Tomcat” instructions.
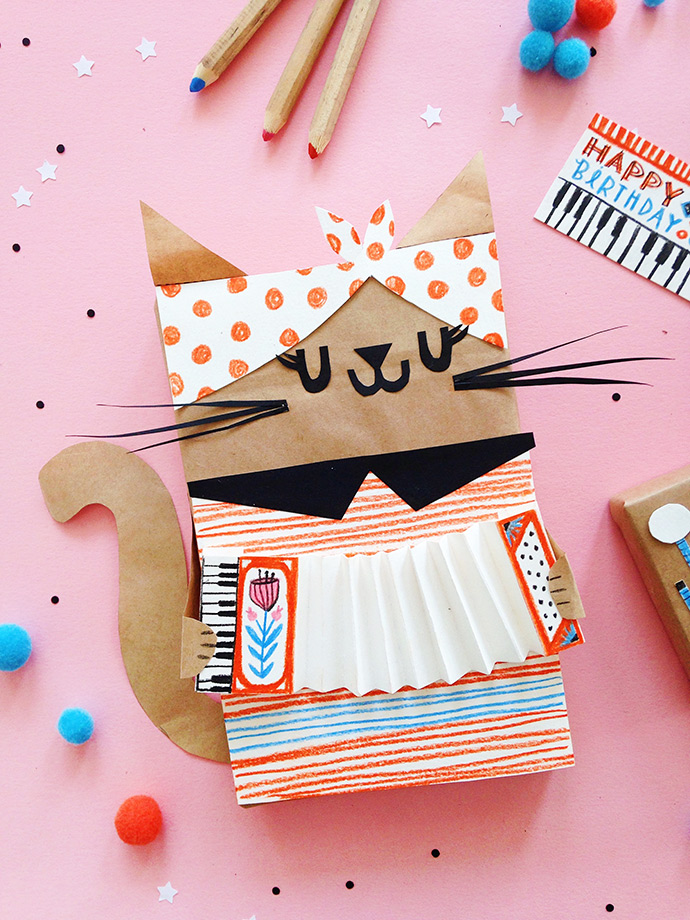
Step 8: BANDANA KITTY
Choose a contrasting color of paper or cardstock to make the bandana. Use your box as a stencil to trace the correct size for your project.

Cut out the paper bandana shape.
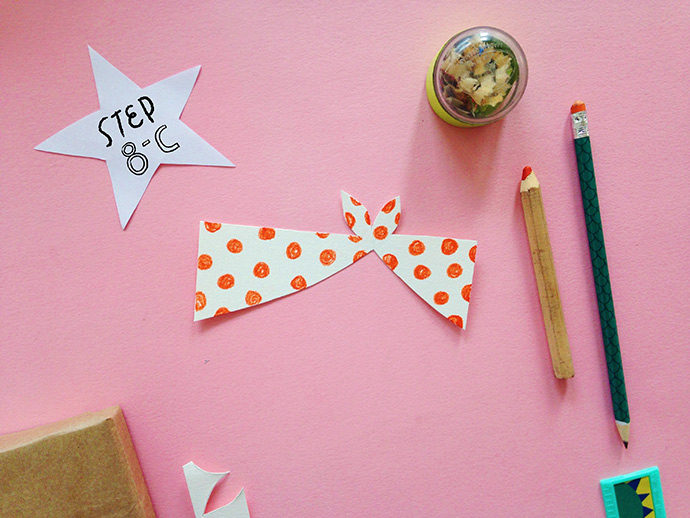
Decorate however you like, or leave a solid color.
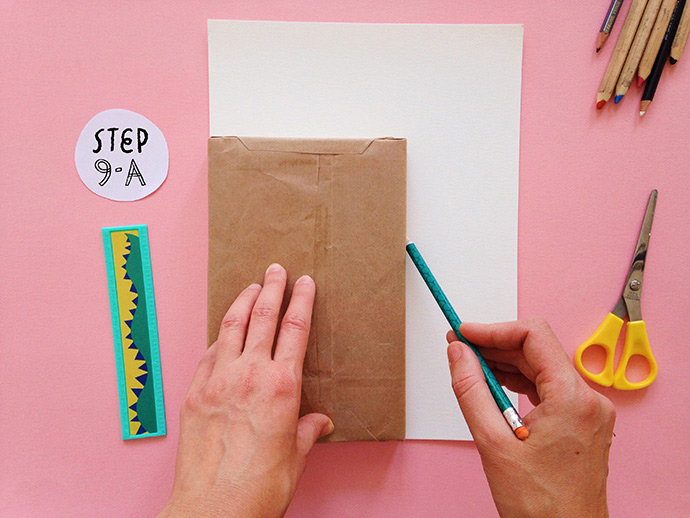
Step 9
Using the same paper as you did for the bandana or a complimenting one, use your box to trace a rectangle shape to make an outfit for your kitty. I made mine approximately ⅔ of the box’s height.
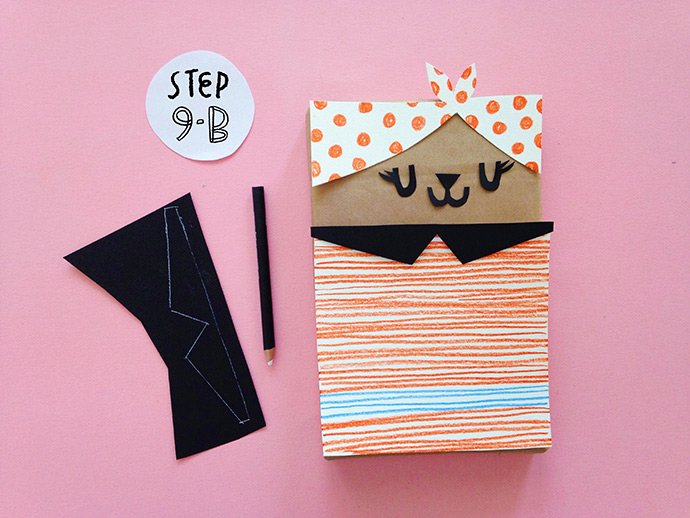
Decorate as you like. I spontaneously decided to make a collar from black cardstock.
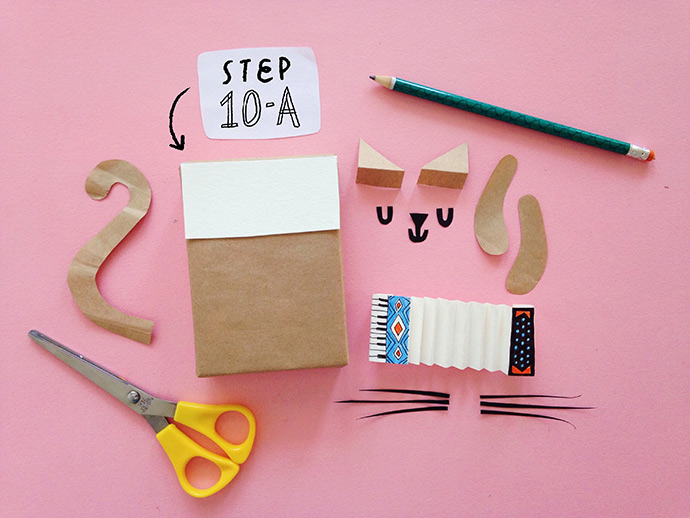
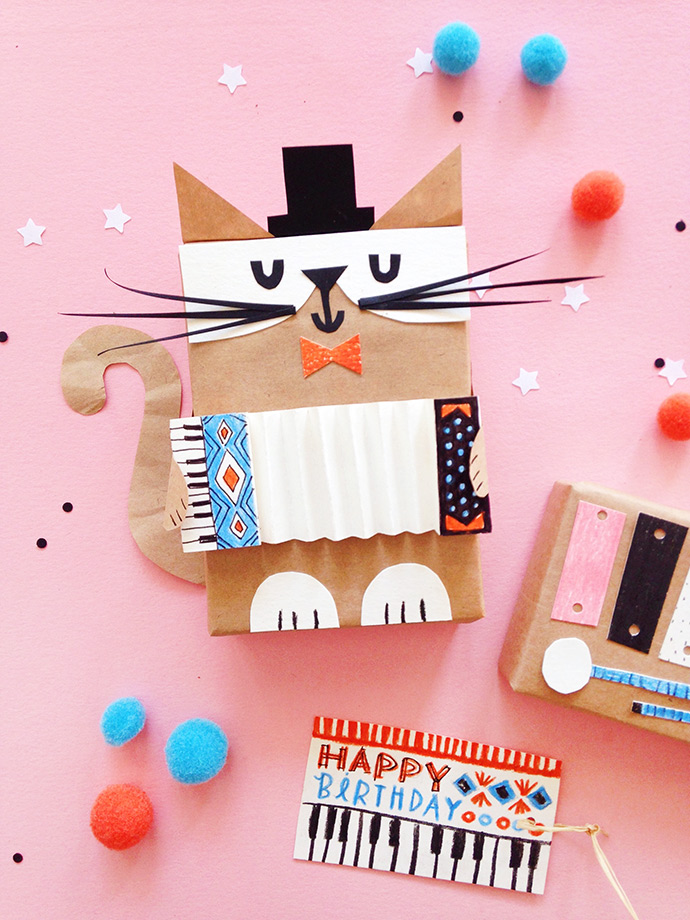
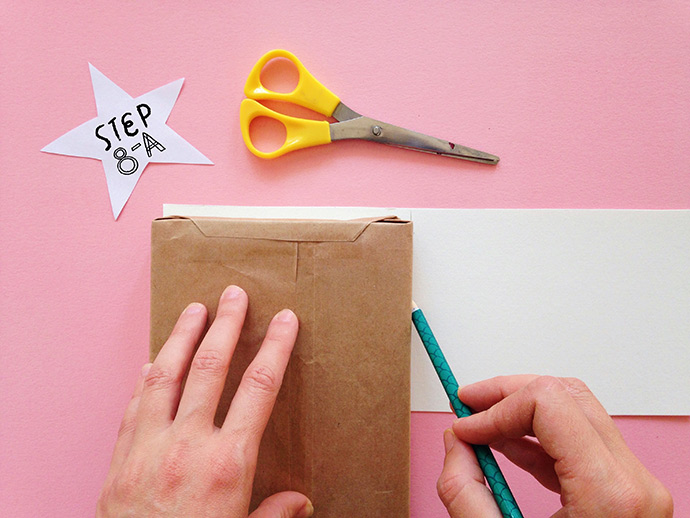
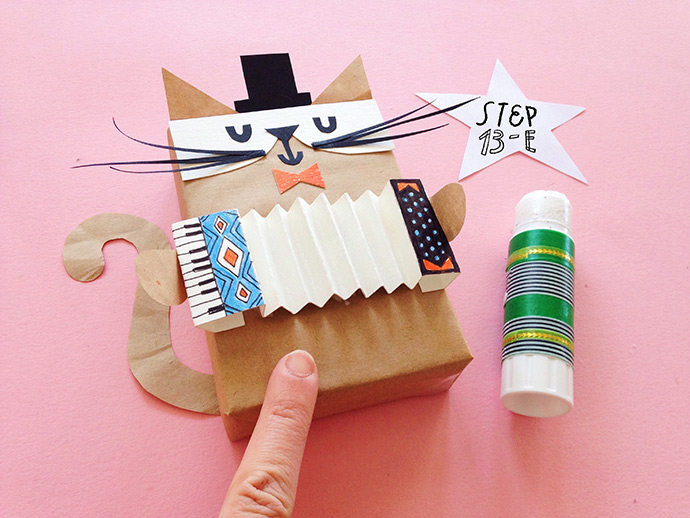
Step 10: TOP HAT TOMCAT
As you can see, I followed Step 1 – 7 and have all the same pieces, but scaled down for a smaller box. For this step, choose a contrasting color of paper or cardstock (I chose white). Use your box as a stencil to trace a rectangle the same width and approximately ¼ – ⅓ of the height.
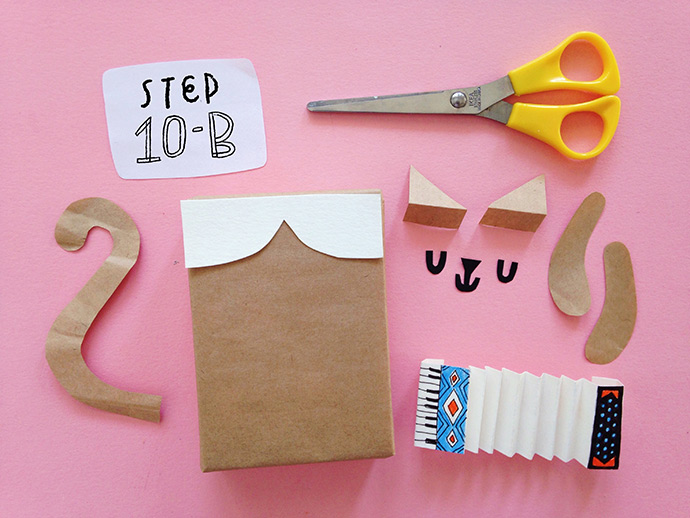
Cut away an upside-down arched “V” to make a patch of face coloring.
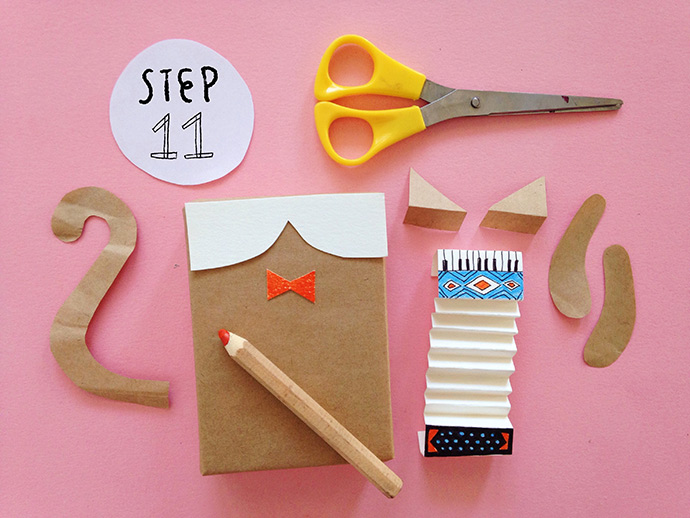
Step 11
Draw two overlapping triangles and cut it out to make a little bow tie.
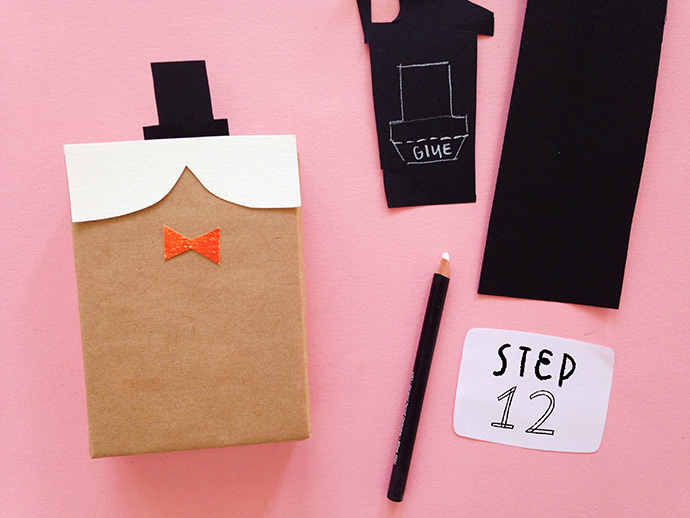
Step 12
Use black cardstock to draw a top hat (a square on top of a long, thin rectangle), and then add an extra rectangle at the bottom where you can put glue to attach to your box. Cut out.

Step 13
It’s time to put it all together, whichever style you’ve picked – now comes the really fun part! You’ve worked so hard getting all your pieces ready, and now it is time to grab your glue and start sticking things down. You can mostly attach the pieces in any order, but be sure to glue the “outfit” on the Bandana Kitty BEFORE the accordion. The face patch of the Top Hat Tomcat needs to be glued BEFORE the face pieces, but I bet you already knew that. ;)
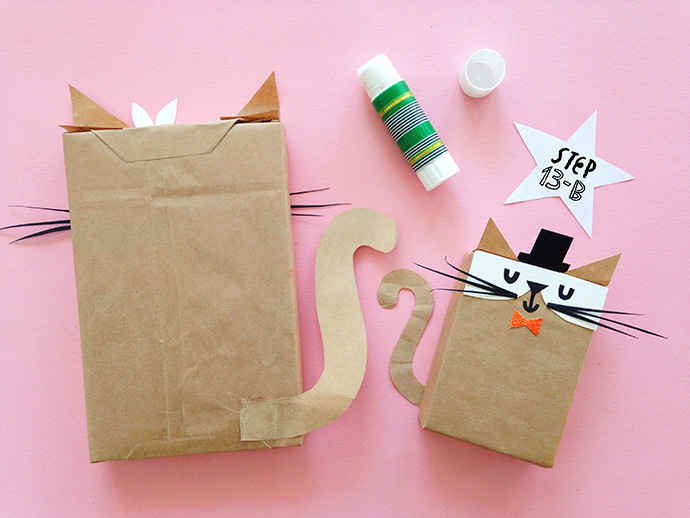
To attach the tail, align the tail the way you like and attach to the back BEFORE gluing arms and accordion.
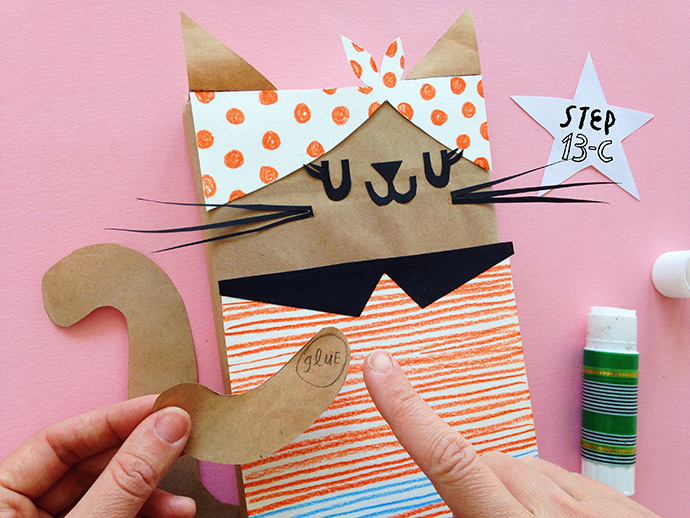
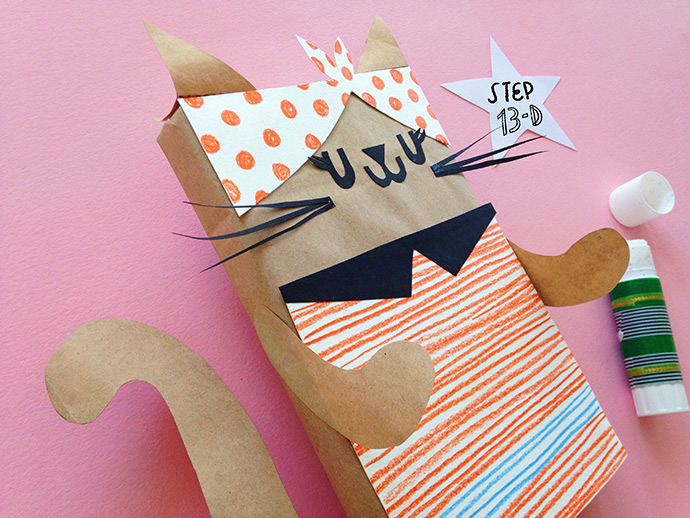
To attach the arms, apply glue to the shoulder area and attach to the sides of the box.
The accordion needs to be glued in the designated “glue” areas PLUS on the bottom ridges of the accordion folds, so they stay in place and don’t pop out away from the paper.
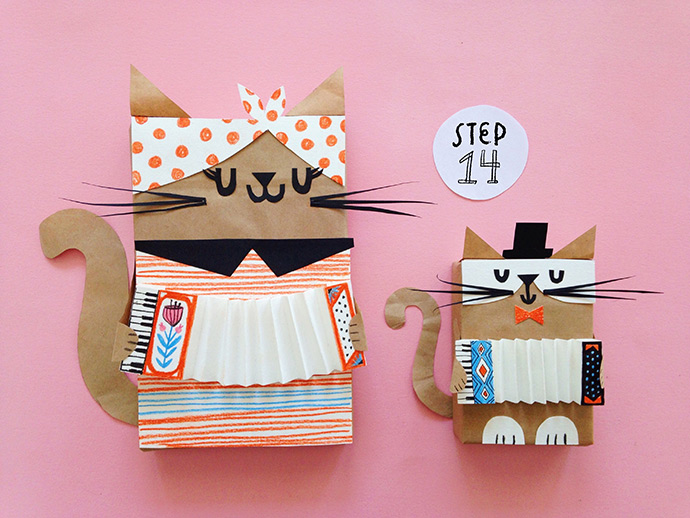
Step 14
Fold the “paws” so they overlap the accordion to make it look like your cat is playing the instrument.

Happy wrapping!!