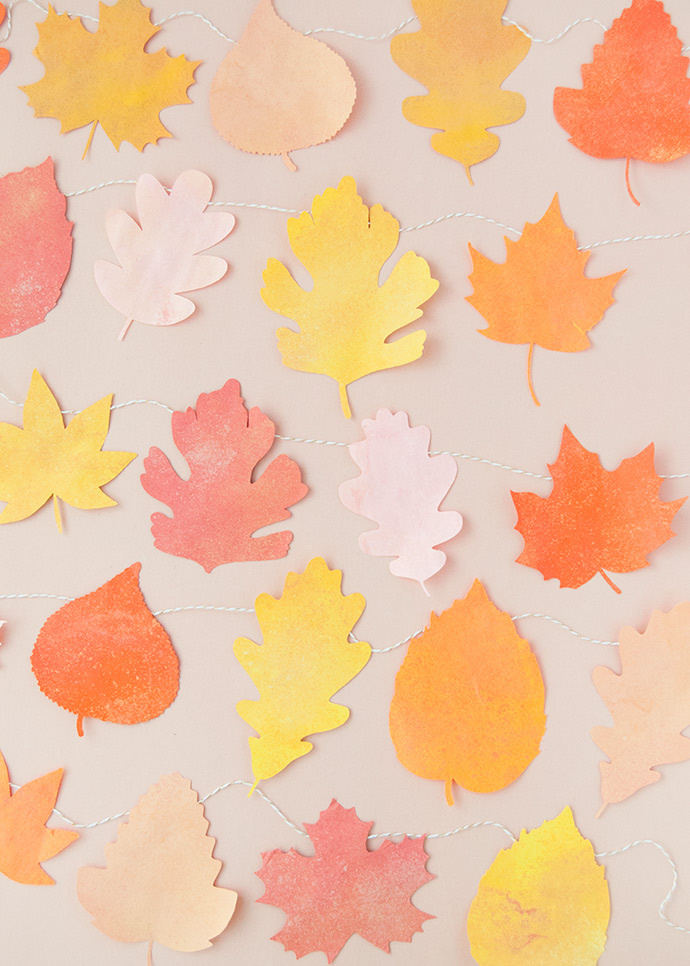
The leaves are starting to change colors and we couldn’t be more excited! Today we’re celebrating with this fun DIY garland inspired by the bright colors of fall. While browsing on Pinterest recently, we came across this amazing floating chalk print technique from Kate at the Picklebums blog. We love how simple it is and the results are fantastic!
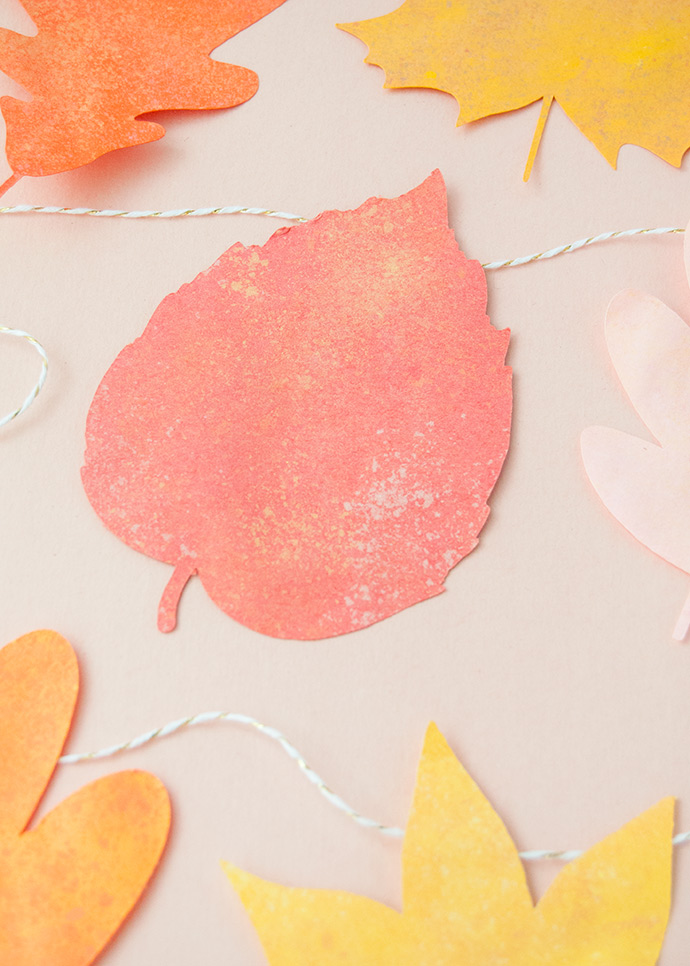
Depending on how you do it, the look is almost a cross between marbling and spatter painting. The chalk is so easy to clean up and yet doesn’t rub off the paper once it’s dried – amazing! We thought the subtle gradient would be just perfect for fall leaves, so were so excited to try the technique ourselves on colored construction paper. We were not disappointed! Keep reading to see how to make your own fall leaf garland!
what you need:
- Construction paper
- Chalk (in multiple colors)
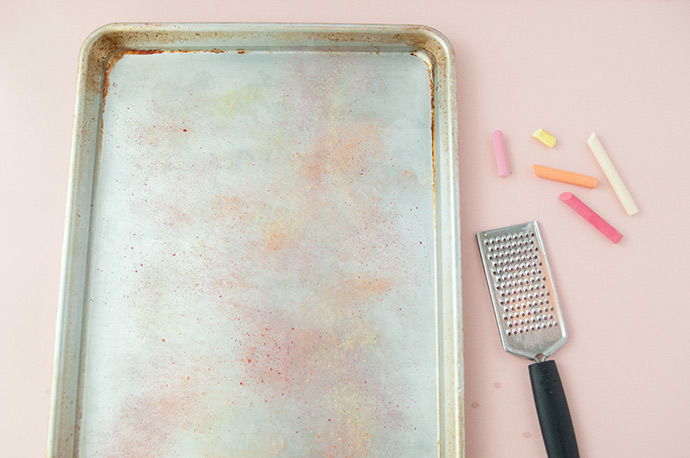
- Cheese grater
- Cookie sheet (or similar)
- Wire cooling rack
- Pencil
- Scissors
- String
how-to:
Step 1
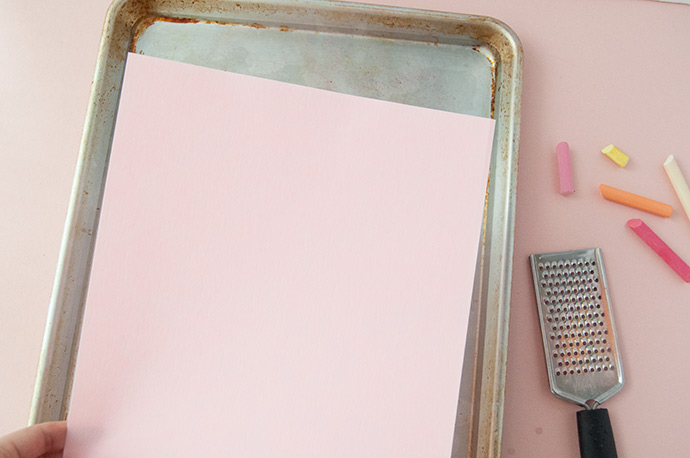
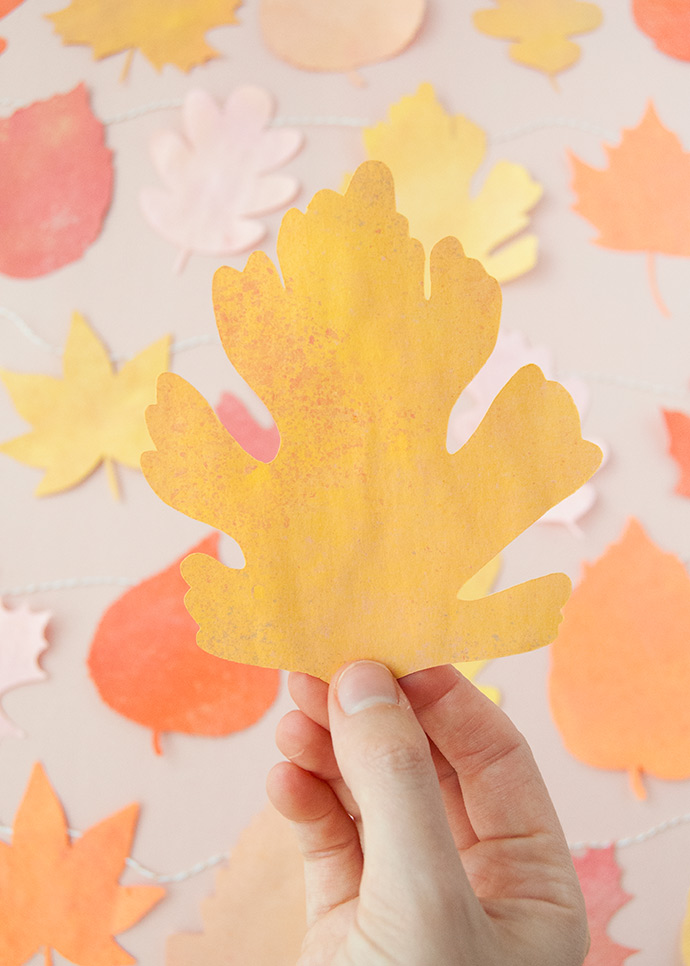
Place your cookie sheet on your work surface and fill with water. Then use your cheese grater to shave the colored chalk over the surface of the water – we used warm fall colors for this. Continue adding more colors until you’ve mostly covered the surface.
Step 2
Select a piece of construction paper and carefully set on the surface of the water.
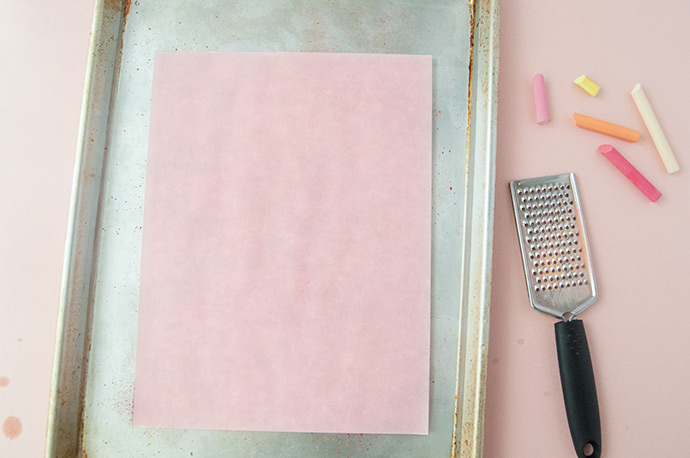
Once the paper has made contact with the water, quickly and carefully remove it from the water and set onto a wire cooling rack to dry, chalk-side up.
Step 3
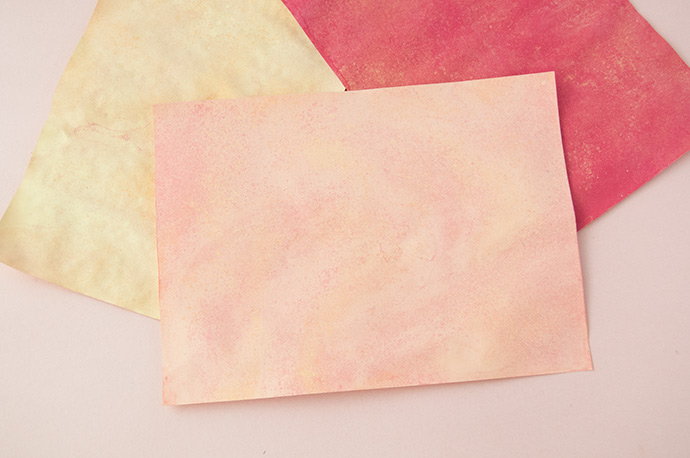
Continue this process with more chalk and different colors of paper. It’s all an experiment, so have fun trying different combinations and techniques! Let the papers dry completely. If you like, after they’ve dried you can also set them under a stack of heavy books to flatten them.

Step 4
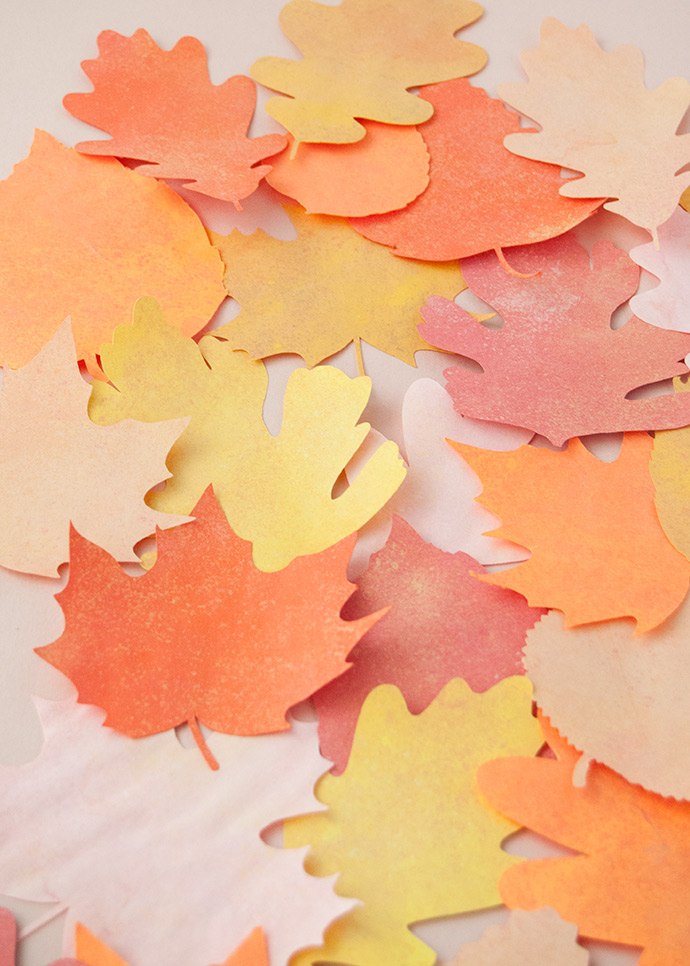
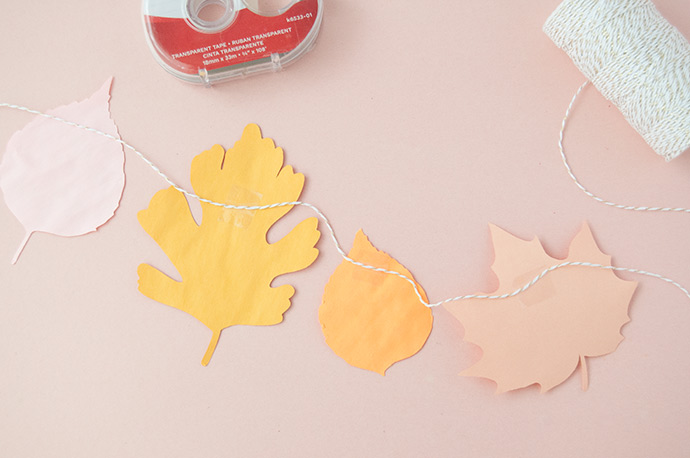
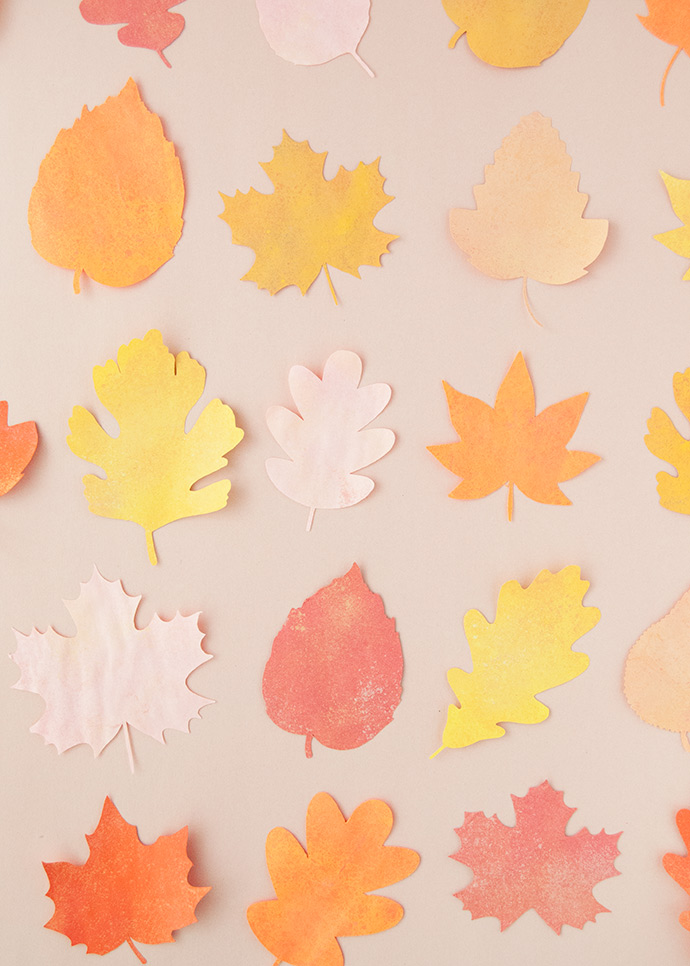
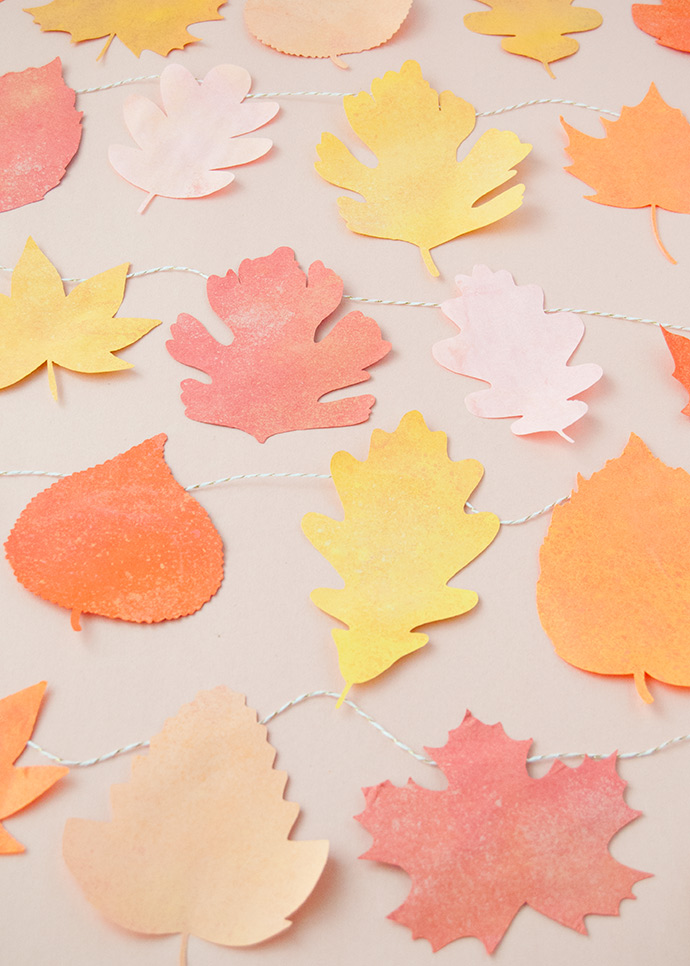
Draw leaves onto the paper and cut out. You can look at leaf image online for inspiration, make up your own leaf shapes, or even collect real leaves on a walk and trace them onto your paper.
Step 5
Finally, lay out the leaves in an order that you like. Cut a long piece of string and tape it to the back of each leaf, leaving a little bit of space between them.
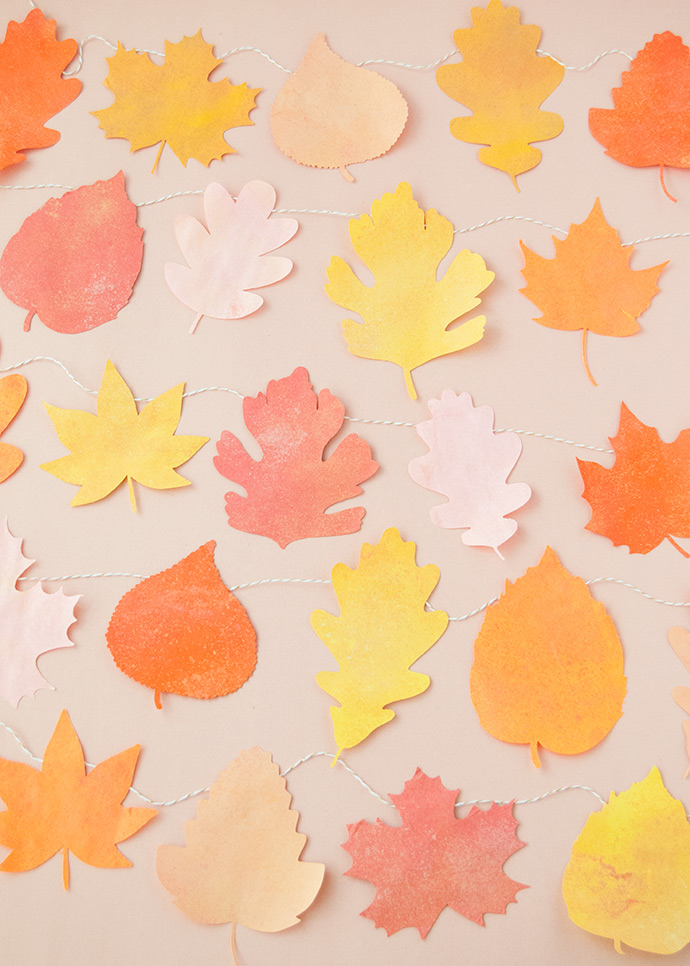

Happy crafting!