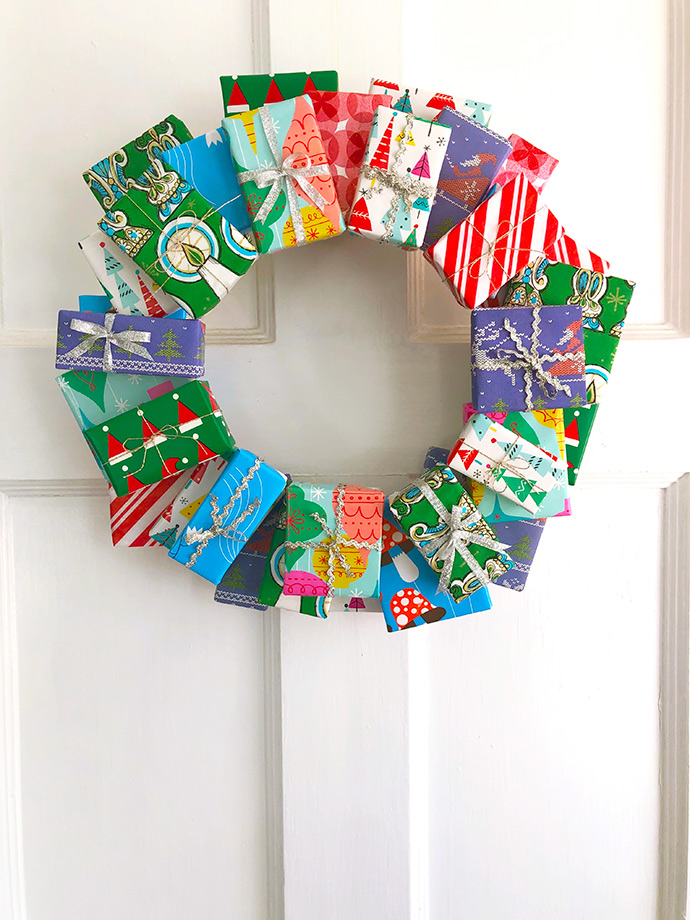
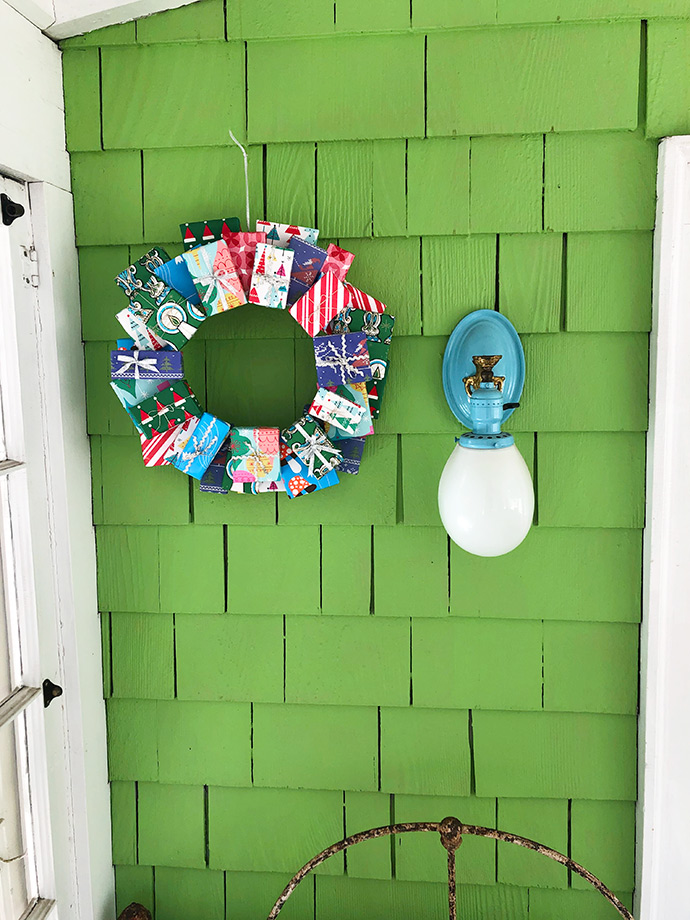
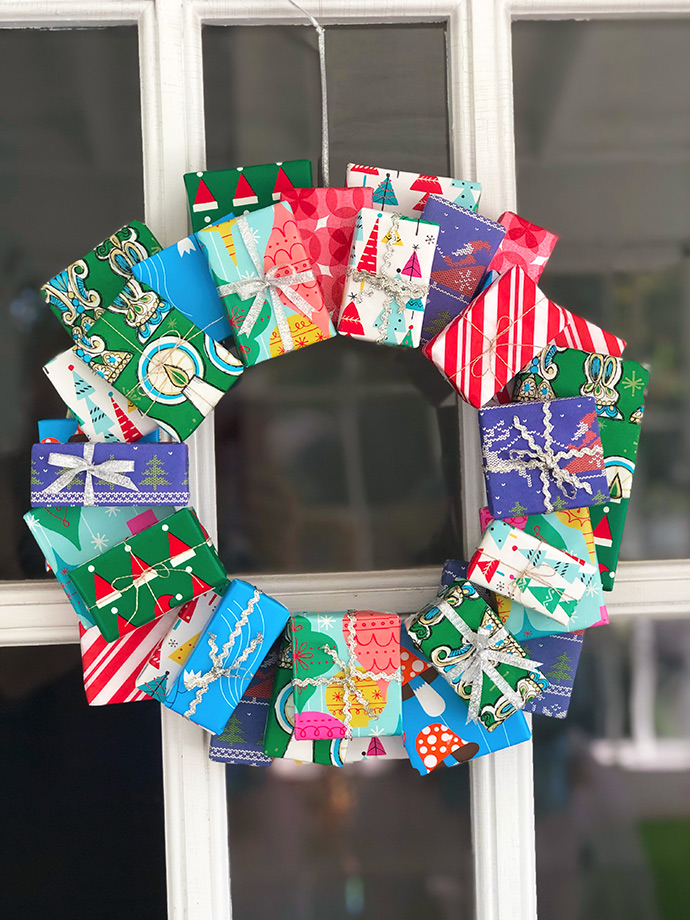
Warm holiday memories stay with us for a lifetime, and homespun crafts can span generations. I grew up with one of these festive package wreaths, and every Christmas it was hung in our entryway near the ever-growing Christmas card display. Make one with friends or family and enjoy its charms year after year.
what you need:
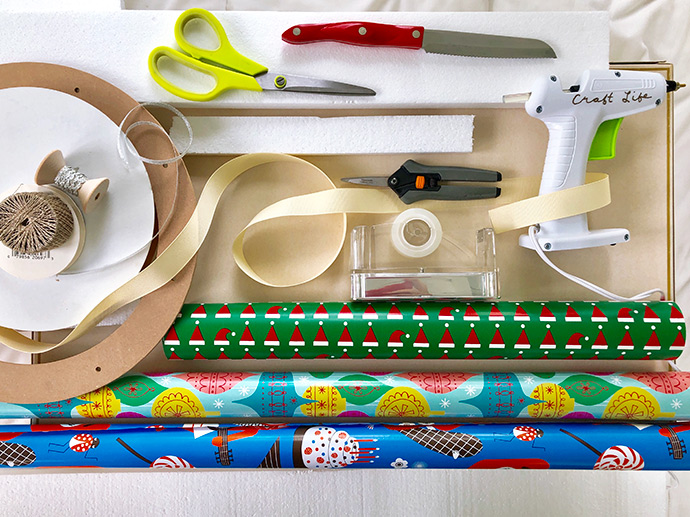
- Styrofoam sheets, between ½” and 1” thick
- Serrated knife
- Scissors to cut wrapping paper
- Scissors to cut ribbon
- Glue gun, low heat
- Extra glue sticks
- Flat wreath form, 12” diameter (or make one from cardboard)
- 4 yards of 1” wide ribbon to wrap wreathform (optional)
- Wrapping paper
- Clear tape
- Assorted ribbons, ric rac, and/or string for package trimming
how-to:

Step 1
Cut package shapes from Styrofoam using a serrated knife.
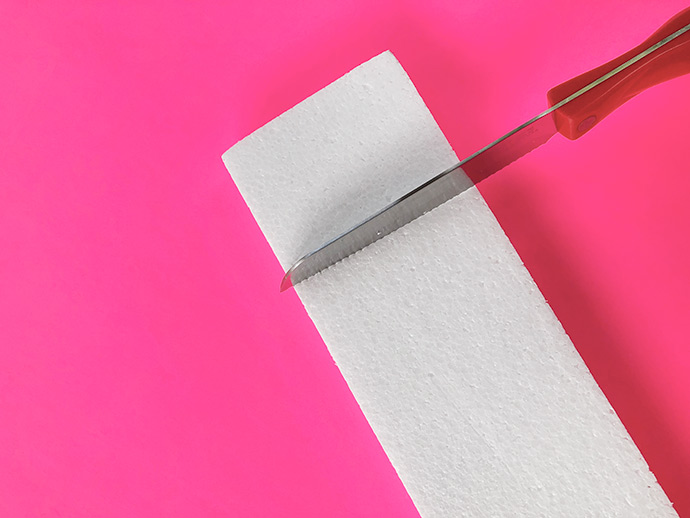
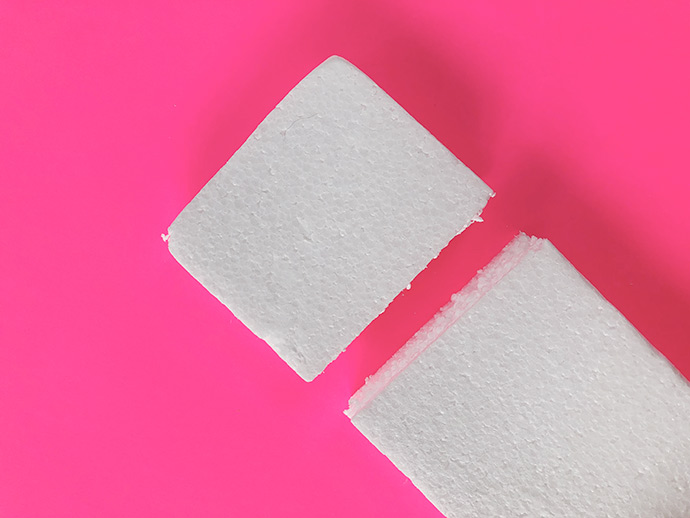
Rotate your Styrofoam and cut on all four sides for the cleanest cut.
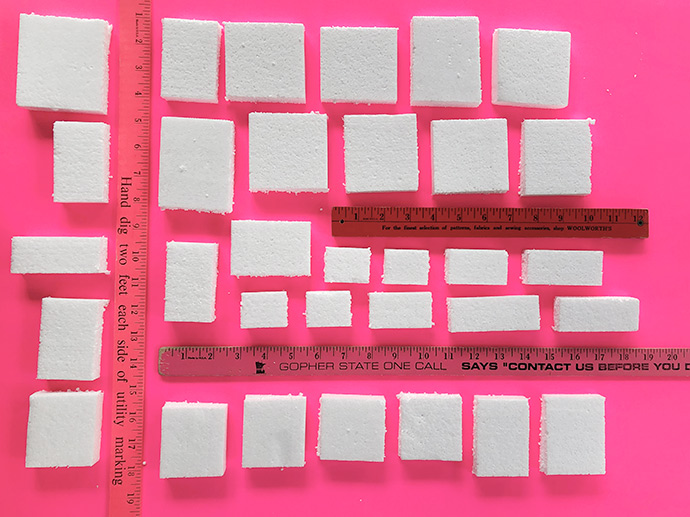
To make a wreath for a 12” wreath form, there will be three layers of presents. The biggest ones are on the bottom; middle and smaller sizes are in the middle and top layers.
These sizes are guidelines, and it’s a good idea to make a few extra packages in different sizes so you have flexibility when assembling your creation.
10 ea: 3” x 3.5”
8 ea: 3” x 3”
6 ea: 2” x 3”
5 ea: 1” x 3”
4 ea: 1” x 2”
*finger snap*
Step 2
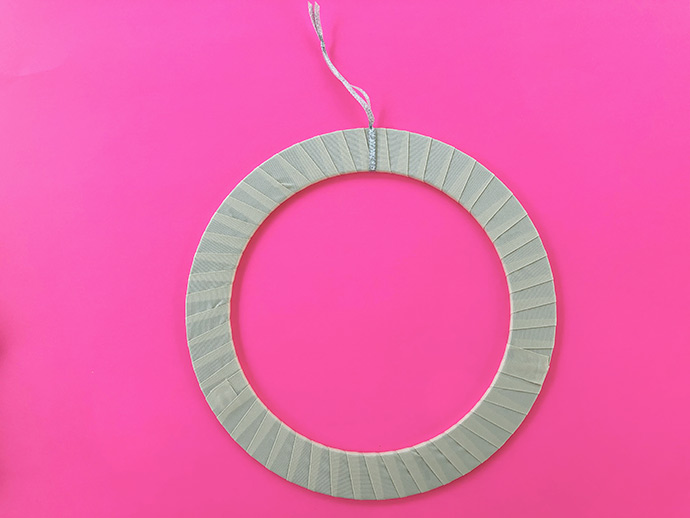
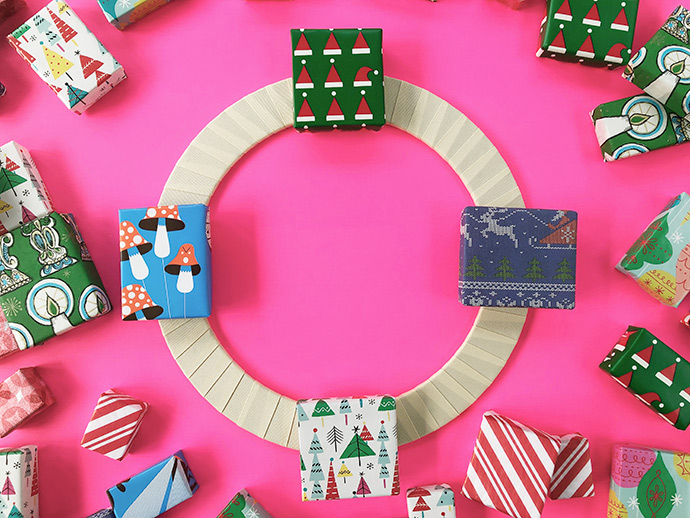
Using a flat 12” diameter craft ring/wreath form made of wood fiber or similar (or cut one from corrugated cardboard), wrap the ring with ribbon as shown below to create a nice base. As you work, secure the ribbon with hot glue—every few wraps will do. (Most of the ring will be covered in packages, but a bit may peek through.)
Tie a ribbon for hanging on the form before affixing packages to it.
Step 3
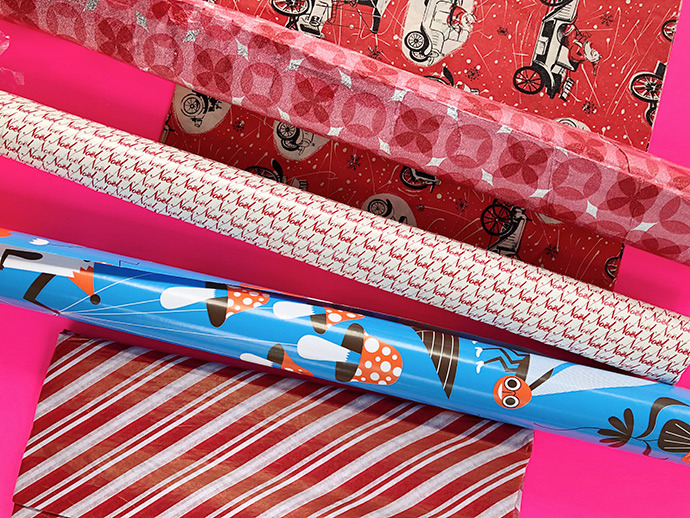
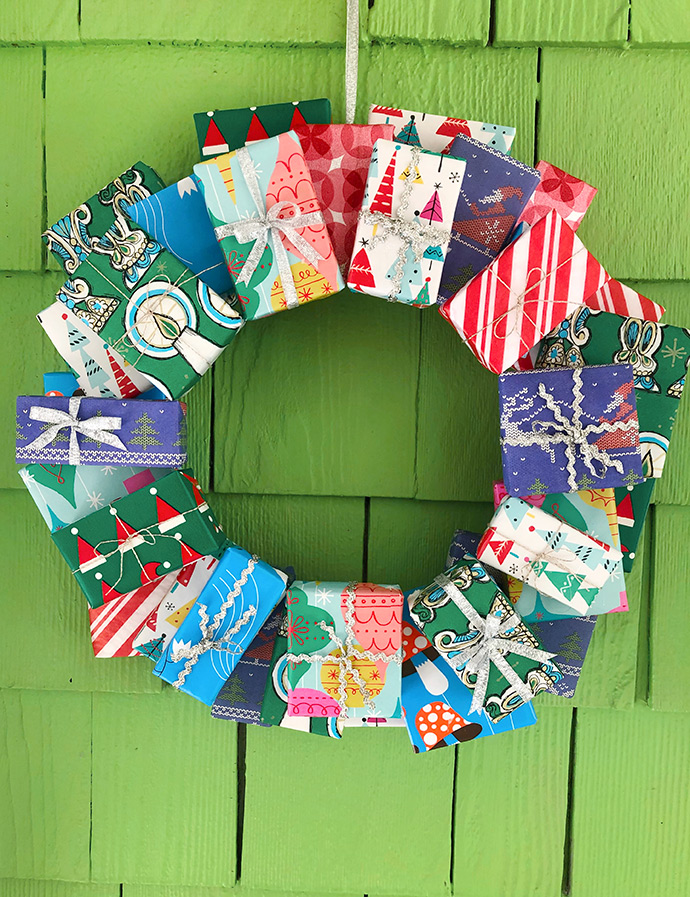
Choose your paper to wrap the packages. This is a great project to use those odds-and-ends or even a post-holiday project where you salvage the nice part of used wrapping for this project. You might choose to limit your palette to give your wreath a cohesive look, such as mostly red and white, as shown above.
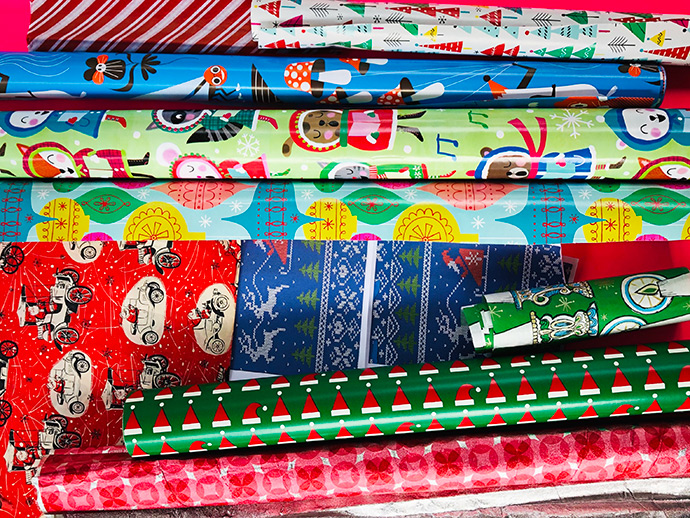
Love it! But, I went for the maximalist, color-riot look (above). I find the paper works together because it’s fun and has a nice dash of vintage to boot.
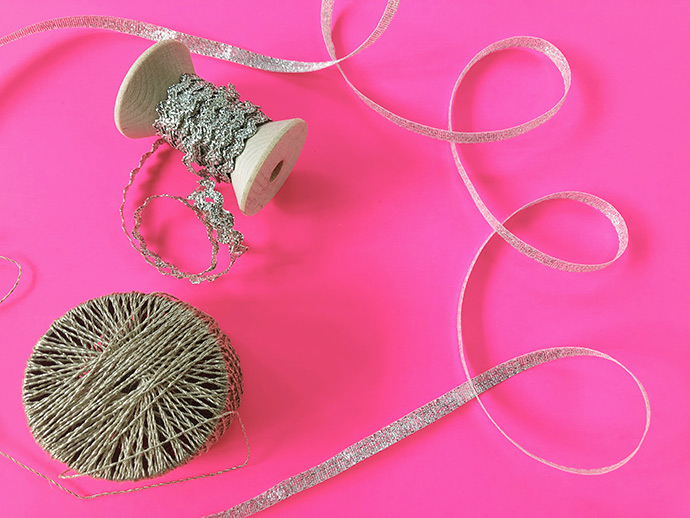
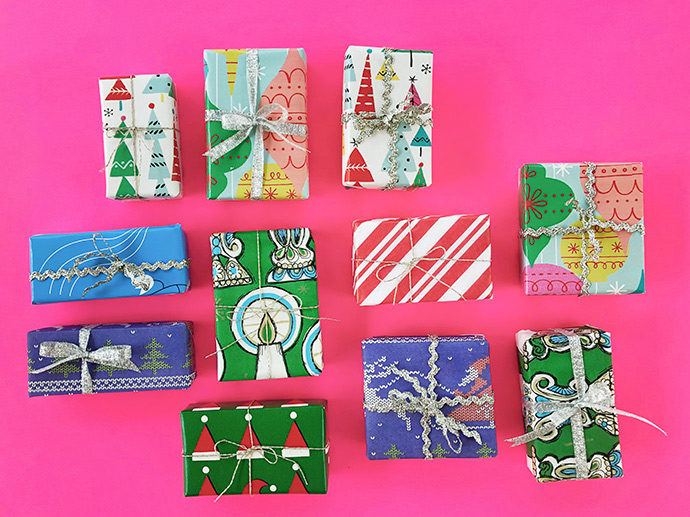
Add a ribbon, string, or ric rac to finish the package look. Tip: the bigger packages on the bottom don’t need to be tied with bows because they would be covered up anyway.
Step 4
Ladies and Gentlemen: wrap your packages! *finger snap*
Step 5
Once your packages are wrapped, it’s time to arrange them on the wreath form. Don’t glue them down yet—make sure you love your composition first!
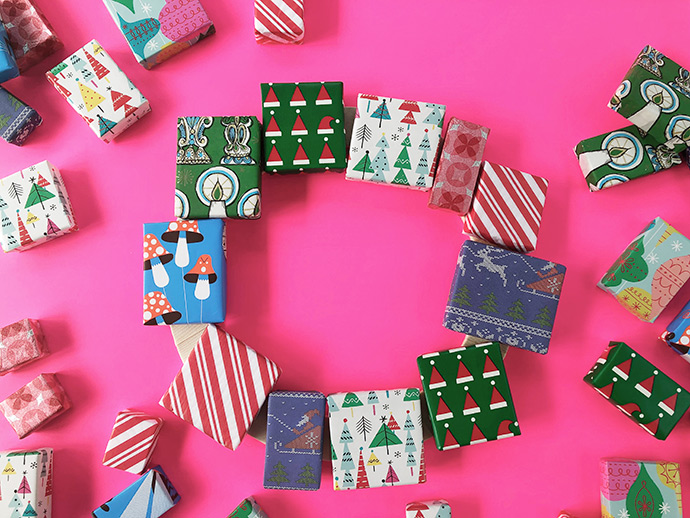
Layer one, complete.
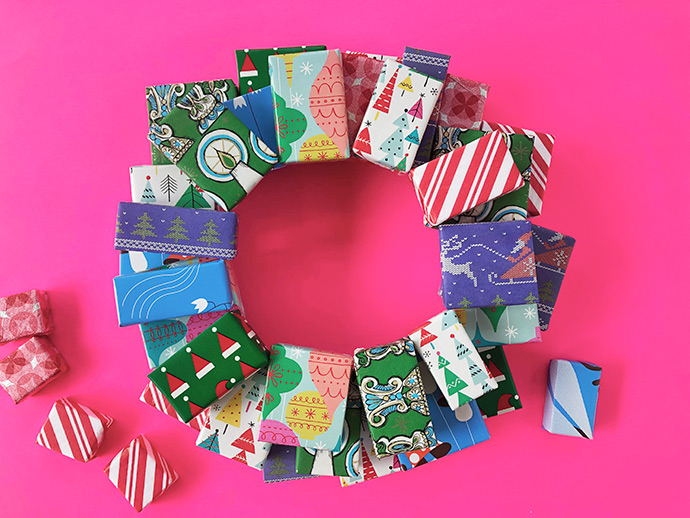
Layer 2, complete.
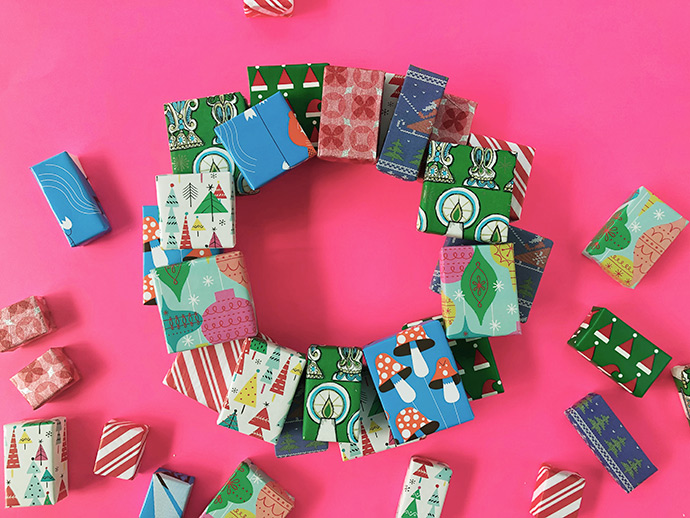
Layer 3, complete.
Step 6
Remove all three layers of boxes and set aside, keeping the packages in their ring layout so you remember how they should be arranged. One by one, hot glue the presents in place, until the bottom ring is complete. Continue by gluing the second layer’s presents in place. Lastly, glue the top layer in place.
Hang the wreath inside, either from the ribbon hanger or perch the wreath form on a nail, if you prefer.
Happy crafting!