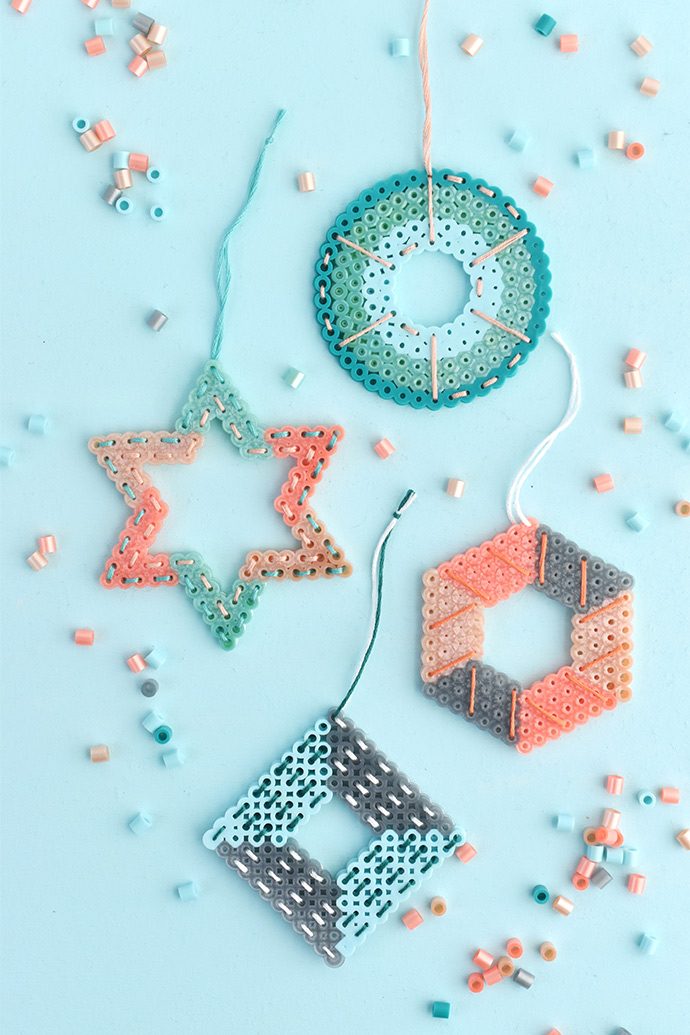
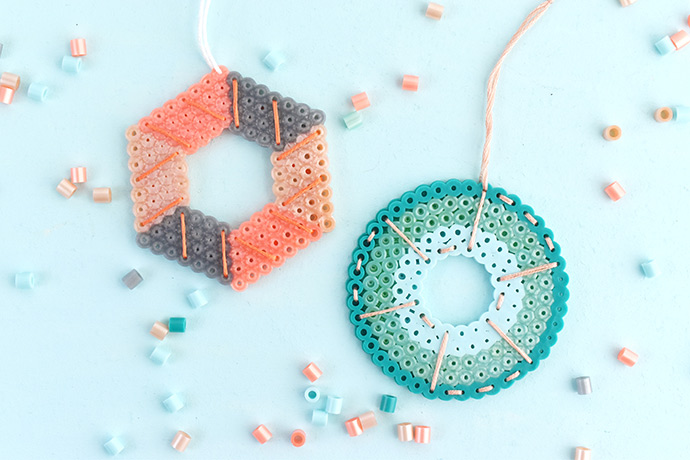
Decorate for the holidays and have fun making with Perler beads and embroidery floss! These adorable ornaments start out like any other fuse bead project, but a few stitches transform them into something special.
By choosing a few favorite colors of Perler beads and matching embroidery thread, you’ll end up with modern adornments for your tree or gifts for friends and family. We chose silver and a few shades of aqua and coral.
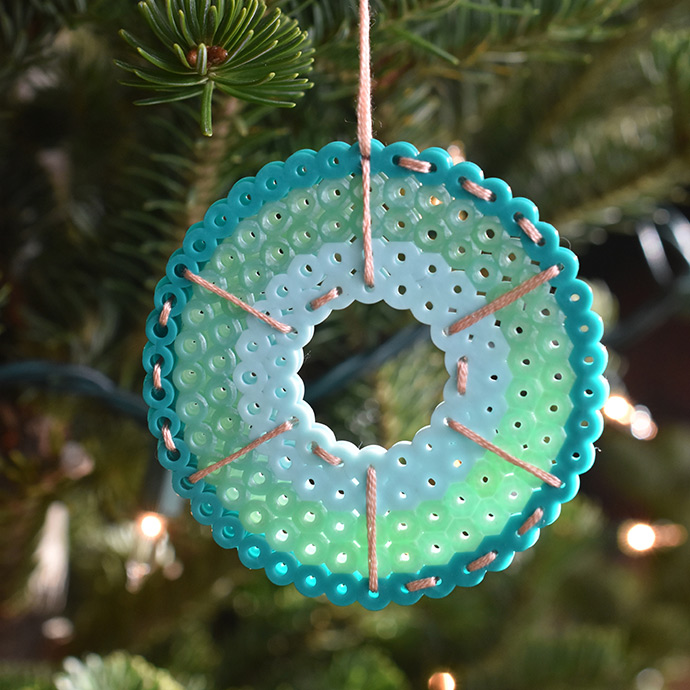
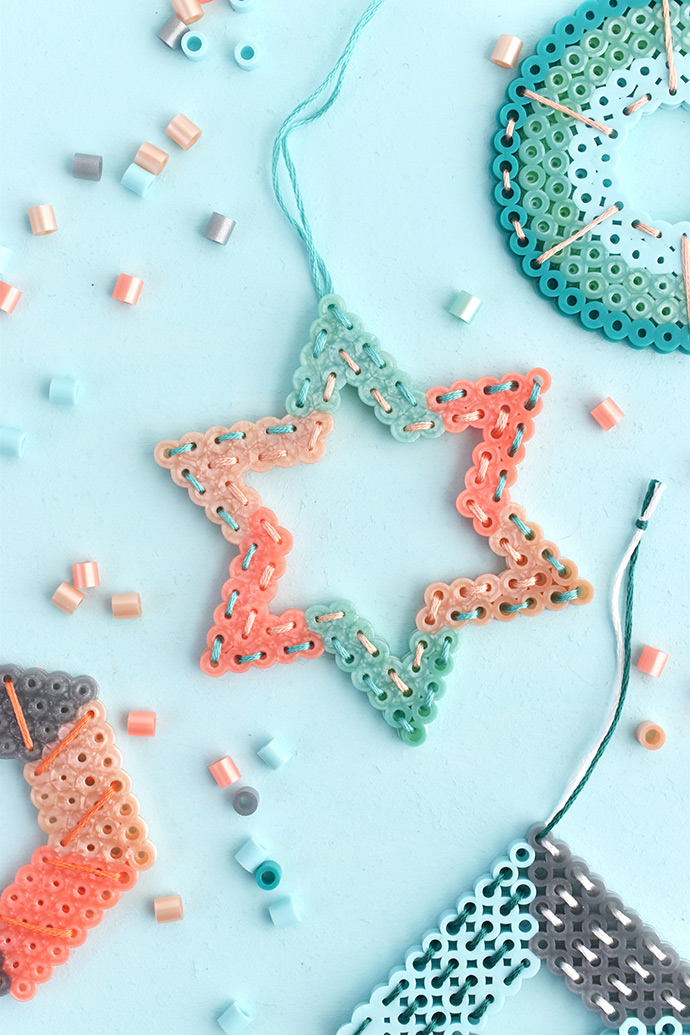
You could also make the ornament base with white beads and add a rainbow of stitches, or make green “wreaths” with stitched decorations!
Heat up the iron and get ready for some stitching fun!
what you need:
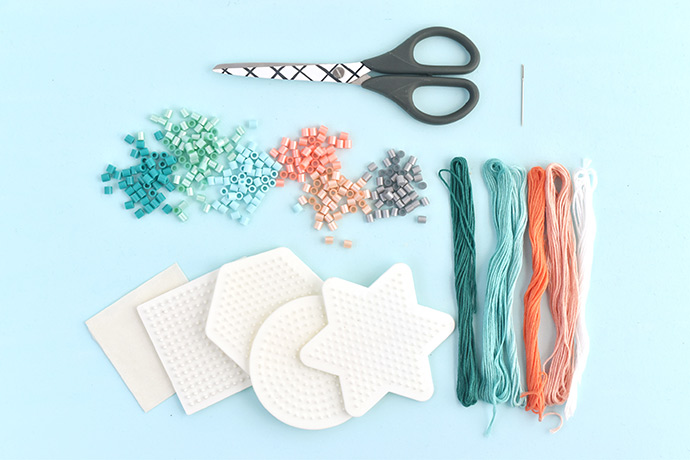
- Perler Beads or Other Plastic Fuse Beads
- Small Fuse Bead Boards and Ironing Paper
- Iron
- Embroidery Floss
- Large Sharp Needle
- Scissors
how-to:
Step 1
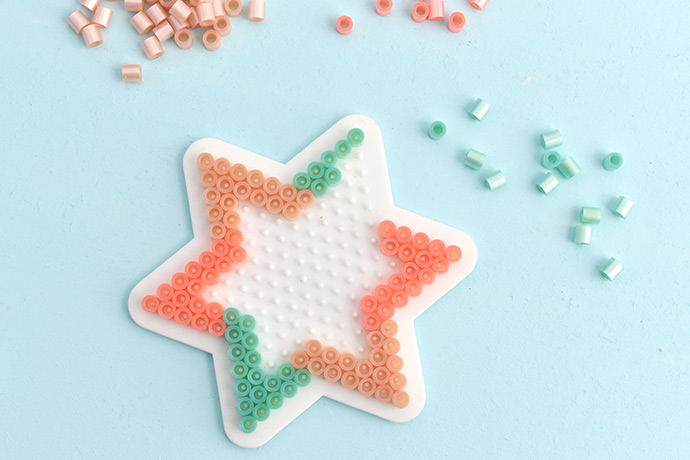
Make some ornament designs with the beads on your boards. You can make them solid shapes or more open in the center. Just be sure that the design completely connects.When the design is almost finished, heat up your iron.
Step 2
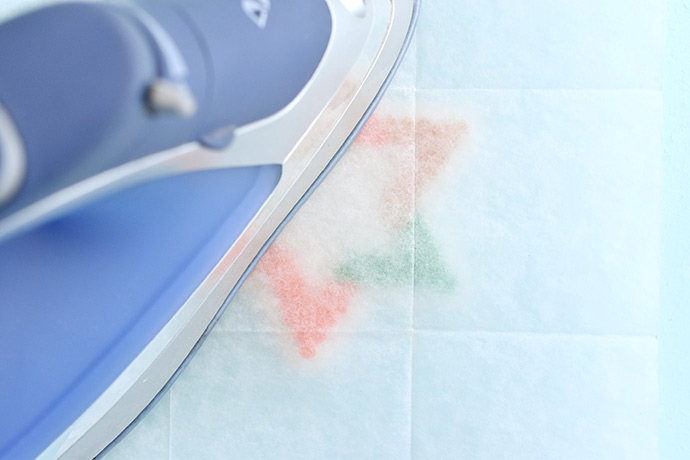
Place the ironing paper over your ornament design and fuse the beads together. For these ornaments, you need to only fuse them a little. Start by moving the iron over the design for 5-8 seconds. Carefully look to see if they are starting to join together. If they aren’t iron for another 5 seconds and check.The beads should connect at the edges but the hole in the middle of each bead should still be open.
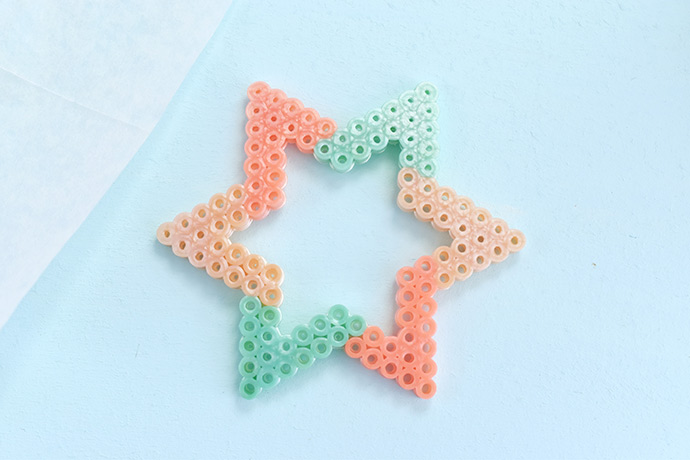
Gently remove the ornament from the peg board and flip the design over. Place the paper on the ornament and iron the second side just like the first side. Remember not to iron it so long that the holes close up!
Place the warm ornament under something heavy so it cools flat. You can make more ornament designs while you wait! (Although it only takes a few minutes to flatten out.)
Step 3
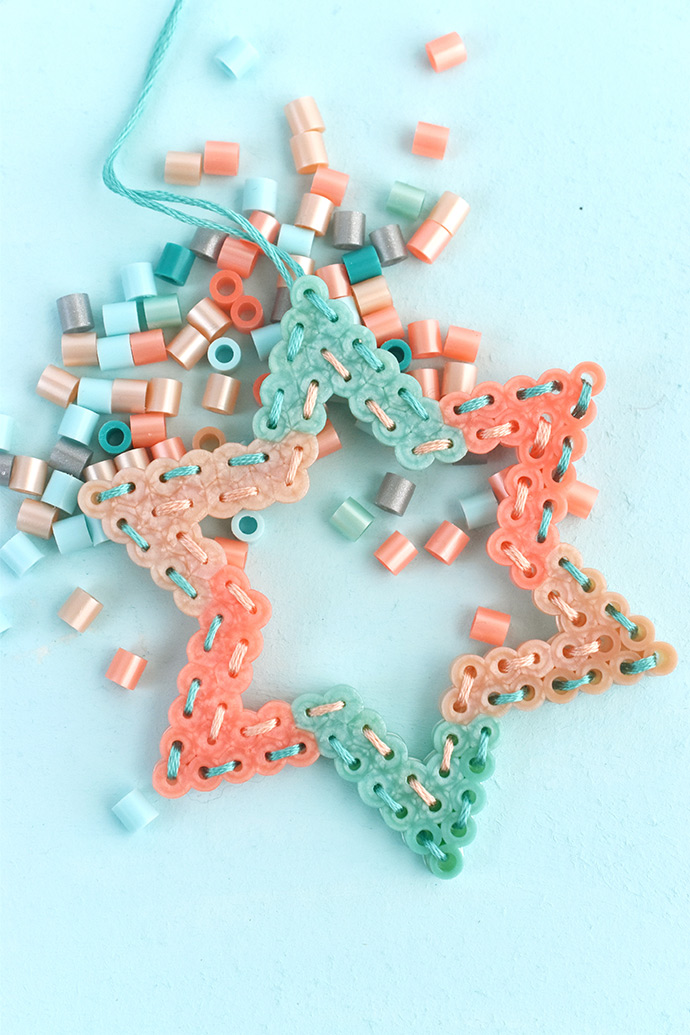
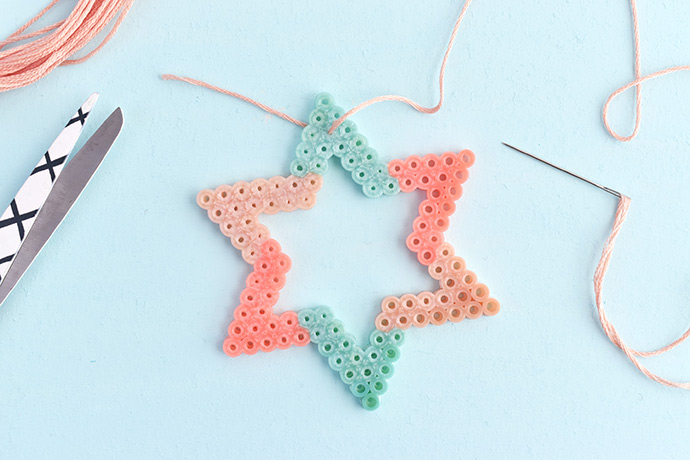
Cut a piece of embroidery floss and thread one end through the needle. Think about what kind of design you want to make with the stitching. It can be as simple as running stitch around the edge!Bring the needle up through one of the beads. Leave a long tail and hold it on the back as you make the first few stitches.
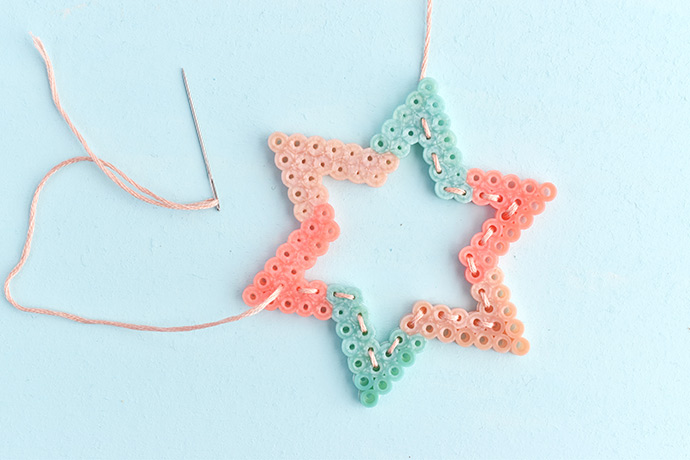
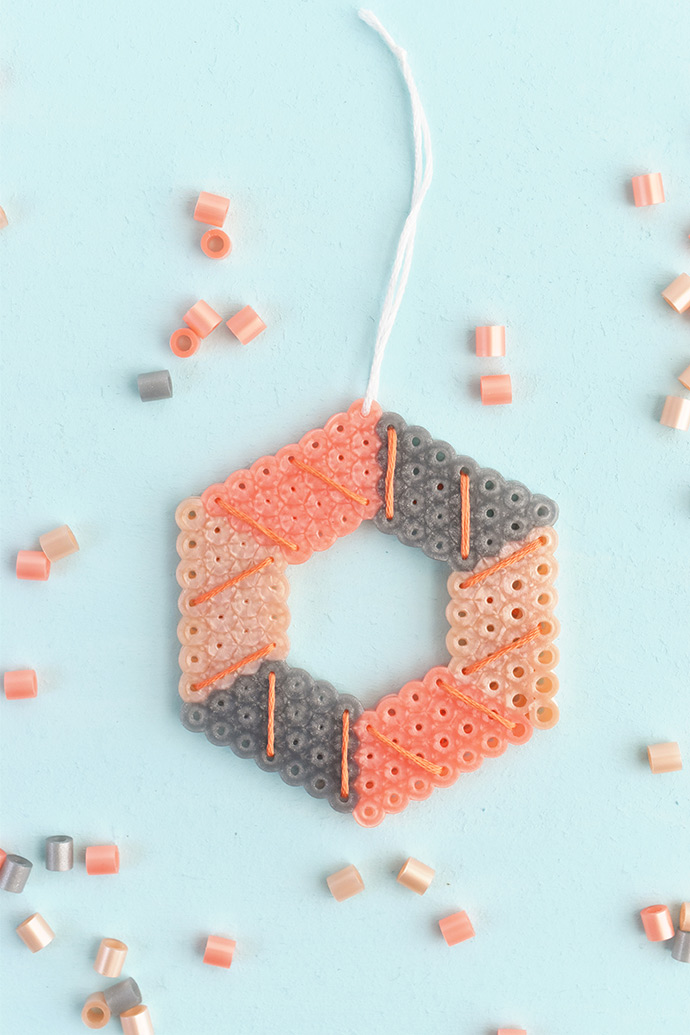
Go up and down through the beads to make your stitched design.
If any of the beads started to close up, use the needle to push through and make the holes a little larger.
Step 4
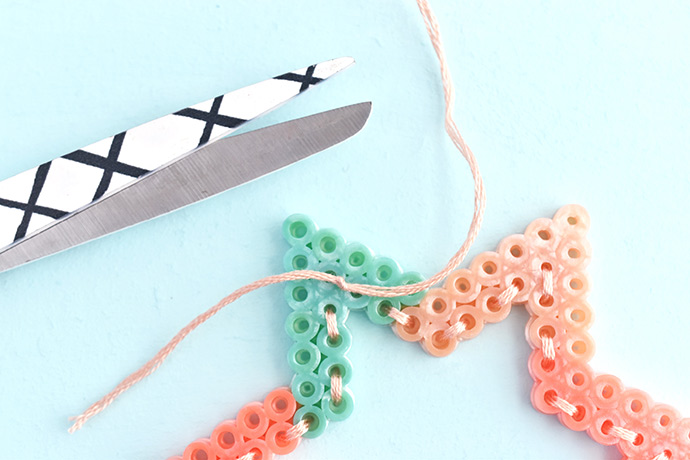
When your stitching brings you back to the start, tie the ends of the embroidery floss together in a knot. Trim the ends.If you want to start and end at two different places, start by going up through one bead and down through another, then tie the thread together on the back. After stitching your ornament, end by tying a knot through the back of the last stitch.
Step 5
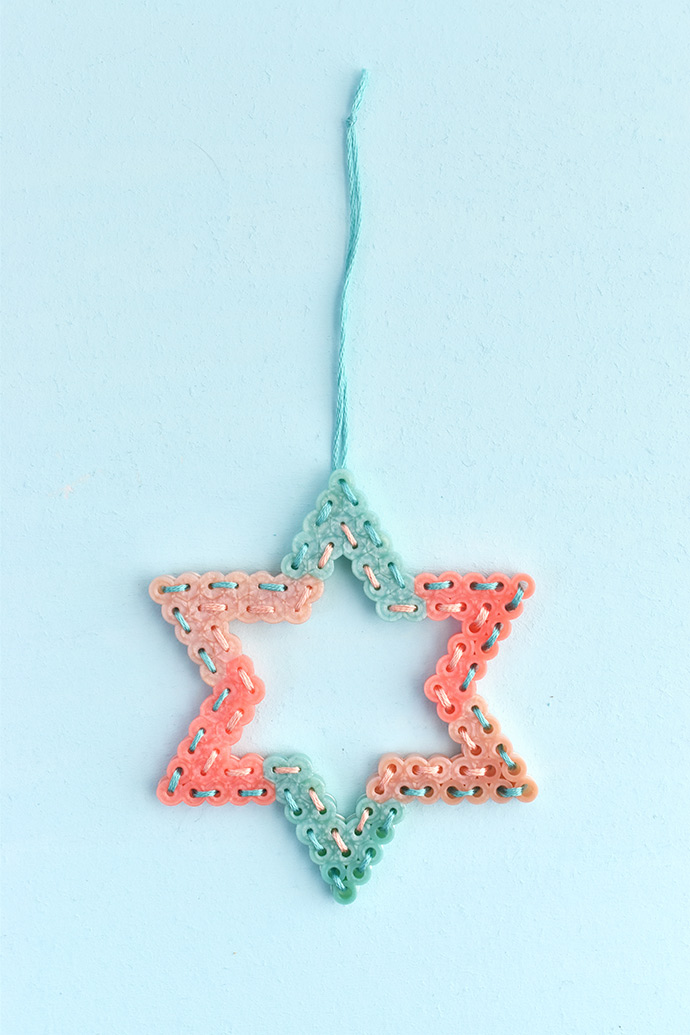
Add embroidery floss as a hanger. You can also leave extra-long tails at the beginning and end, then tie the ends together.
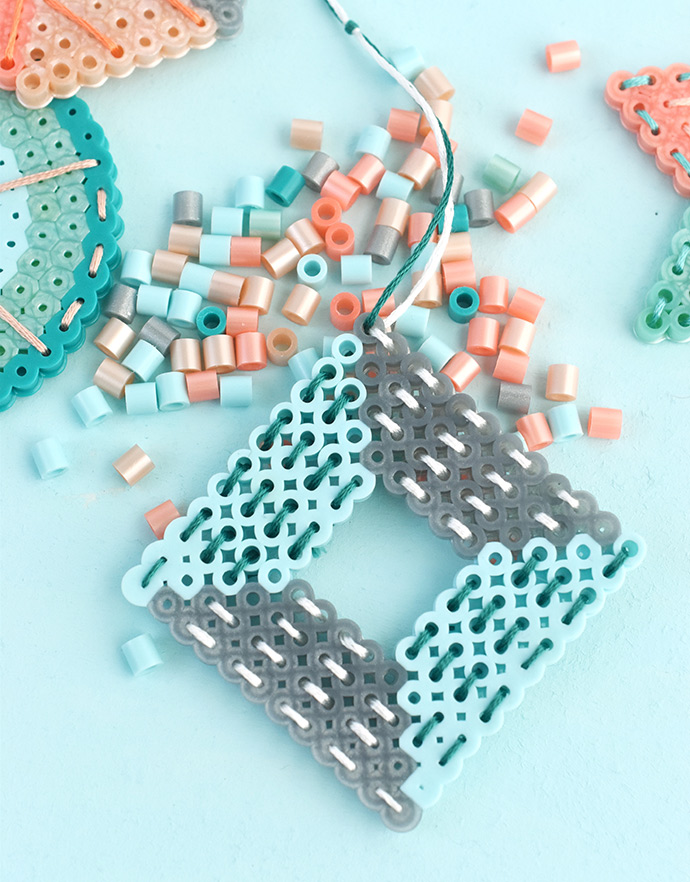
You can make short stitches or long ones! If you make square bases you can even cross stitch little designs. There’s no right or wrong way to stitch the designs as long as you like them.

Hang your creations on the tree, in a window, or attach them to gifts!
Happy crafting!