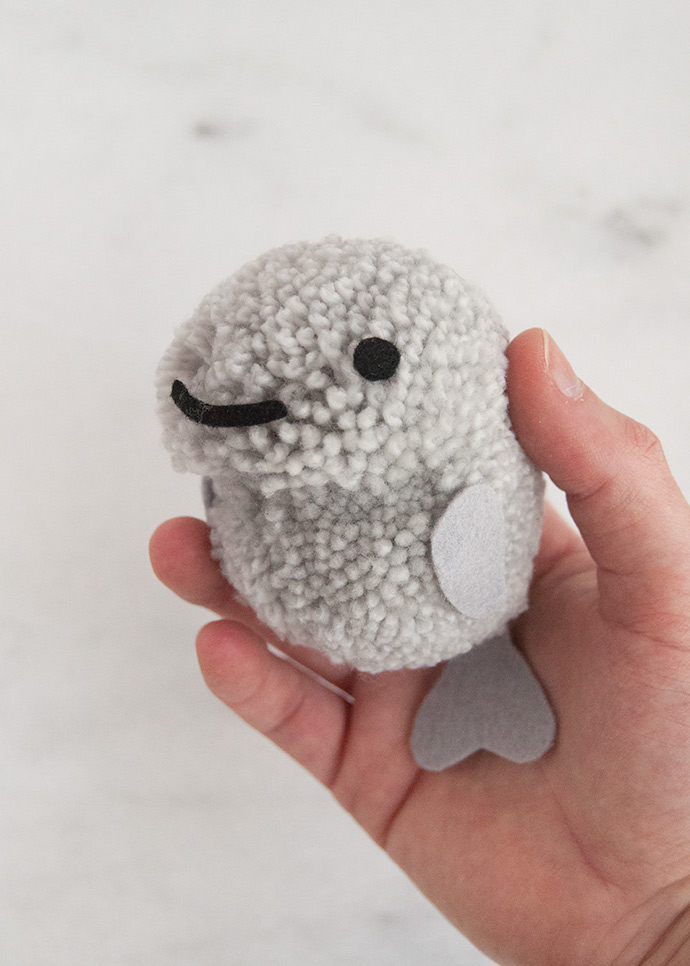
We’re so excited to be back today with the latest addition to our endangered animal pom pom series with Purl Soho. This week, we’re making a pom pom of a slightly lesser known animal: the dugong! Dugongs are related to manatees and are sometimes even called sea cows as they love eating grass in the ocean. Isn’t he a charming little guy? Keep reading to learn how to make your very own dugong pom pom!
what you need:
- Pom Pom Maker Set (small + large)
- Pocket Posy in drizzle gray
- Wool felt (light gray and black)
- Embroidery floss (ecru)
- Scissors
- Tacky glue
- Printable dugong tag
how-to:
Step 1
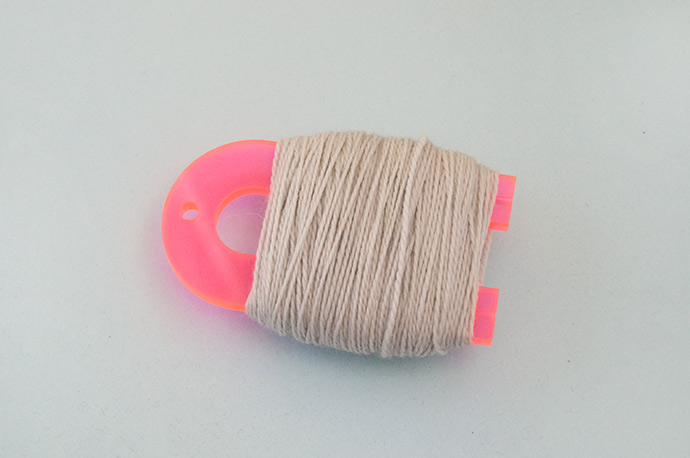
First things first: wind your skein of pocket posy into a ball. If you haven’t done this before, head over to Purl Soho’s tutorial to see their super easy instructions. We used the whole skein for this large pom, but if you choose to make him a bit smaller you can save any leftover yarn for another project. Once the ball of yarn is ready, start wrapping it around the large pink pom pom maker that comes in the set. We continued wrapping until the whole ball was used up. Since this pom is the whole body of the dugong, it helps to have a nice big pom pom to work with.
Step 2
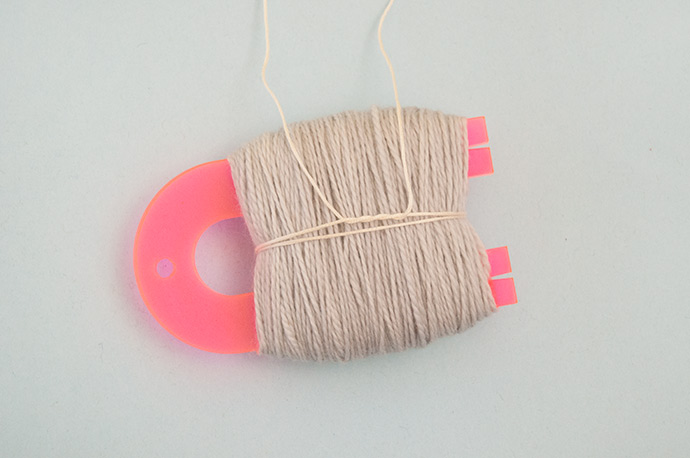
Once the yarn is all wrapped, cut a piece of embroidery thread about 18″ long. Thread one end through the U-shaped gap between the wrapped yarn and the pom pom maker. Bring that same end up and over the wrapped yarn and then back through that same U-shaped gap again. Bring the two ends of the embroidery floss together and be sure that the horizontal threads are nice and centered on the yarn wrap. Tie a surgeon’s knot but wrap the end through the loop twice. Pull the knot together but don’t pull it all the way tight just yet.
Step 3
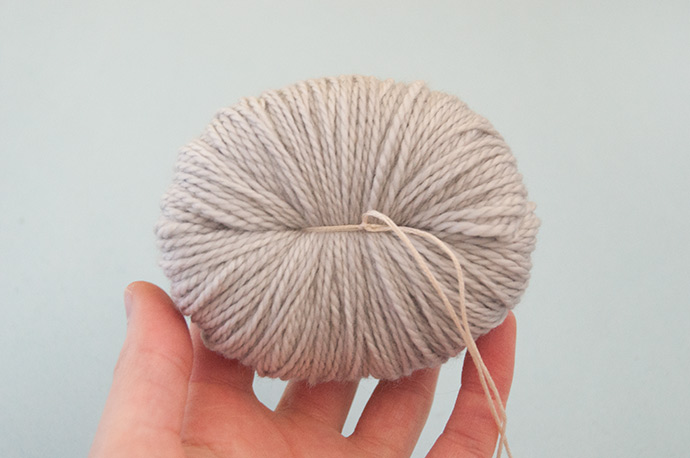
Gently slide the yarn wrap off the end of the pom pom maker and now pull the embroidery floss knot as tightly as you can. Use a finger to hold the surgeon’s knot tight in place and then tie a half granny knot on top to secure. Bring both ends of the floss to the other side of the wrap (make sure to do this so that you don’t catch any loops of yarn along the sides) and tie another tight surgeon’s knot, followed by another granny knot to secure. Be sure that these knots feel very secure and tight – a loose center may cause your pom pom to fall apart later, and we don’t want that!
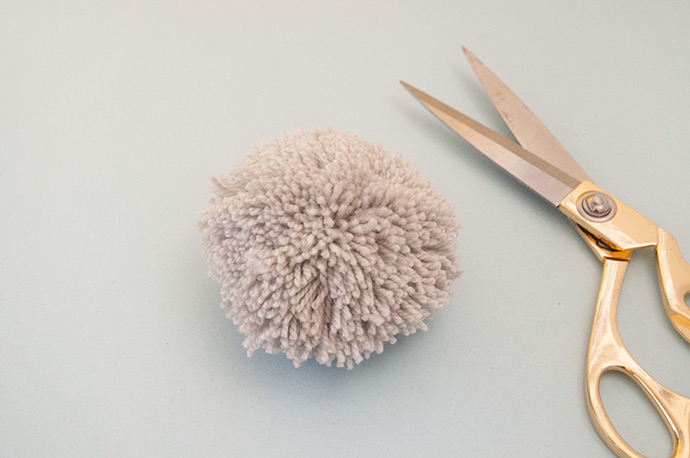
Step 4
Use very sharp scissors to cut all the yarn loops. You’ll now have a large and shaggy looking pom pom like this.
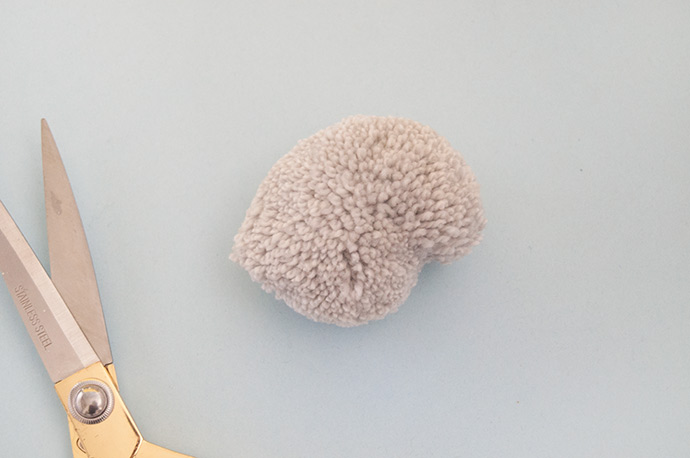
Step 5
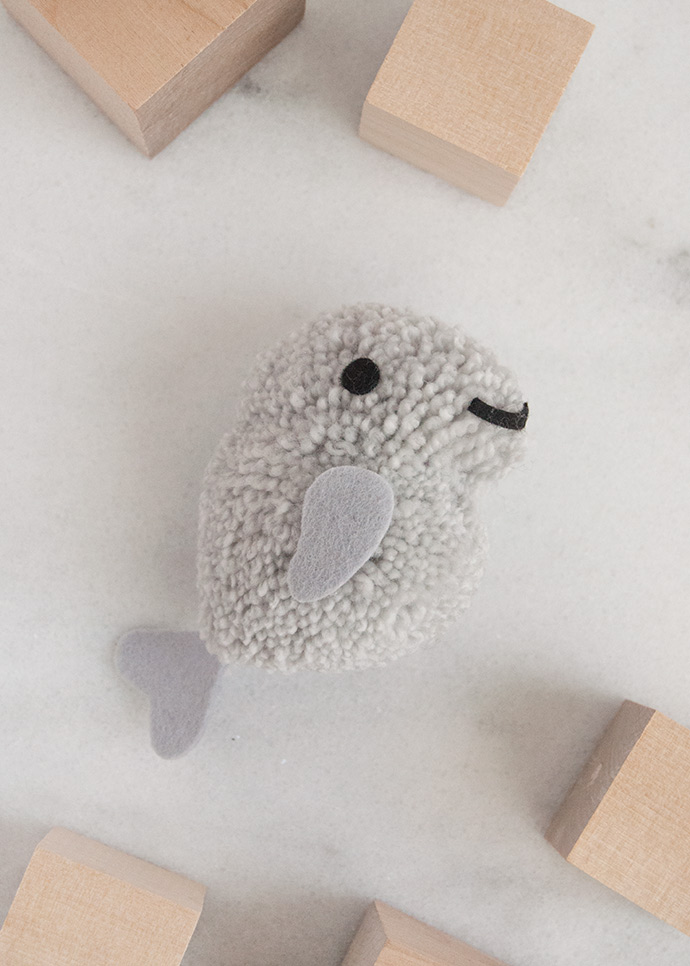
And now the fun part – trimming the pom pom into a dugong shape! Before you begin trimming, you’ll notice that the pom pom is likely large in one direction – use this to your advantage when cutting out the dugong shape. It helps to bring up a photo or two of real dugongs, or cartoon ones, to reference. This is the shape we were happy with! We left a point on one side for the tail and rounded the other side for his head.
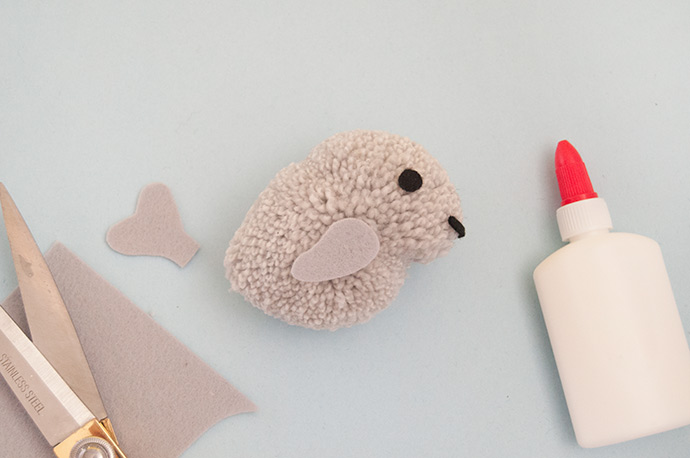
Step 6
Time to add some details to make this pom really look like a dugong. Cut a heart-shaped tail and two rounded teardrop-shaped fins from felt and glue into place. From the black felt, cut two small circles for the eyes and a long thin smile, and glue those in place too. Let dry completely.
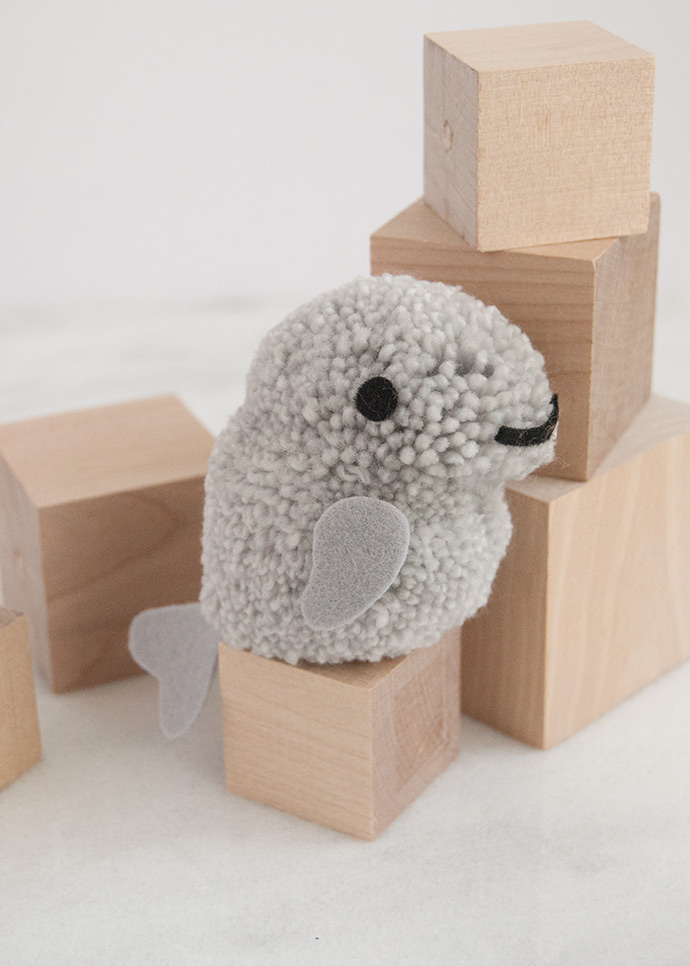
Isn’t he adorable? Learn more about dugongs here, and what you can do to help! See you soon for the next pom pom in the series!