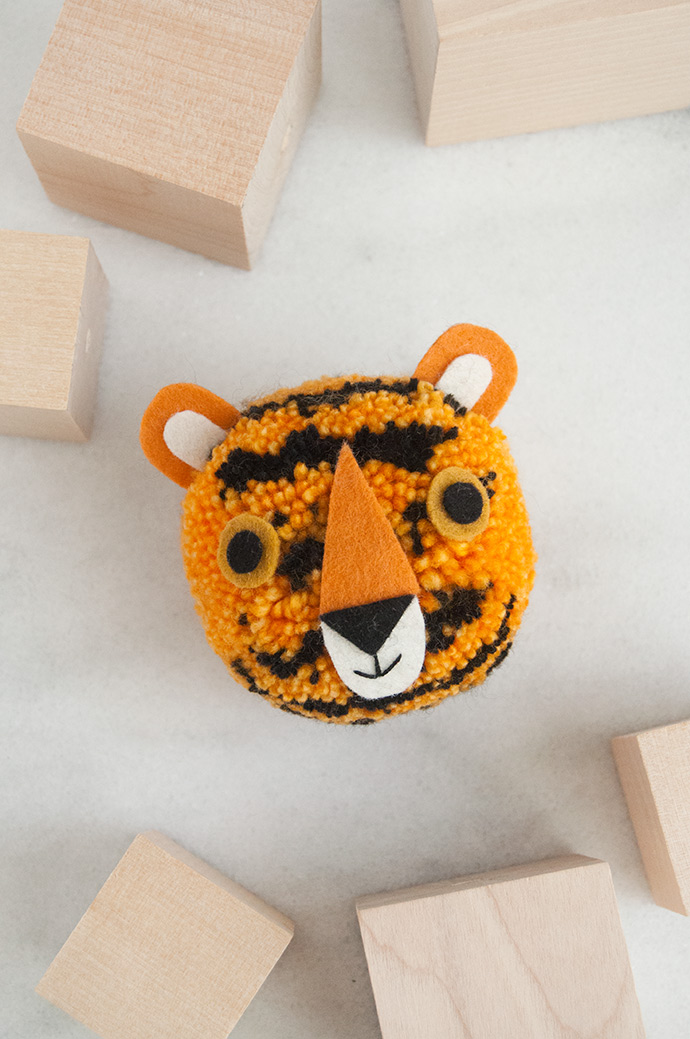
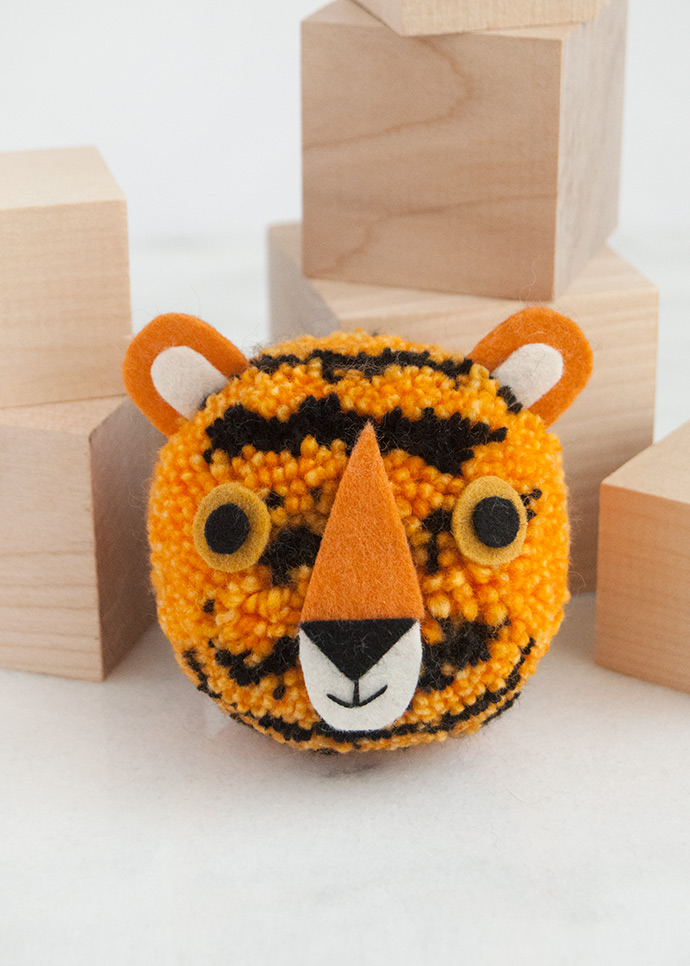
When we started planning this series of endangered animal pom poms with our friends at Purl Soho, we knew that we wanted to share this adorable tiger pom pom in October – the orange and black colors on her are just too perfect for Halloween! We’re so happy to learn that after many years of declining numbers, the wild tiger population is finally starting to grow yet again. There are still fewer than 4000 tigers in the wild, but we are optimistic that this important part of the ecosystem will continue its growth in the right direction! If you want to make a pom pom tiger all your own, keep reading for the full instructions below!
what you need:
- Pom Pom Maker Set (small + large)
- Pocket Posy in marigold orange and heirloom white
- Line Weight in soft black, solid
- Wool felt (pumpkin, butterscotch, white, & black)
- Embroidery floss (black)
- Scissors
- Tacky glue
- Needle
- Printable Tiger Tag
how-to:
Step 1
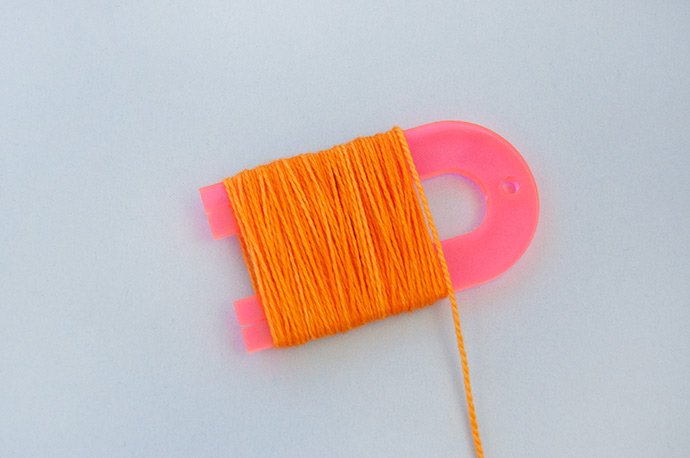
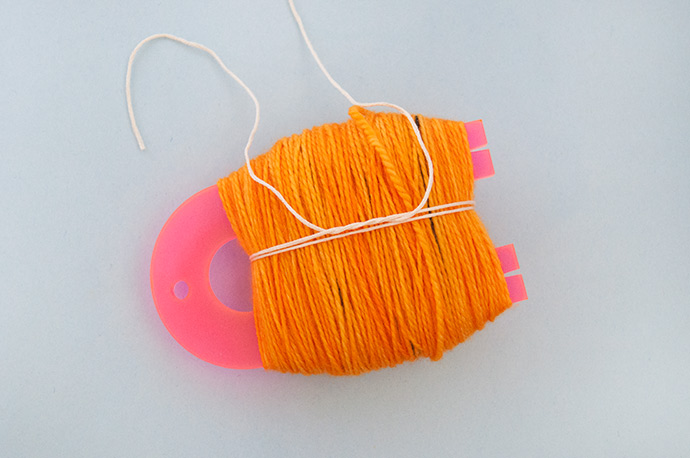
Wind your skeins of Pocket Posey and Line Weight into balls. If you haven’t done this before, Purl Soho’s tutorial on this is very simple and so helpful! Once you have balls of yarn, wrap the marigold orange Pocket Posey around the large pink pom pom maker about 75 times, without cutting the yarn tail yet.
Wind your skeins of Pocket Posey and Line Weight into balls. If you haven’t done this before, Purl Soho’s tutorial on this is very simple and so helpful! Once you have balls of yarn, wrap the marigold orange Pocket Posey around the large pink pom pom maker about 75 times, without cutting the yarn tail yet.
Step 2
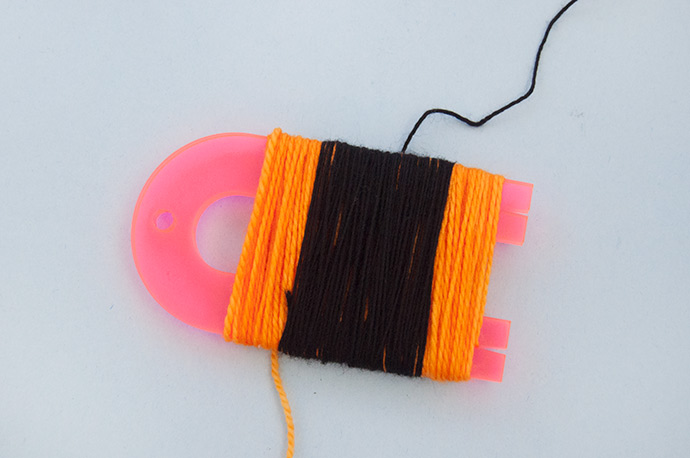
Wrap the black Line Weight yarn on top of the orange about 30 times, keeping it to the center so that orange yarn is still visible on both sides. Trim the black yarn so that it’s no longer attached to the ball.
Wrap the black Line Weight yarn on top of the orange about 30 times, keeping it to the center so that orange yarn is still visible on both sides. Trim the black yarn so that it’s no longer attached to the ball.
Step 3
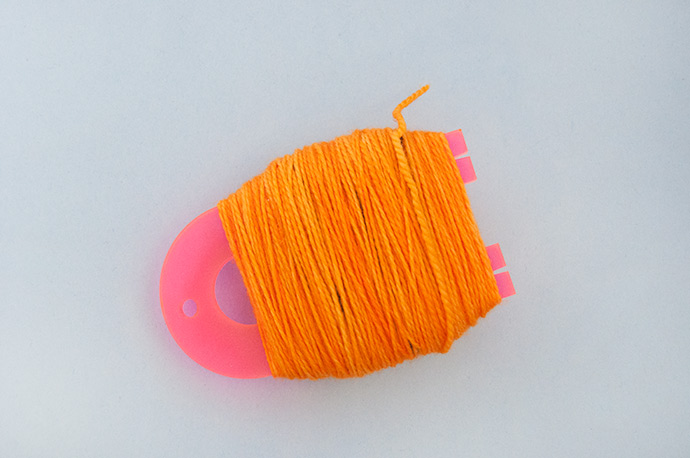
Add another layer of orange yarn on top, covering the black yarn completely, again with about 75 rotations. Repeat this process of alternating between orange and black yarn until you have three layers of black yarn. Finish this step off with an orange layer that completely covers the black yarn, and cut the yarn from the ball if you haven’t used the whole thing.
Add another layer of orange yarn on top, covering the black yarn completely, again with about 75 rotations. Repeat this process of alternating between orange and black yarn until you have three layers of black yarn. Finish this step off with an orange layer that completely covers the black yarn, and cut the yarn from the ball if you haven’t used the whole thing.
Step 4
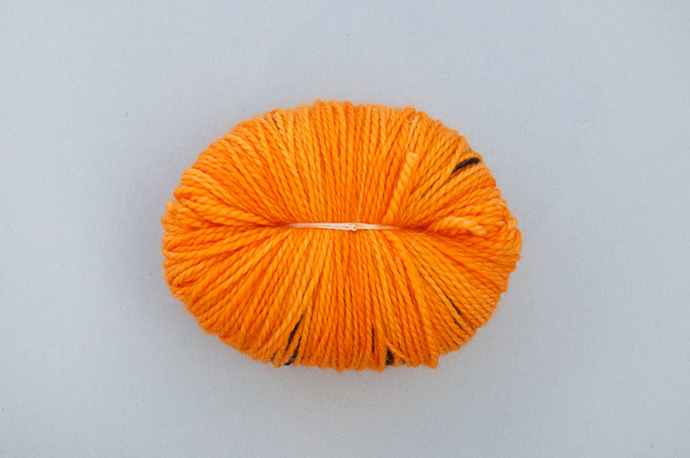
Cut an 18″ piece of embroidery thread. Thread one end through the U-shaped gap between the wrapped yarn and the pom pom maker. Bring that same end up and over the wrapped yarn and then back through that same U-shaped gap again. Bring the two end of the embroidery floss together and make sure that the horizontal threads are nice and centered on the yarn wrap. Tie a surgeon’s knot but wrap the end through the loop twice. Pull the knot but don’t pull all the way tight just yet.
Step 5
Carefully slide the yarn wrap off the end of the pom pom maker. Pull the embroidery floss knot as tightly as you can. Use a finger to hold the surgeon’s knot tight in place and then tie a half granny knot on top to secure. Bring both ends of the floss to the other side of the wrap (make sure to do this so that you don’t catch any loops of yarn along the sides) and then tie another tight surgeon’s knot, followed by another granny knot to secure. Make sure that these knots feel secure and very tight – a loose center may cause your pom pom to fall apart later.
Carefully slide the yarn wrap off the end of the pom pom maker. Pull the embroidery floss knot as tightly as you can. Use a finger to hold the surgeon’s knot tight in place and then tie a half granny knot on top to secure. Bring both ends of the floss to the other side of the wrap (make sure to do this so that you don’t catch any loops of yarn along the sides) and then tie another tight surgeon’s knot, followed by another granny knot to secure. Make sure that these knots feel secure and very tight – a loose center may cause your pom pom to fall apart later.
Step 6
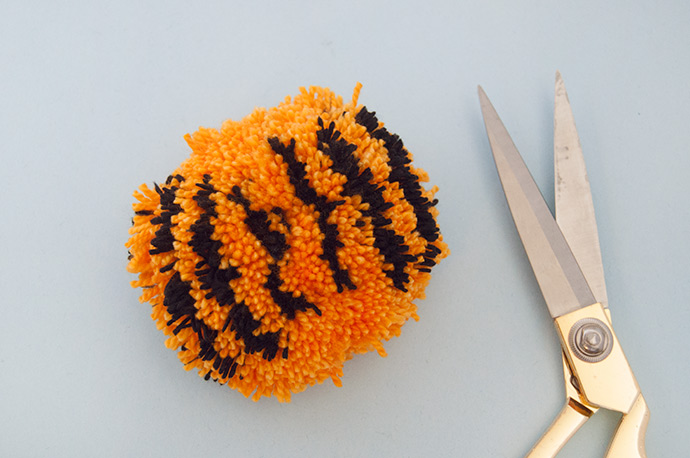
Use very sharp scissors to cut all the yarn loops. You’ll now have a kind of rough and shaggy looking pom pom like this.
Use very sharp scissors to cut all the yarn loops. You’ll now have a kind of rough and shaggy looking pom pom like this.
Step 7
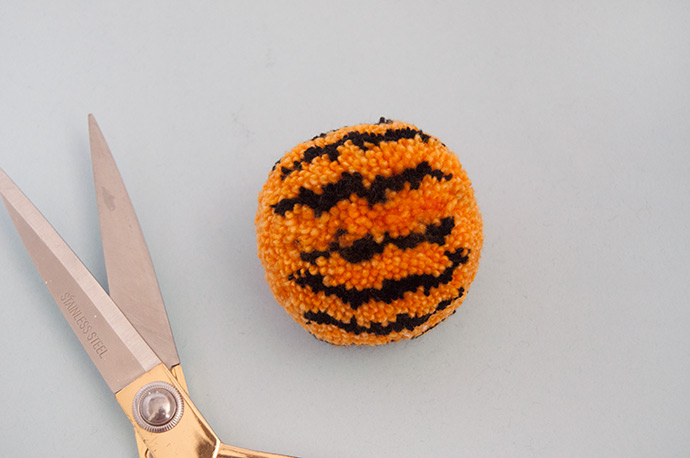
Use the pom pom guide and your sharp scissors to trim down the pom pom until it’s nice and round. Don’t those stripes look great?
Use the pom pom guide and your sharp scissors to trim down the pom pom until it’s nice and round. Don’t those stripes look great?
Step 8
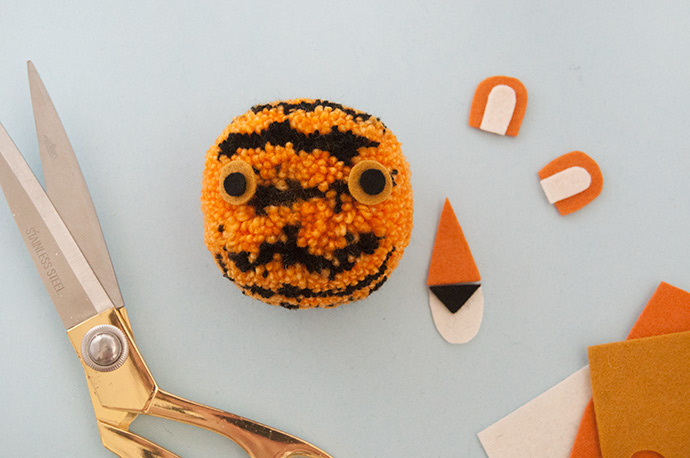
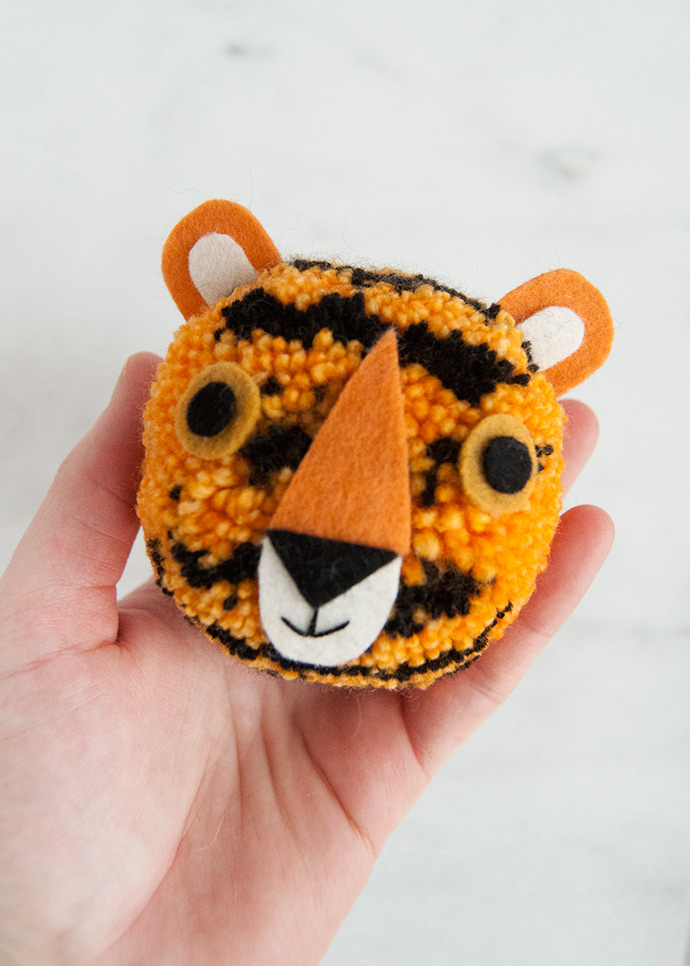
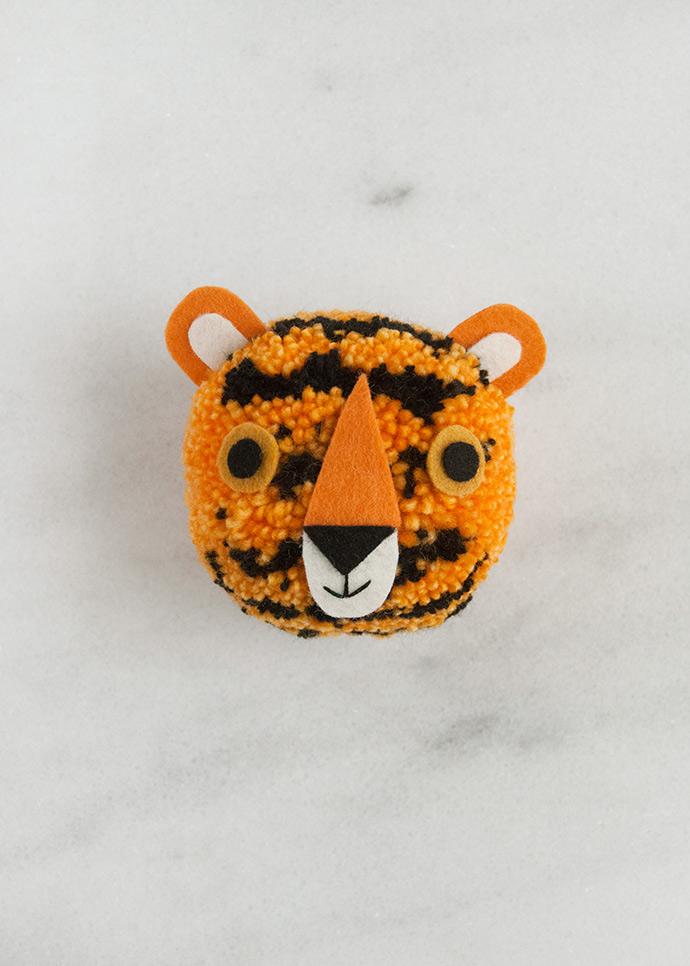
Time to make the tiger’s face! Cut two circles out of butterscotch felt and two slightly smaller ones from black felt for the eyes. For the ears, cut two D-shapes from pumpkin felt and two smaller white ones to layer on top. For the nose, cut a tall triangle from pumpkin felt, a shorter triangle from black felt, and a D-shape from white felt.
Time to make the tiger’s face! Cut two circles out of butterscotch felt and two slightly smaller ones from black felt for the eyes. For the ears, cut two D-shapes from pumpkin felt and two smaller white ones to layer on top. For the nose, cut a tall triangle from pumpkin felt, a shorter triangle from black felt, and a D-shape from white felt.
Step 9
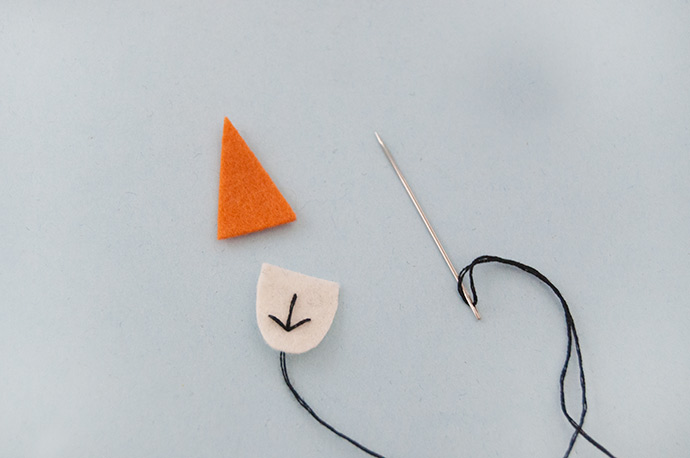
Use a needle and thread to make three stitches on the white D-shape of the mouth to create a little smile. Tie off the black embroidery floss on the back of the felt.
Use a needle and thread to make three stitches on the white D-shape of the mouth to create a little smile. Tie off the black embroidery floss on the back of the felt.
Step 10
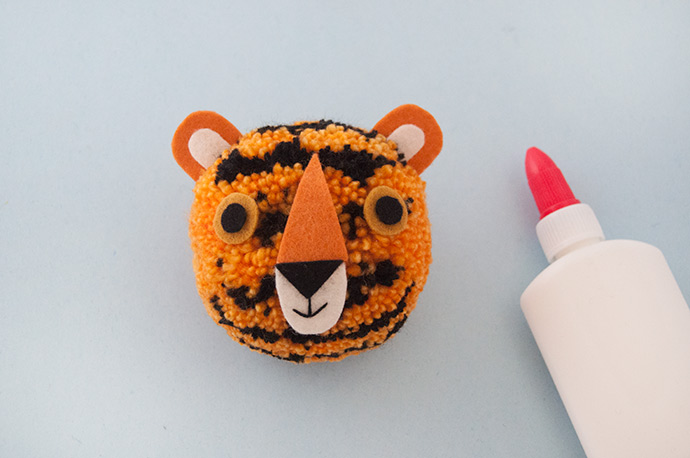
Apply glue to the backs of the felt pieces and secure them in place on the pom pom. Let dry completely!
Apply glue to the backs of the felt pieces and secure them in place on the pom pom. Let dry completely!
Learn more about the tiger here and what you can do to help! And check back next month for another addition to our endangered animal pom pom series.