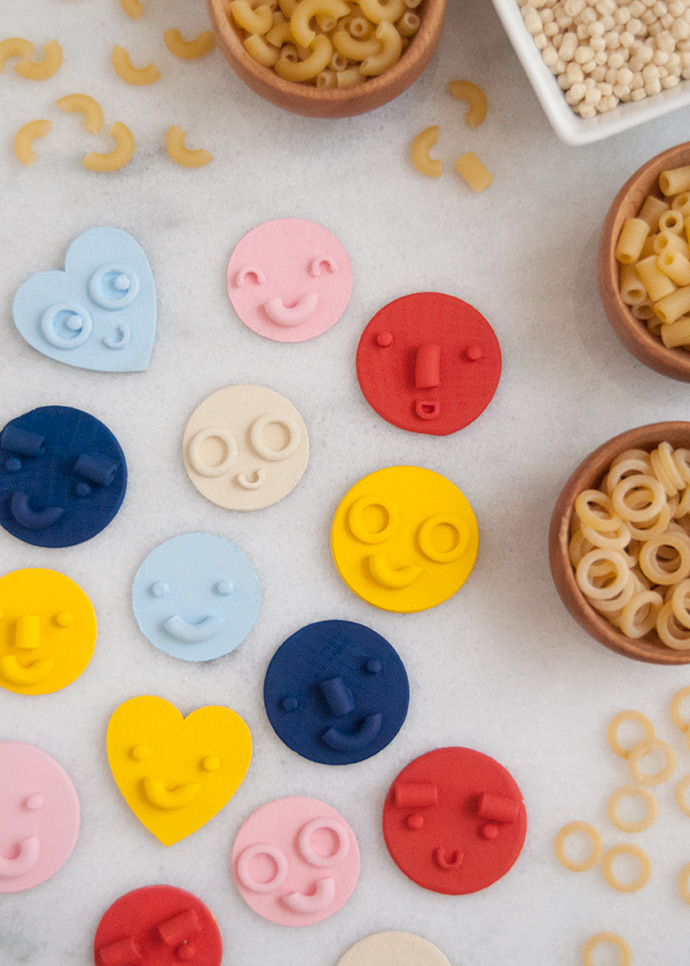
When I was putting boxes of pasta away into the kitchen cupboard the other day, I found myself looking at the pearl couscous thinking that there had to be a craft there. I don’t normally have pearl couscous on hand so when I saw it next to the box of macaroni it struck me that together they would make the perfect smiley face!

I searched my pasta stash for other small noodles to add some variety and these friendly pasta faces were born! Mixing and matching the pasta noodles to make different expressions is so much fun. I couldn’t help but give them all smiles but I love the idea of using these to teach kids about emotions if you made some sad, mad, laughing, or sleepy.
what you need:
- Small wooden circles (or other shapes)
- Pasta noodles (macaroni, tubetti, pearl couscous, anelli, alphabet, or others)
- White glue
- Toothpick
- Paint
- Paintbrushes
how-to:
Step 1
If you don’t have wooden circles on hand or can’t find them at your local craft store, you can instead trace a round object (like a jar lid or roll of washi tape) onto cardboard and cut out as many circles as you like.
Step 2
Pour your different pasta noodles into bowls to have them nice and handy. If you’re using alphabet pasta, it helps to pour it out onto a plate so that you can more easily sort through them to find the letters you need.
Step 3
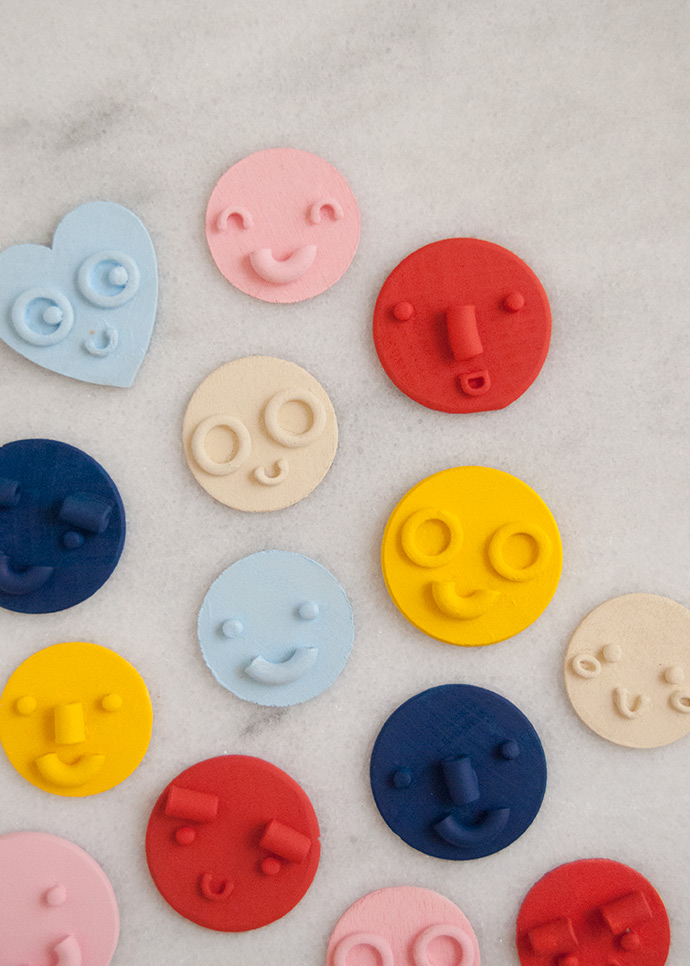
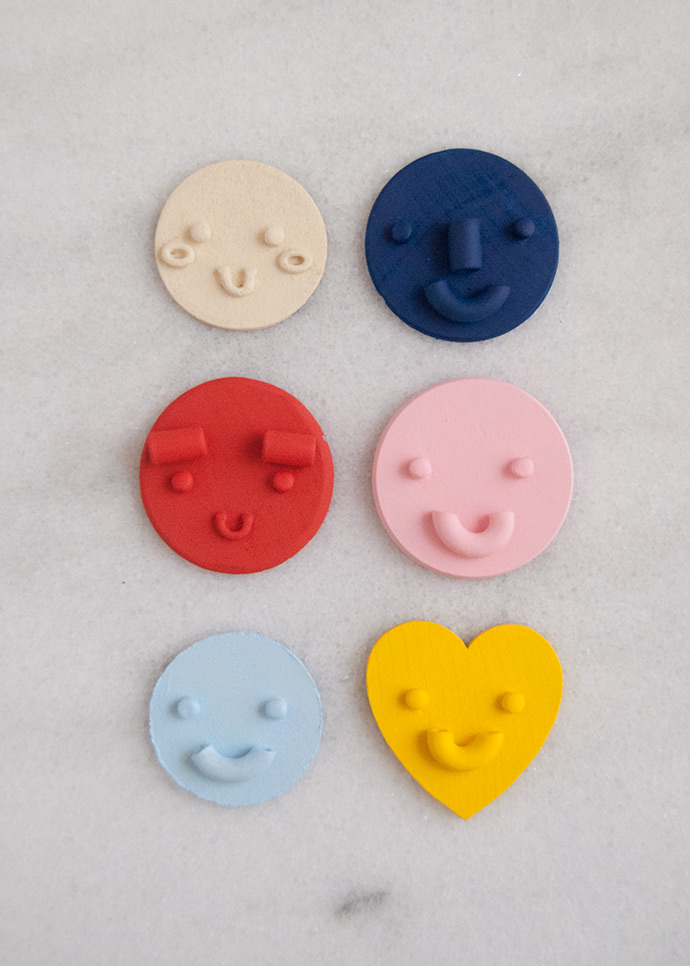
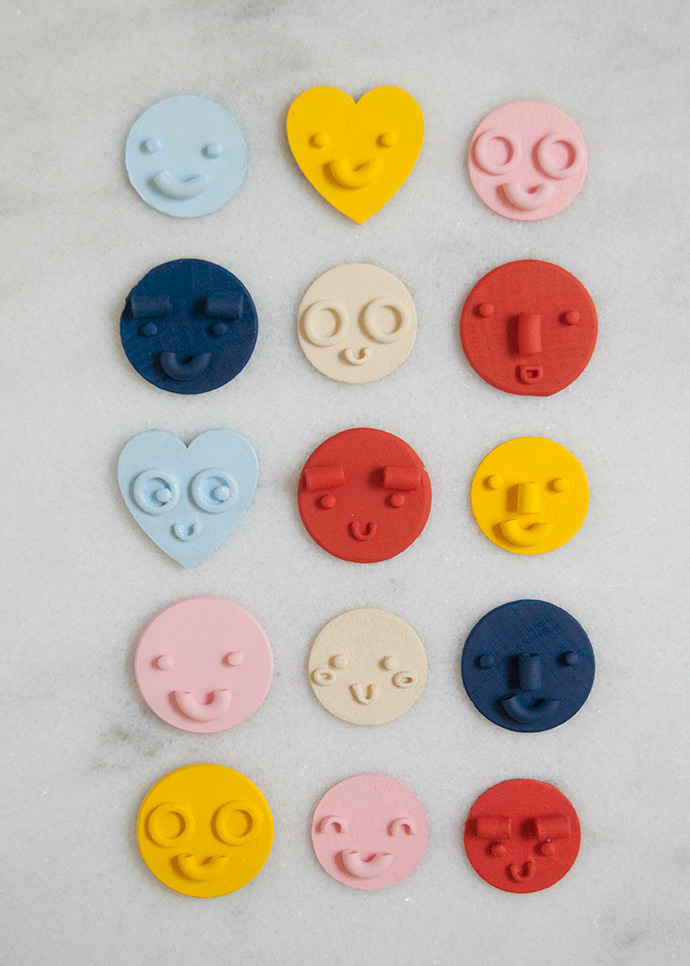
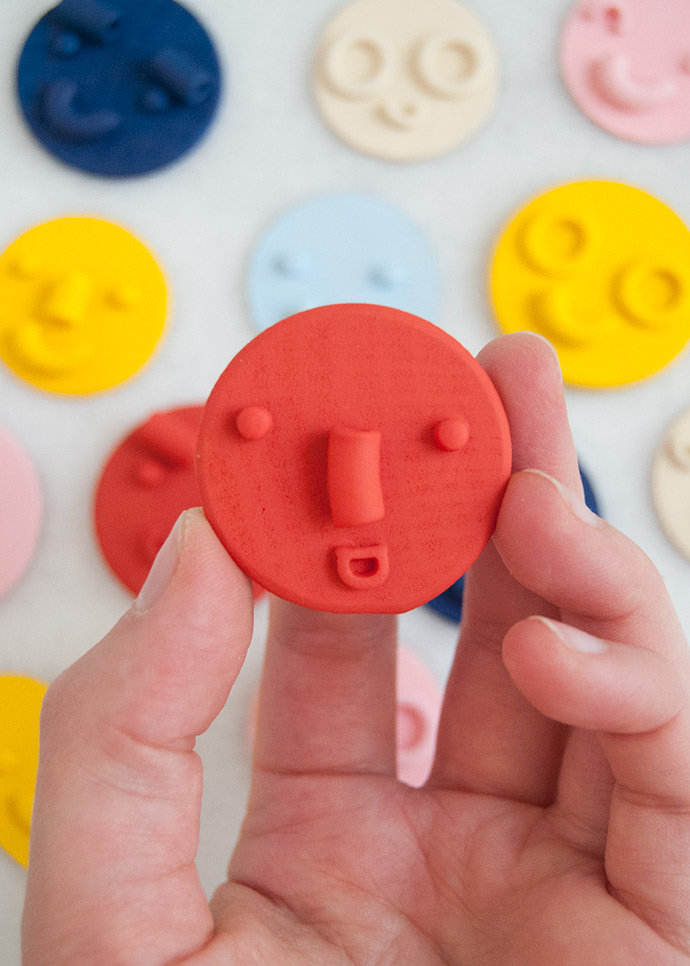
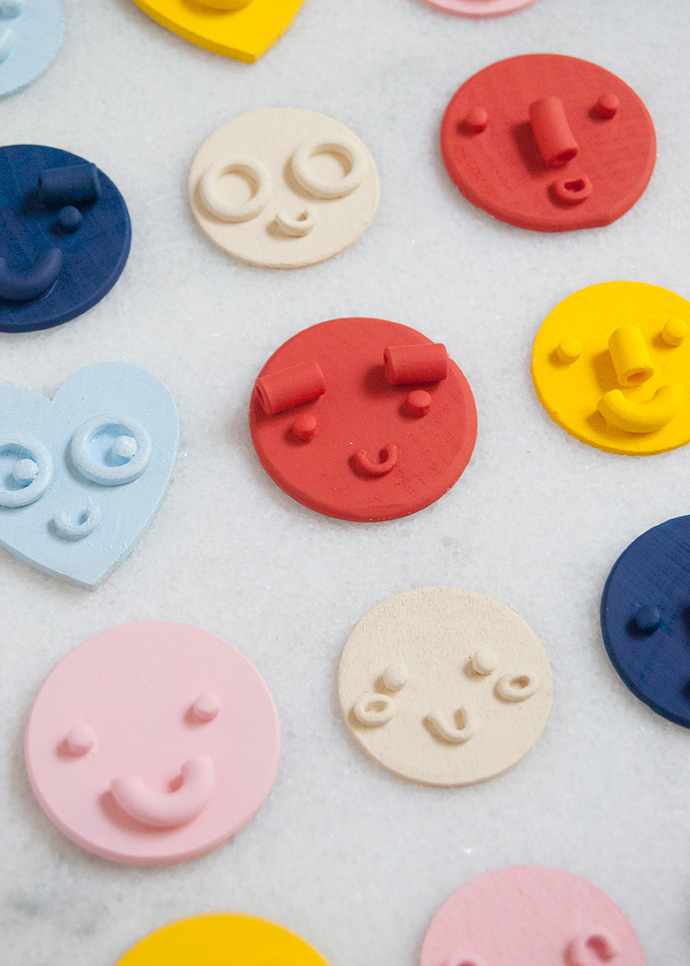
Arrange faces onto the circles! Macaroni noodles make perfect smiles and pearl couscous are excellent eyes. Tubetti noodles are great for noses and eyebrows! Anelli is also fun for big round eyes that you can put couscous into to make look almost like googly eyes. From alphabet pasta, Ds, Cs, and Us make cute mouths and Os can be rosy cheeks. Don’t let these suggestions limit you of course – there are SO many ways to arrange pasta into playful faces. And your grocery store may have additional shapes that will inspire you!
Step 4
Once you have the faces arranged, use tacky glue to secure the pasta onto the circles. It helps to use a toothpick to apply glue to the extra small noodles, and another toothpick to help gently nudge the pasta into the exact place you want once you’ve placed it on the circle. Sometimes your fingers just can’t quite get the spot exactly right, so the toothpick (or even tweezers!) are very helpful. Let the glue dry completely.
Step 5
Apply paint onto the circles and let dry.
Step 6
Your pasta faces are ready to go! They are fun little tokens or treats as-is, but you can also glue magnets or pins to the backs if you like.
Happy crafting!