
Supposedly, if you see a shooting star, it is considered to be good luck! These favor pouches were inspired by our lion favors, and may be given to all the lucky guests at your next party! We are always looking for a fun way to present favors that won’t break the bank, and also allow for some fun crafting. Depending on the age, kids can definitely get involved in making these, and may even be capable of doing the entire project.

These could be fun for a whole shooting star party, stargazing, rainbow theme, or could be made in red, white and blue for the 4th of July or anything patriotic. If you’re into all the 80s toys that seem to be appearing again, we could definitely picture including these in a My Little Pony or Care Bears theme!

what you need:
- Star template (see step 1)
- Brown paper grocery bags
- Pencil
- Scissors
- Silver acrylic paint
- Sponge brush
- Silver glitter
- Small hole punch
- Plastic tablecloths in multiple colors
- Tinsel (optional)
- Candy or small favors
how-to:

Step 1
Draw, print, or use a cutting machine to create a star template out of cardstock. Our star is about 8 inches wide. Trace the star onto paper bags, twice per favor pouch. Use scissors to cut them out.
Draw, print, or use a cutting machine to create a star template out of cardstock. Our star is about 8 inches wide. Trace the star onto paper bags, twice per favor pouch. Use scissors to cut them out.
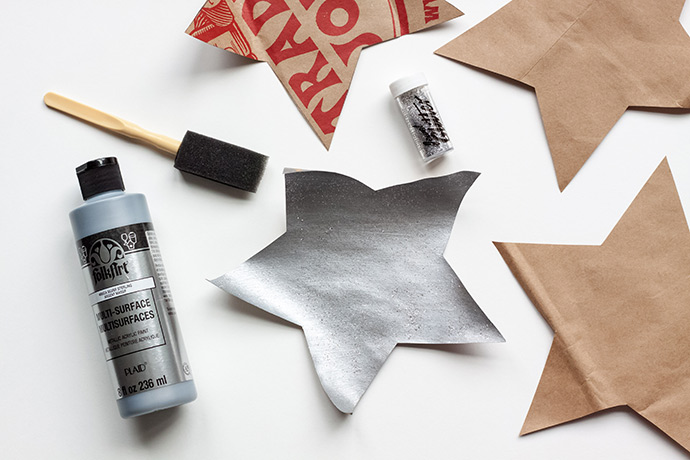
Step 2
Paint the plain side of both stars using silver acrylic paint. Sprinkle silver glitter all over the stars while the paint is still wet, and allow to dry.
Paint the plain side of both stars using silver acrylic paint. Sprinkle silver glitter all over the stars while the paint is still wet, and allow to dry.
Step 3
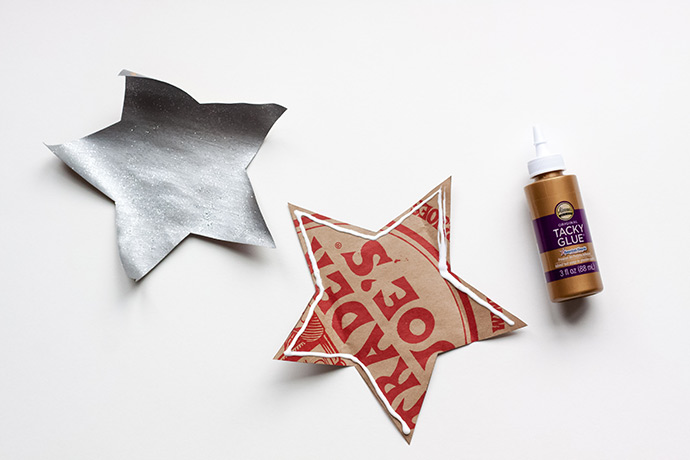
Place glue near the edge of one entire star (not the painted side), leaving one entire side without glue as seen in the photo above. Line the two stars up perfectly, with the silver sides facing out. Press down so they stick together around the edges. We pressed down over wax paper, so it could catch any glue that seeps out. You may want to place your stars on a fresh piece of wax paper with another piece of wax paper over them, so you can place heavy books on top to keep them flat as they dry. Allow to dry completely.
Place glue near the edge of one entire star (not the painted side), leaving one entire side without glue as seen in the photo above. Line the two stars up perfectly, with the silver sides facing out. Press down so they stick together around the edges. We pressed down over wax paper, so it could catch any glue that seeps out. You may want to place your stars on a fresh piece of wax paper with another piece of wax paper over them, so you can place heavy books on top to keep them flat as they dry. Allow to dry completely.
Step 4
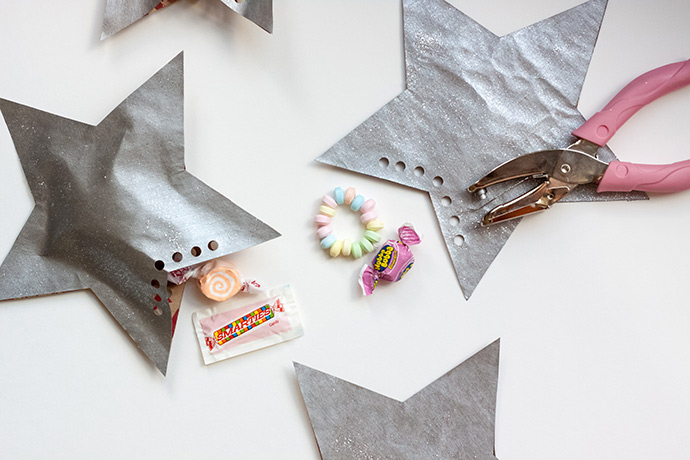
In the very middle of the opened side of your star, use a small hole punch to create a hole about ½” from the edge. Punch three more holes on each side of the center hole, slightly less than ½” inch apart from the center of each hole. Place small candy or favors inside the pouch.
In the very middle of the opened side of your star, use a small hole punch to create a hole about ½” from the edge. Punch three more holes on each side of the center hole, slightly less than ½” inch apart from the center of each hole. Place small candy or favors inside the pouch.

Step 5
Cut your tablecloths into 1” wide by 54” long strips. This is easiest to do with the tablecloths folded.
Cut your tablecloths into 1” wide by 54” long strips. This is easiest to do with the tablecloths folded.

Step 6
Fold your tablecloth strips in half. If you would like to add tinsel, hold a piece along your first strip of tablecloth. Start by folding the first strip in half again and twisting the end to make it skinny enough to fit through the hole. Place the strip through the first hole, from the top. Once it is through, pull the loop apart, and place the loose ends of the strip through the loop. Pull gently, until you have a knot at the star, with two strips hanging down. Repeat this step with each tablecloth strip, until all seven holes are tied.
Fold your tablecloth strips in half. If you would like to add tinsel, hold a piece along your first strip of tablecloth. Start by folding the first strip in half again and twisting the end to make it skinny enough to fit through the hole. Place the strip through the first hole, from the top. Once it is through, pull the loop apart, and place the loose ends of the strip through the loop. Pull gently, until you have a knot at the star, with two strips hanging down. Repeat this step with each tablecloth strip, until all seven holes are tied.

Your shooting stars are ready to party!


Happy crafting!