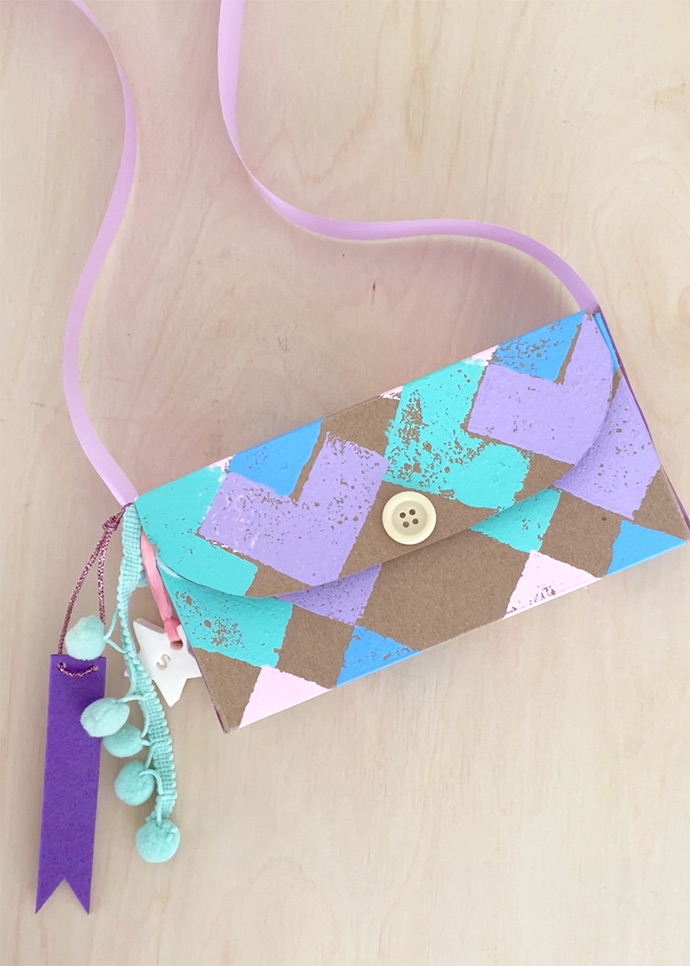
Repurpose empty macaroni boxes into a play purse, stamped to look like a quilted bag! We are in love with all of the quilted purses, coats, bags, hats, you name it that we see, so thought we’d use them as inspiration for this craft! Macaroni boxes are the perfect size for a kid’s play purse, but granola bar boxes or similar work well too! Or maybe a cereal box could be turned into a quilted backpack?! Before stamping, do an online image search for traditional quick block patterns for inspiration. It’ll be hard to pick just one!
Read the written instructions below and check out the video on Instagram Reels!

what you need:
- Two empty macaroni boxes
- Kitchen sponges
- Paper plates
- Paint
- Scissors
- Hot glue gun
- Ribbon
- Adhesive velcro dots
- Buttons, charms, and trim (optional)
how-to:
Step 1
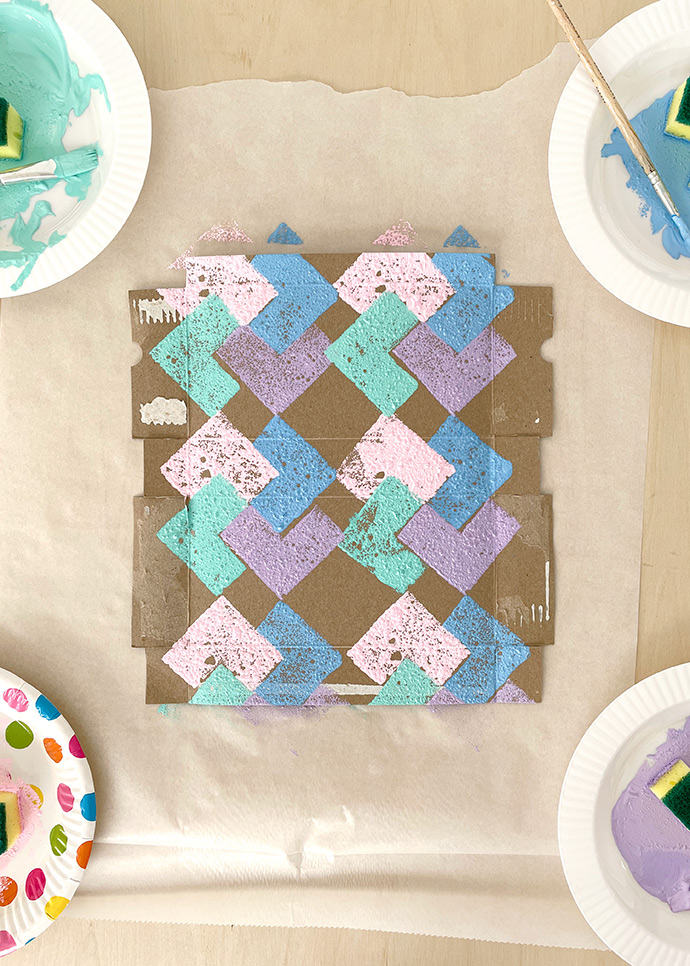
Disassemble both macaroni boxes and lay flat. You can also use other boxes here (like granola bars, crackers, etc) but it helps if you have two of the exact same size.
Step 2
Decide on your “quilt” design. Do an online image search for traditional quilt block patterns and pick one you like. Cut the sponges into shapes to match your design – you’ll need one per color.
Step 3
Squeeze out paint onto paper plates. Dab your sponge stamp into the first color and do a few test stamps on scrap paper before stamping onto the first macaroni box. Stamp all over both macaroni boxes and set aside to dry completely.
Step 4
Use a hot glue gun to reassemble one of the macaroni boxes, but leave one of the long and narrow sides open. Trim off this flap so that you have a open box, kind of like a cardboard VHS sleeve.
Step 5
The second box will be used to make the purse flap. Cut off all the side flaps on the box and then down the middle of one of the large box panels. Keep the other large panel intact for now. Glue the half panel to the back of the purse so that the narrow panel covers the opening of the purse and the full panel is now on the front of the purse. You can give this front panel a rounded edge like we did, if you like!
Step 6
Apply adhesive velcro dots so that the purse flap can open and close. Glue a button on the front to give the look of having a real working button on the purse flap.
Step 7
Cut a piece of ribbon to be the purse strap and glue to both sides of the purse.
Step 8
Add some charms and trim on one side of the bag if you like.
You can also choose to paint the inside of the box, or line it with paper if you like!
Happy crafting!