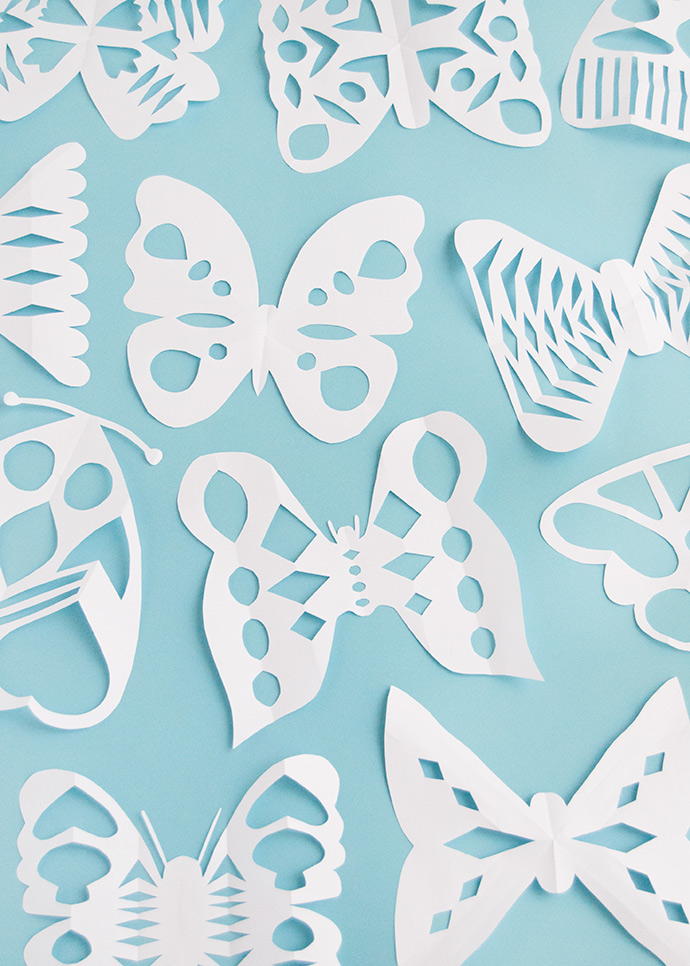
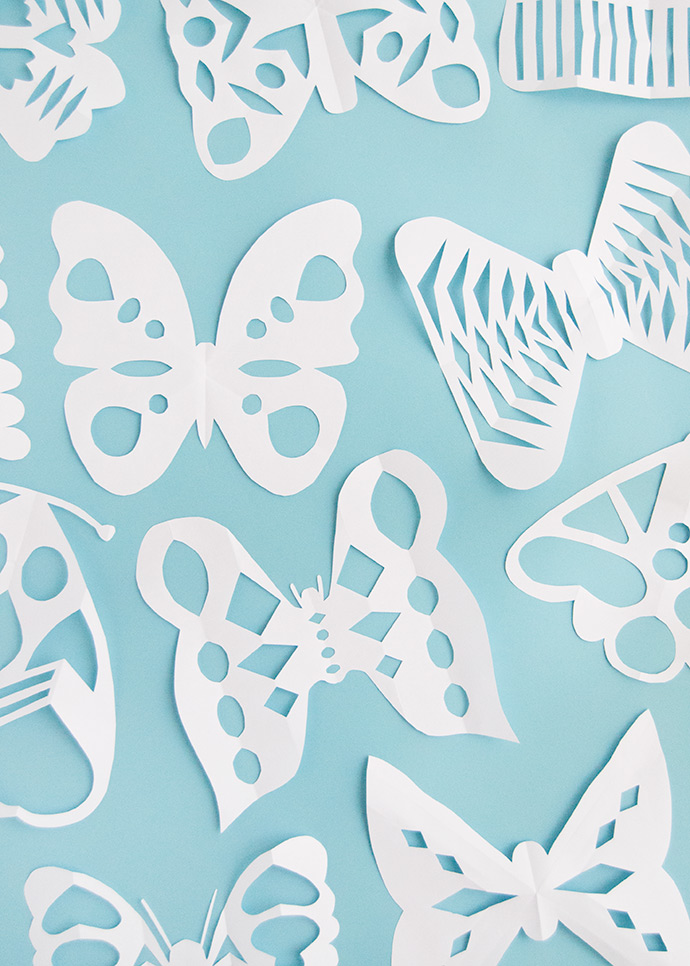
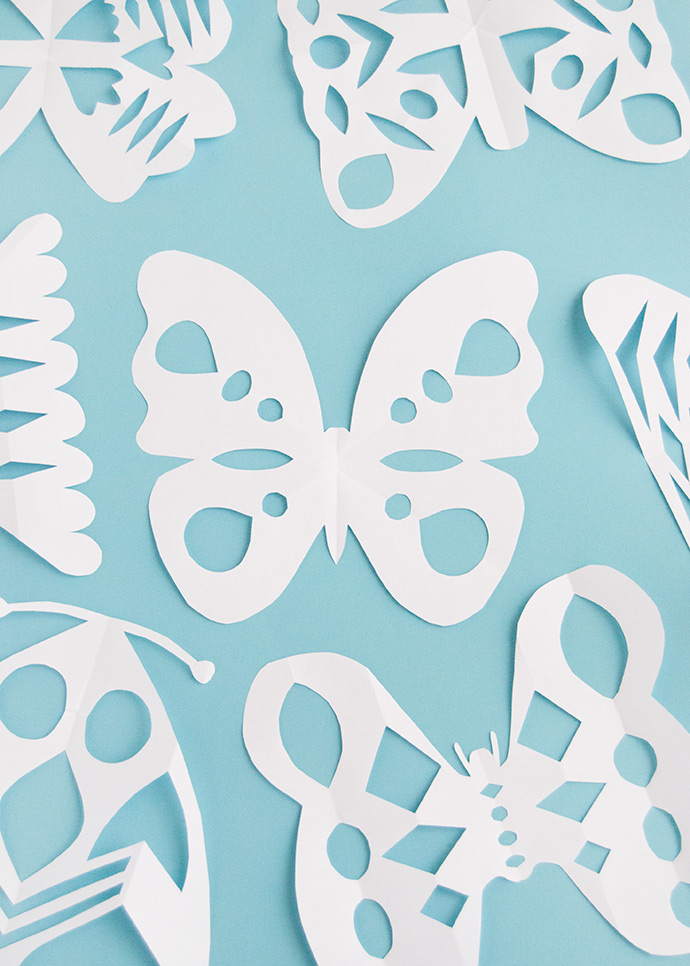
Even if the first snowfall hasn’t come where you live yet, once December hits we’re officially in the mood for making paper snowflakes. While experimenting with the process and different folding techniques, we stumbled onto a fun idea – what if we made snowflakes that look like butterflies and moths?

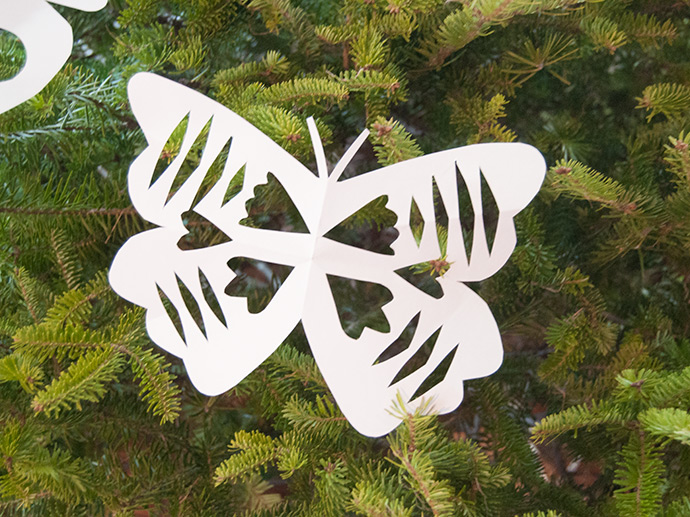
They’re just as easy as regular paper snowflakes, but you’ll have so much fun trying out different folds and cutting techniques. We’ve divided these into two slightly different methods, both of which are detailed below. They perch perfectly on a Christmas tree, but also make festive window decor too – just tape them up! Keep reading for the full instructions.
what you need:
- White paper
- Scissors
- Pencil (optional)
how-to:
Square Folding Method:
Step 1
Begin with a white paper square – we trimmed a regular piece of printer paper into an 8 1/2 ” by 8 1/2″ square. Fold the square in half, and then in half again so that you have a smaller square made up of four layers.
Step 2
Use a pencil to sketch out the outline of a simple butterfly or moth shape, or just go for it with a pair of scissors. It can help to do a quick image search on Pinterest for illustrated images of moths and butterflies to reference. There are tons of different shapes you can cut!

Step 3
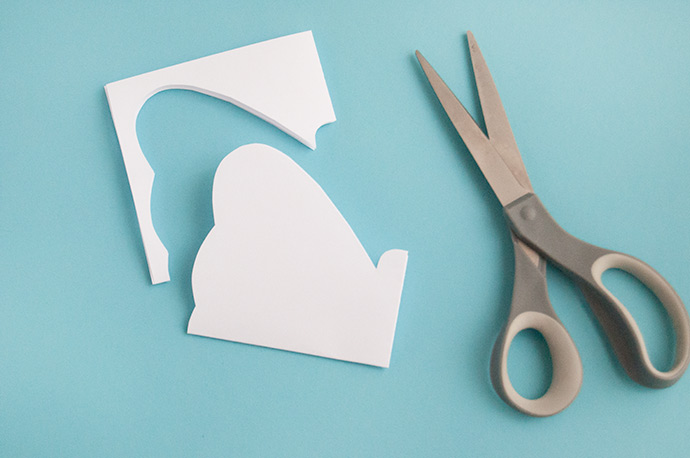
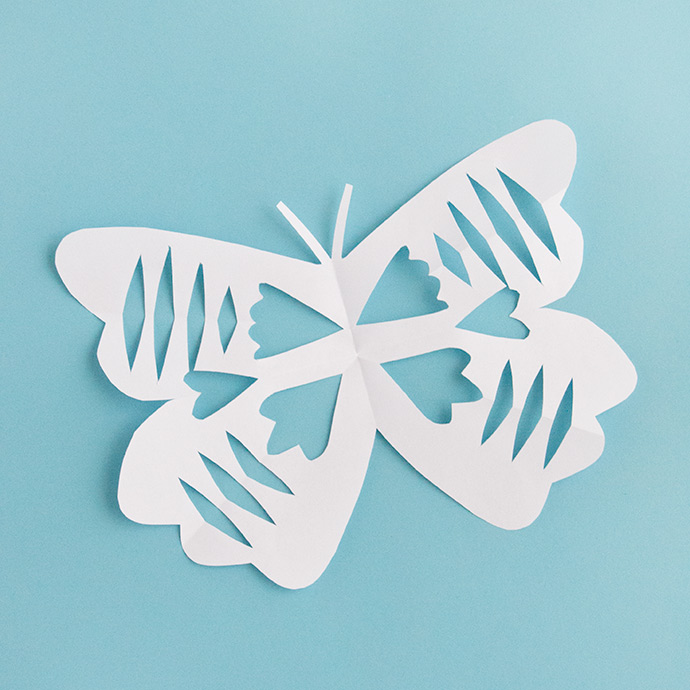
Fold the butterfly’s wing on a diagonal, as shown. This doesn’t need to be exact, and it likely won’t even be possible for you to make it exactly even after cutting your butterfly outline, so don’t worry about that too much.

Step 4
Like you would with a normal paper snowflake, cut simple designs into the fold you just made.
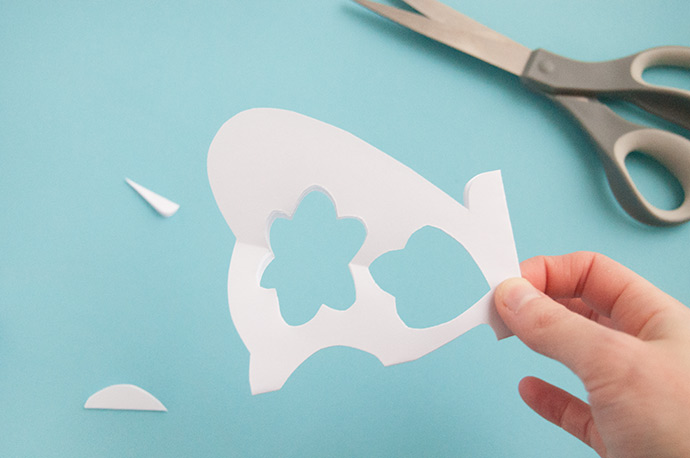
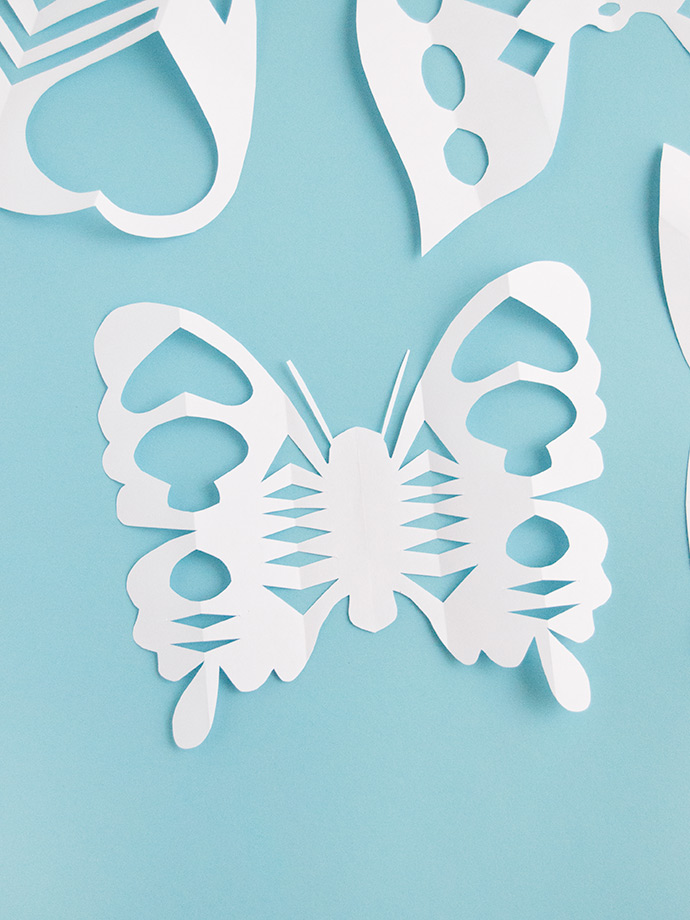
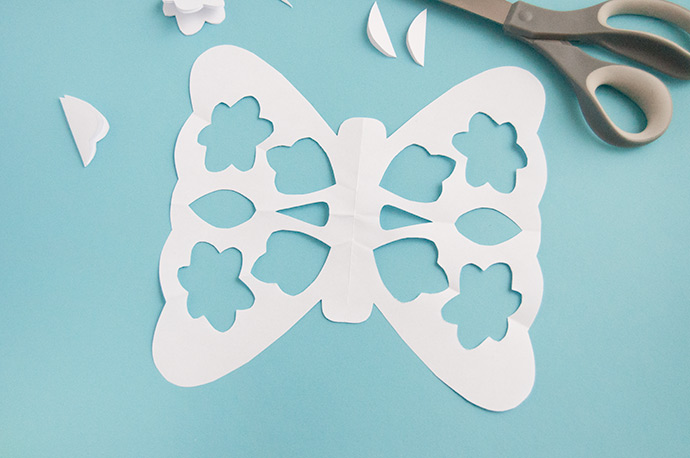
When unfolded, it will look like this! You can also cut more shapes onto the horizontal fold at the bottom here. If you want, you can add more folds to cut even more shapes. The folds can be anywhere you like, and as you experiment you’ll begin to see what techniques give the best results.
Step 5
When you’re happy with the design, unfold the butterfly and flatten under a pile of heavy books.
Accordion Folding Method:
Step 1
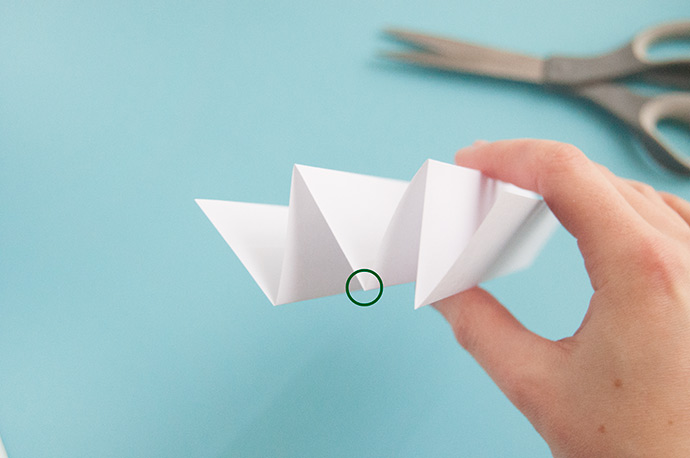
Begin with a white piece of paper, either a square or rectangle will work. Fold the paper into an accordion so that, when folded one side has an odd number of folds as shown above. The centermost fold will be the middle of the butterfly or moth.
Step 2
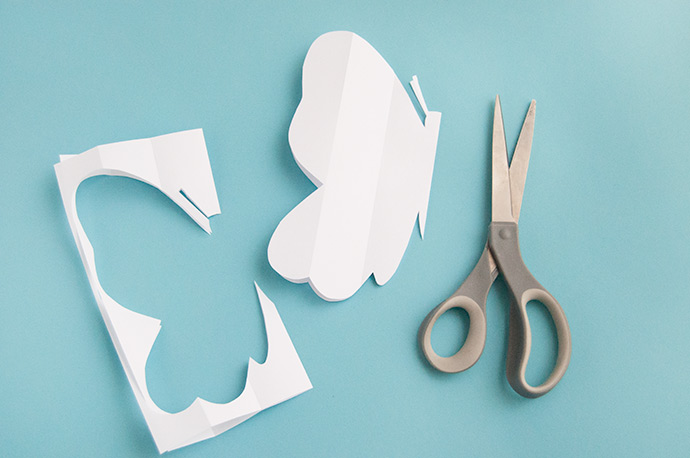
To cut the outline of the butterfly, we held the centerfold and flattened the rest of the folds so that you’re only working with two layers for the time being. Cut out a butterfly shape, so that the center of the body is right on that same centerfold.

Step 3
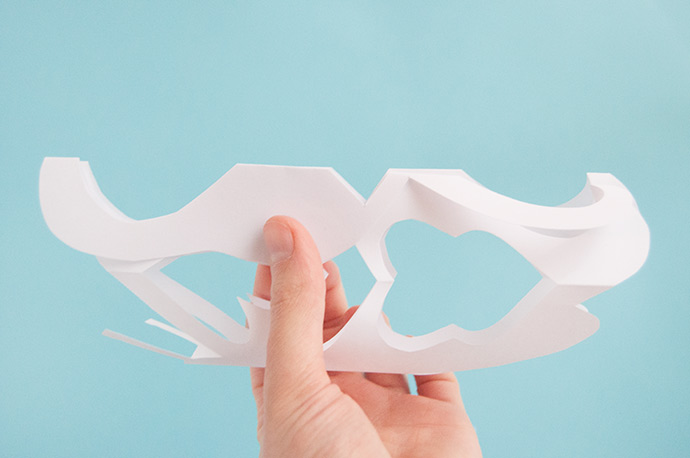
At this point, you can start getting creative with the folds. In the above image, the butterfly’s body was folded in and these cuts were made along the two folds next to the centerfold. It can help to hold the paper up to a light or window to make sure you don’t cut away the body completely when making these cuts.
Step 4
Next, we folded the outermost folds back in and made some shapes along those edges too!

Step 5
Unfold your masterpiece!
Happy crafting!