This post is sponsored by Plaid Enterprises.
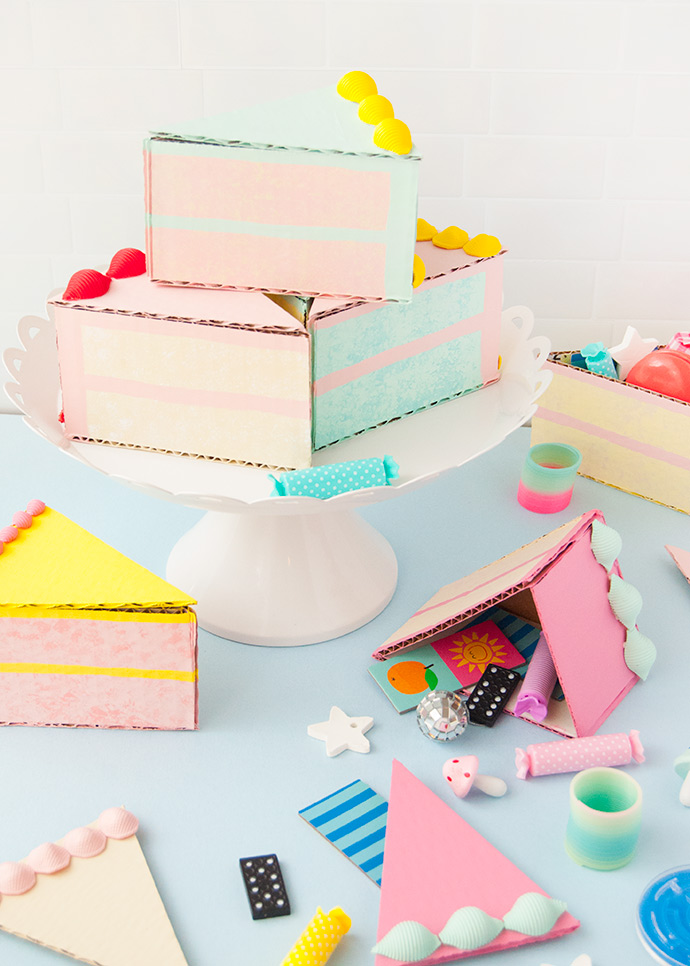
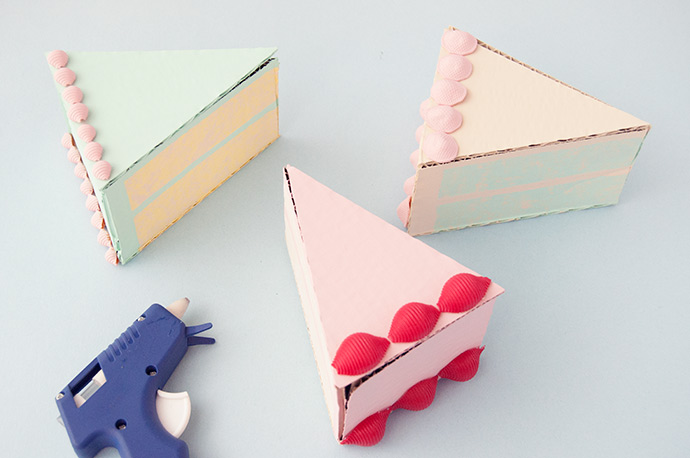
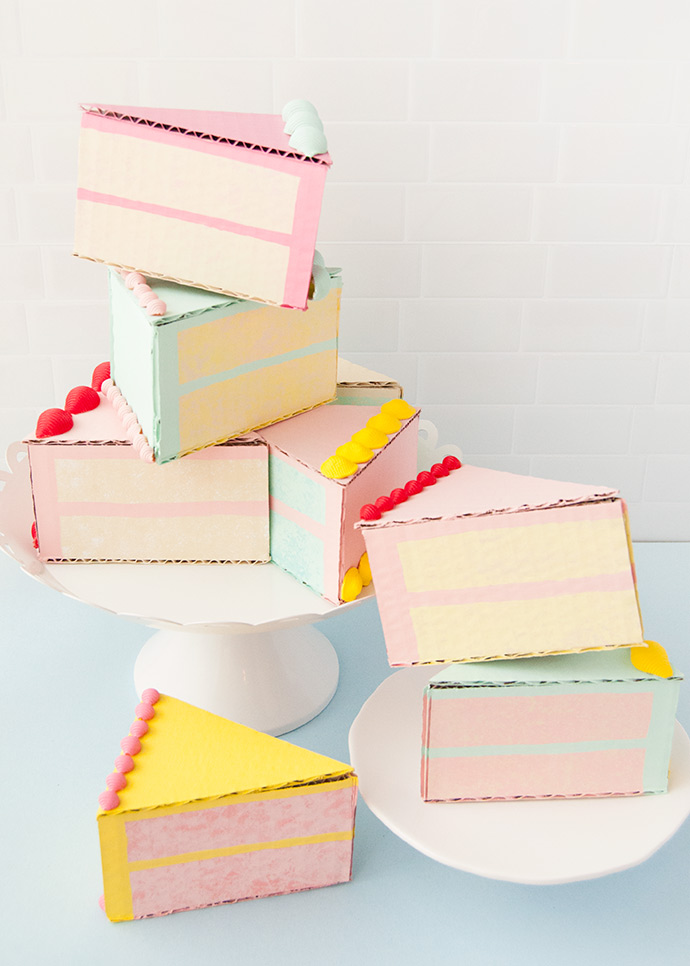
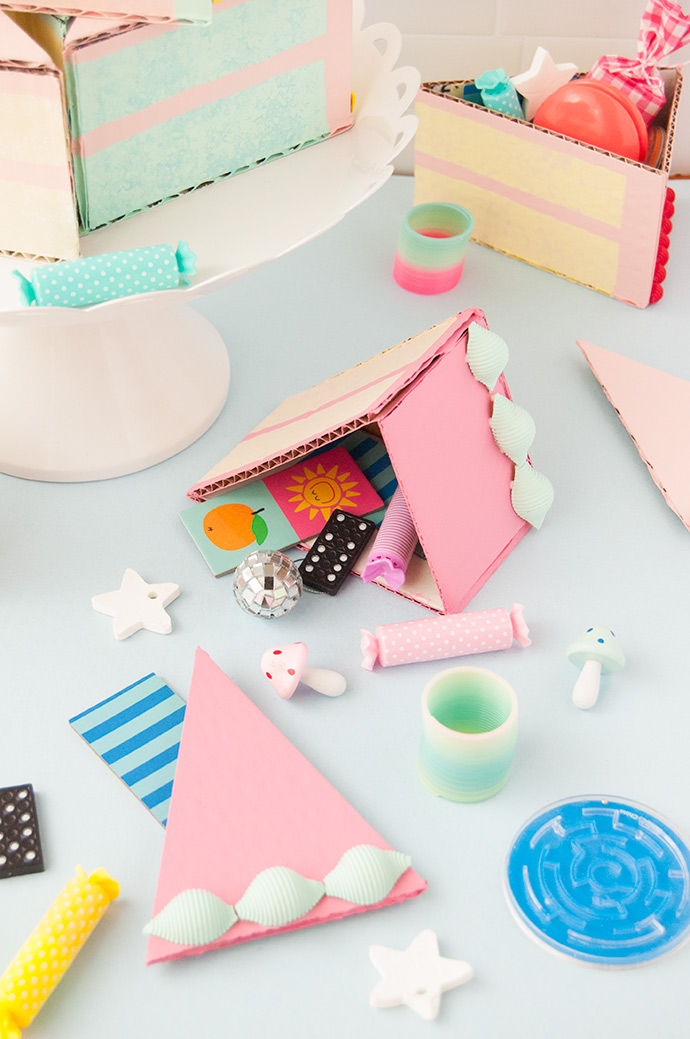
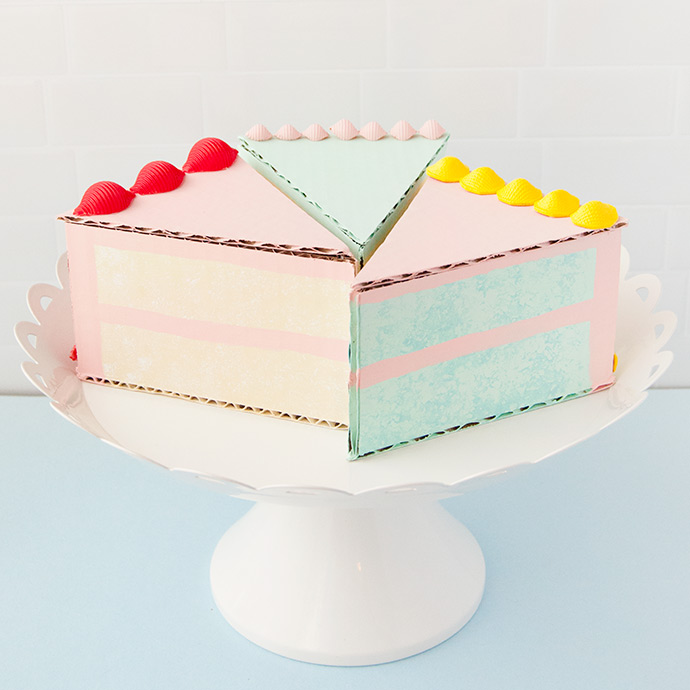
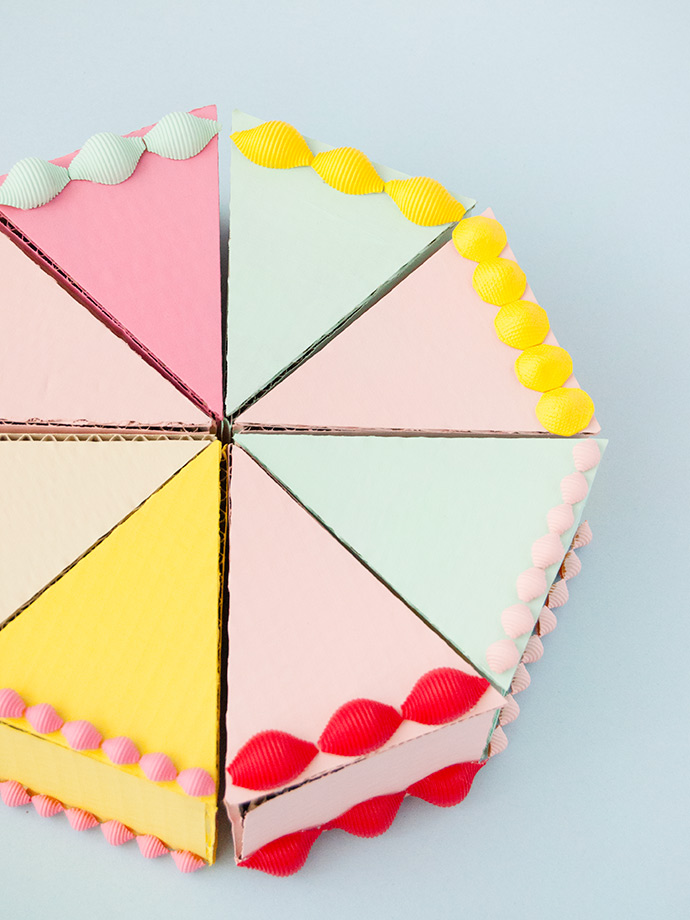
Making your own party favors can be a piece of cake! These sweet slices are crafted from a few of our go-to supplies: recycled cardboard, pasta noodles, and Folk Art Acrylic Paint. We love how both the small and large pasta shells make the perfect lines piped frosting. Isn’t it amazing what a coat of colorful paint can do?
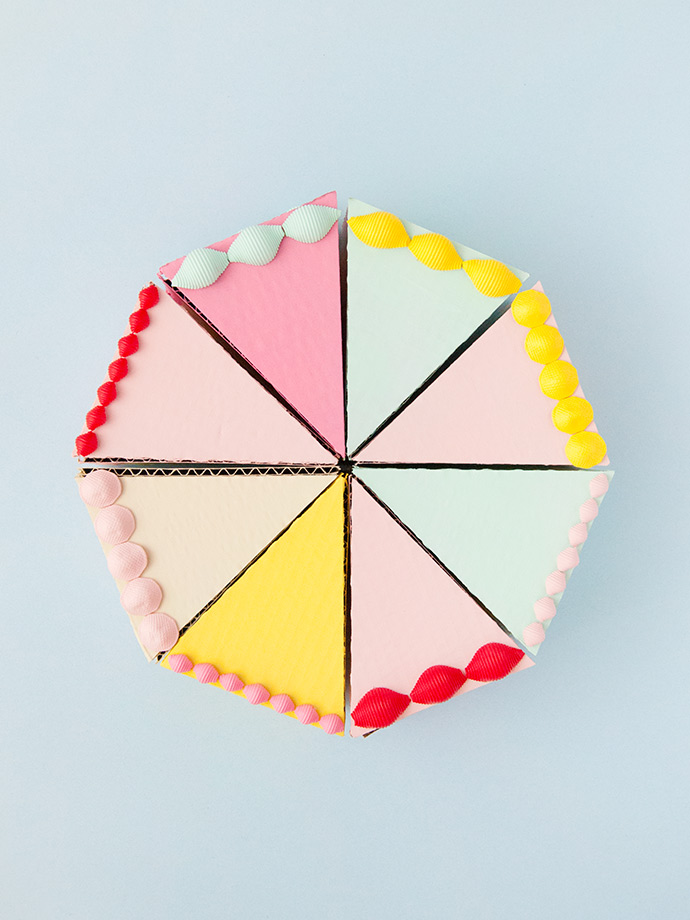
We couldn’t help but paint each slice a different color to look like different flavor combinations. Pink strawberry cake with green pistachio frosting? Yes, please! What flavor combinations will you come up with? To see the full instructions, keep on reading!
what you need:

- Folk Art Acrylic Paint
- Paint brush
- Sponge brush
- Corrugated cardboard
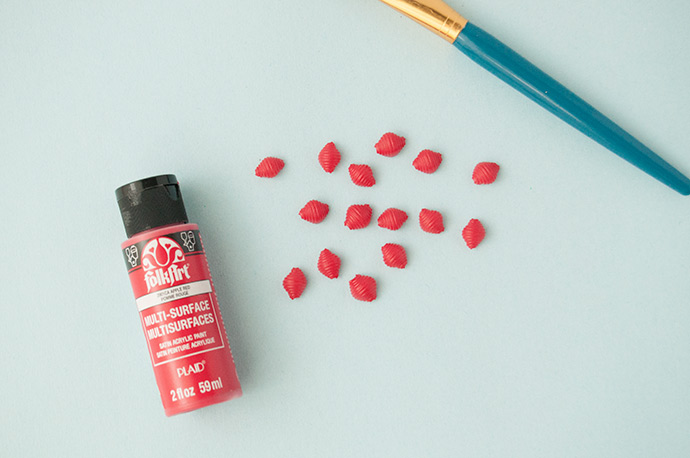
- Pasta noodles (various shapes)
- Hot glue gun
- Ruler
- Pencil
- Craft knife
how-to:
Step 1
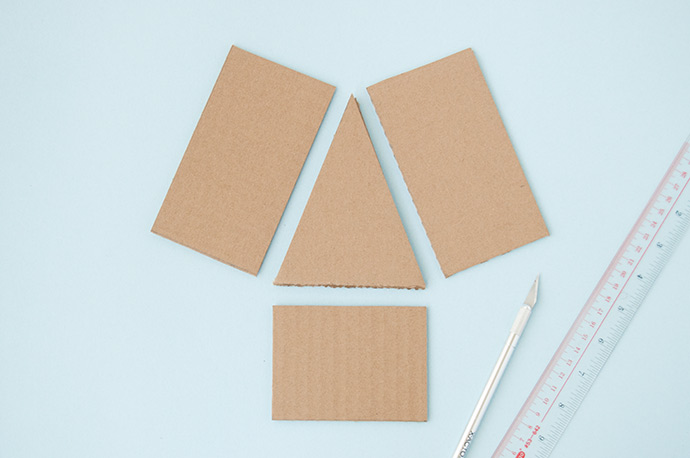
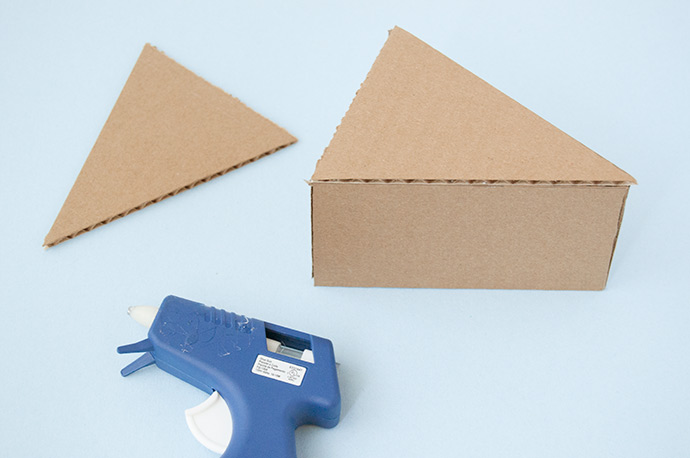
Begin by cutting out the cake slices out of corrugated cardboard. For these cake slices, we made the triangle 4″ at the short, base side and 5″ from that line to the tip. Cut two of these triangles for each slice. For the three sides, just make sure that each is the same length as each side of the triangle, and decide how tall you’d like the cake to be – ours were 3″ tall. Feel free to customize these dimensions for even bigger (or tinier!) slices.
Step 2
Use a hot glue gun to assemble the box, leaving one triangle separate for now.
Step 3
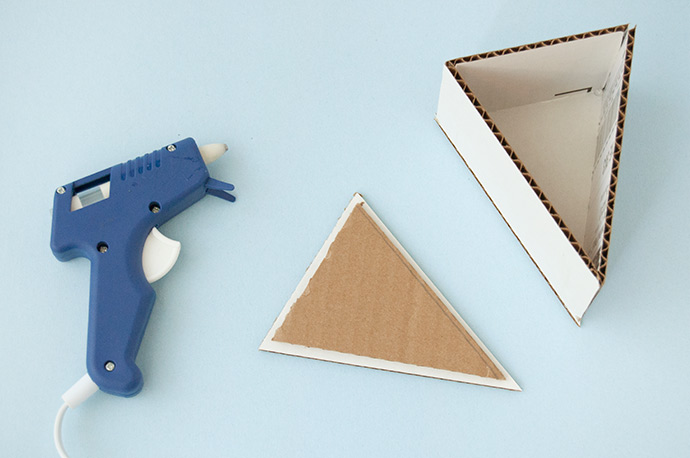
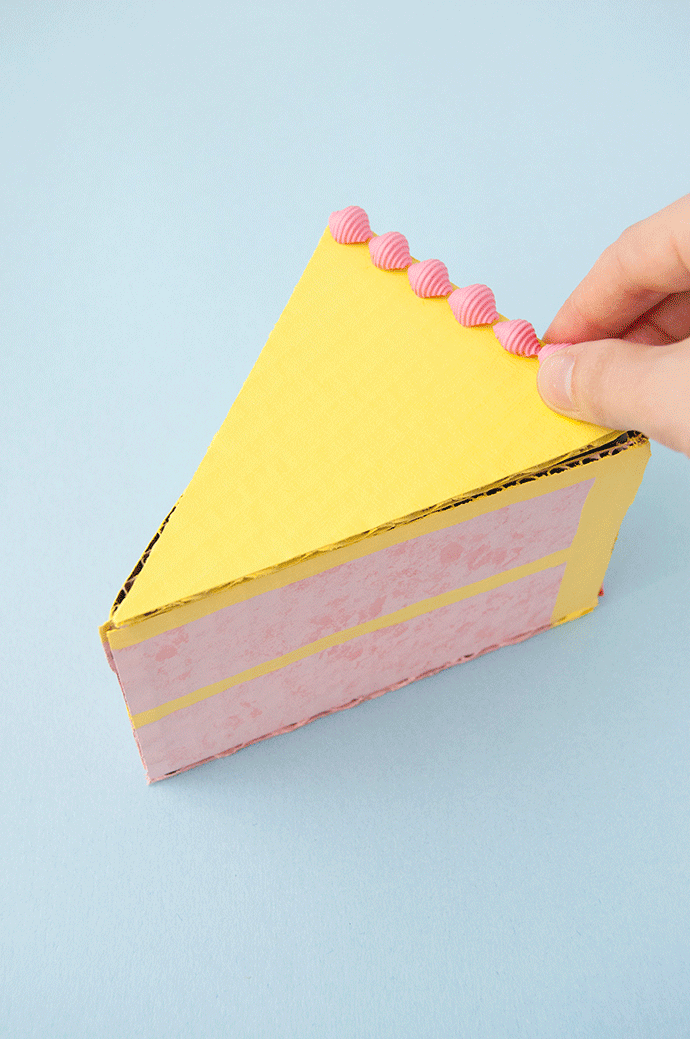
The triangle you haven’t glued on yet will be the lid for the box. We traced this triangle onto another piece of cardboard and then cut it out, but slightly smaller so that it fits inside the assembled box. Once it does, hot glue it to the larger triangle lid – the lid should now sit nicely atop the box and stay in place.
Step 4
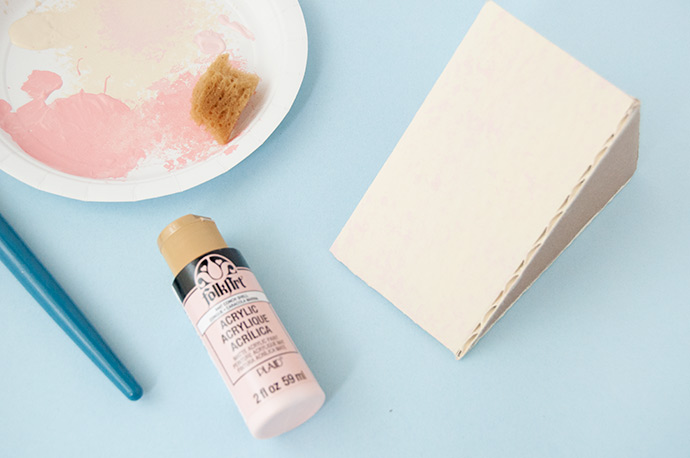
Get painting! The first layer of paint will be whatever color you’d like the cake itself (not the frosting) to be. When applying this color, you only need to paint the two large sides of the box (and the bottom if you like). Once this has dried, choose a slightly lighter or darker color and apply it onto the cake in a splotchy way with a sponge. It doesn’t need to be perfect, and this added texture really makes it look like the texture of cake! Let dry.
Step 5
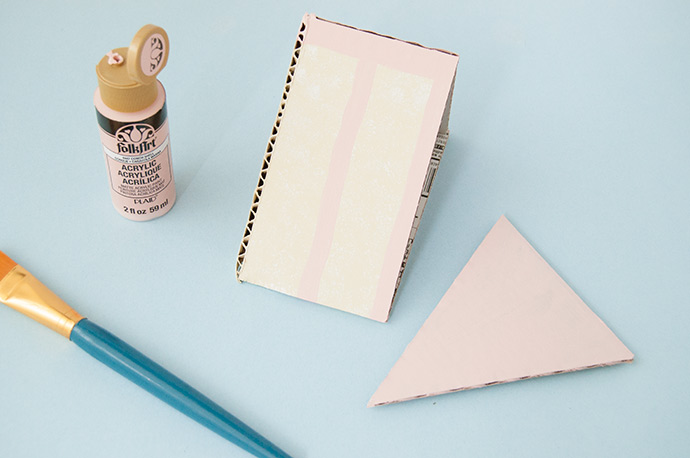
And now everyone’s favorite part of cake – the frosting! Pick another color and paint the entire lid and smaller side. For the two longer sides, use a brush to apply stripes of paint as shown above, to imitate the look of a layer cake. Let dry.
Step 6
To make the frosted details, pick out a handful of pasta shells (large and small shells work great here!) and paint them a contrasting color.
Step 7
Once all the paint is dry, use the hot glue gun to attach the painted pasta onto the top and bottom edges of the cake.

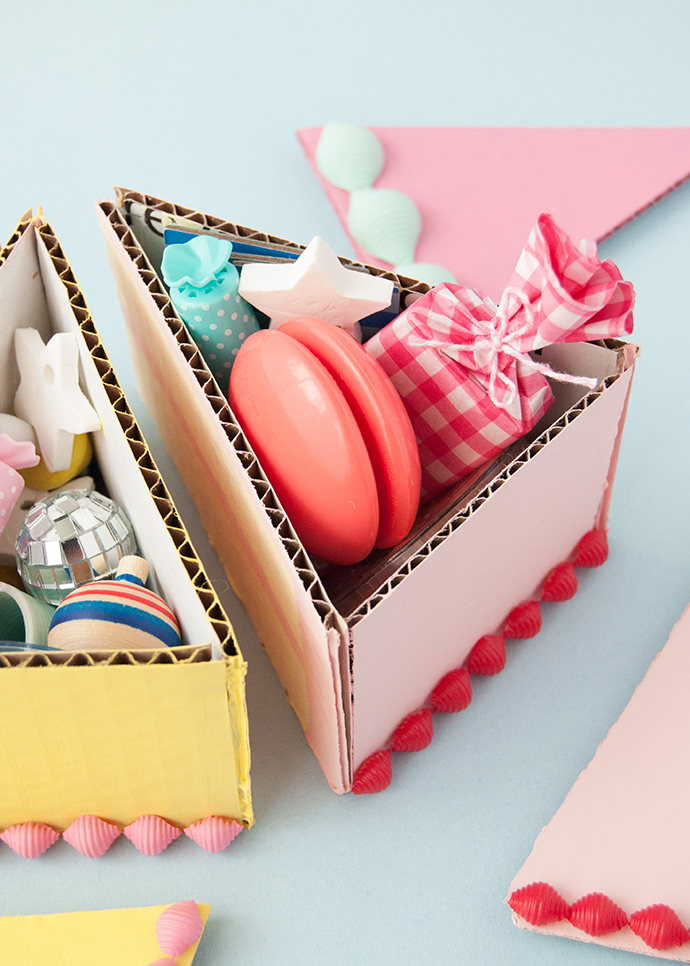
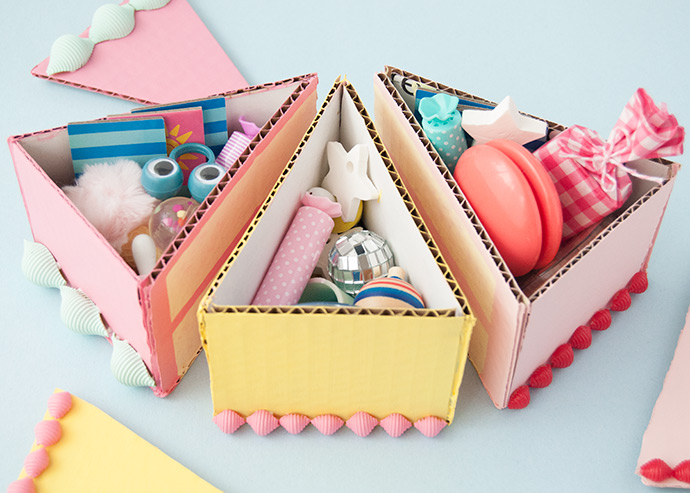
Fill the cake slices with small goodies and treats!
Happy crafting!