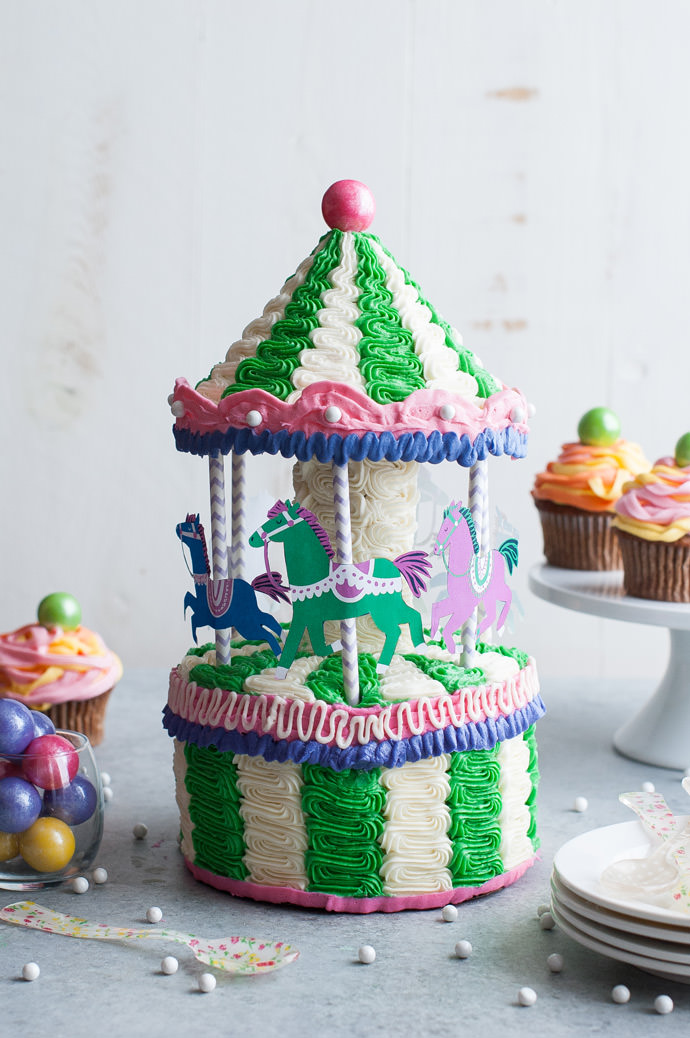
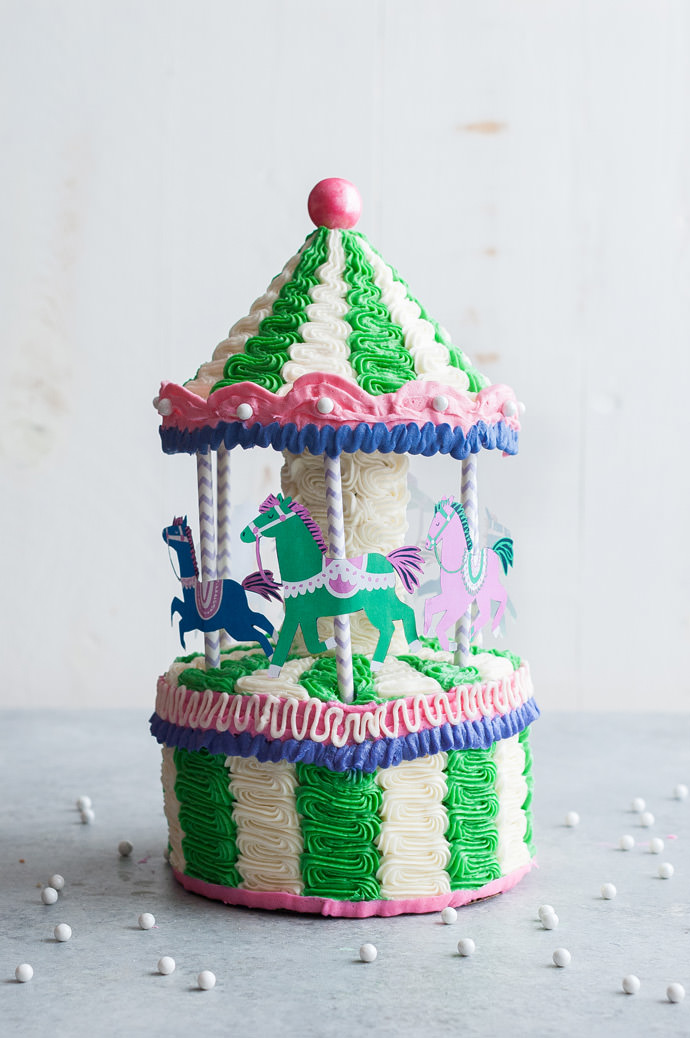
Being a kid means you live in a world full of magic. Your years are full of pretend play, whimsical sweets, and colorful parties. Even a ride on a carousel is equal to galloping across an enchanted land on a noble steed. Young or old, bring those happy memories to life on this playful carousel cake. As Julia Child said, a party without cake is just a meeting – just imagine the looks on everyone’s faces when you bring this cake to a party!
Some pre-made cake toppers can cost an arm and a leg – in this DIY project, all printables and instructions are provided so you can make your own carousel cake without even leaving the house. Perfect for a birthday or any summer party, this cake is sure to add joy to your celebration.
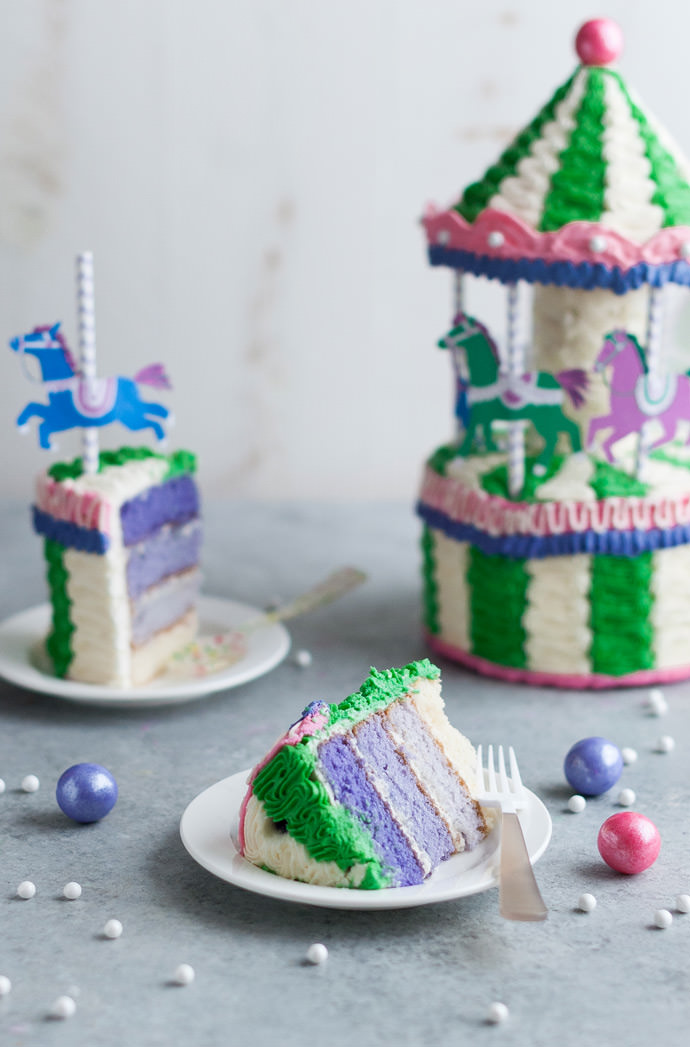
This beautifully frosted ombre cake is not as difficult to make as you might think. Let’s get started!
What You Need
Makes one 6” cake
- Four (6″) cake layers (recipe below)
- One recipe buttercream frosting (recipe below)
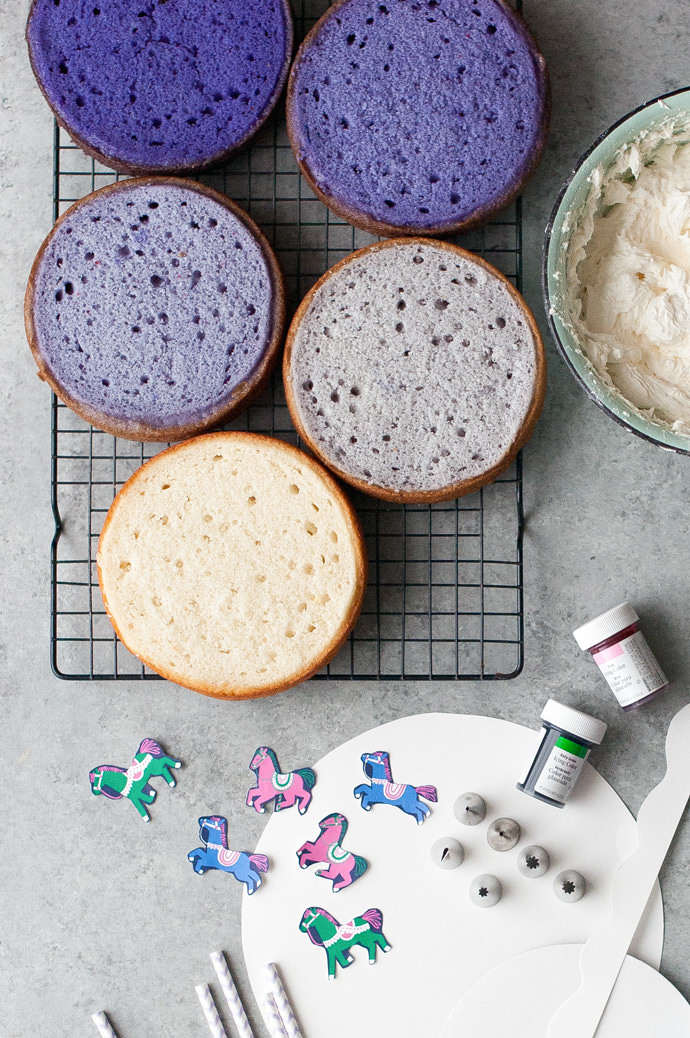
- Food coloring (kelly green, light pink, lavender)
- Piping bags
- Piping tips (star tips, small circle tips, flower petal tips)
- 6 carousel horse cutouts (download printable template here)
- 2 (6”) cardboard cake rounds
- 1 (8”) cardstock circle
- 1 paper roll
- 6 striped straws (in green, purple, or pink)
- Long strip of card stock, 1″ wide, waves cut into one side (as pictured)
- Hot glue gun and glue sticks
- 1 large gumball
- Candy pearls
How-To
Frosting Instructions
Divide the frosting into two bowls. Leave one bowl as is (white) and divide the other bowl into 3 portions (in separate bowls), 2 large portions and one small. Dye the two larger portions green and pink, and dye the smaller portion purple.
Fill the piping bags as follows:
- Fit one bag with a small star tip and fill with half of the white frosting.
- Fit one bag with a small star tip and fill with green frosting.
- Fit one bag with a petal tip and fill with pink frosting.
- Fit one bag with small circle tip and fill with a small amount of white frosting.
- Fit one bag with a petal tip and fill with purple frosting.
To Assemble The Cake
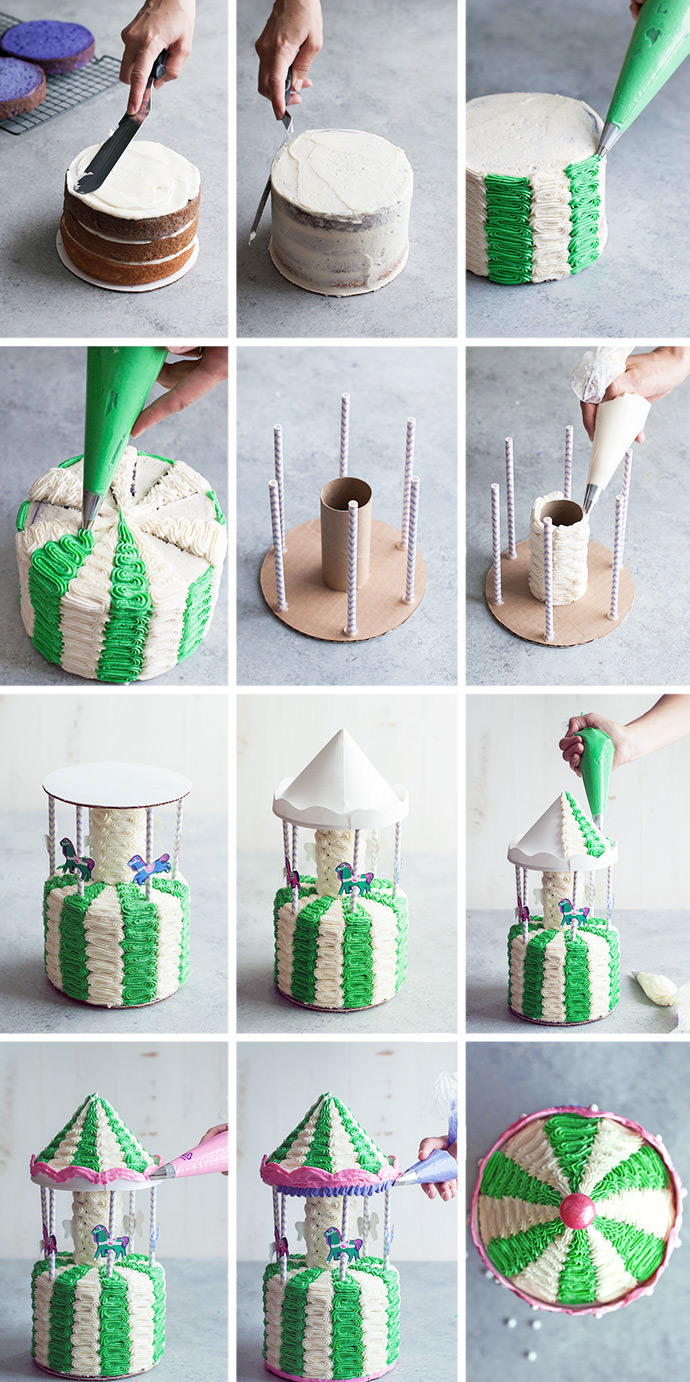
- Place one layer of cake (lightest in color) on a 6” cake round. Frost with a thin layer of white frosting. Add another layer of cake on top (next darkest in color) and frost with a thin layer of frosting. Add another layer of cake on top (next darkest in color) and frost with a thin layer of frosting. Add the last layer of cake on top (darkest in color).
- Cover the entire outside of the cake in a thin layer of frosting.
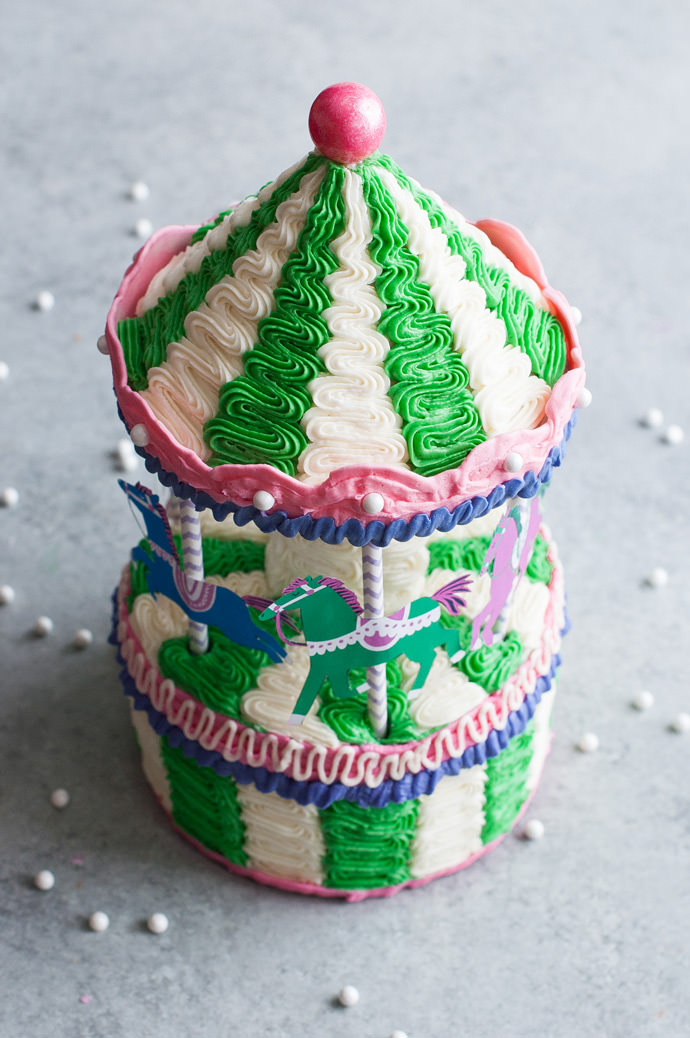
- Using the green and white frosting bags with star tips, pipe ribbons of frosting up the sides of the cake in stripes that are about 1-1 ½ inches thick.
- Pipe triangles of green and white frosting using the same tips on top of the cake in a striped fashion where the stripes are wide at the rim of the cake and get smaller towards the middle.
- Hot glue the toilet paper roll to the center of a 6” cardboard cake round. Hot glue 6 straws evenly around the edge of the cake board, staying about ½ inch in from the edge. Let cool completely.
- Pipe white frosting (star tip) around the toilet paper roll in thick strips.
- Flip the cardboard round over and place on top of the cake, pressing the straws down into the cake until the toilet paper roll makes contact with the cake.
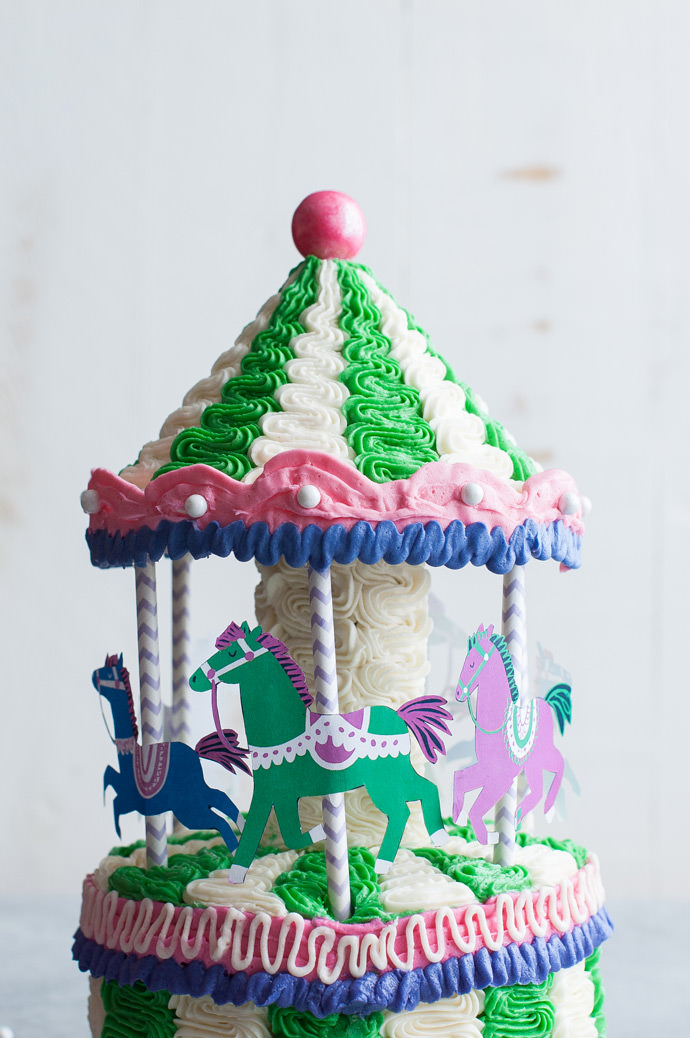
- Hot glue the horse cutouts to the straws.
- Make one cut from the edge of the cardstock circle to the center. Fold it in to make a cone and hot glue the sides together where they overlap. Hot glue the edge of the cone to the top of the cake circle that is sitting on top of the straws. Hot glue the wavy cardstock strip around the edge of the cardboard round.
- Pipe green and white ruffled strips (star tip) up the sides of the cone.
- Using the pink frosting with the petal tip, pipe lines all the way across the wavy cardstock until it is covered in frosting.
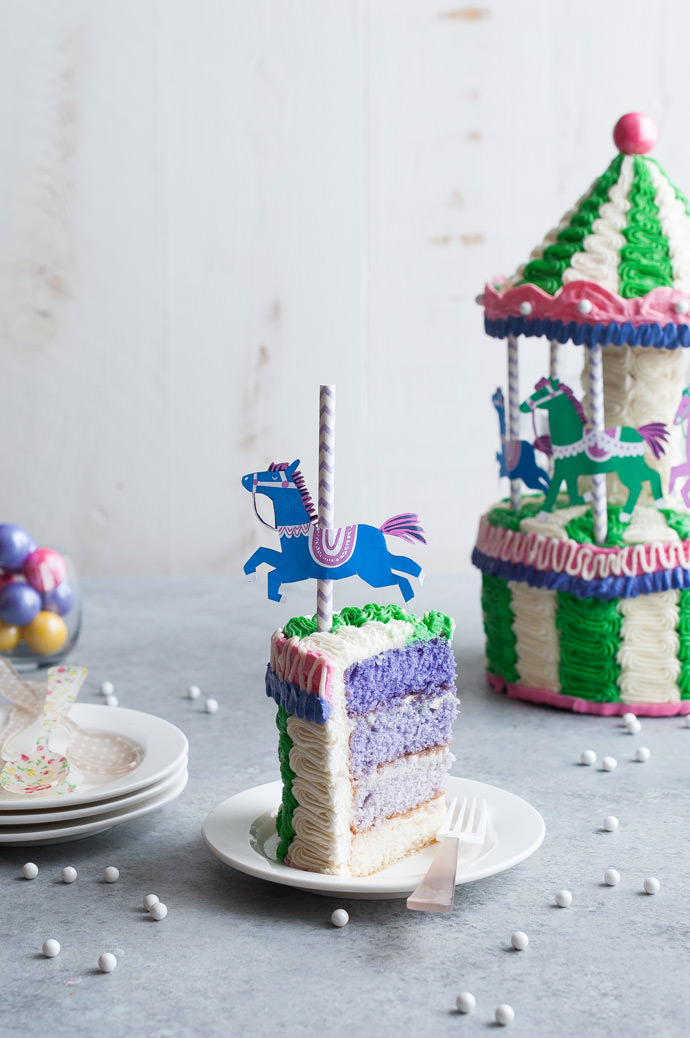
- Pipe purple ruffles along the base of the pink wavy strip. Pipe pink lines along the top side of the cake (about 3 lines thick). Pipe purple ruffles along the base of the pink strip. Pipe white lines in a wavy pattern across the pink strip using the white frosting with the small circle tip. Pipe a pink line around the base of the cake. Place white candy pearls in the center of each pink wave on top of the carousel. Place a gumball on top of the cone. You’re finished!
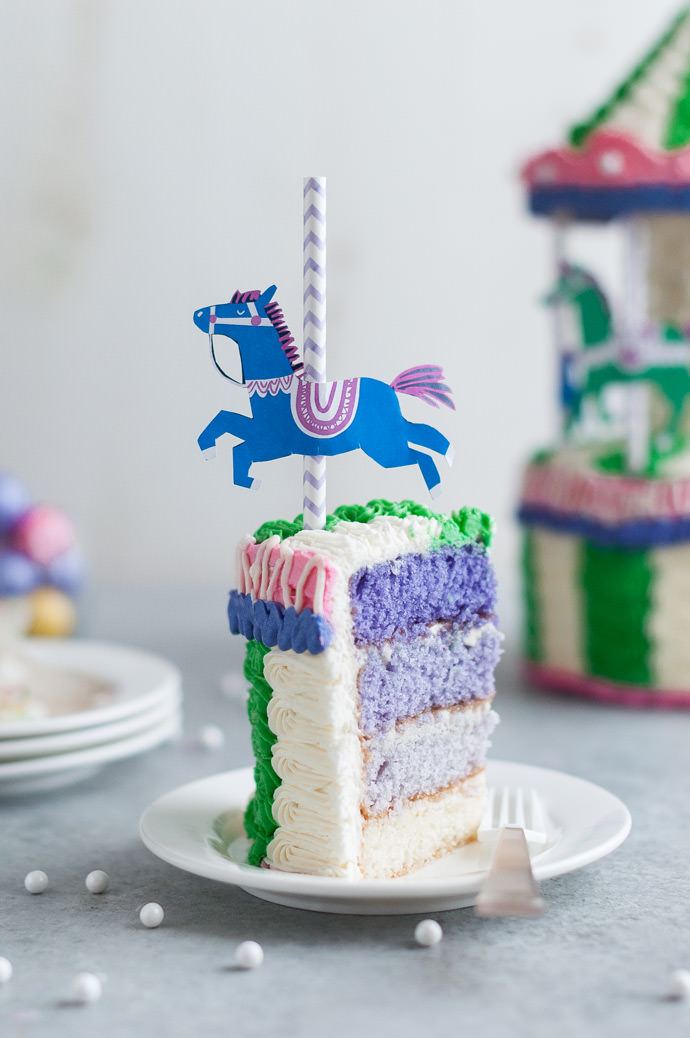
Ombre Cake Instructions
Mix the batter of a white boxed cake mix according to package instructions. Divide the batter equally into four different bowls. Leave one bowl white, color one bowl light purple, color another bowl medium purple, and color the last bowl dark purple (use gel food color for best results).
Grease and flour two 6” cake pans. Fill each pan with one color of cake batter. Bake at 350 for 17-20 minutes, or until a tester inserted in the middle comes out clean. Let cool for 10 minutes and remove from pans. Let cool on wire rack. Wash the pans, and grease and flour them again. Fill the pans with the remaining colored batter (one per each pan) and bake in the same manner as the last cakes. Remove from the pans and let cool.
Level the cakes with a serrated knife and proceed with cake assembly instructions.
ButterCream Frosting Recipe
- 3 sticks butter, softened
- 1 ½ pounds powdered sugar
- 1 teaspoon vanilla
- 3-4 tablespoons heavy cream
Place the butter in a large mixing bowl and beat with an electric mixer until smooth. Add the powdered sugar and beat in a little at a time until stiff. Add the vanilla and cream and beat for 2-3 minutes, until the frosting is light and fluffy. Add more cream if a less stiff consistency is desired. Store in an airtight container in the fridge. Remove from fridge and let sit 30 minutes to 1 hour before using (if not using right after making).
Enjoy!