One of the things I love most about the holiday season is the fantastical nature of it all! Whether its a “winter wonderland” or “Santa’s workshop”, spaces and imaginations come alive in ways they don’t seem to at other times of the year: in store windows, in community gathering places, and in our homes. I love fostering this sense of magic and wonder in our household each year, getting the kids involved in the decorating and crafting.
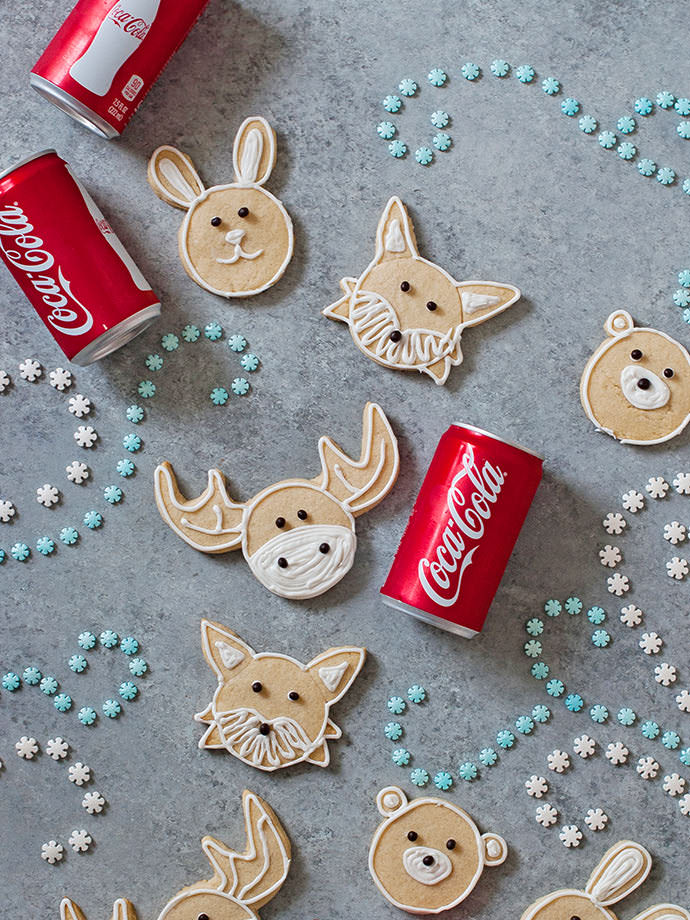
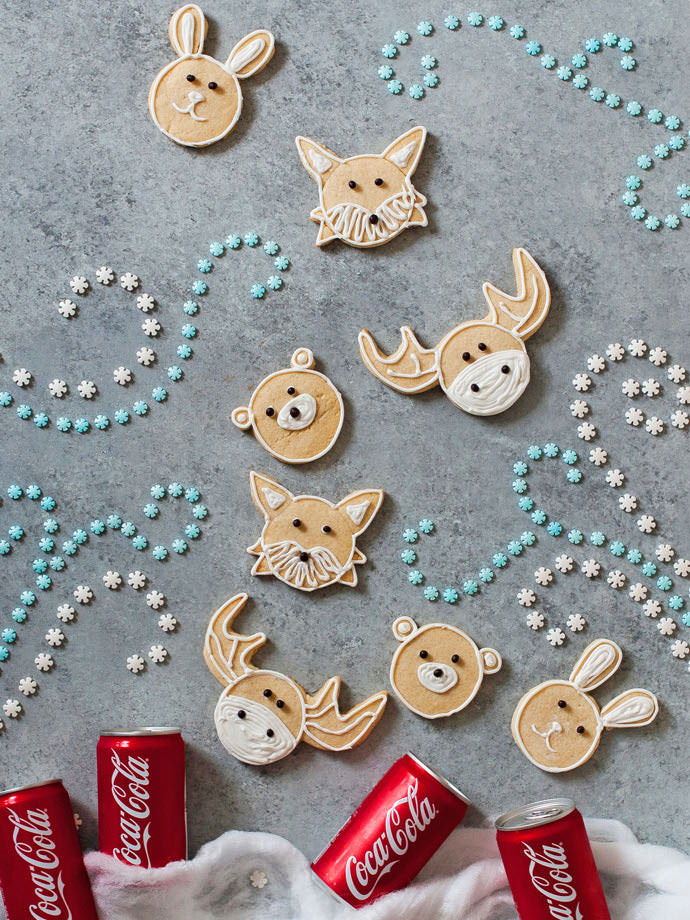
One of our favorite holiday DIYs? Cookie decorating, of course! But not just any old sugar cookie – no candy canes or stars, here! This year, we dreamt up a crew of forest friends that we hoped would pitch in and help us prepare for the holiday season (think “Cinderella” and her furry little helpers). The kids wanted these characters to be highly personalized, so we decided to make the cookie cutters ourselves.
Though it may sound daunting, making your own cookie cutters from objects you likely already have in your home is actually very simple! After enjoying a few cold cans of Coca Cola, we used the empty can to create our forest friends. We loved the whimsy these little critters brought into our household this holiday season!
What You Need
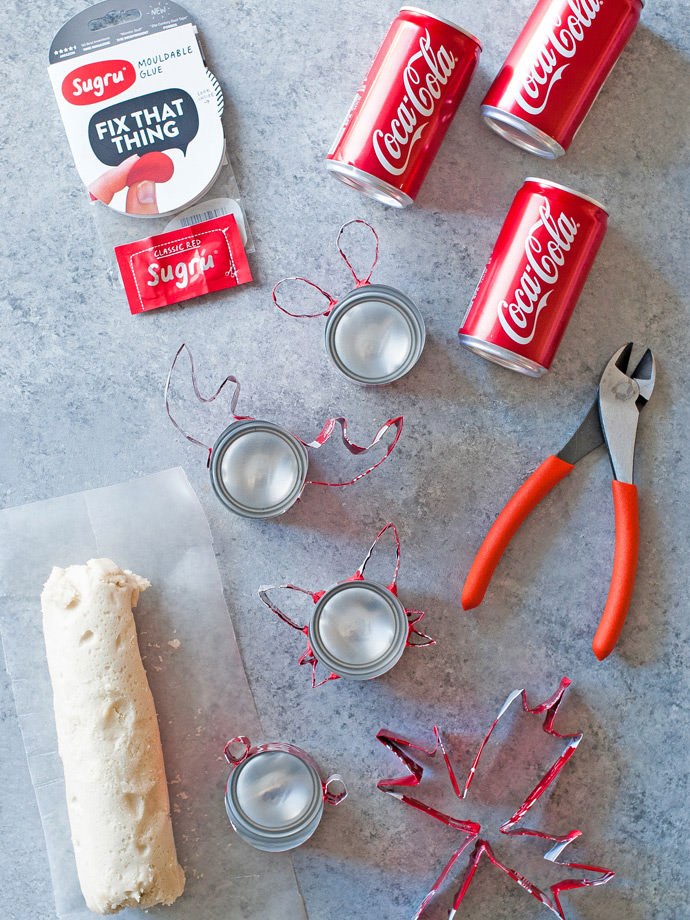
- Mini Coca Cola cans
- Metal-cutting scissors or wire cutters
- Protective work gloves
- Sugru or other binding agent
- Cookie dough
- Cookie decorating supplies
How-To
Step 1
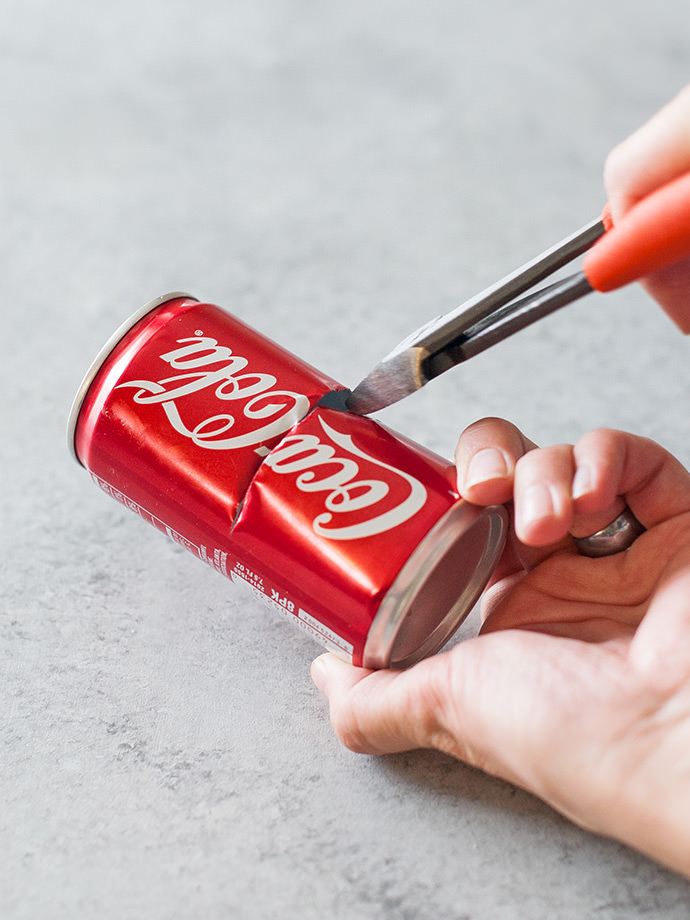
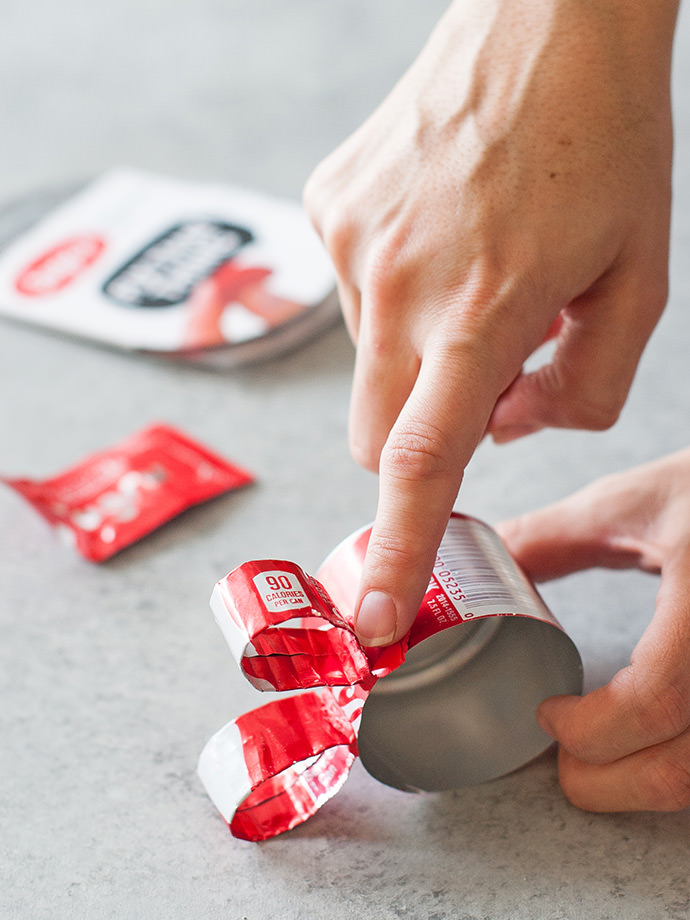
Open your mini Coke and enjoy! Once the can is empty, take your metal cutting scissors and pierce the side of the can. Cut all the way around so you’re left with just the base of the can and roughly 1 inch of tin all the way around. This becomes the head of your forest friend! At this stage, make sure to put on your work gloves – take the remaining tin from the can and (carefully!) fold it over on itself to double its thickness. Now you can mold this tin into any shape you desire: antlers, rabbit ears, or fox whiskers.
Step 2
Take a small bit of your Sugru or binding agent and use this to adhere your tin ears or antlers to the base. The Sugru will need 24 hours to dry but, once it does, it’s on there for good!
Step 3
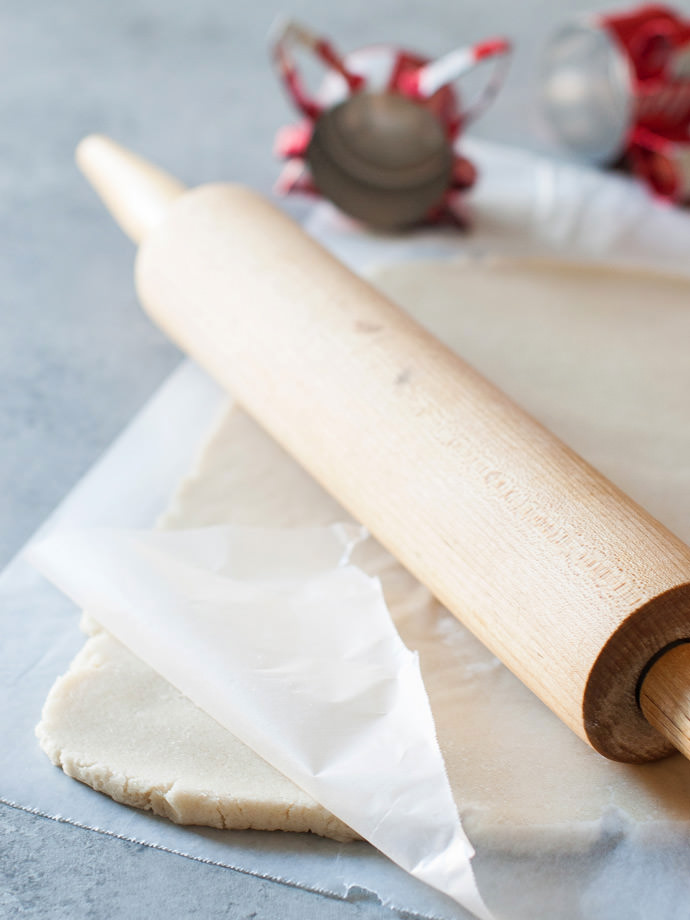
Once your cutters have dried, you’re ready to make your forest friend cookies! Take your favorite cookie dough recipe (or premade dough!) and roll it out between two sheets of wax paper, to a thickness of 1/4 – 1/2 inch, depending on how thick you like your cookies. Chill dough for 30 minutes in the refrigerator.
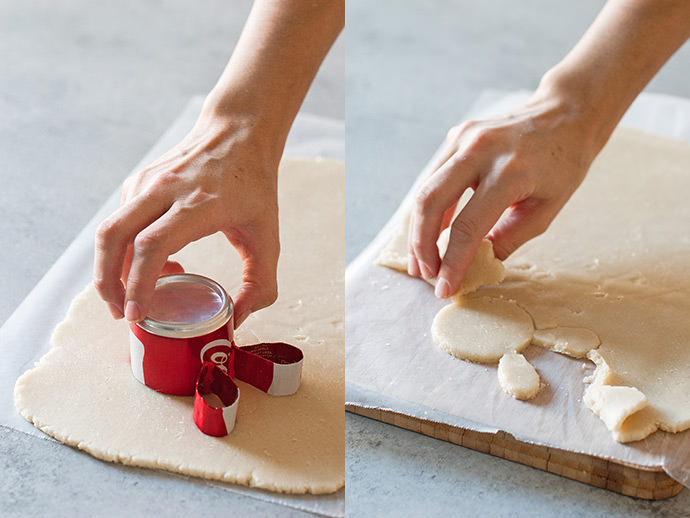
Remove dough from refrigerator and peel off the top layer of waxed paper. Using your cookie cutter, cut out several of each forest friend. Run a sharp knife all the way around the shape of the cookie cutter to ensure a clean cut.
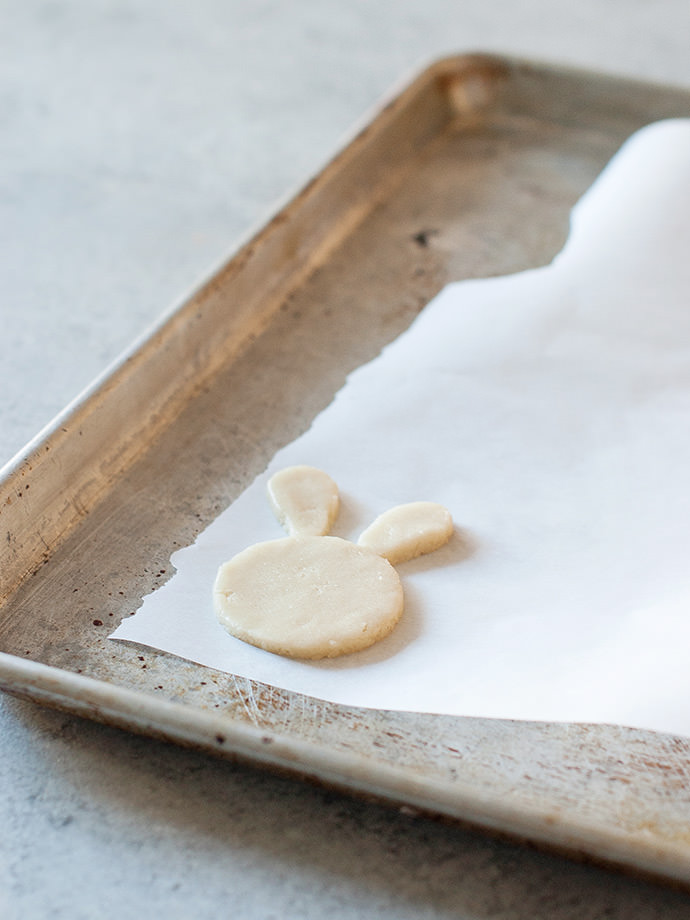
Peel the dough around the animal shape away from the waxed paper and set aside. Flip the dough shape upside down in the palm of your hand and peel away the bottom layer of waxed paper. Flip shape right side up in a parchment lined baking sheet. Repeat process with remaining dough and cutters.

Step 4
Decorate your forest friends, then enjoy them with your family and friends!
This post is sponsored by Coca-Cola.