This post is sponsored by STAEDTLER
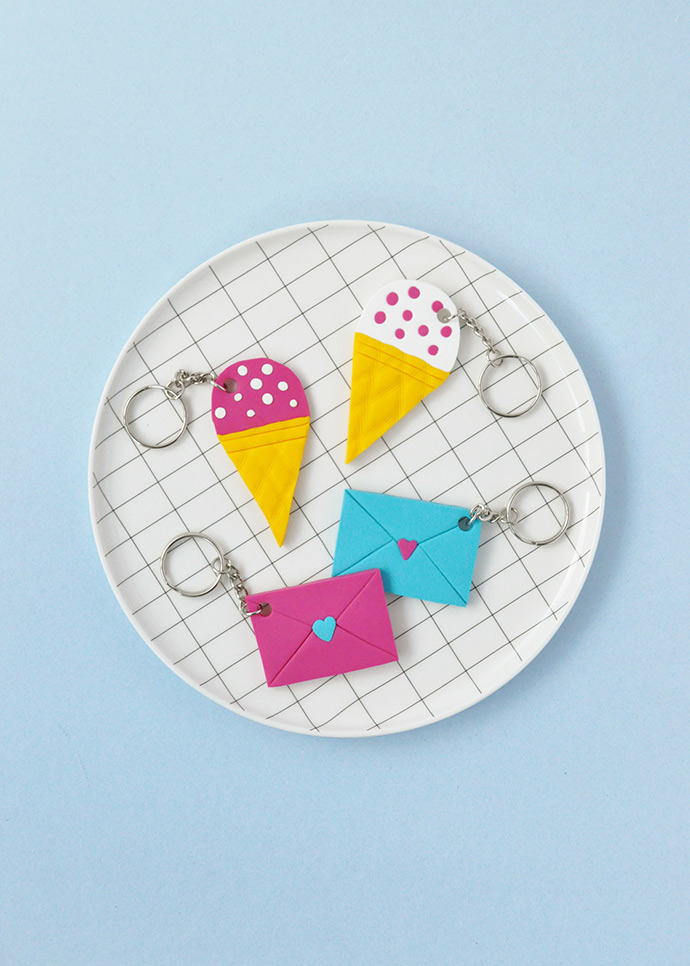
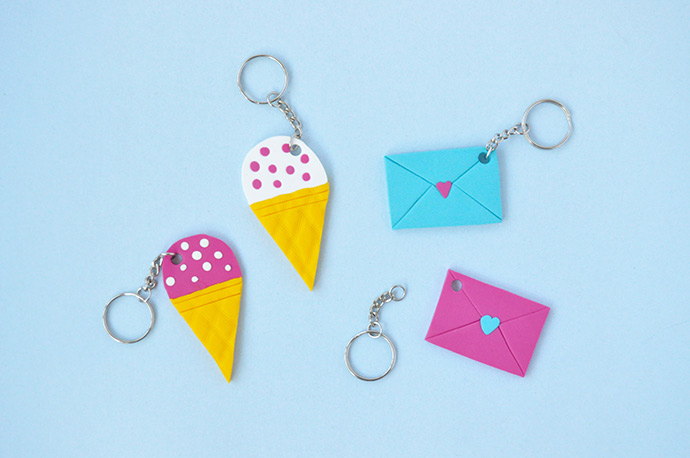
We can’t help but love a good keychain – you can really make whatever shape you like, no reason needed! Today we’re working with a few of our favorite shades of FIMO soft to make these matching pairs of keychains, perfect to make as a gift for your bestie! Read the full instructions below to match our keychains exactly, but feel free to get creative with the colors. Mix and match to make the keychains completely unique.
If you live in Europe, look for this project available as a ready-to-use kit at your local craft store or online here! We had so much fun designing these keychains and want everyone to be able to make them, so take a look at the supplies list and instructions below to craft along with us!
what you need:
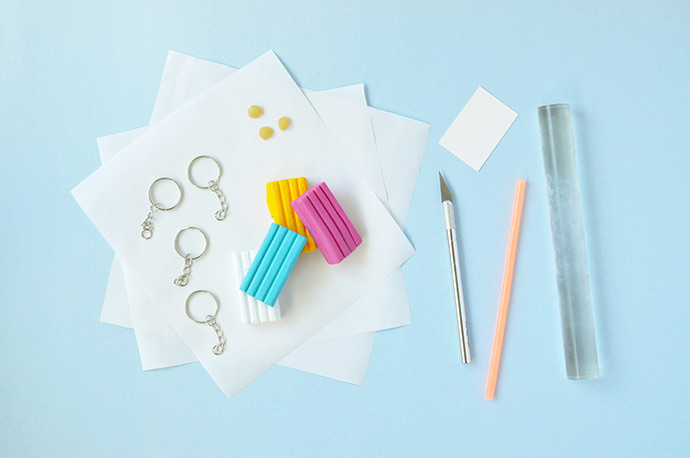
- FIMO soft (sunflower yellow, raspberry, peppermint, white)
- FIMO acrylic roller
- Craft knife
- Drinking straw
- Pasta noodles
- Freezer paper
- Keyrings
- Cardstock
how-to:
Step 1
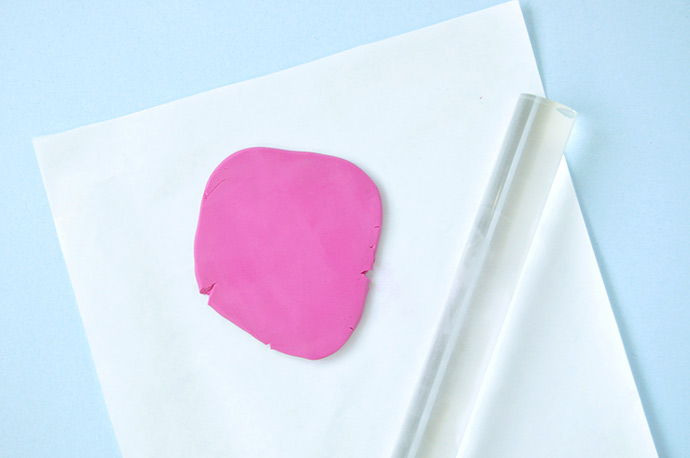
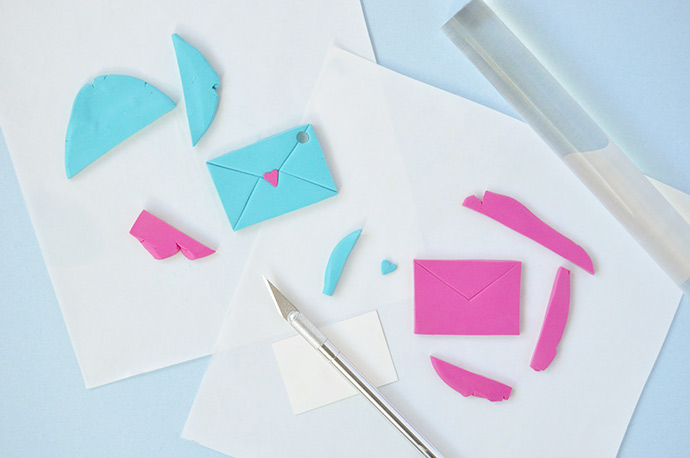
Soften the pink FIMO soft in your hands and roll flat until about 3/8” thick. We like to do this on the shiny side of a piece of freezer paper so that the work surface stays clean and the FIMO stays as dust-free as possible. Do this for each of the four colors of FIMO, each on its own piece of freezer paper and washing your hands and the roller in between colors.
Step 2
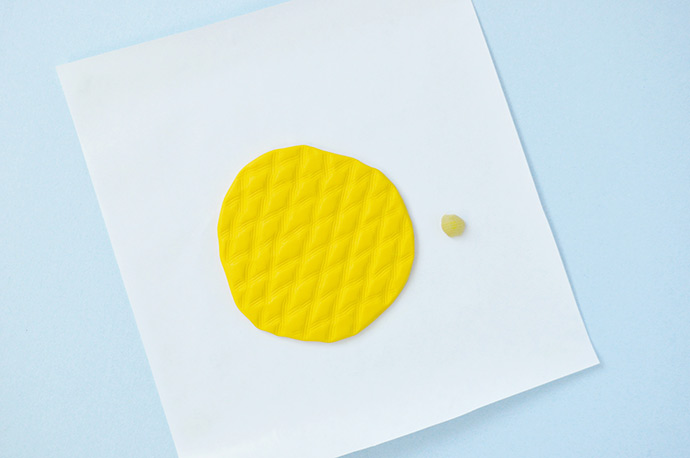
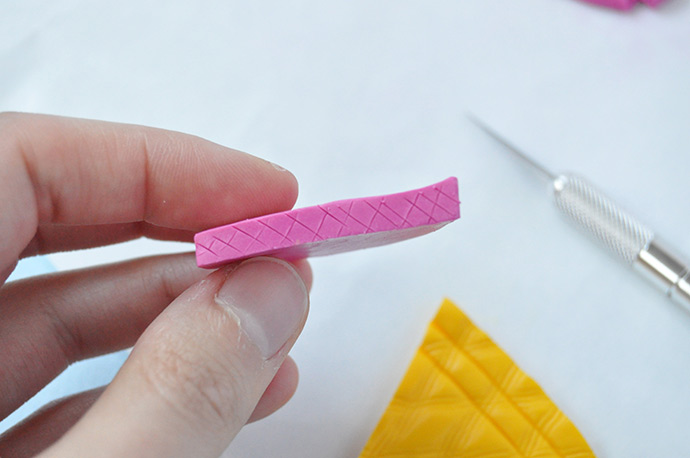
Use a textured pasta noodle to press a grid pattern into the FIMO. This will be the waffle cone for the ice cream!
Step 3
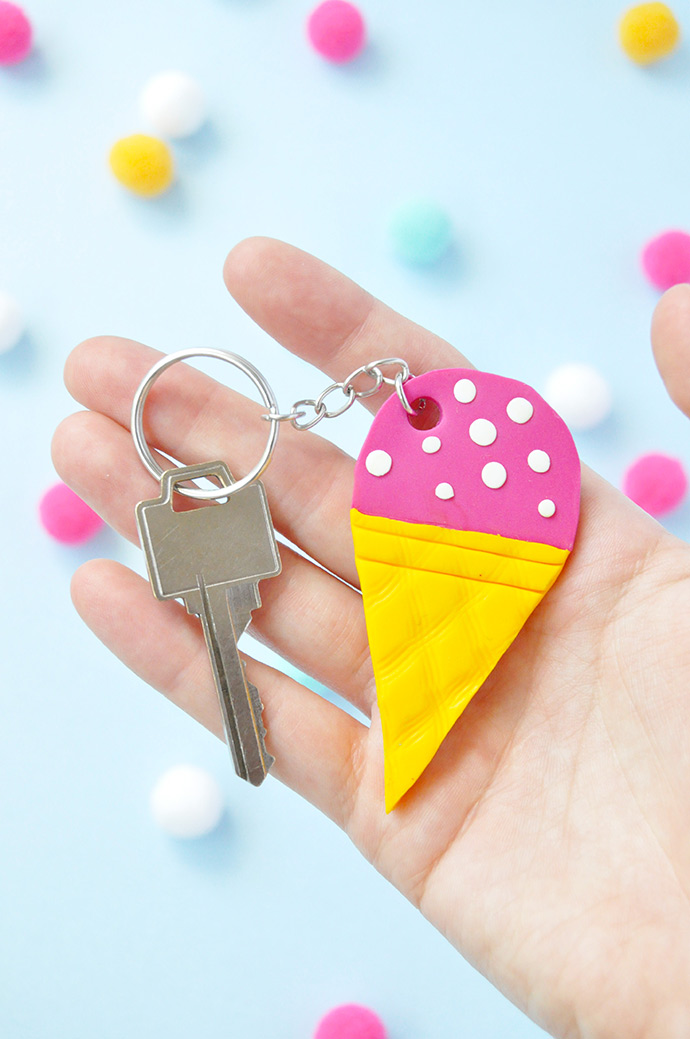
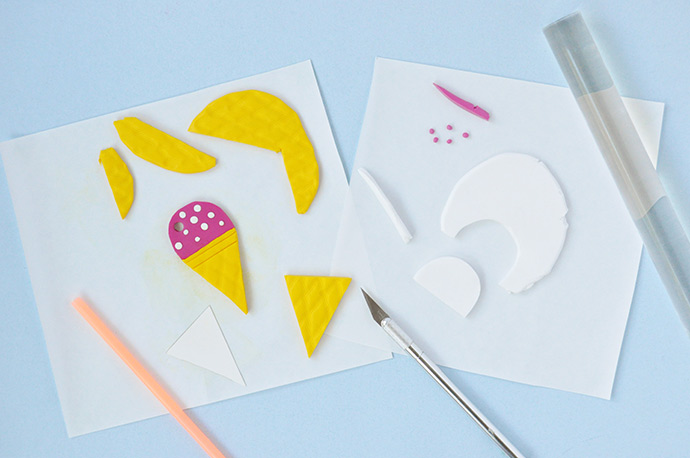
Cut two triangles out of the yellow clay – you can eyeball this, or draw a template onto scrap paper first and trace that onto the clay. Then use the edge of a piece of cardstock to press two lines into the top of each ice cream cone. To make the ice cream, cut a straight edge with the craft knife into the FIMO and then cut a curved top – we made one vanilla (white) scoop and one raspberry (pink) scoop. Use the cut-offs to roll tiny little balls to use as sprinkles. Arrange these onto the scoops and gently roll flat with the roller. Then use a straw to poke a hole in the ice creams.
Step 4
To attach the ice cream to the cone, make a crosshatch pattern along the edge of both pieces and press together.
Step 5
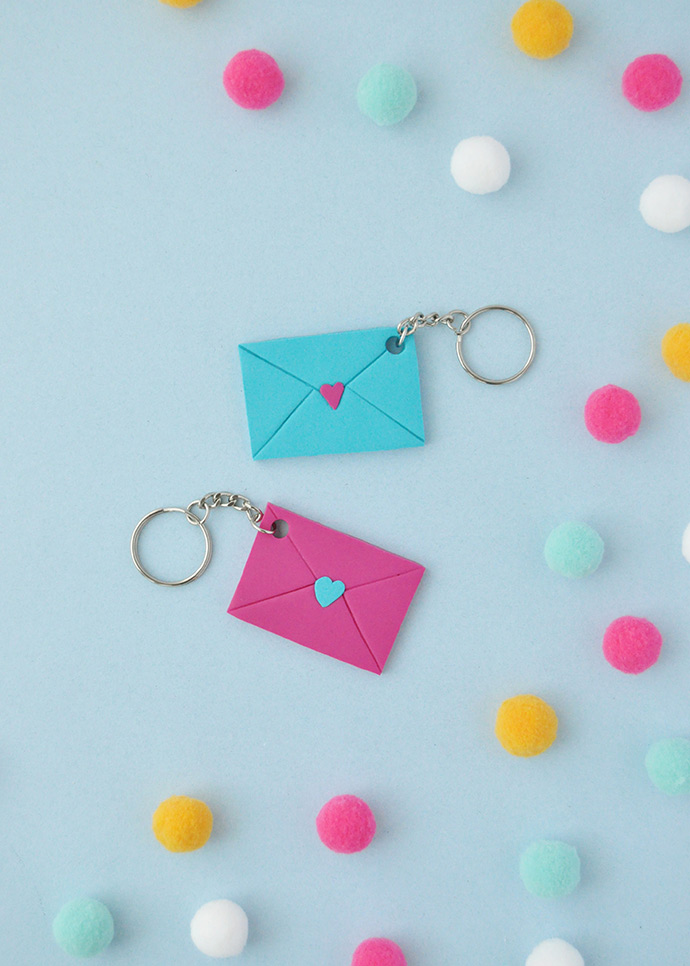
For the envelopes, cut two rectangle that are each about 2” by 1 ½” – we made a quick template with scrap paper first to make sure they were as even as possible. Next use the edge of a piece of cardstock to press lines into the rectangle so that it looks like an envelope flap. Then make a little tiny heart out of a contrasting color and place onto the center of the envelope. Roll gently with the roller to attach. Finally, poke a hole in the corner with the straw.
Step 6
Place all four finished pieces on a clean baking sheet and harden in the oven according to the directions on the package. When finished, let cool completely and attach a key ring onto each charm. Voila!


Happy crafting!