When I was little, my favorite episode of Mr. Rogers’ Neighborhood was the one with the marionettes. I can still sing the song that the little elf puppets sang! Marionettes are so amazing to me, especially as they move with precision.
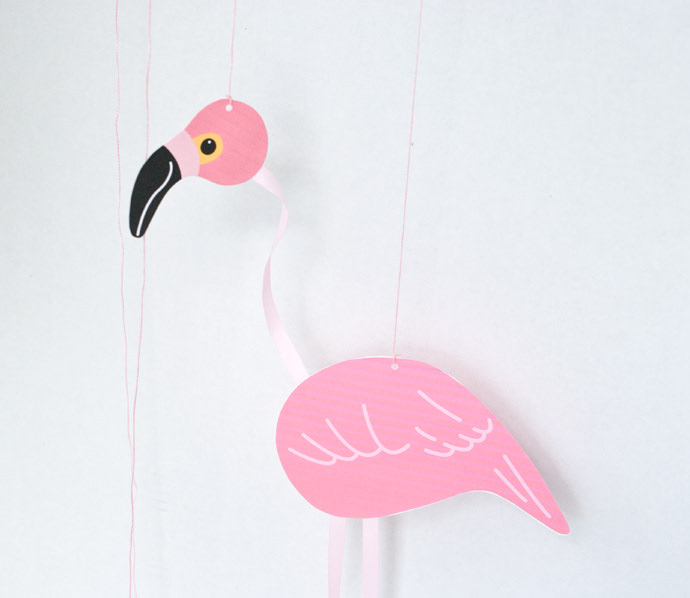
That type of movement is probably not what you’ll get with this crazy flamingo. However, it’s easy to make and has two simple ways to control it. Kids can make it and get their feet wet in the world of puppetry!
Just don’t get your marionette’s feet wet. Because this flamingo is also a printable!
What You Need
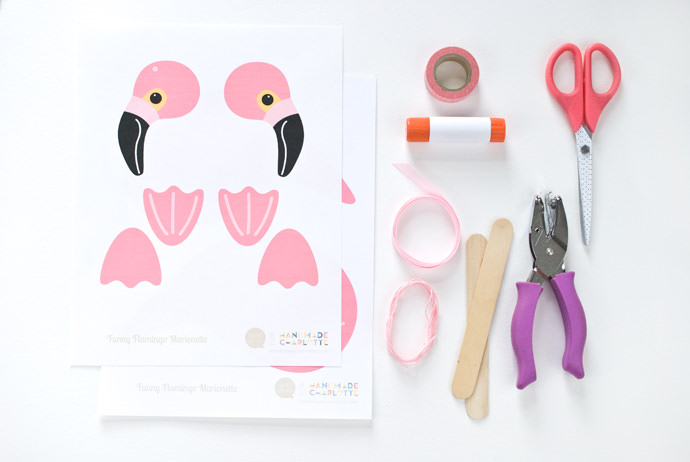
- Printable Flamingo Marionette Template (download here)
- Card stock
- Pink ribbon
- String
- Two large craft sticks
- Scissors
- Glue stick
- Hole punch
- Tape
How-To
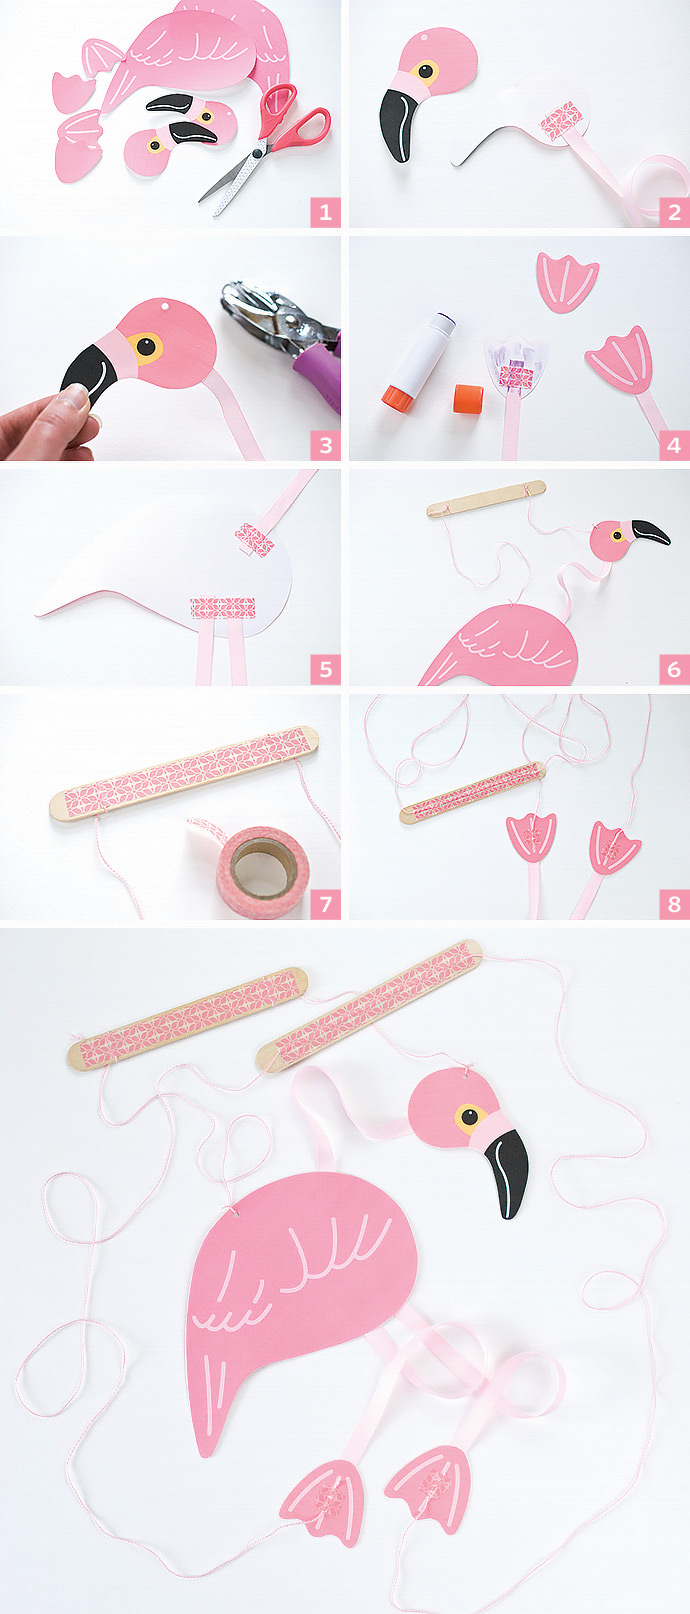
- Print the flamingo template on card stock and cut out the pieces.
- Cut an 8-inch piece of ribbon and tape it to the reverse side of one of the head pieces.
- Glue the second head in place over the piece with the ribbon. You can glue right over the tape. Punch a hole on the marked circle.
- Cut two 12-inch pieces of ribbon and tape both to the reverse side of each of the plain feet pieces. Glue the lined feet pieces on top.
- Tape the other ends of the neck and legs as shown. The placement and angle don’t need to be exact but try to make sure the dot on the body is right at the top. Glue the second body piece in place and punch a hole in the dot.
- Cut a 15-inch piece and a 7-inch piece of string. Tie the longer piece through the top of the body and secure with a double knot. Tie the other piece to the head. Tie the other ends to a large craft stick.
- Secure the strings with a piece of tape. The taped side will be the top, and the knotted side of the craft stick will be the bottom, so the strings hang down properly.
- Cut a 2-yard piece of string and tape each end to a flamingo foot. Find the middle of the string and lay it across the second craft stick (the long way). Tape the string in place.
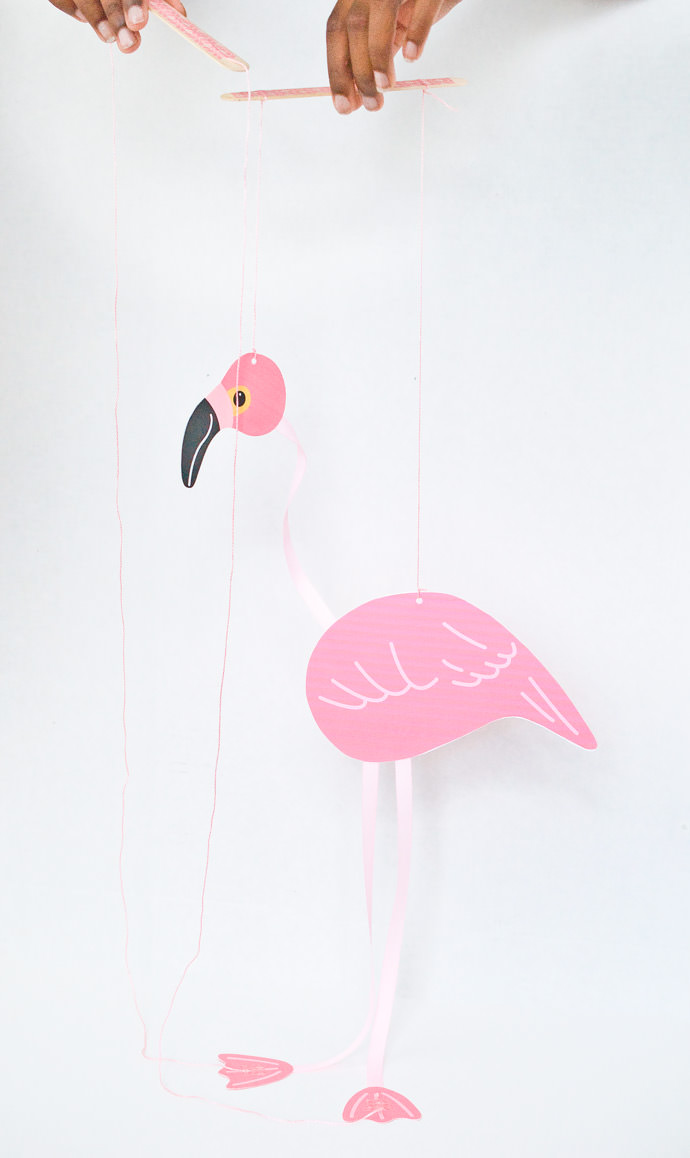
How to Control the Marionette
Now your flamingo is finished and ready for some silliness! Show your child how to hold the two craft sticks. The head/body stick will move the head up and down and keep your flamingo moving forward as it walks.
Hold the second stick perpendicular to the first, pivoting it back and forth to move the feet. The length should make it so you are holding it a little higher than the head/body stick. This makes it easier to move without hitting the other elements.
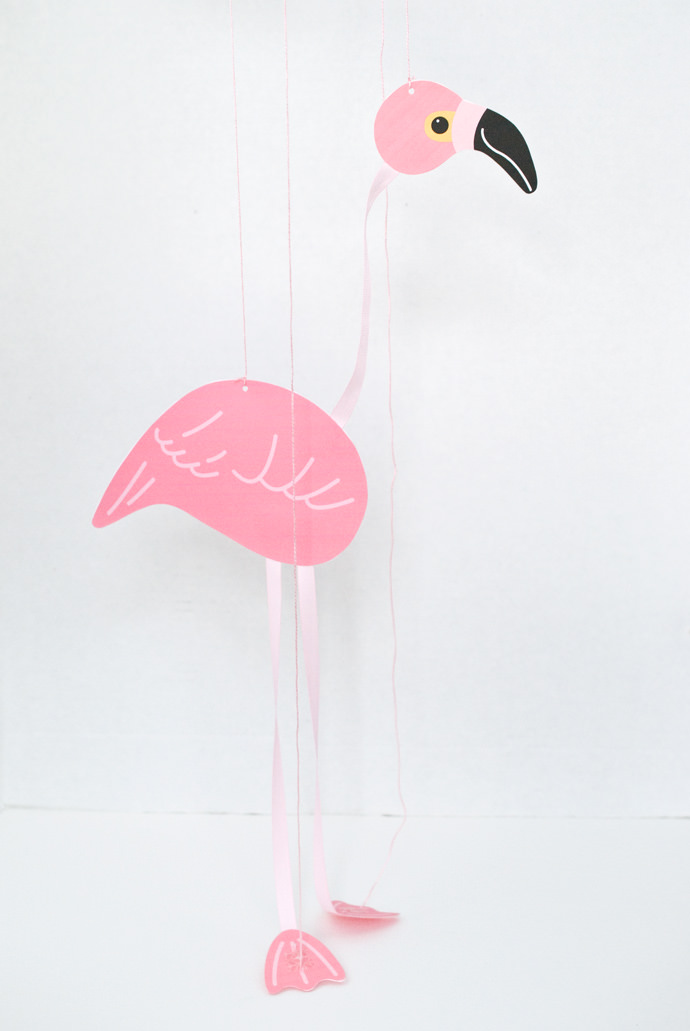
Learning to work with a marionette takes some practice. Because this is a funny flamingo, it’s okay for him (or her) to move in a slightly silly way.
Now make another one and you can put on a flamingo puppet show!
Happy crafting :)